How to Add Floor Plates to a Form in Rhino
Software Used:
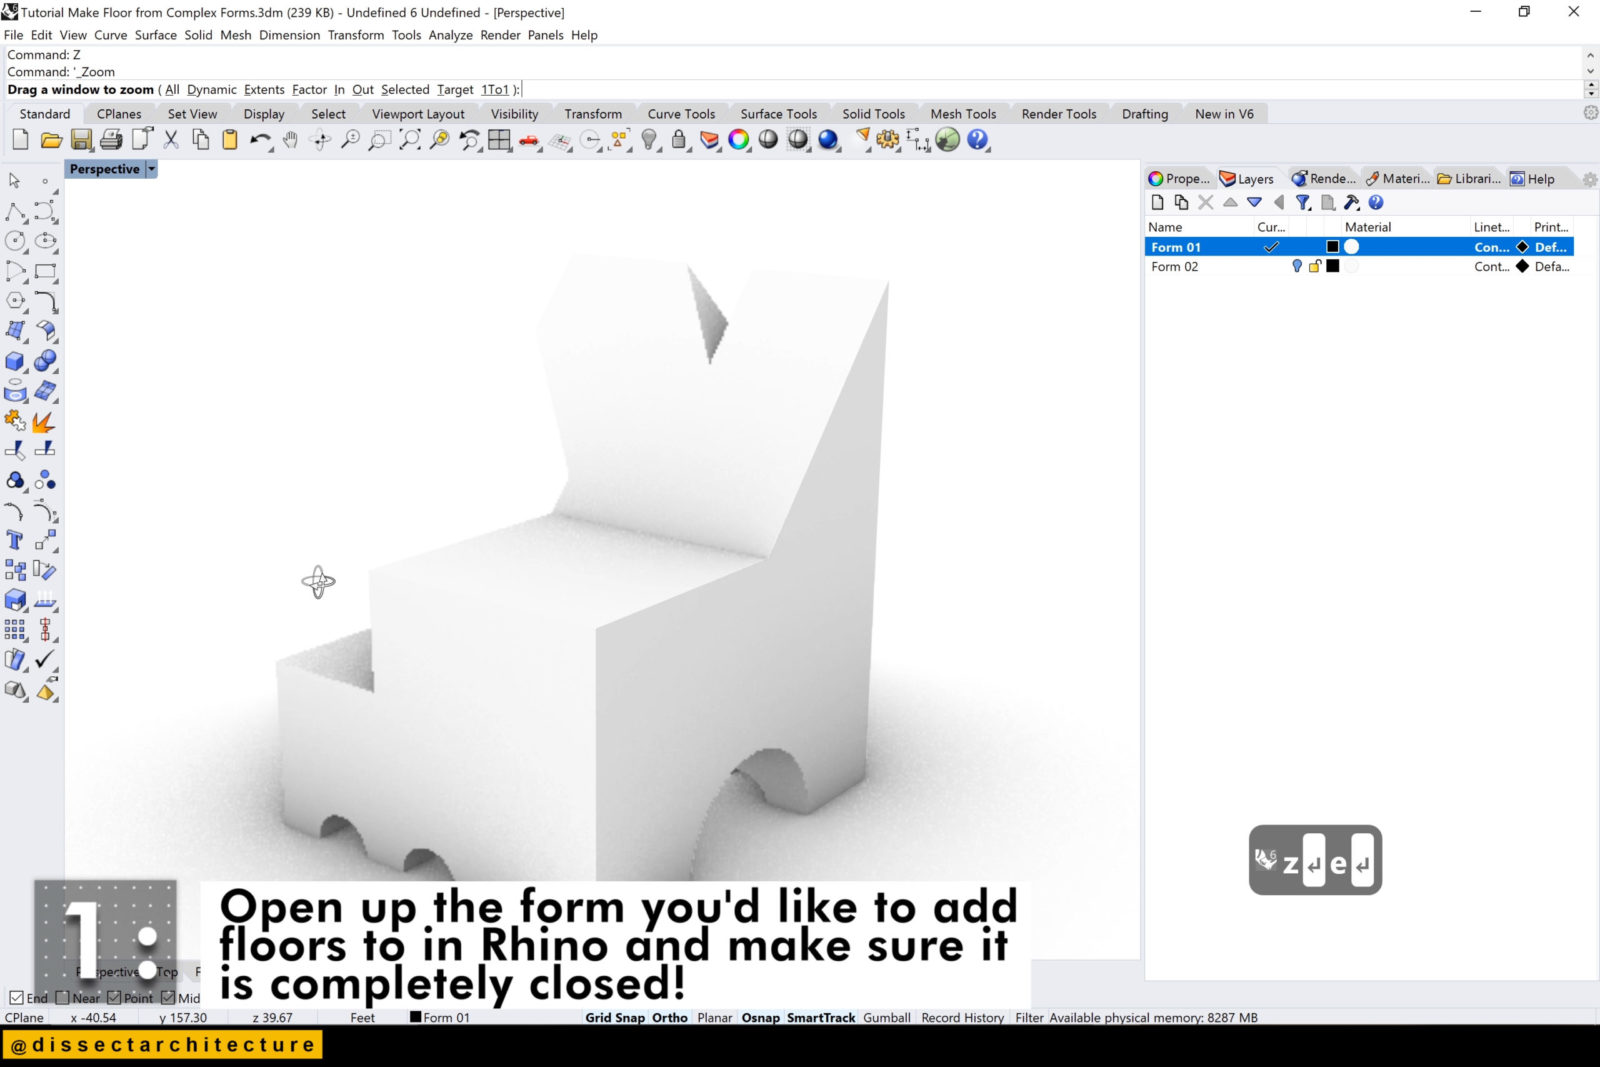
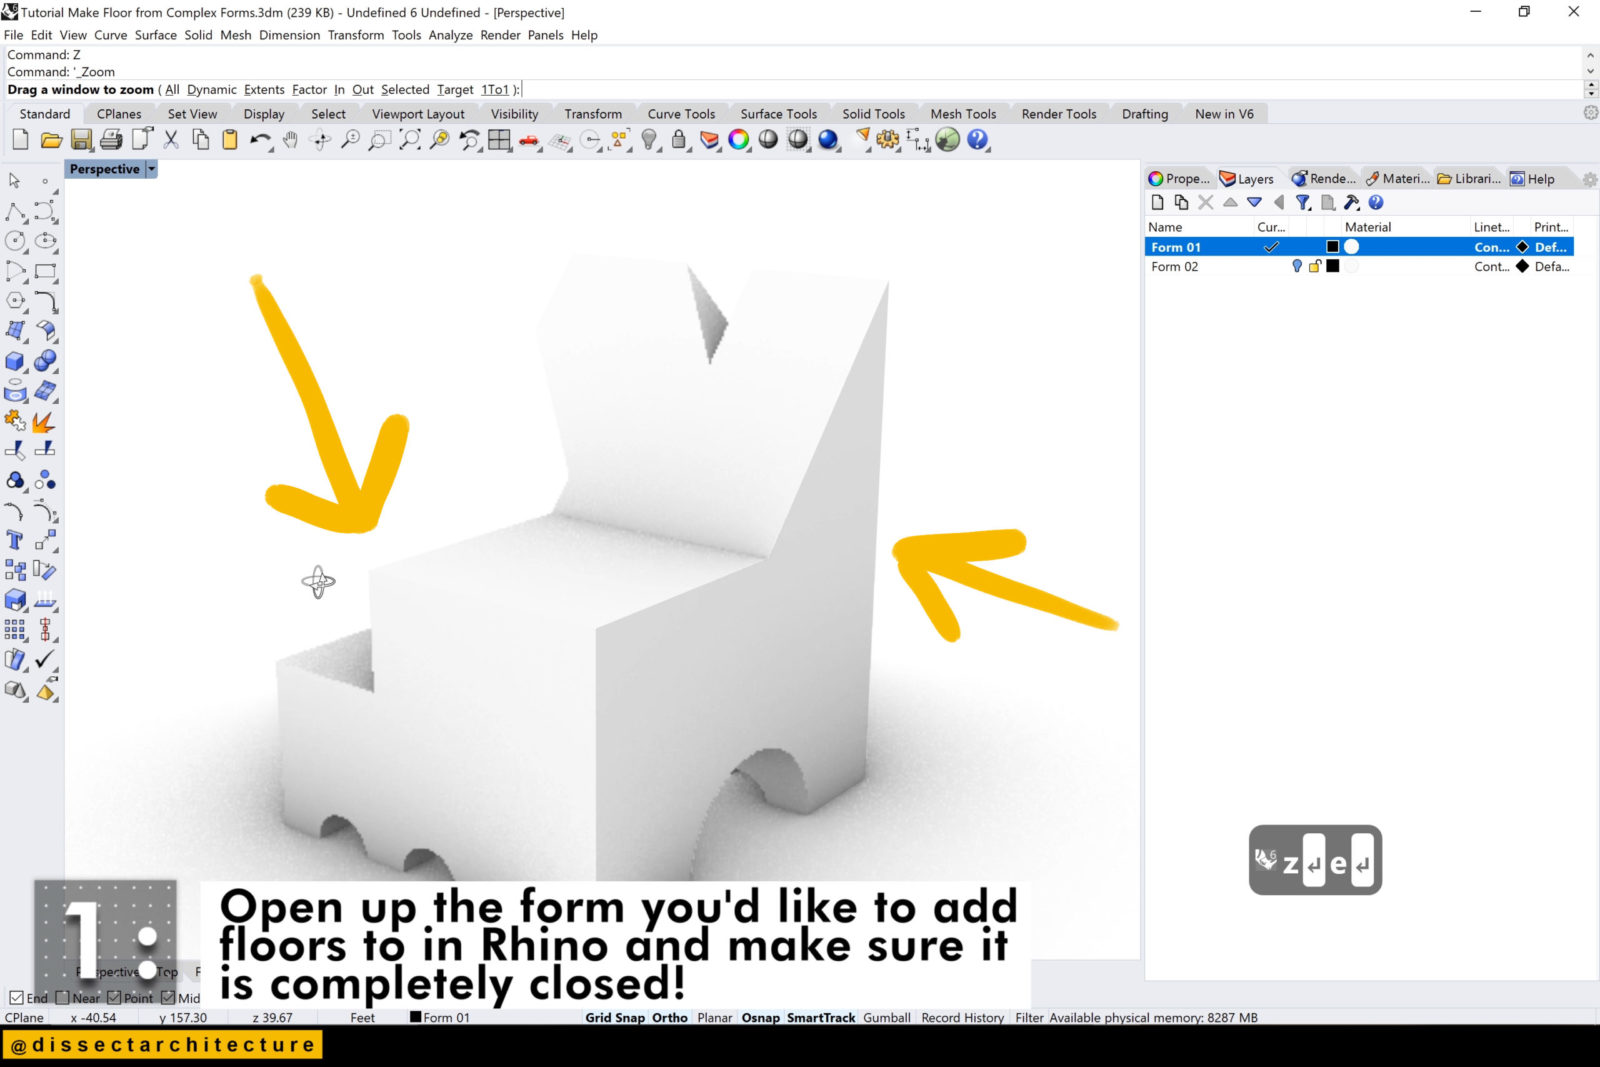
Step 01
Open Rhinoceros 3D and the file with the 3D form you’d like to add floors into. Make sure the 3D form is completely closed.
Step 02
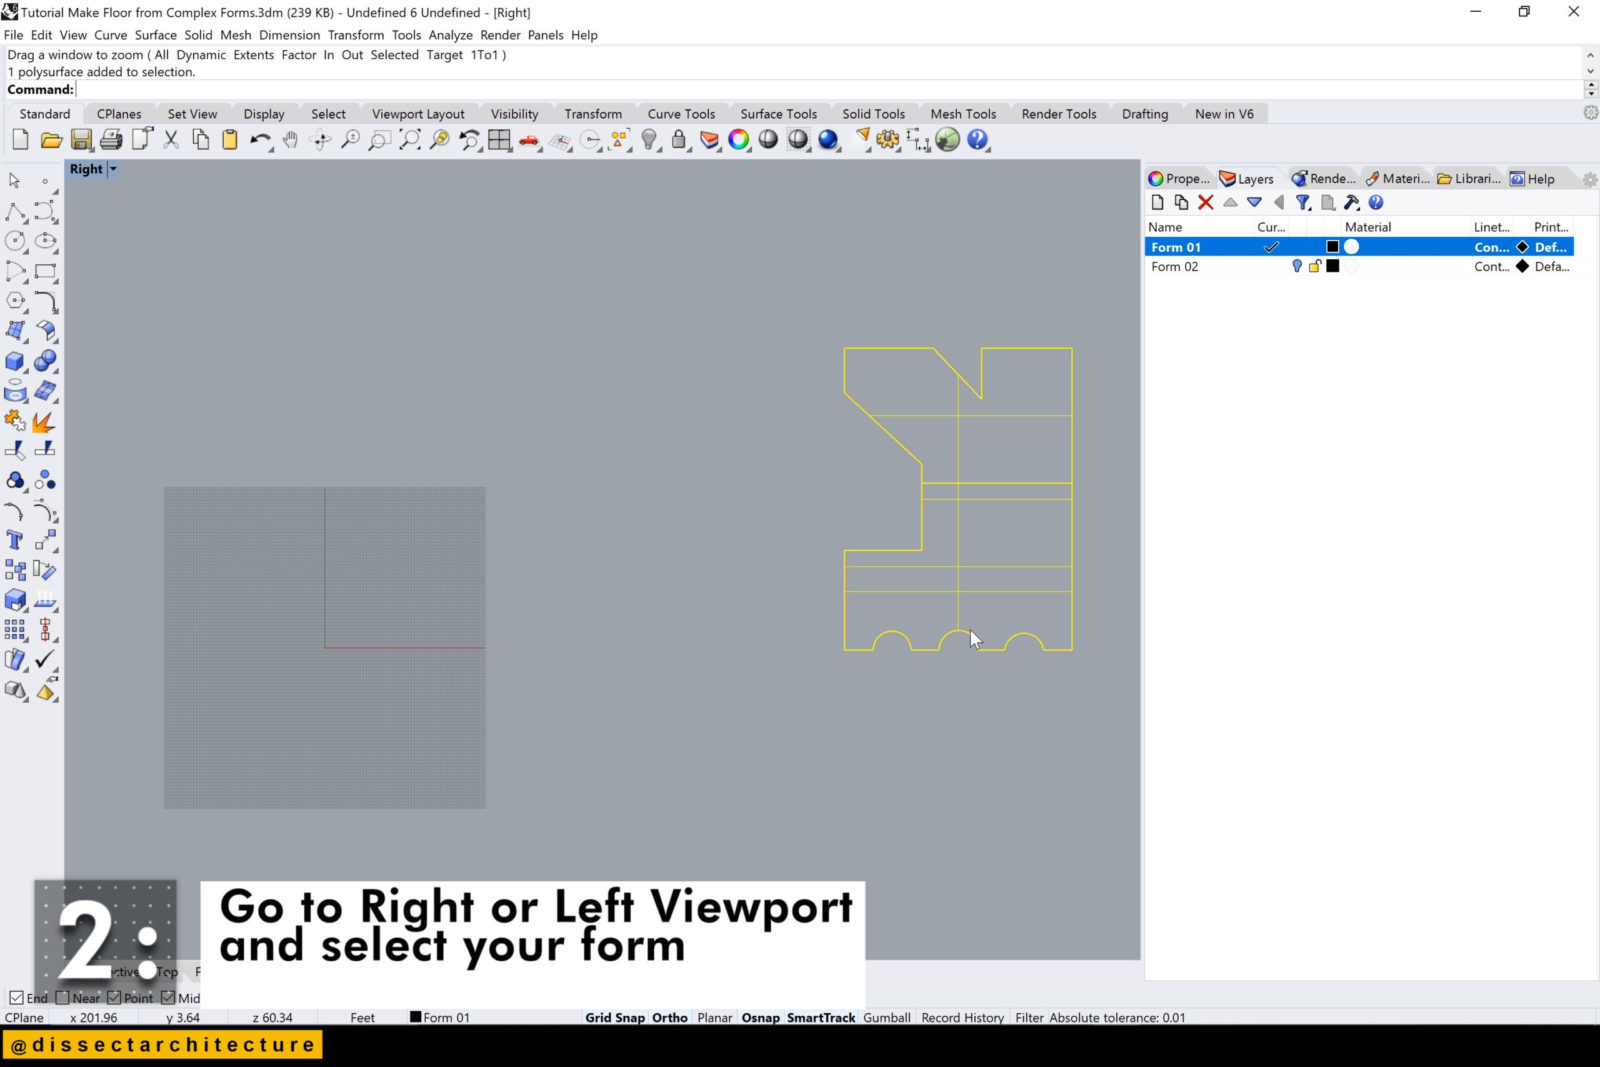
Go to the Right or Left Viewport and select your form.

Step 03
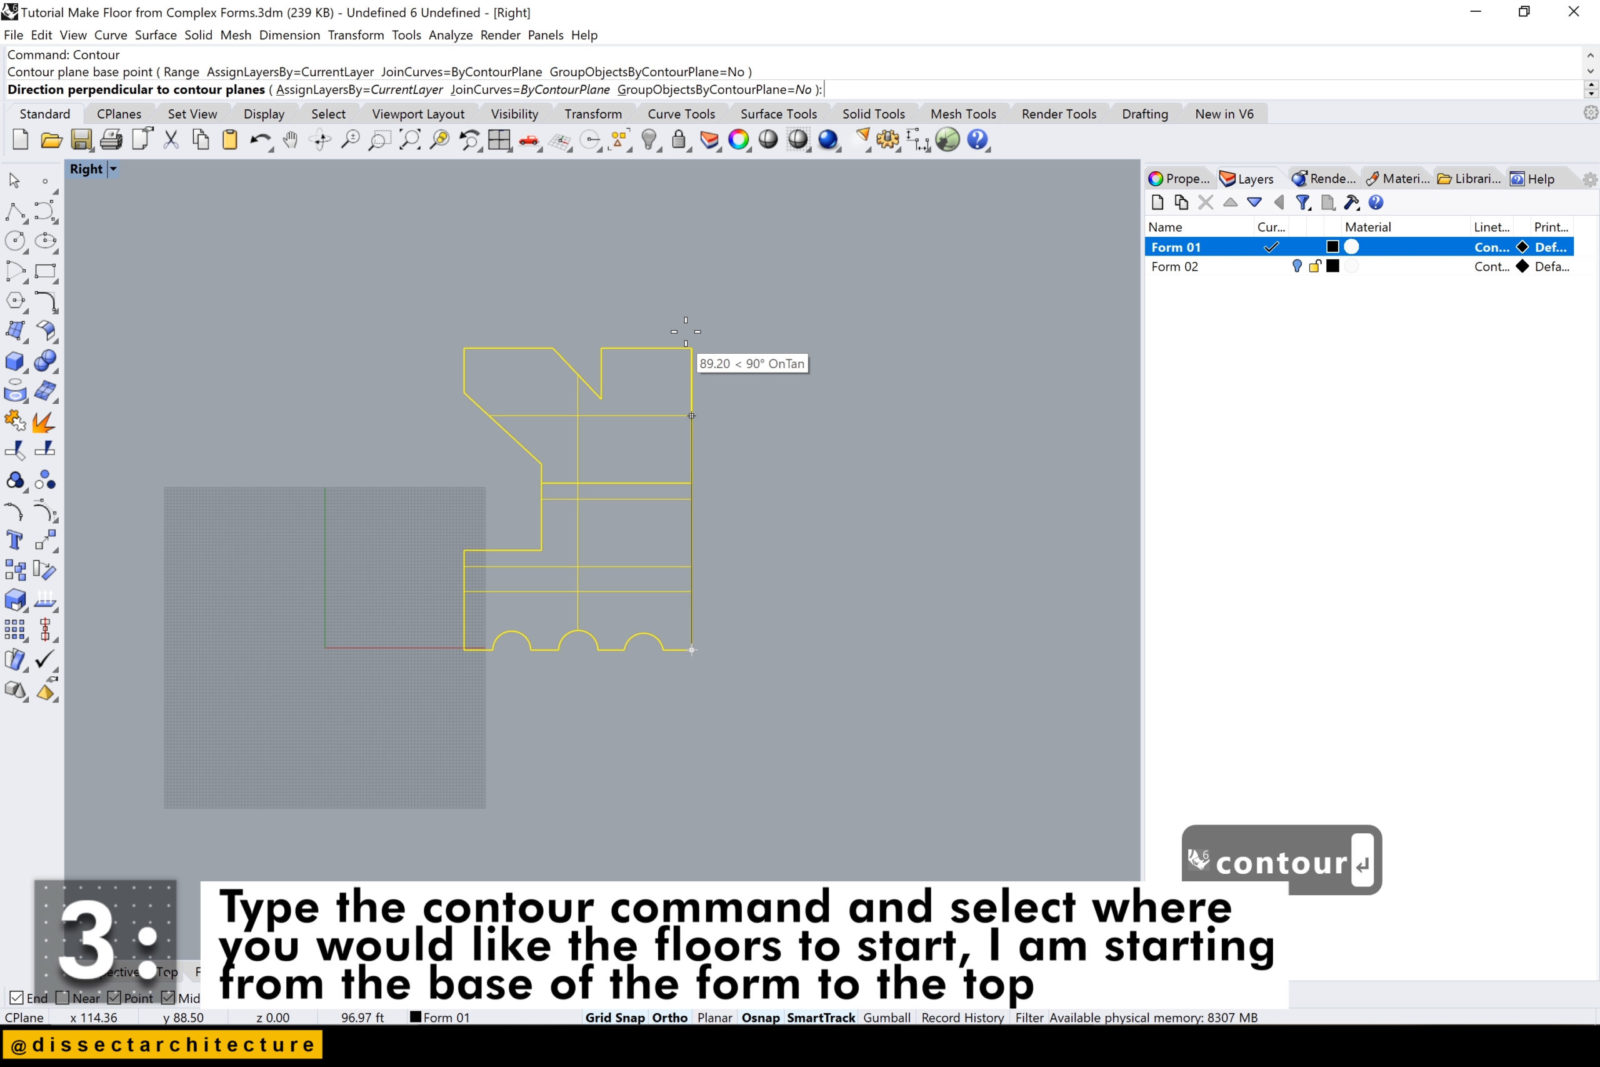
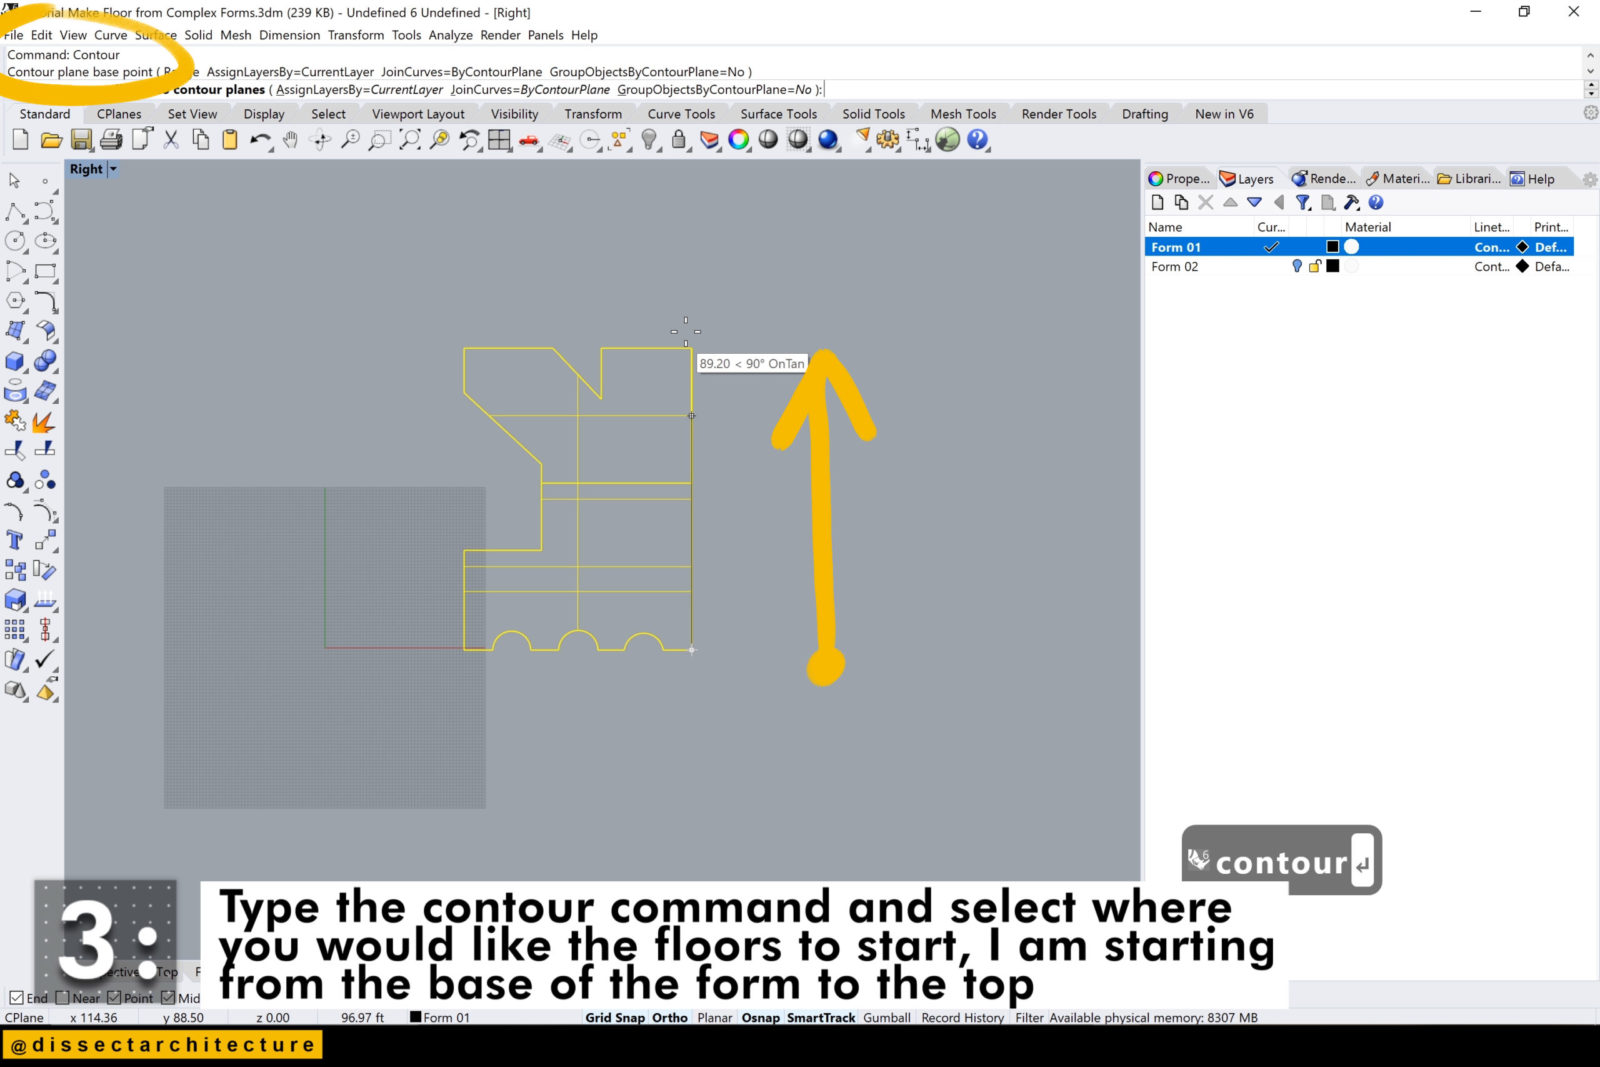
Type the Contour command into the Command Line and select where you would like the floors to start. I am starting from the base of the form and extending the line to the top of the form.
At this time also designate the distance between each floor/contour. Make sure to take into account the width of your floor plate that will be added later.
Step 04
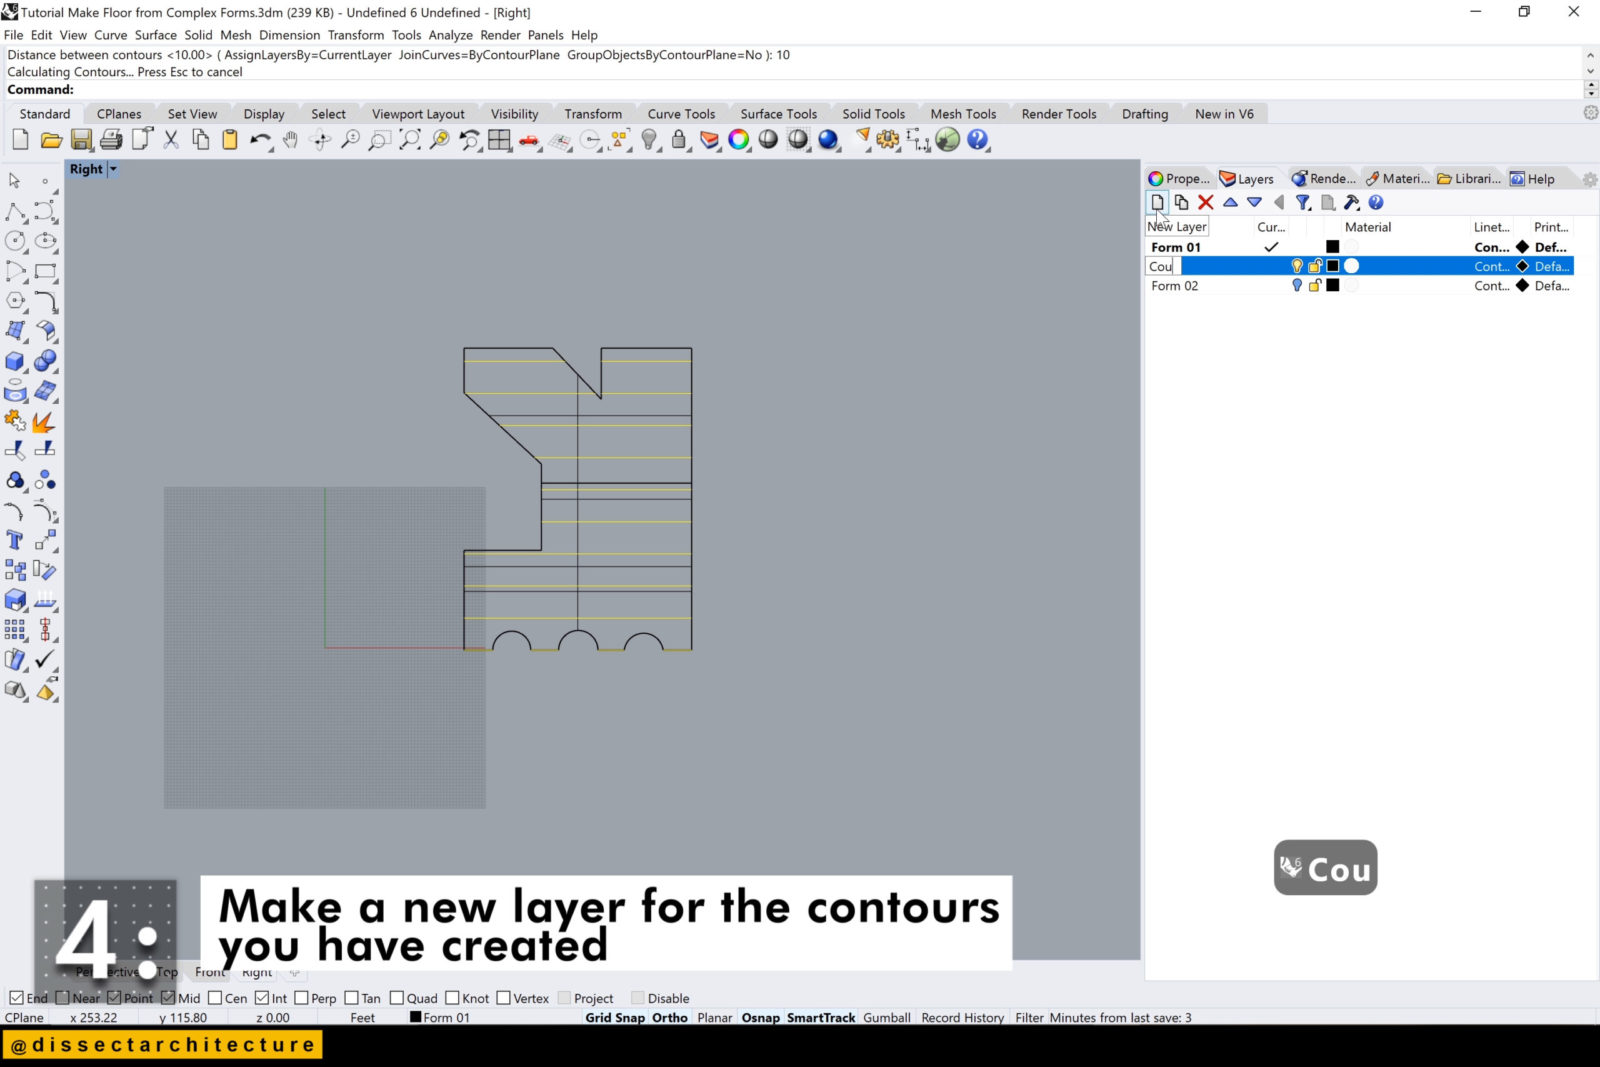
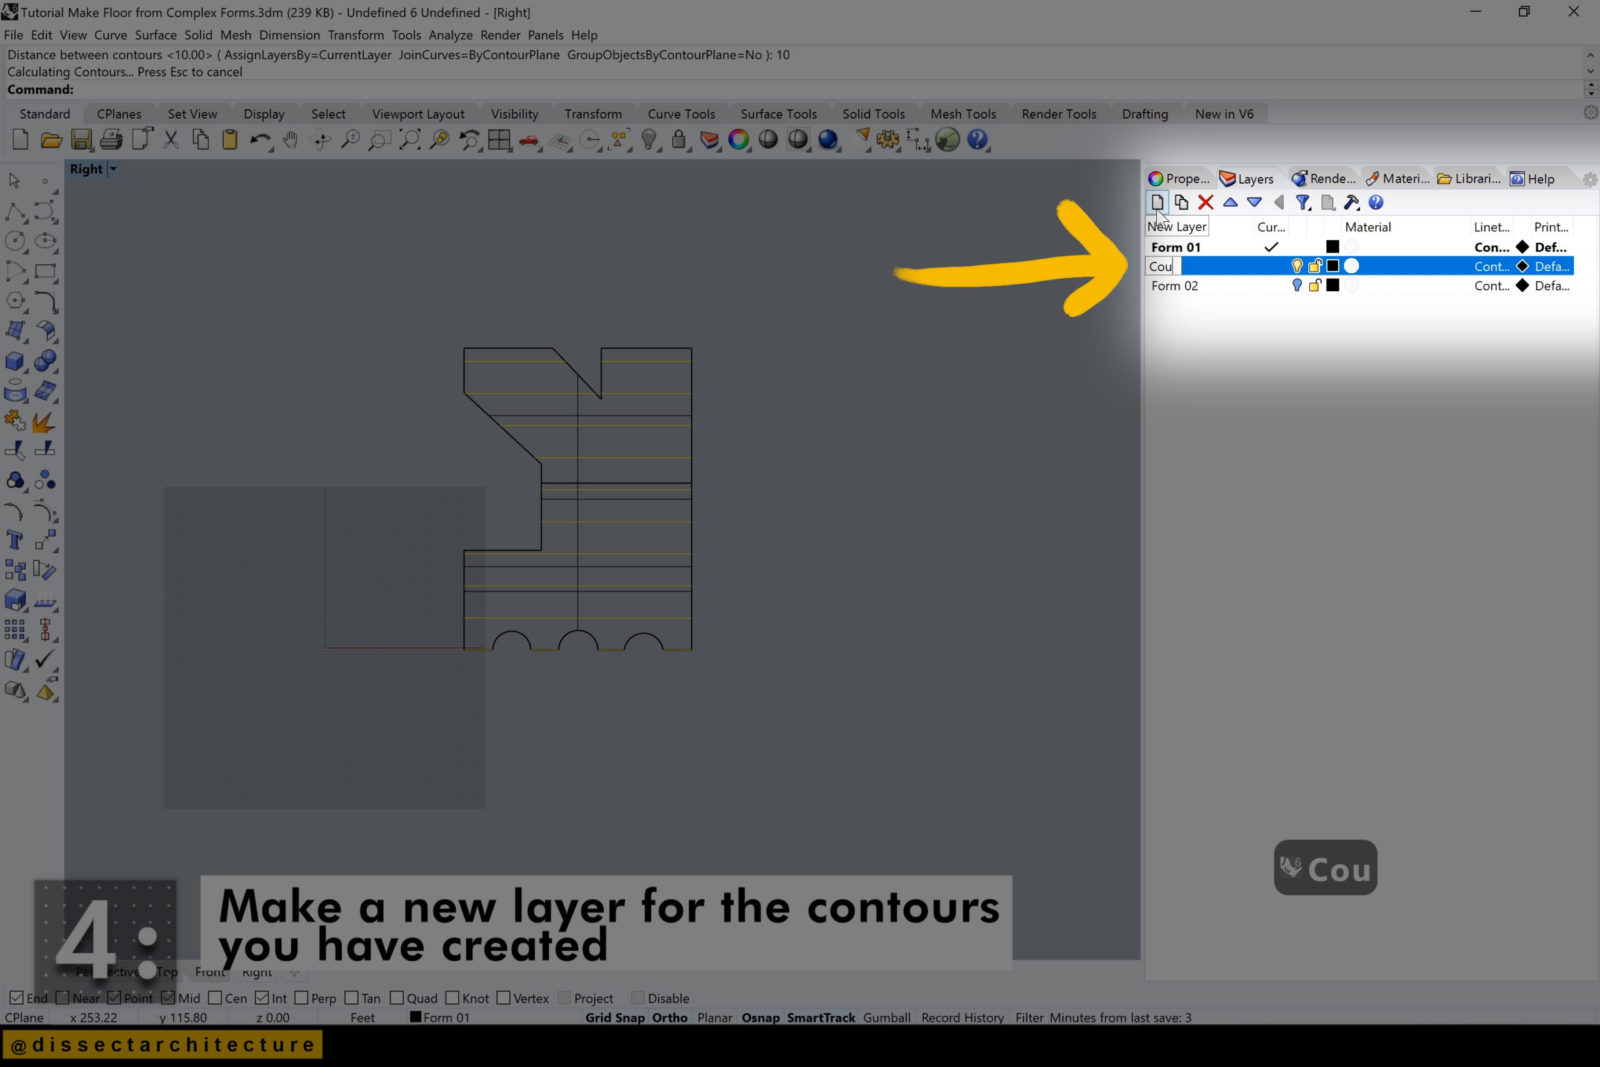
Make a new layer for the contours that you have created.
Step 05
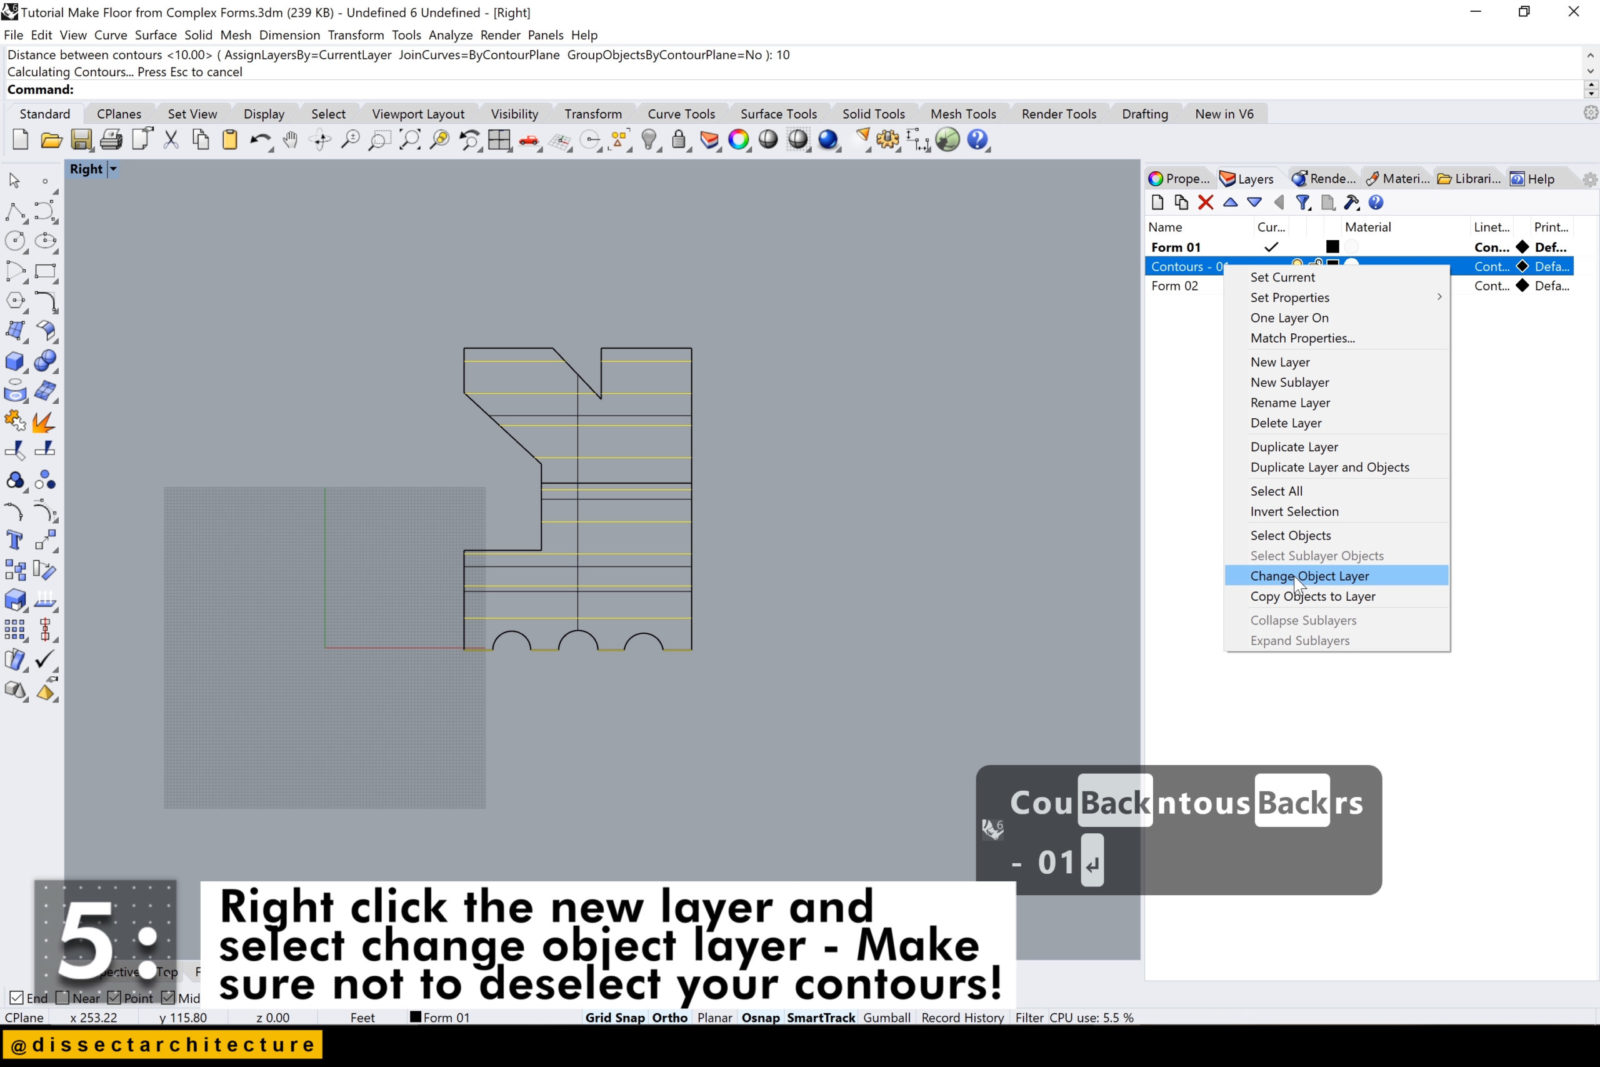
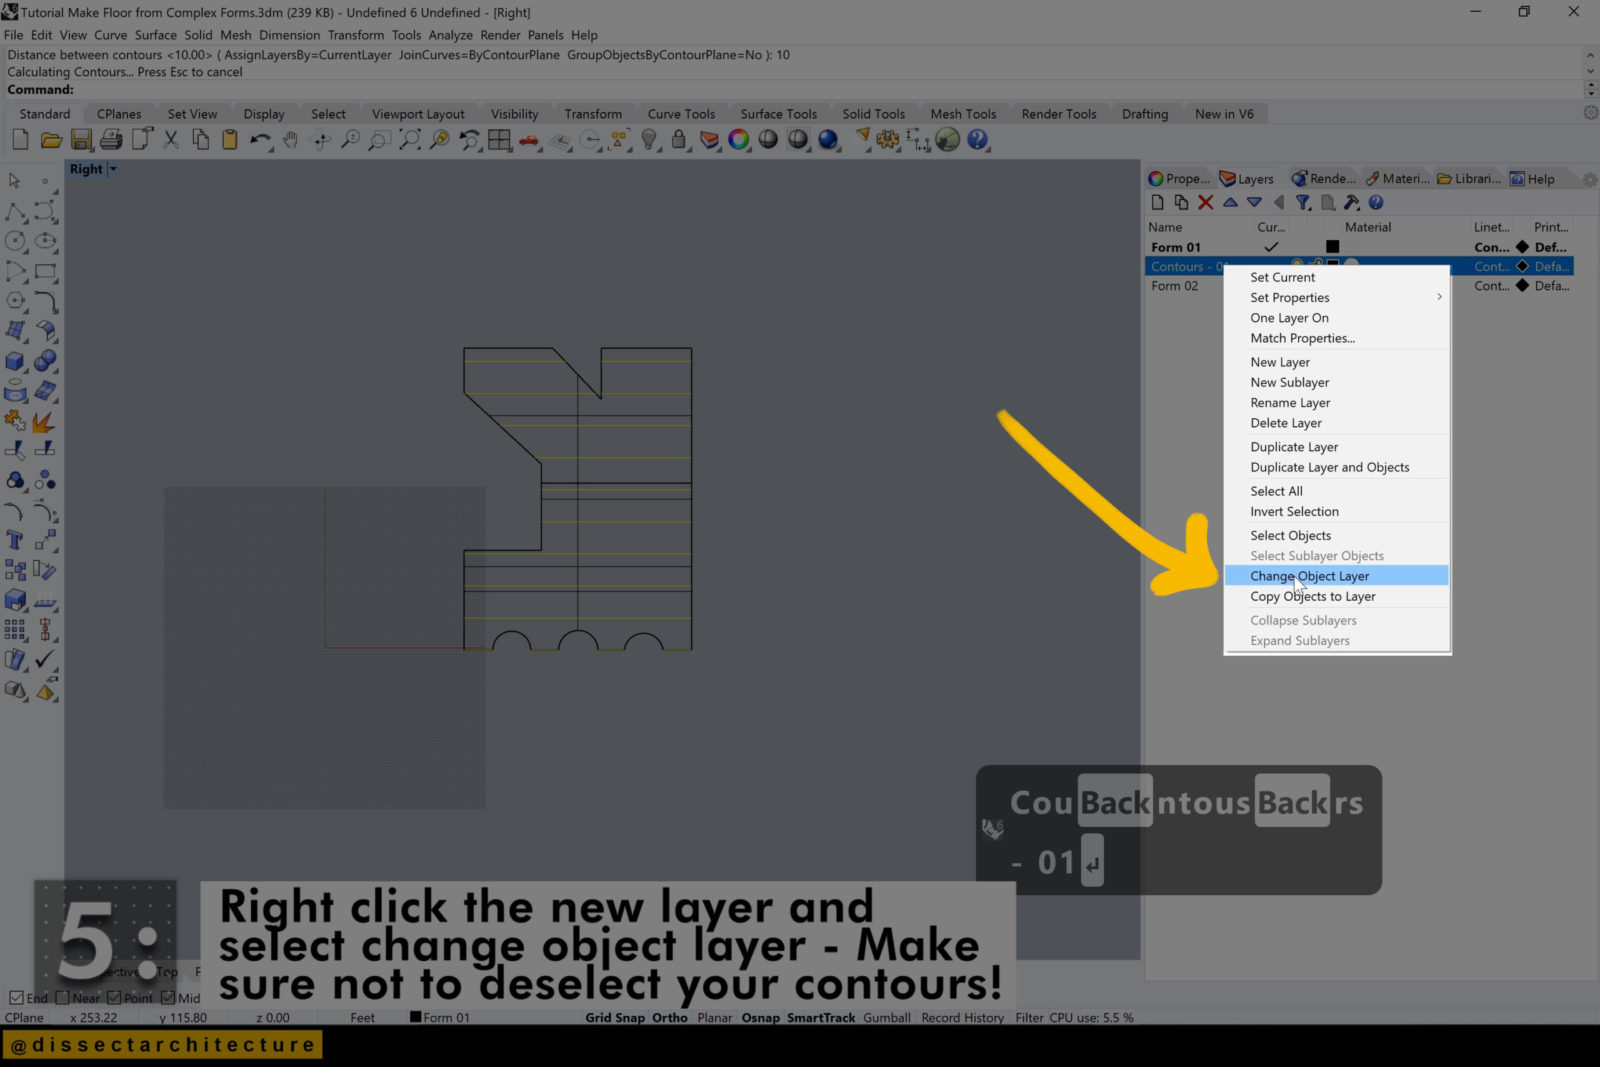
Right-click the new layer and select Change Object Layer with the contours you just created still selected. Make sure not to deselect your contours!
If you then turn off the layer with 3D form you can see all the contours that have been created!
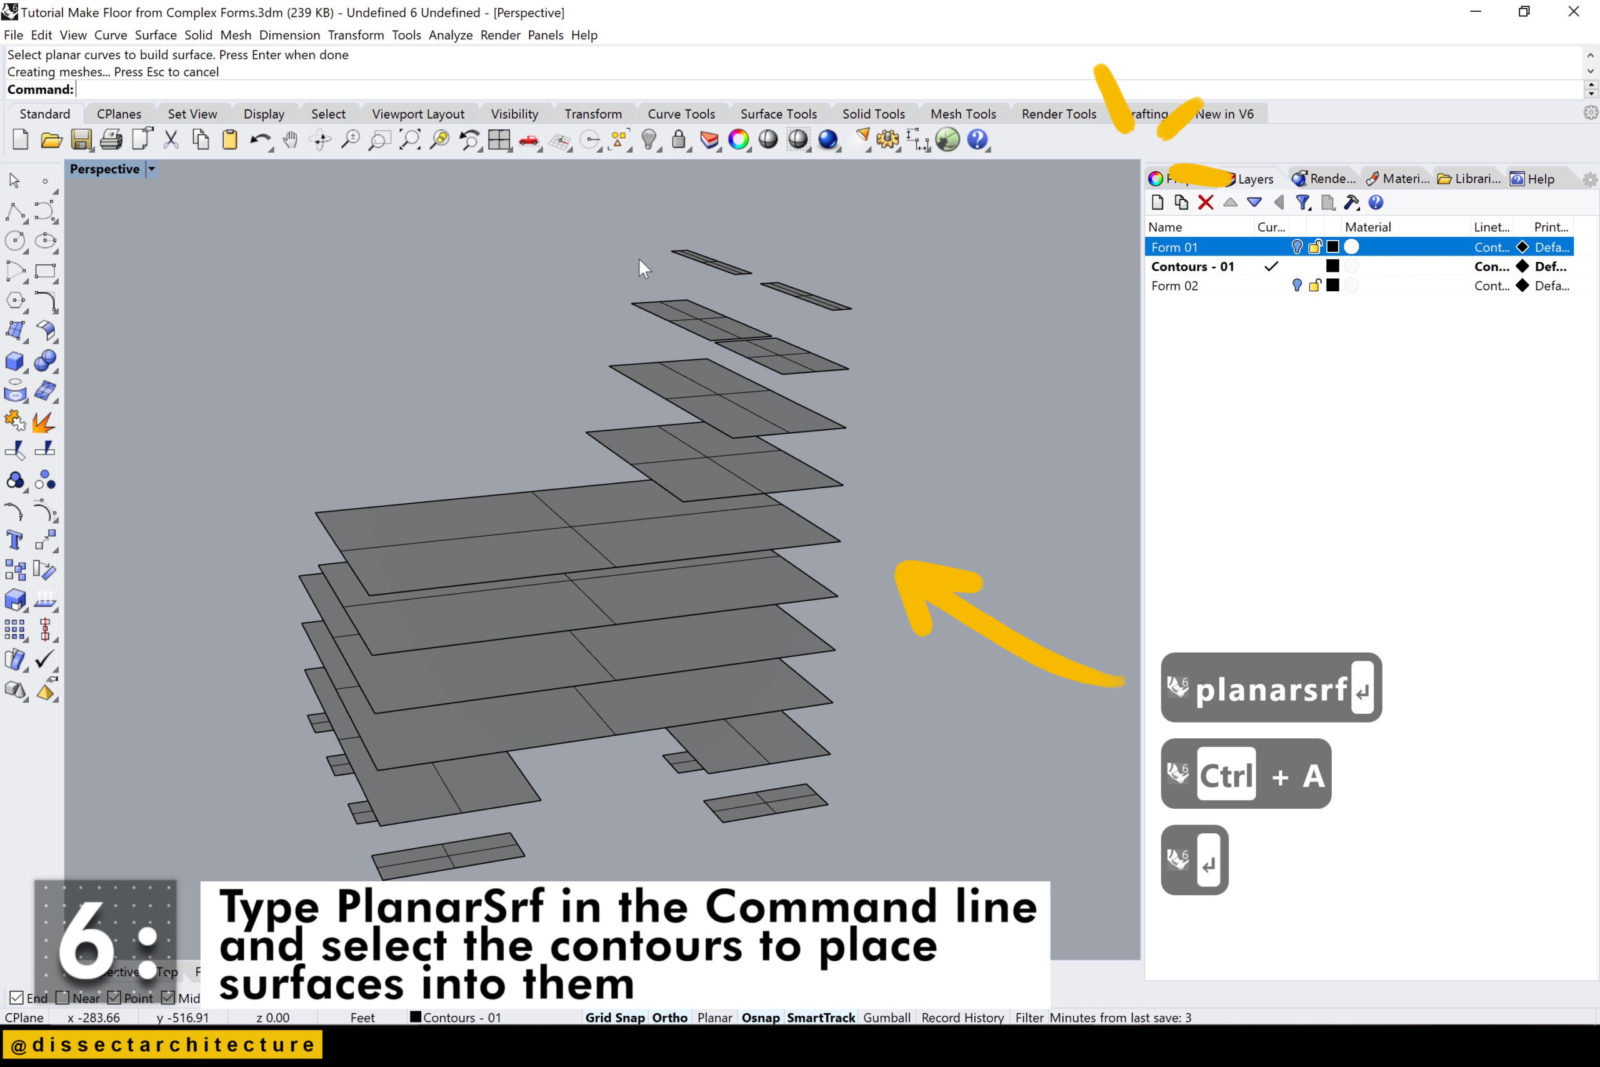
Step 06
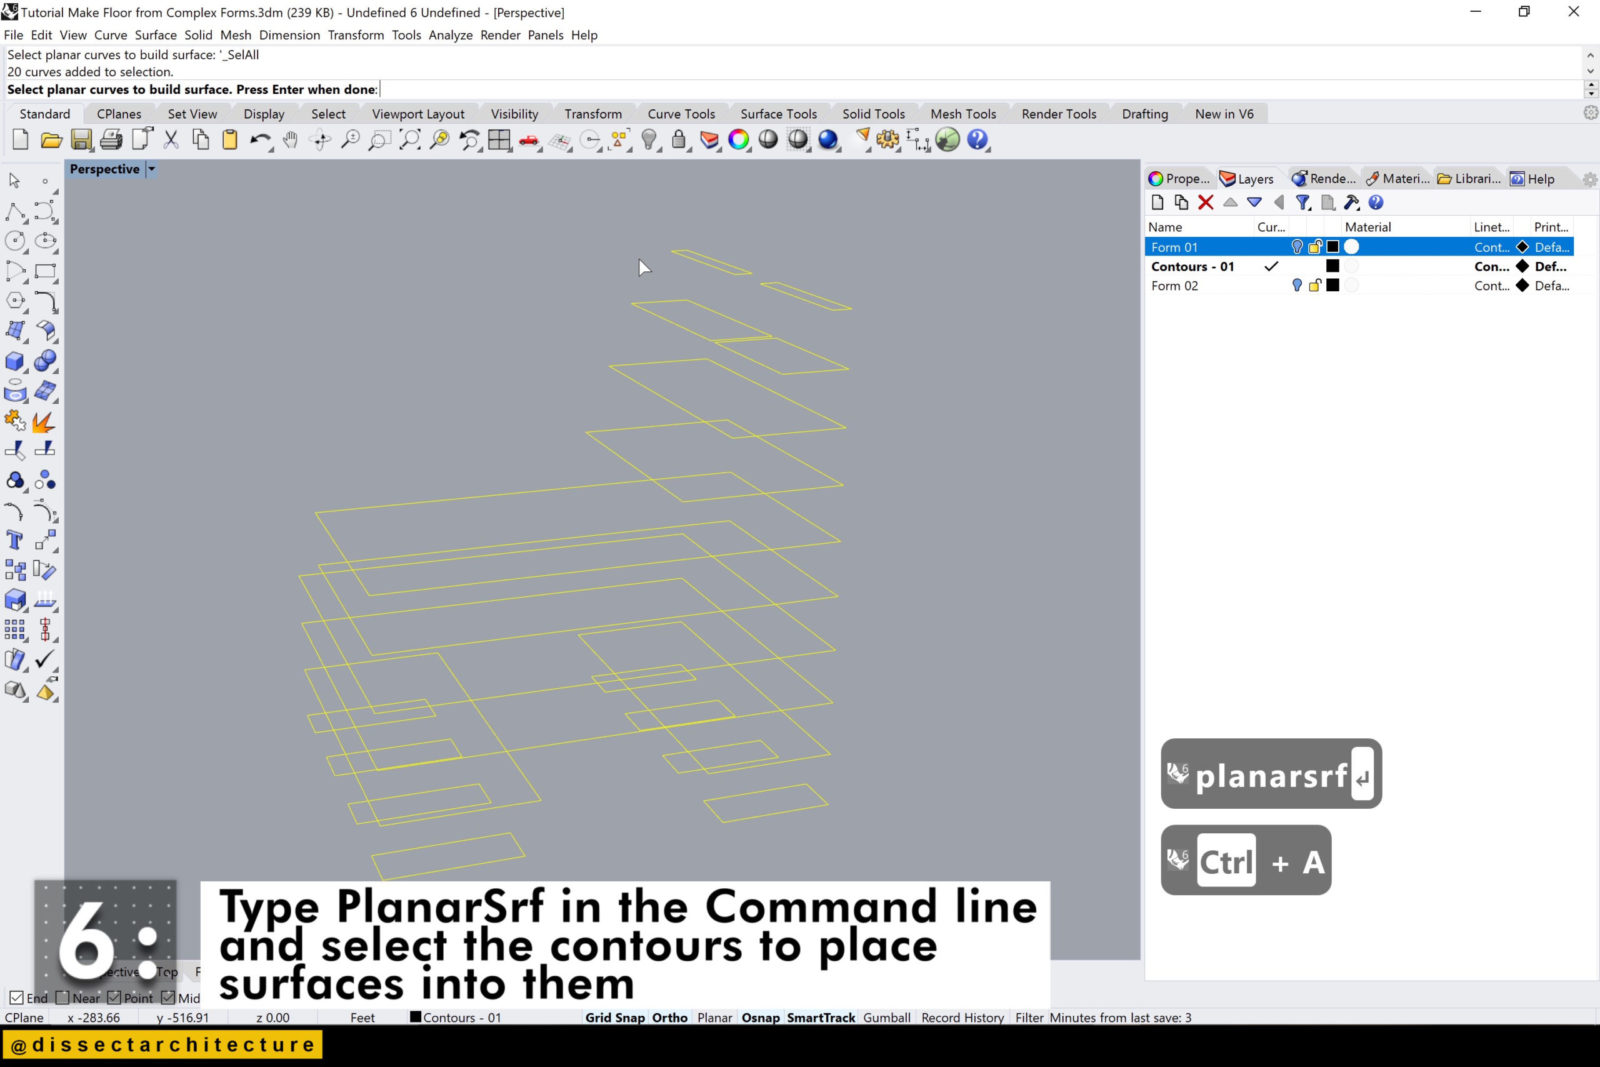
Type PlanarSrf in the Command Line and select the contours to place surfaces into them.
Now we will add some thickness to them.
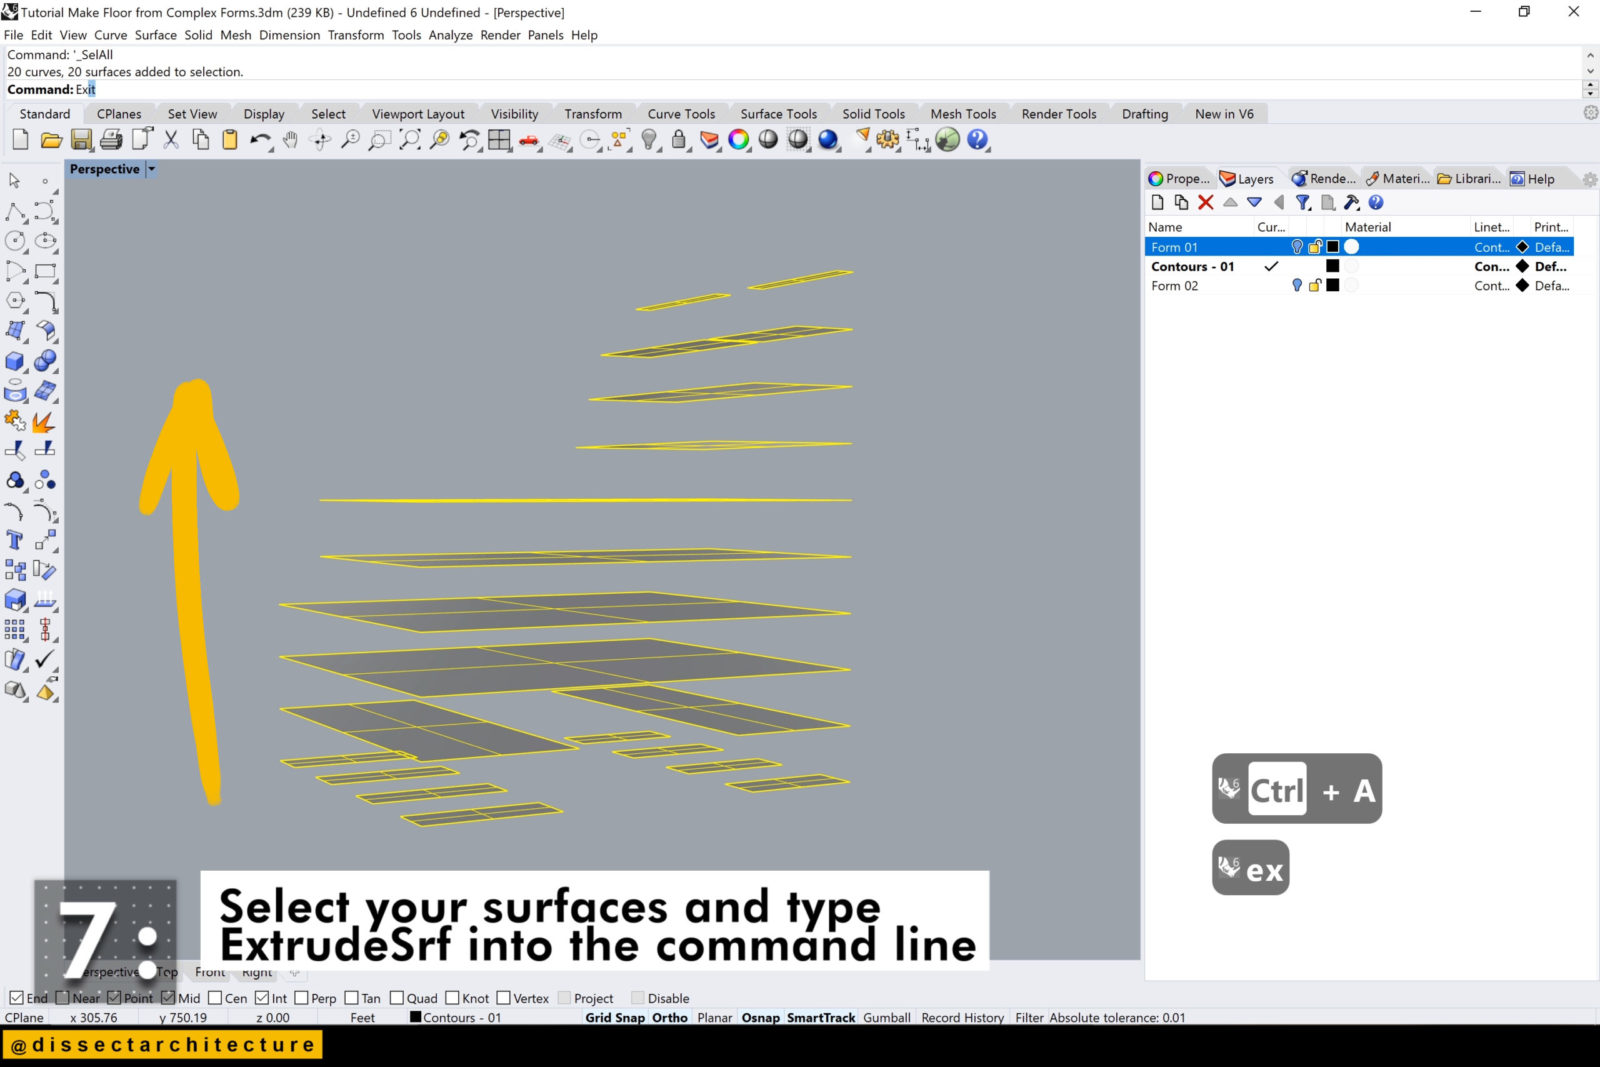
Step 07
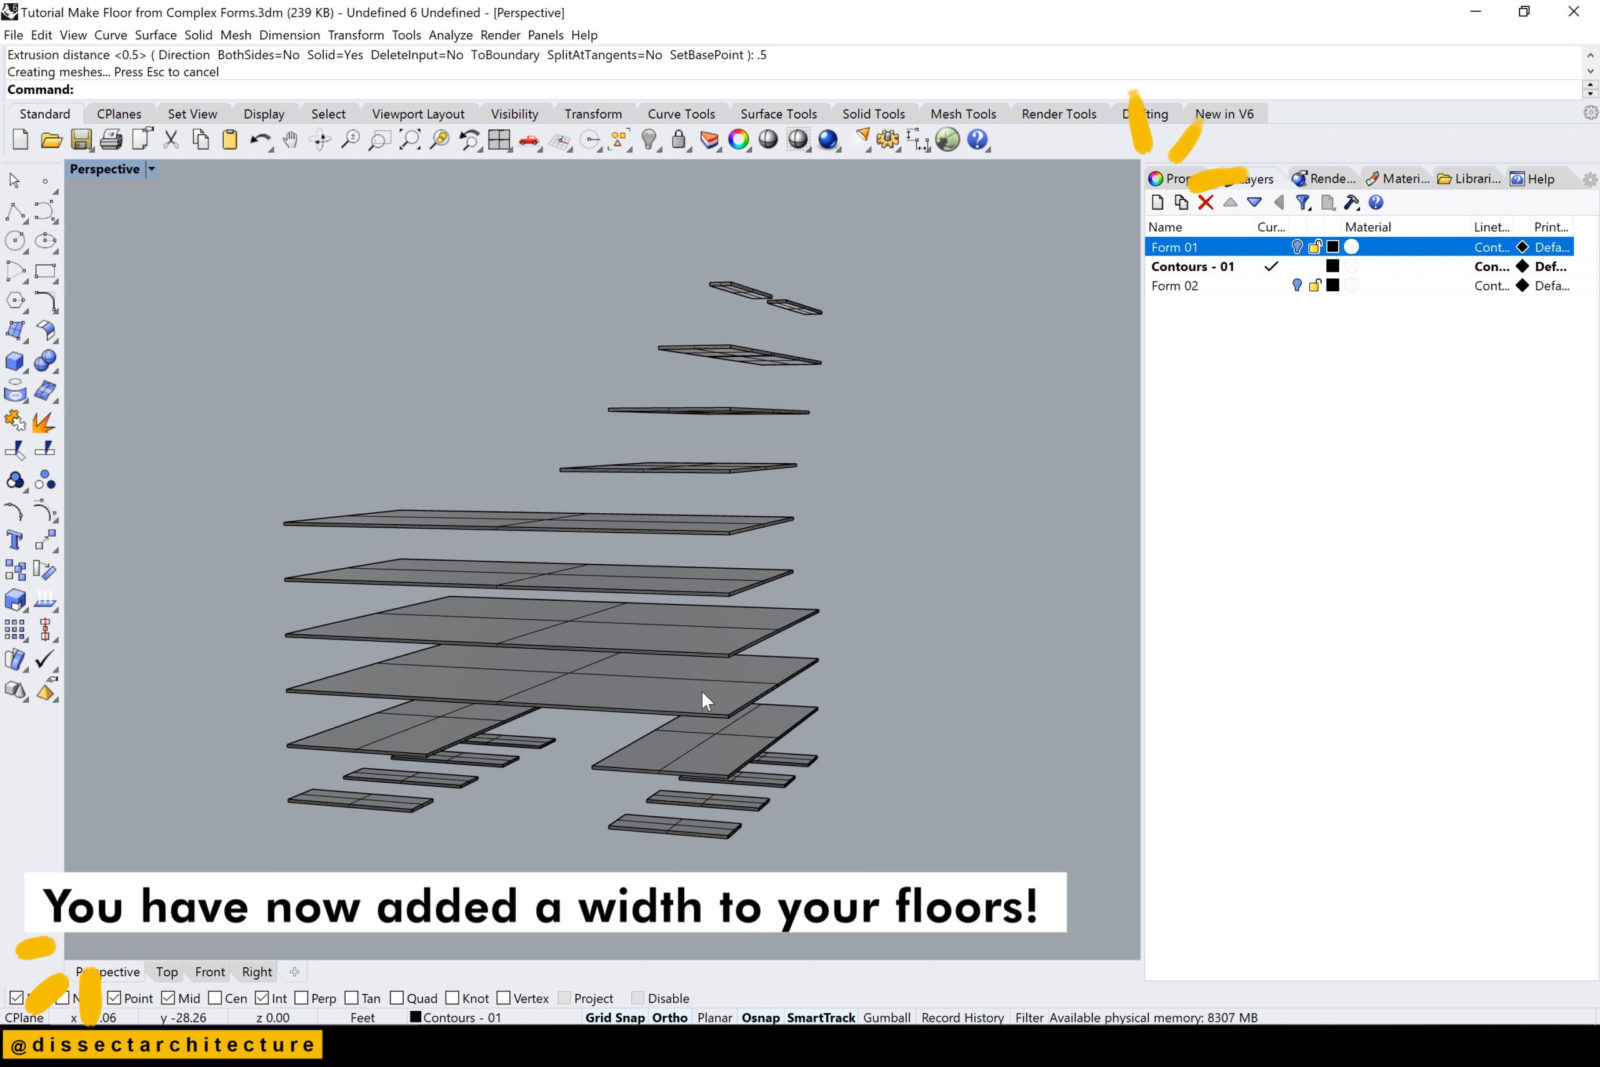
Select your surfaces and type the ExtrudeSrf command into the Command Line. To make this easier on myself I am going into the right viewport once again and choosing the direction of my extrusion.
You now have added thickness to your floors!