How to Create a Landscape Disk
Objective:
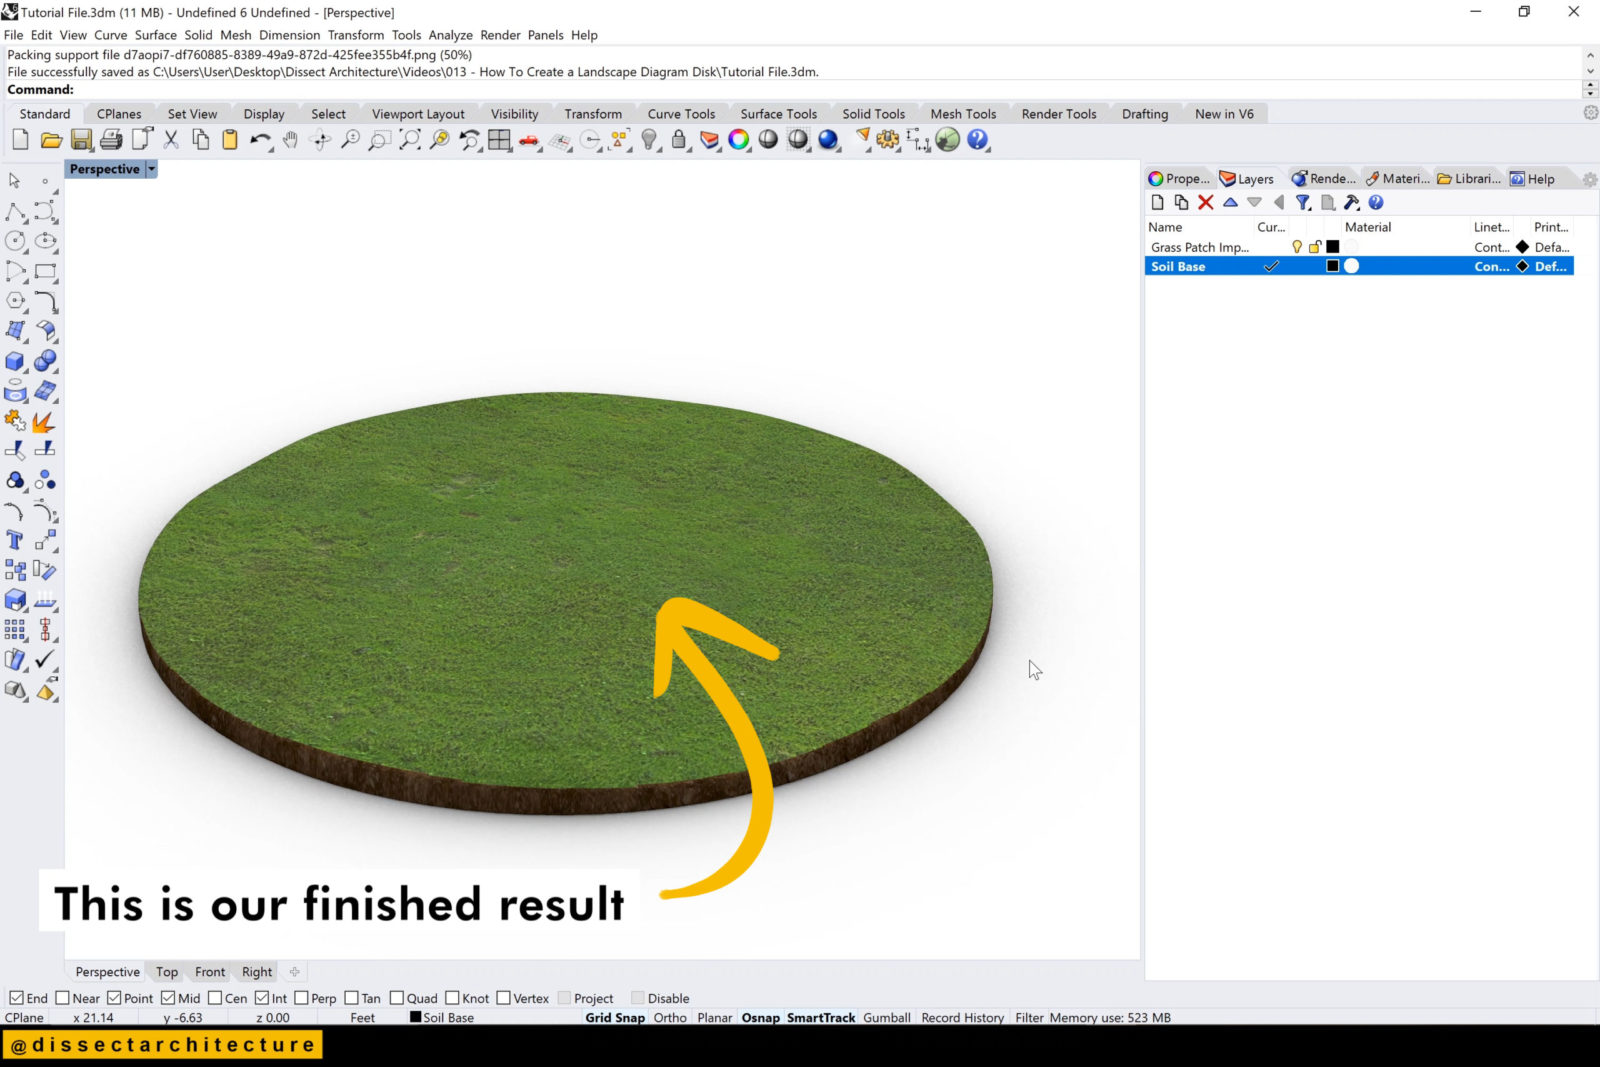
The tutorial will explore how to create a landscape disk representation with Rhinoceros 3D and Adobe Photoshop that can be applied to a variety of projects or used to create diagrams.
Learn how to create this landscape diagram through both Rhino and Photoshop. Disk diagrams can provide information and are a great way to conceptualize a site. The landscape disk is built in Rhino, rendered, and then taken into Photoshop for post-production. These landscape disk diagrams can be used by both students, architects, and landscape architects to present their work!
Step 01
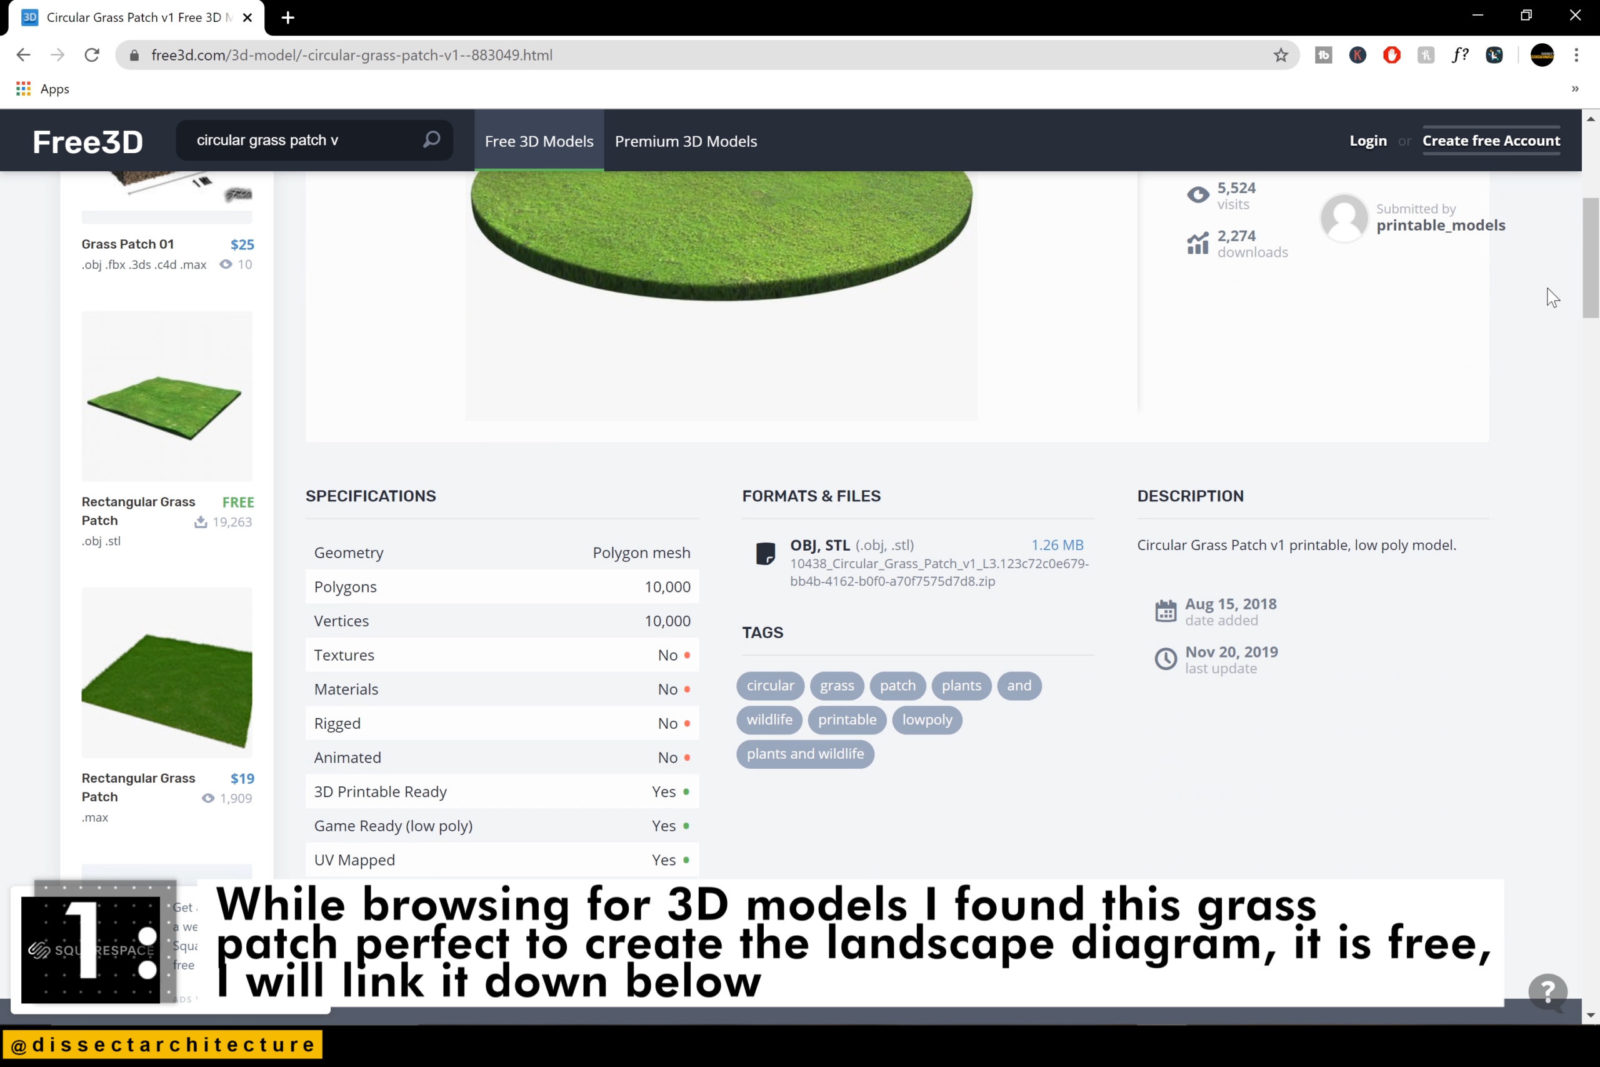
Open your web browser.
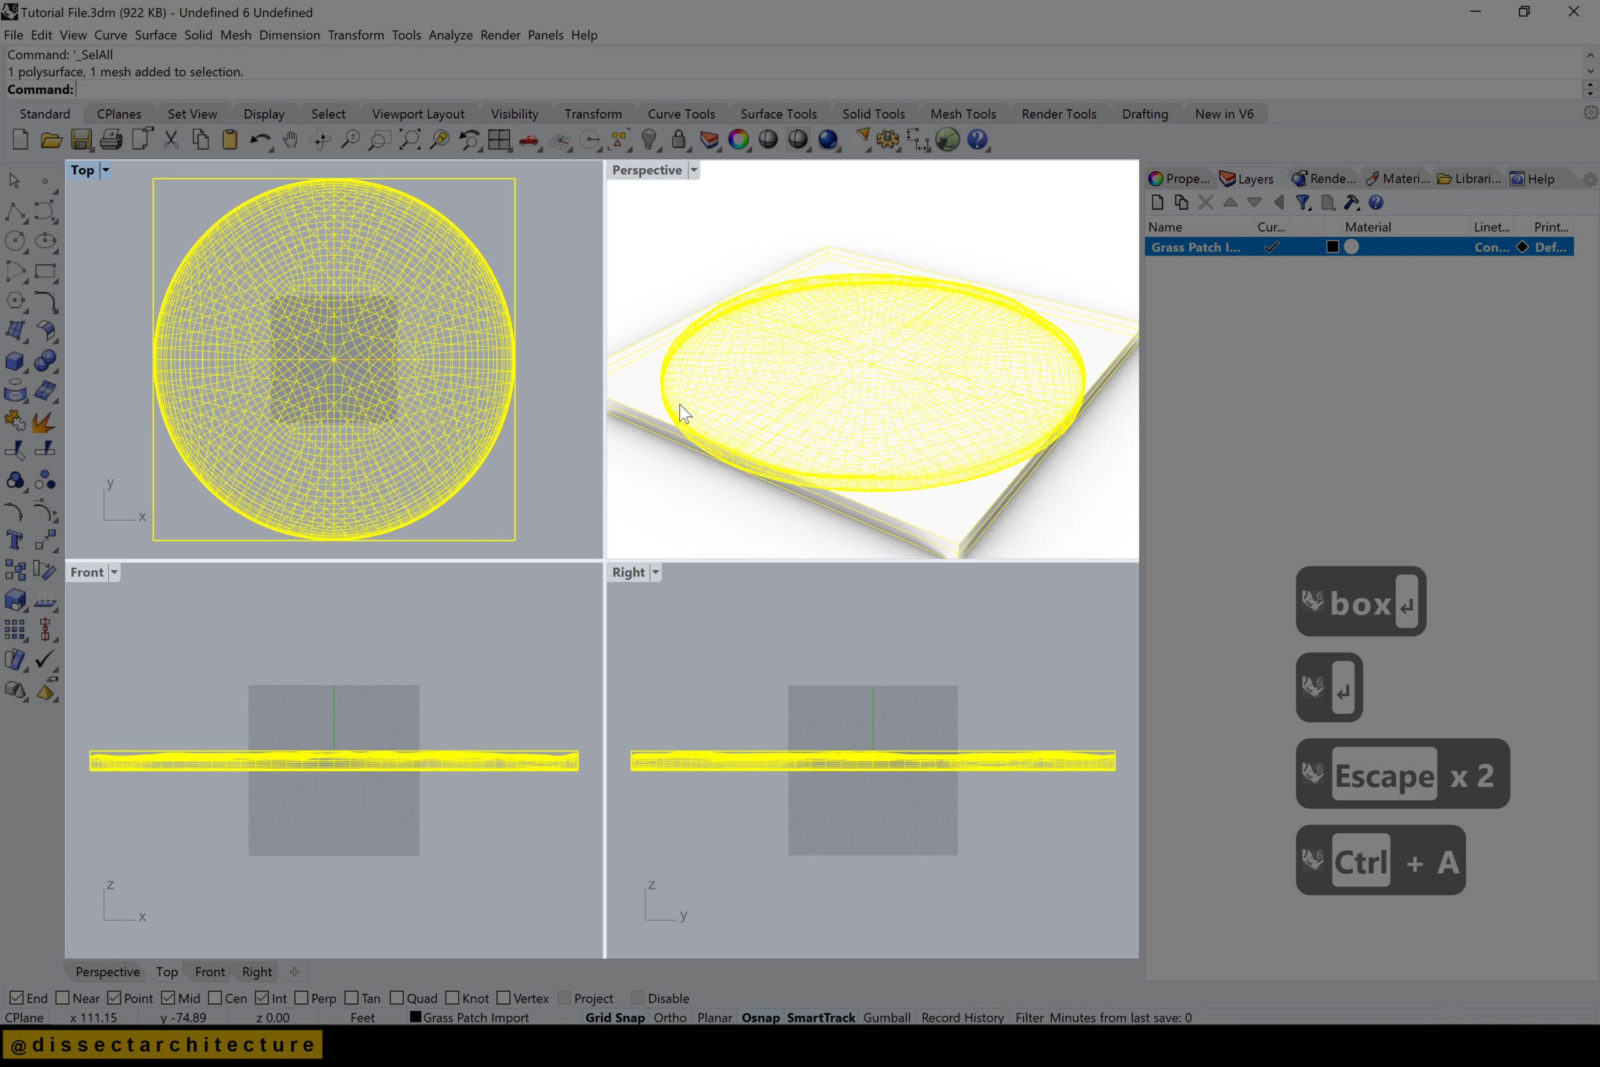
While browsing for 3D models I found this grass patch that is perfect to become the base of the landscape diagram. It is free, I found it via www.free3d.com, download it here.

Step 02
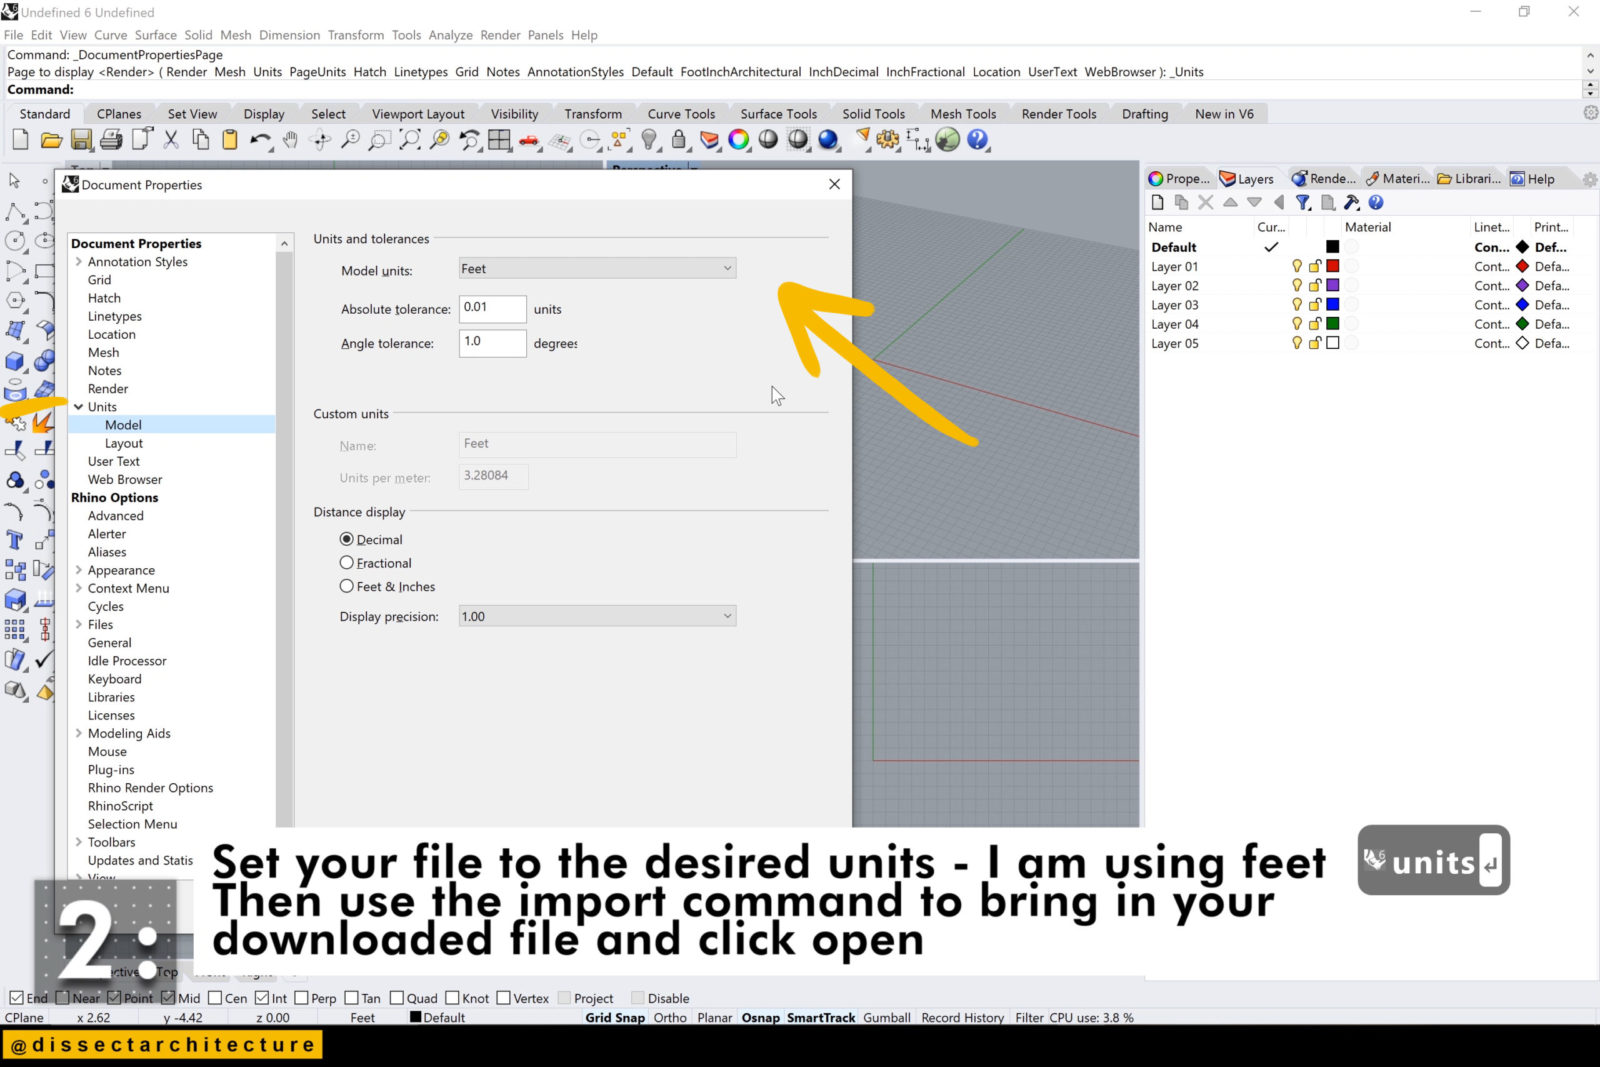
Open Rhinoceros 3D and set your file to the units you are working within your model. I am using feet. Then use the Import command to bring in your downloaded file. Follow the command prompts.

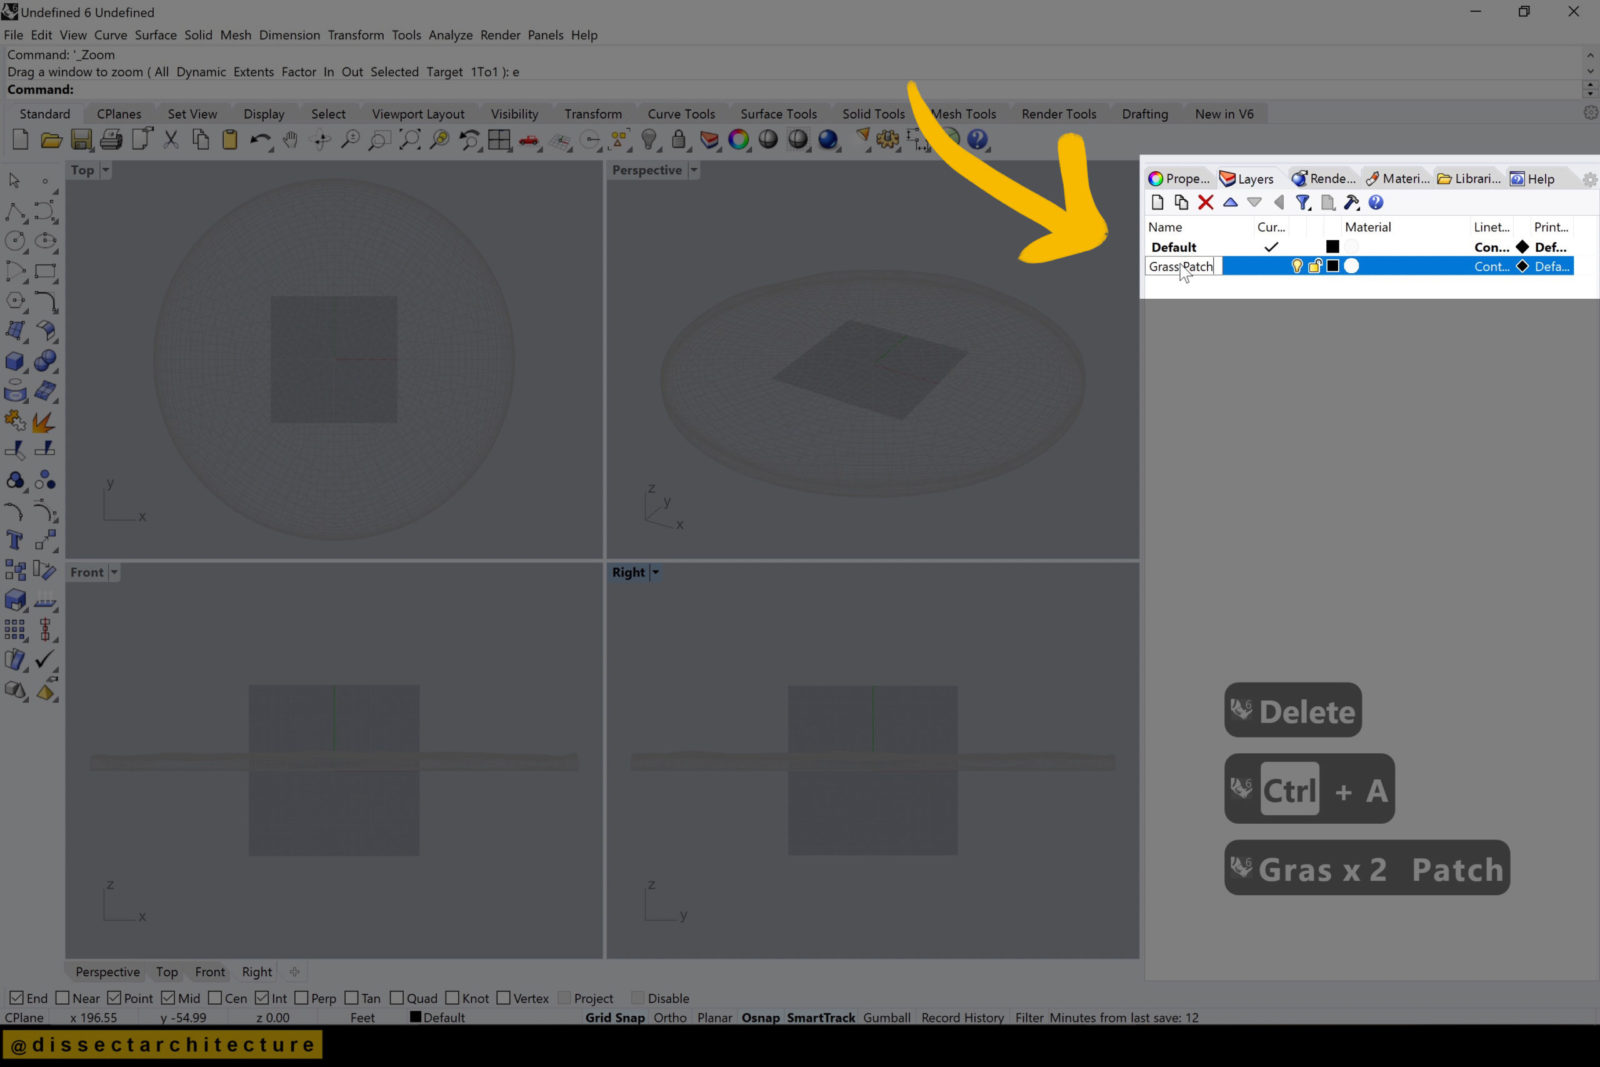
Step 03
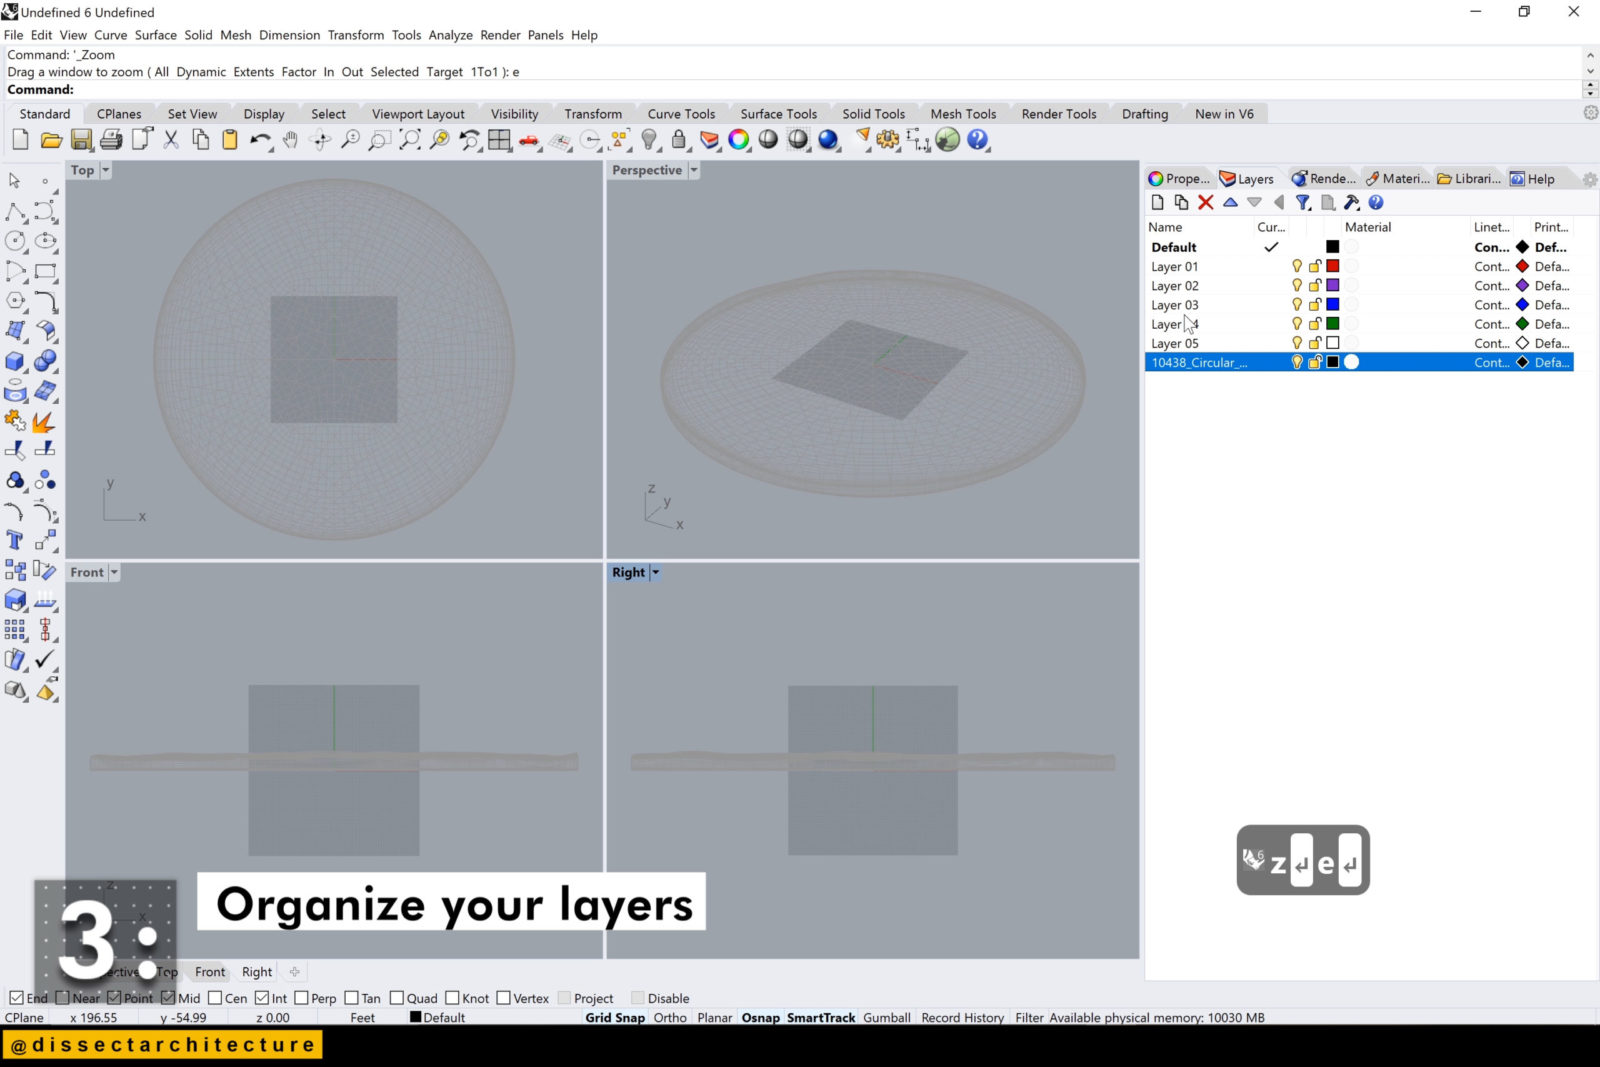
Now organize your layers.
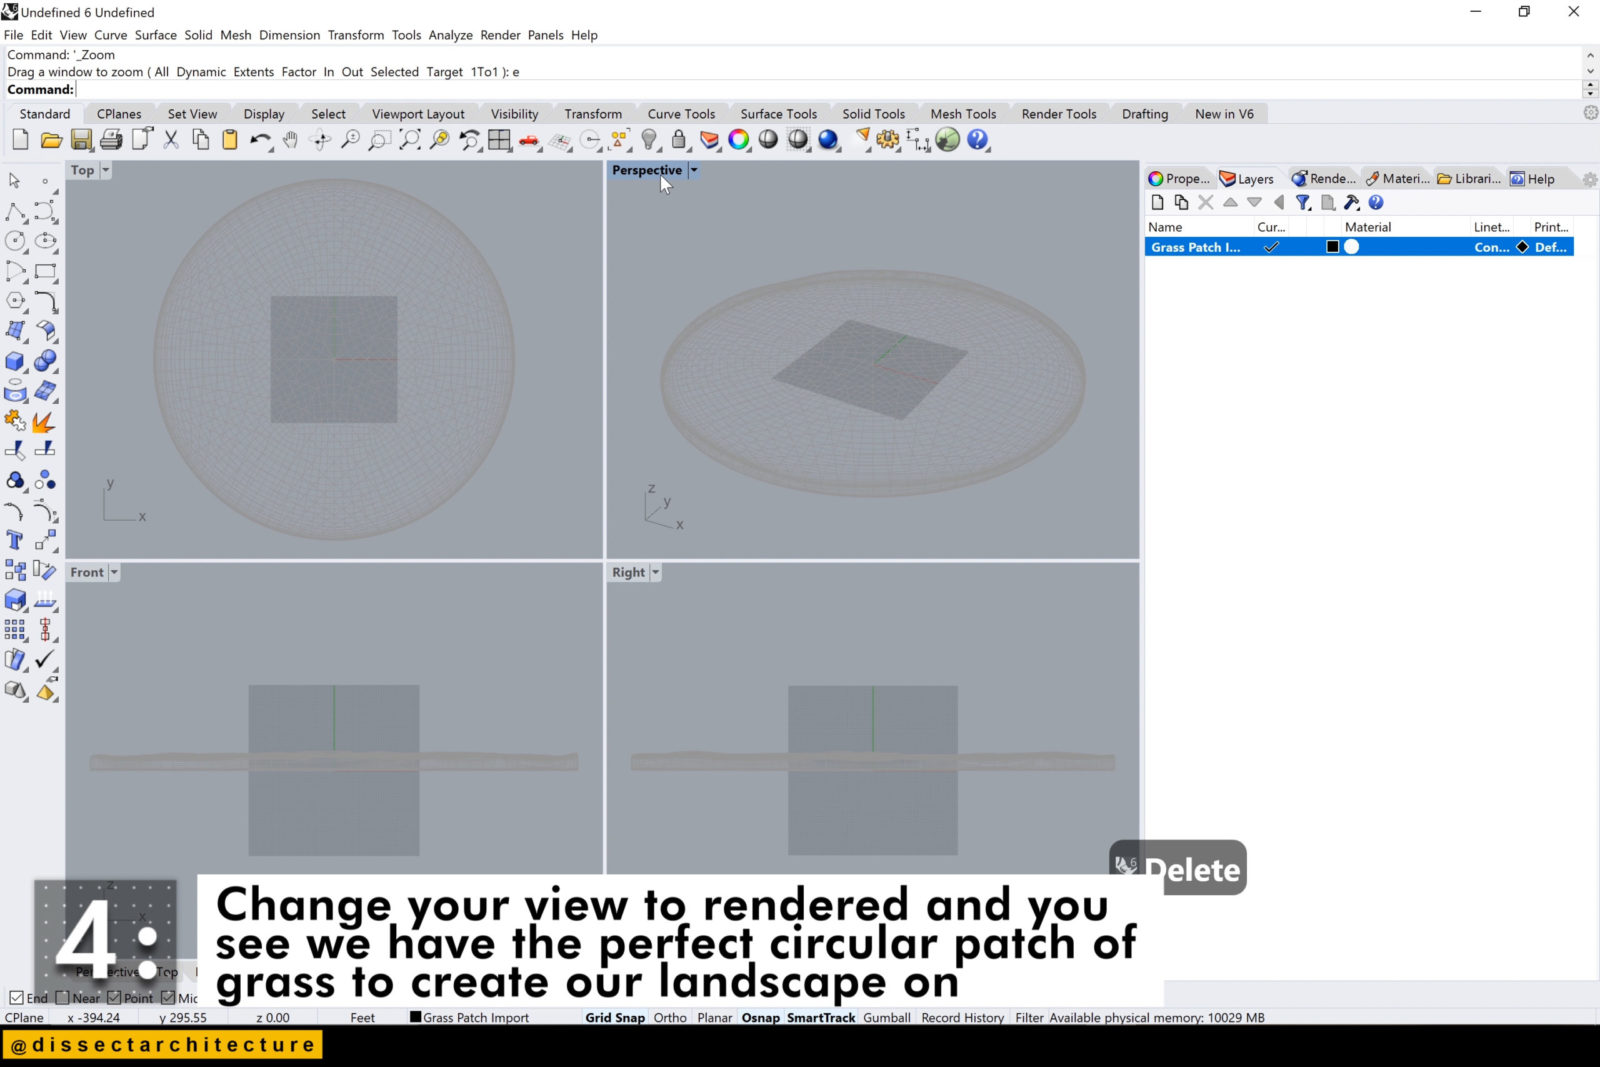
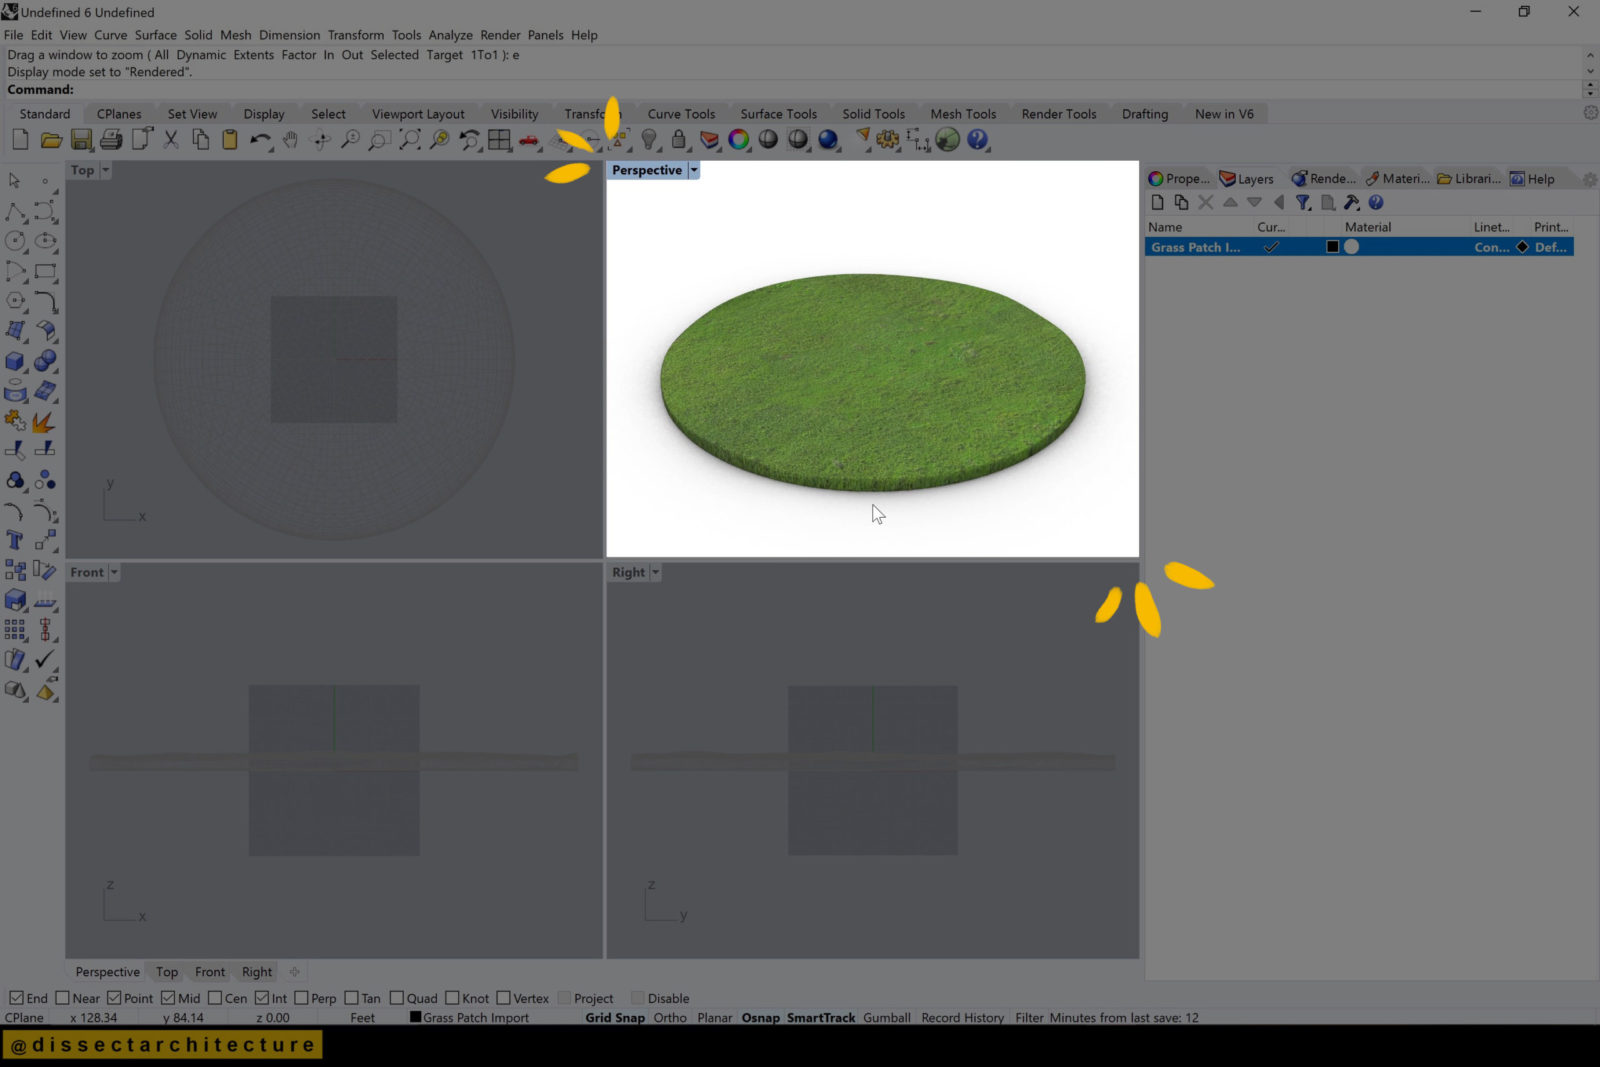
Step 04
Change your Perspective viewport to the Render display and you see we have the perfect circular patch of grass to create our landscape on.
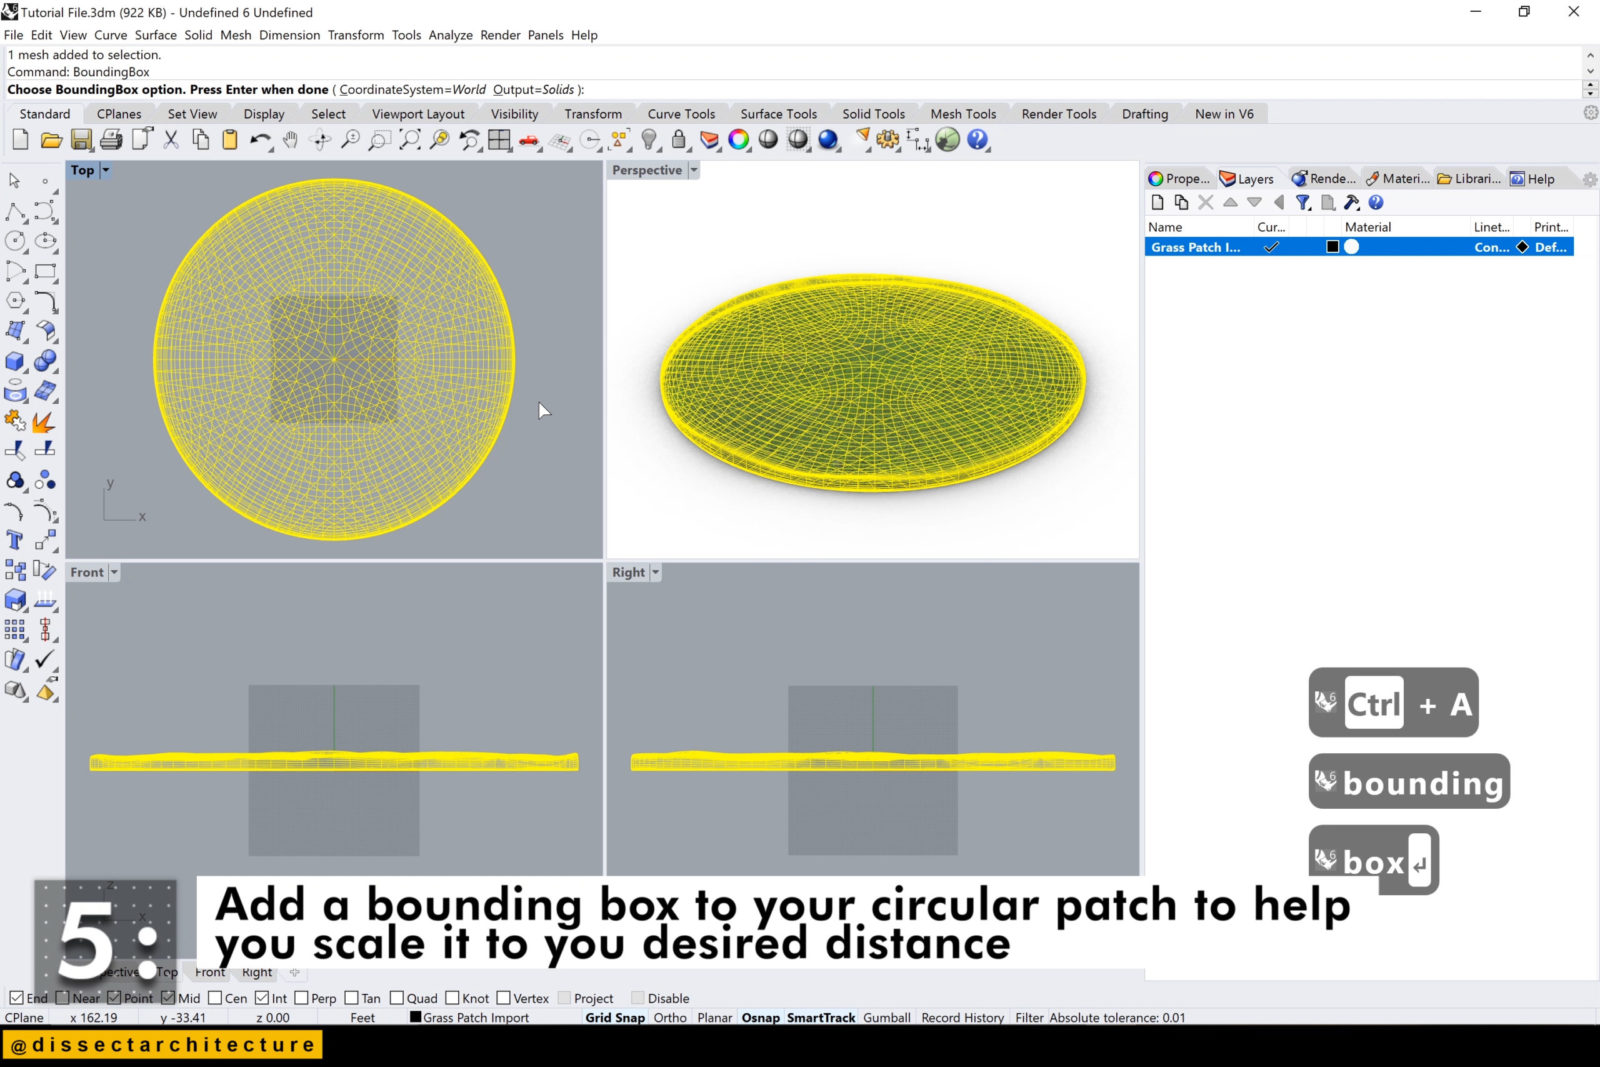
Step 05
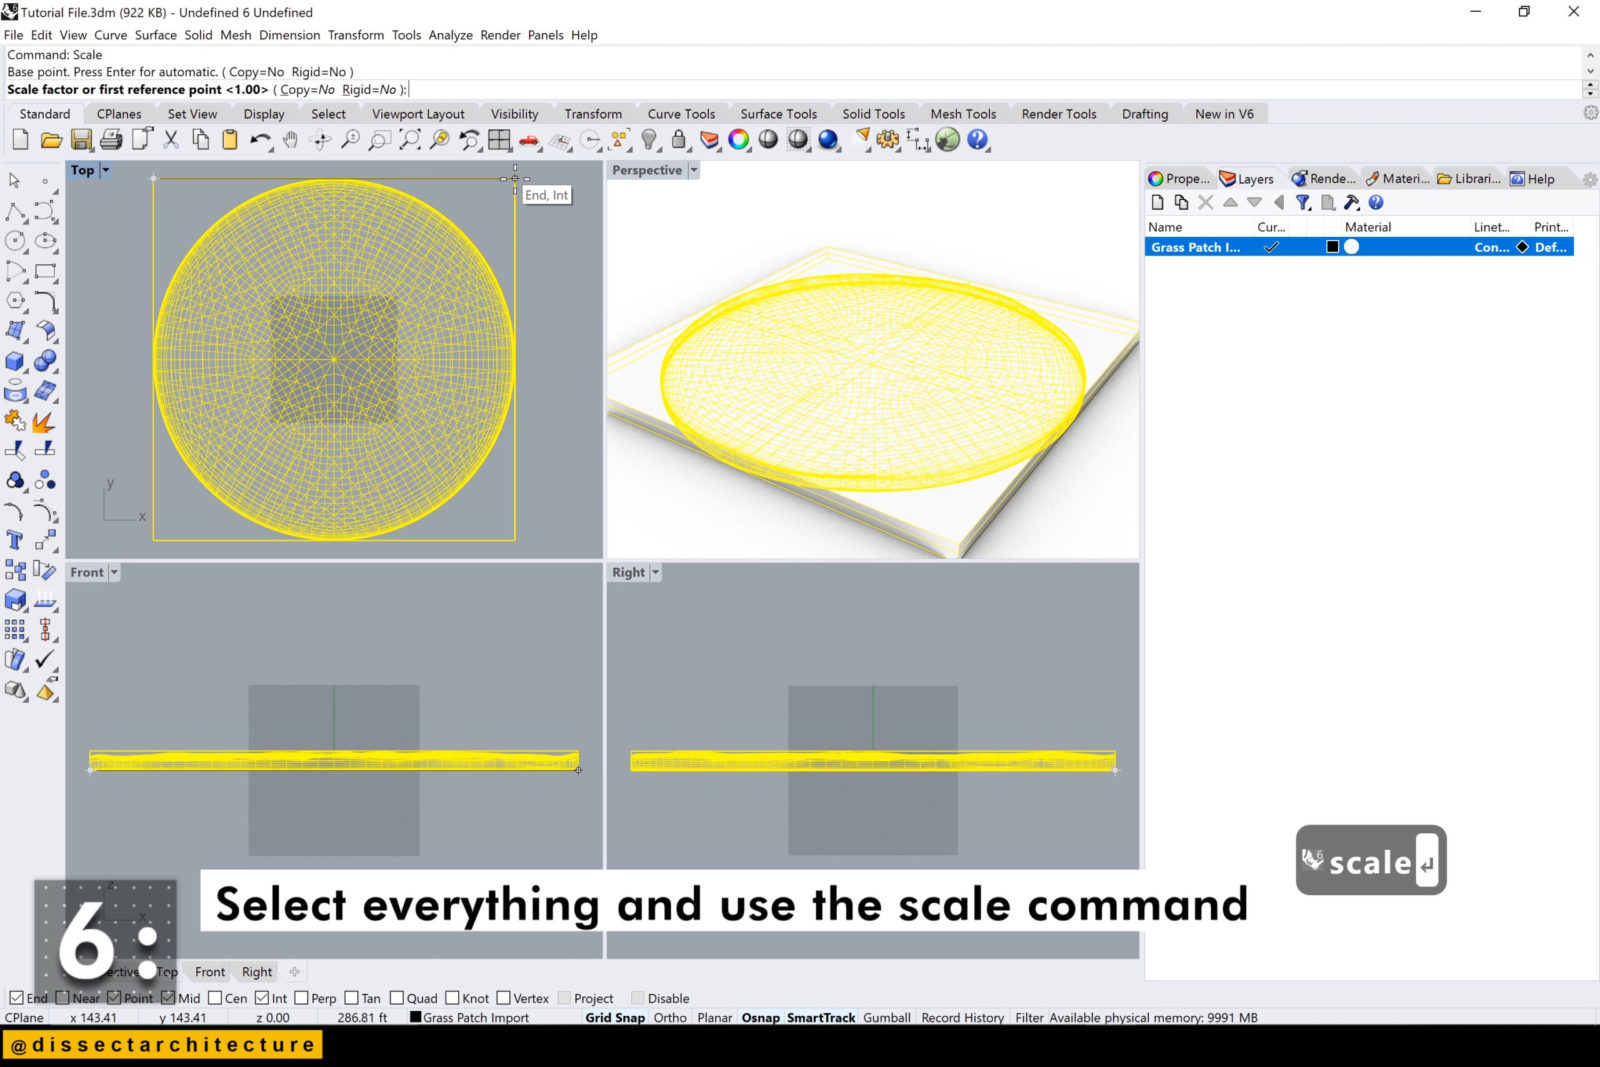
Add a bounding box to your circular patch with the BoundingBox command to help you scale it to your desired distance.
Step 06
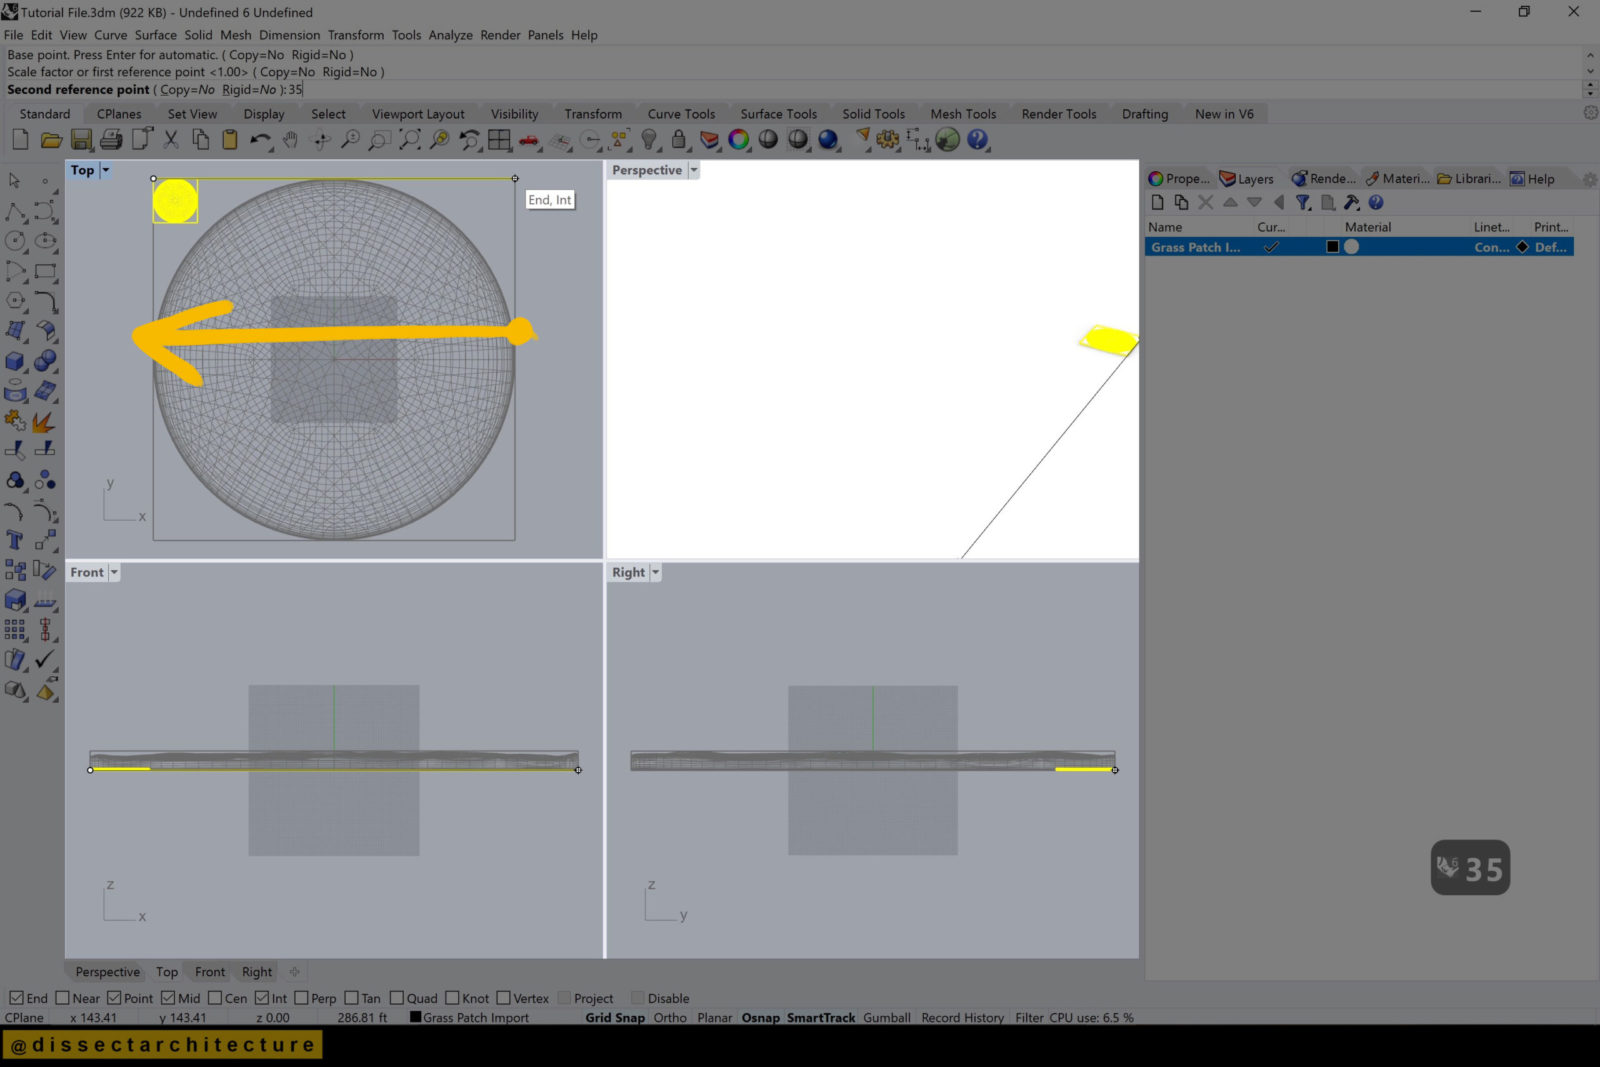
Select everything and use the Scale command to make the circular patch larger.
Step 07
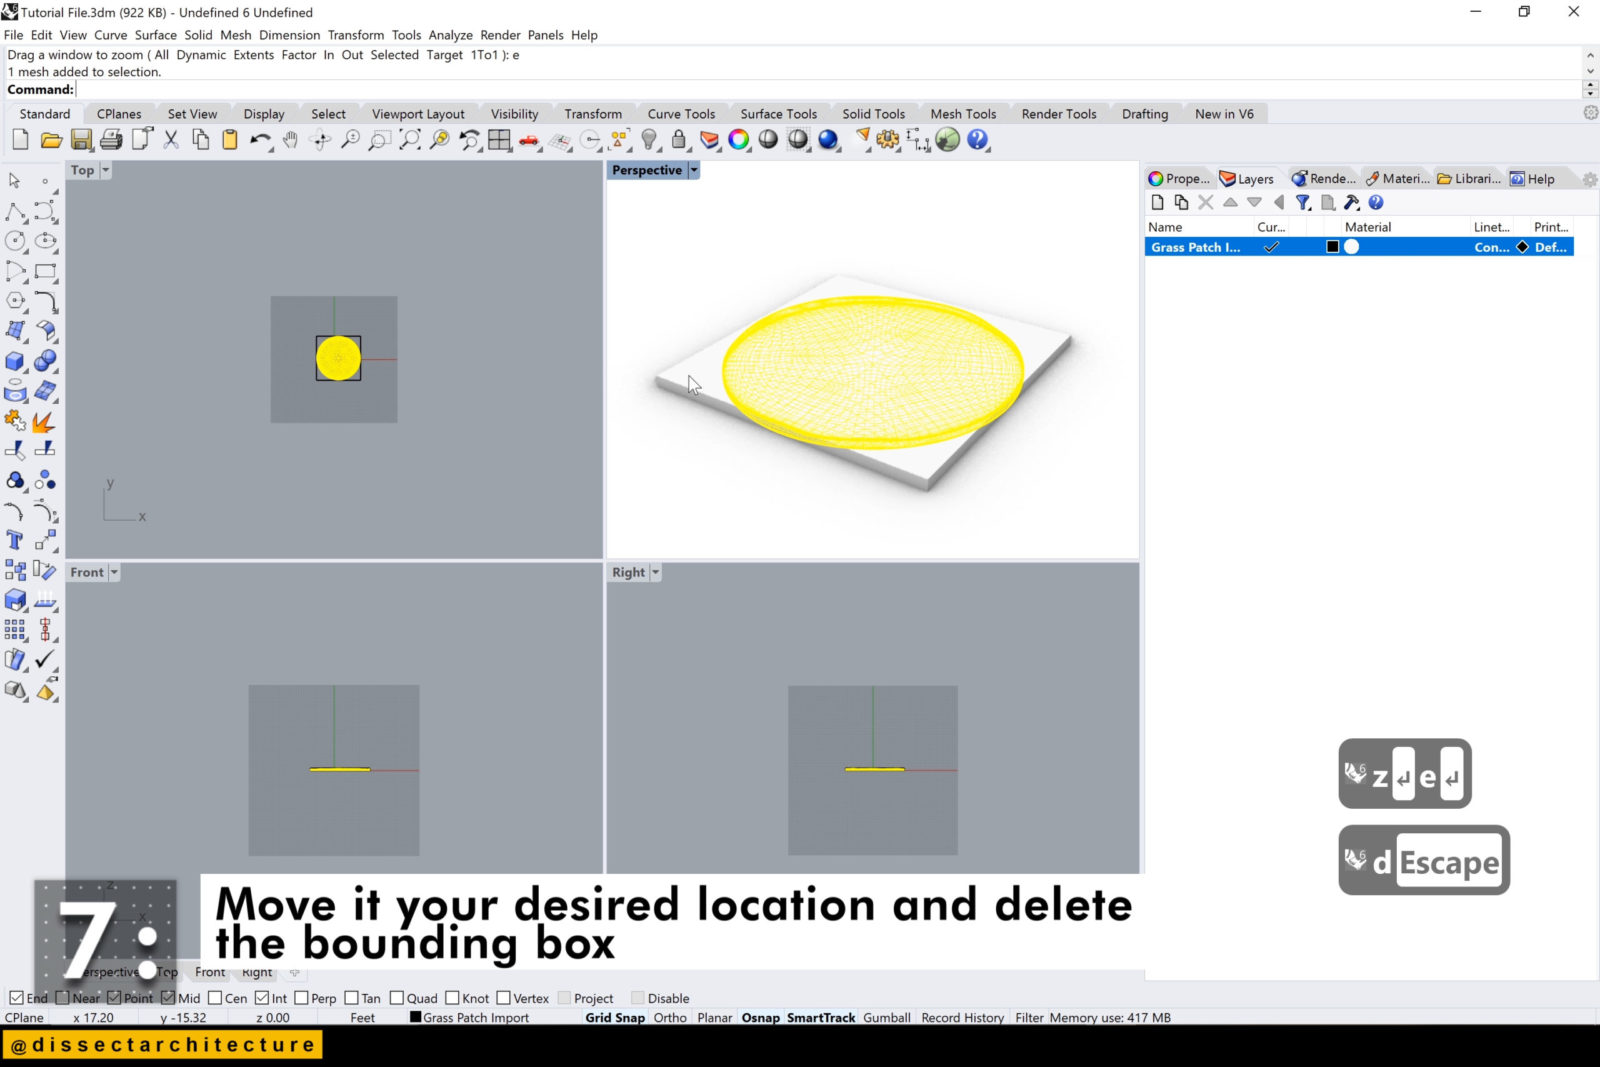
Move it to your desired location and delete the bounding box.
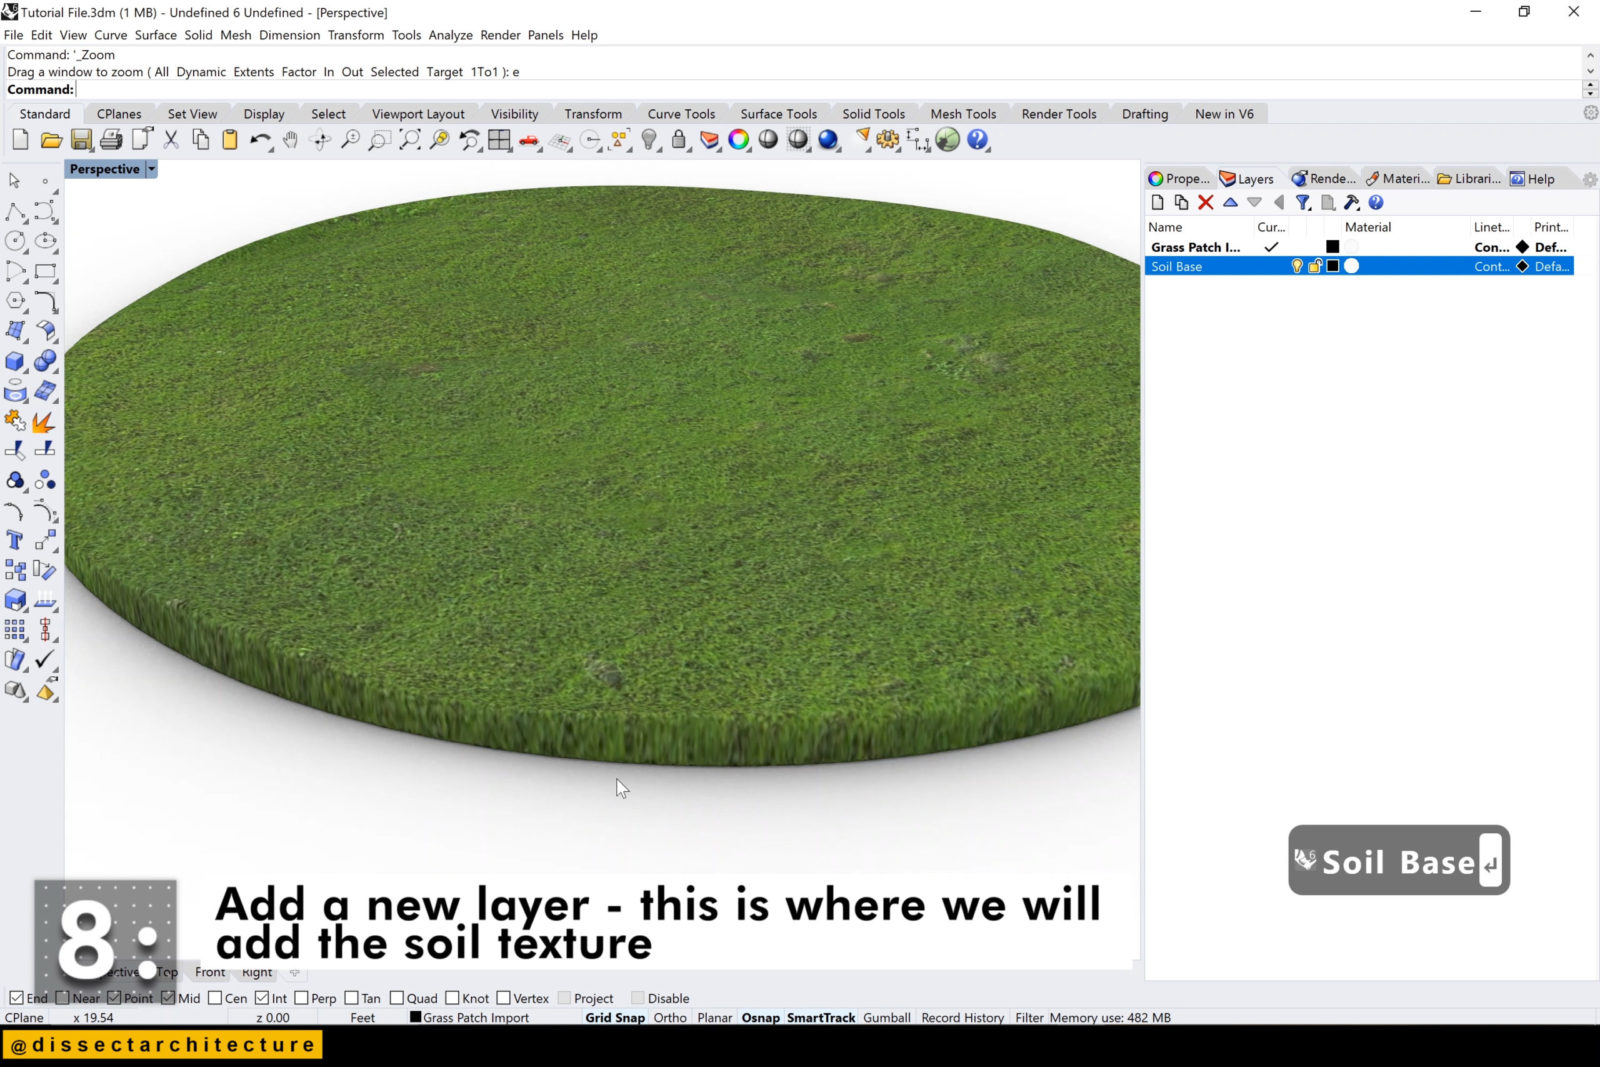
Step 08
Add a new layer, this is where we will add the soil texture.
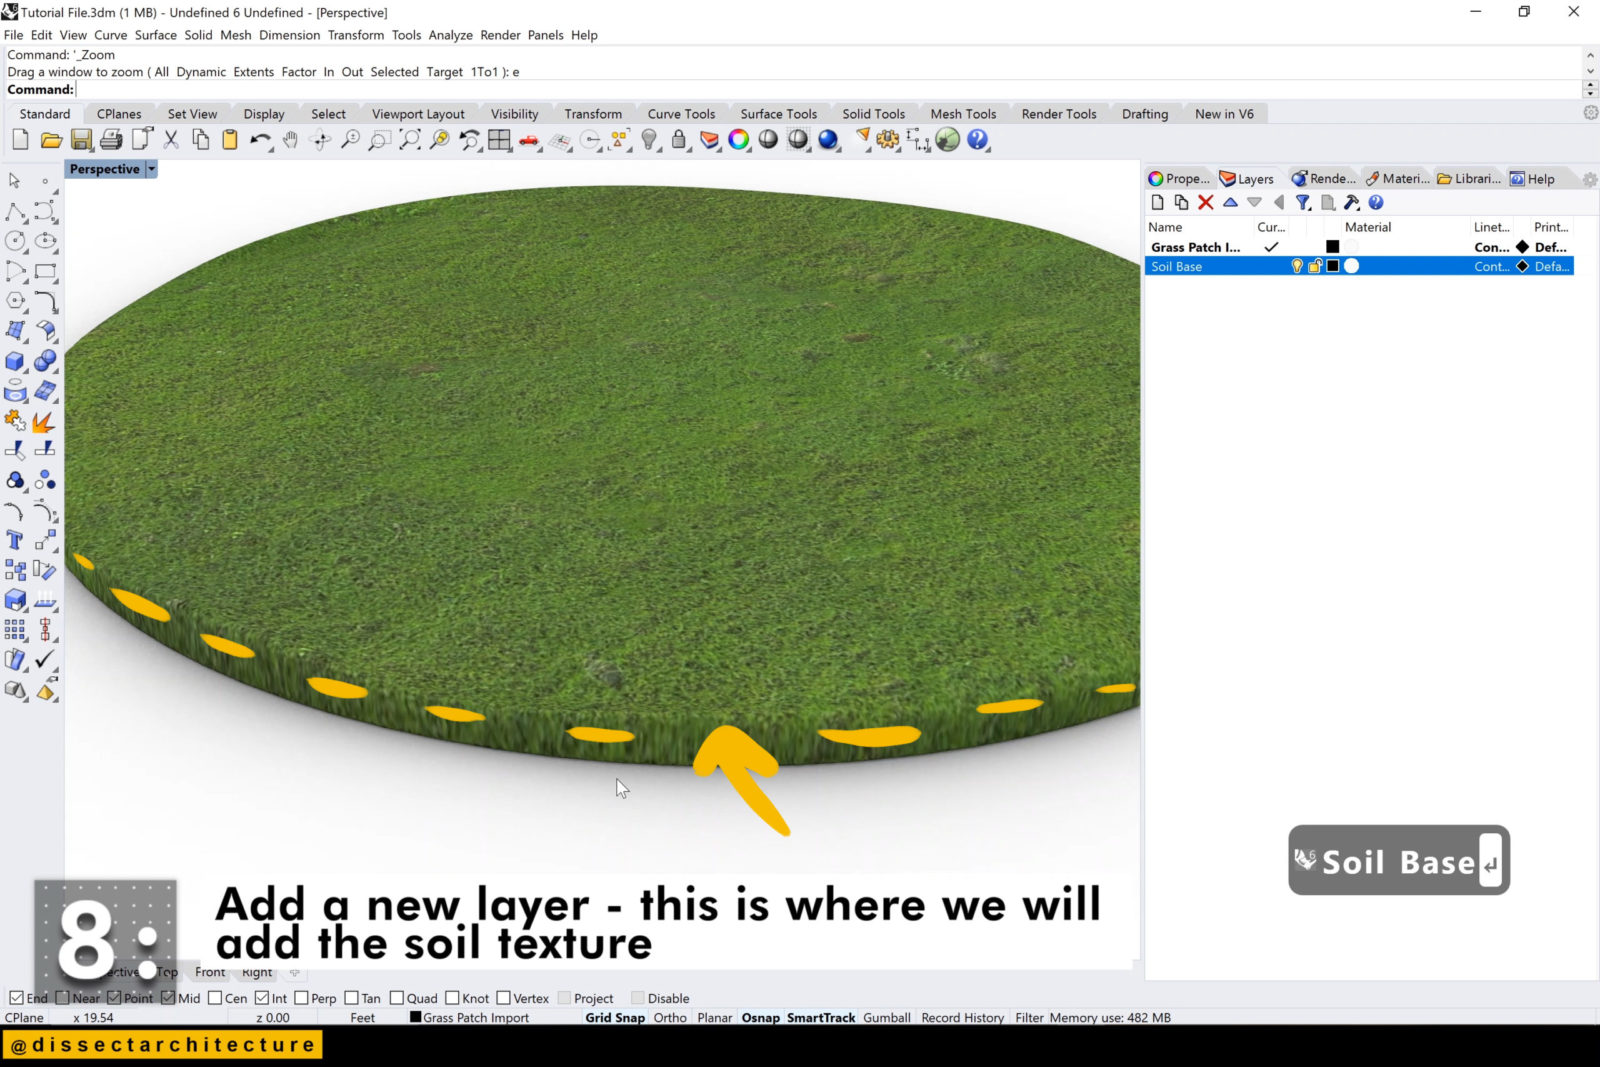
Step 09
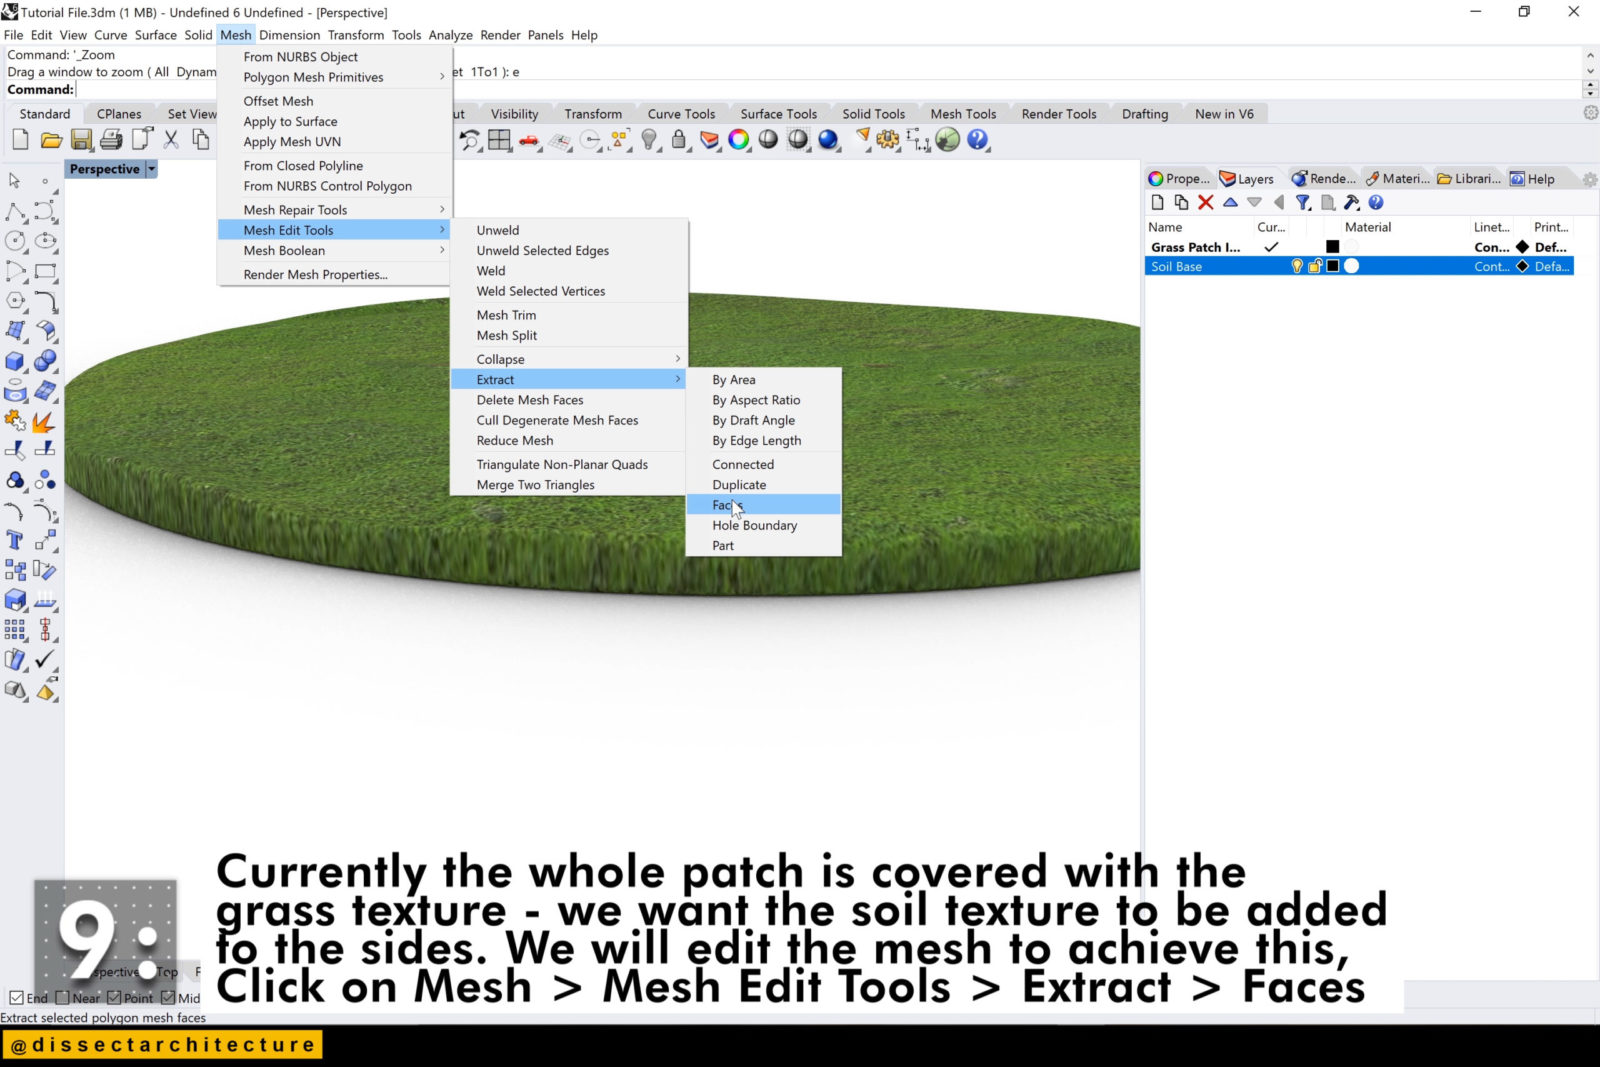
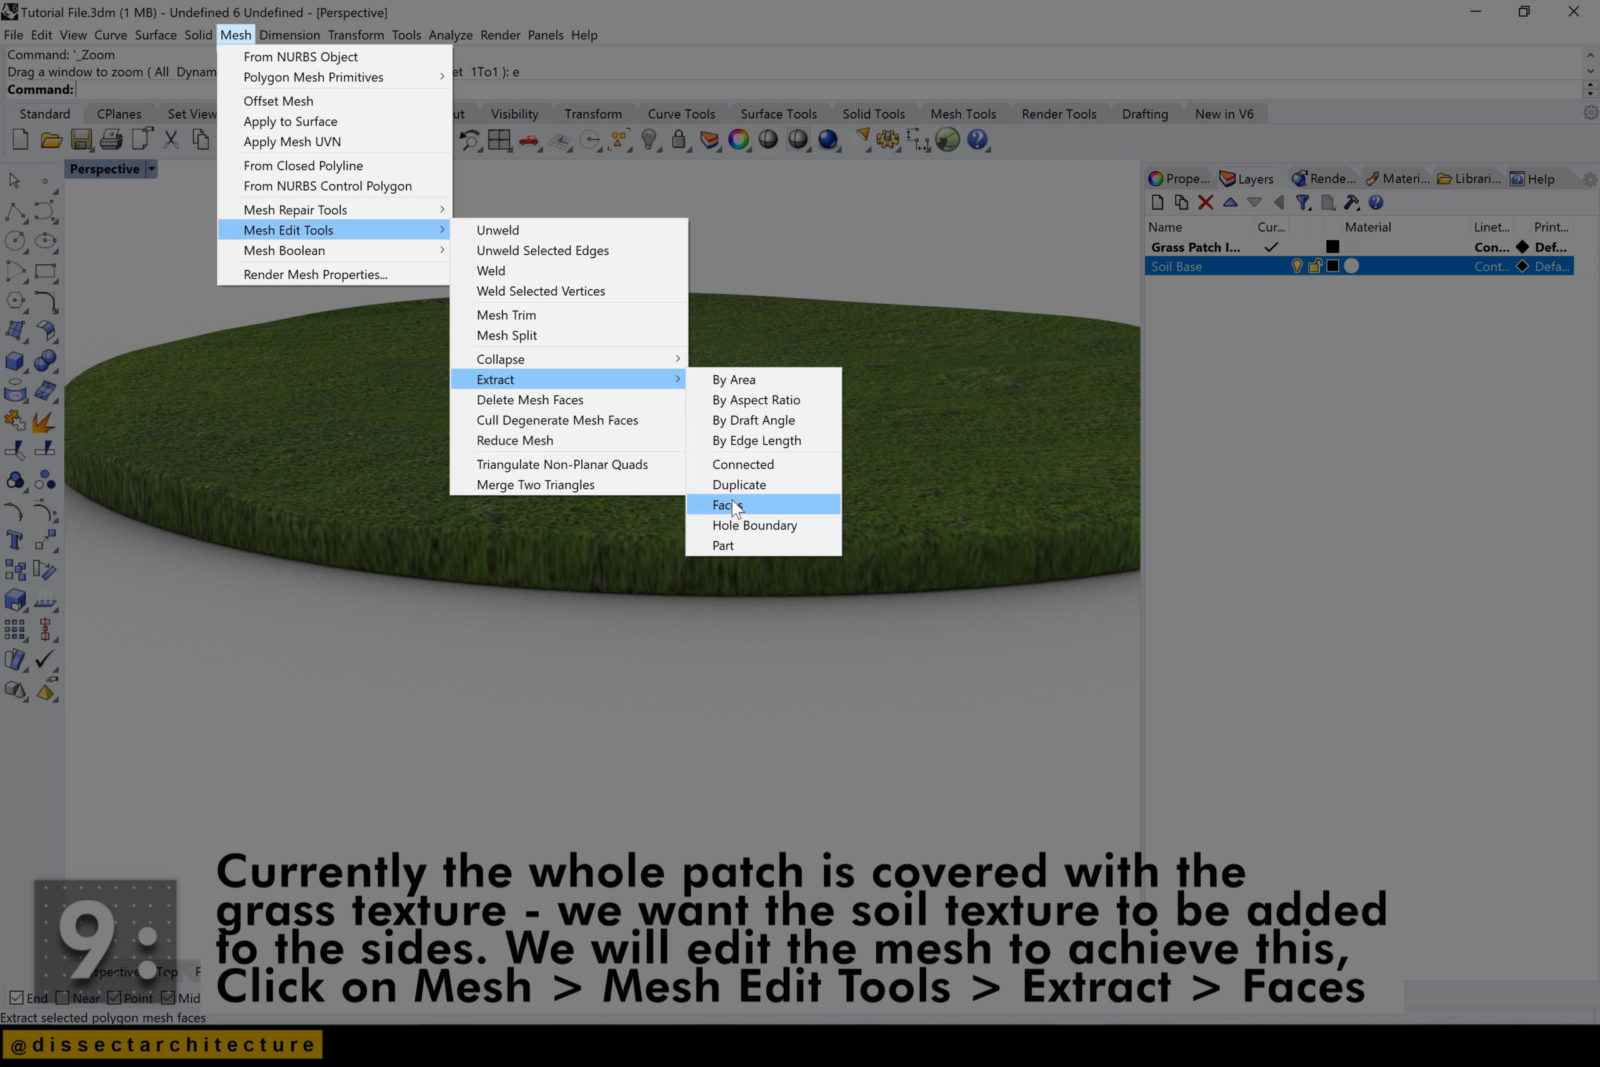
Currently the whole patch is covered with the grass texture. We want the soil texture to be added to the sides.
Edit the mesh to achieve this, to do so click on Mesh > Mesh Edit Tools > Extract > Faces.
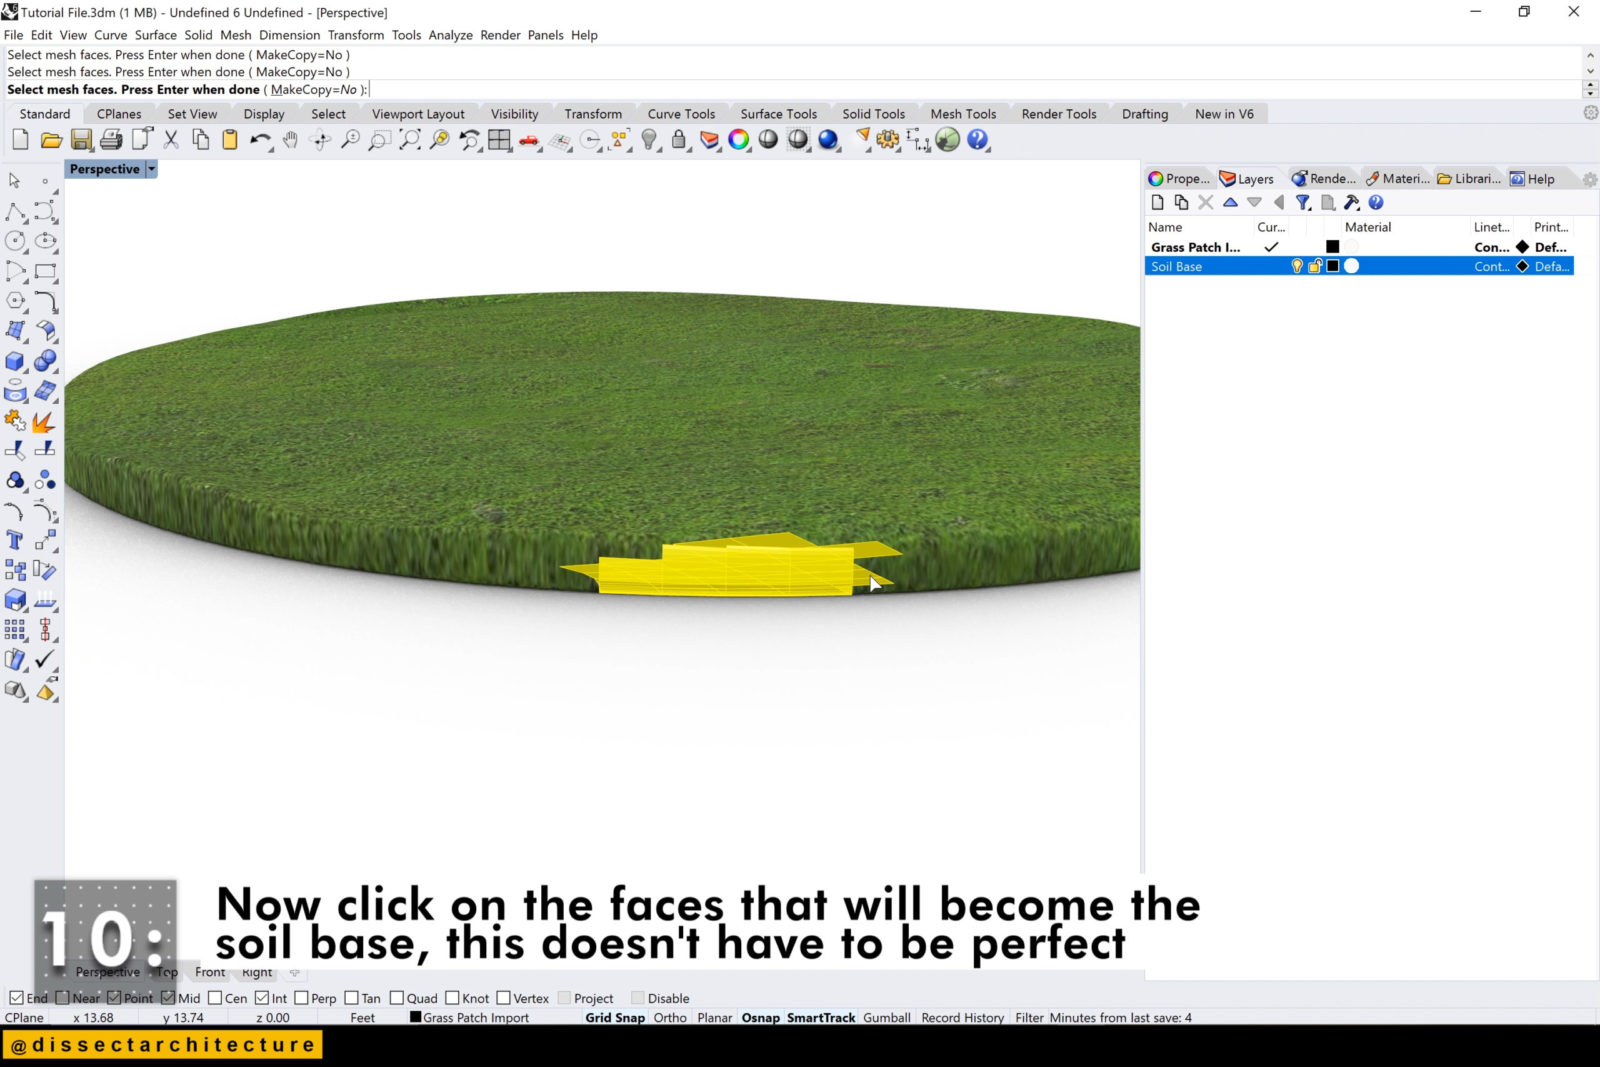
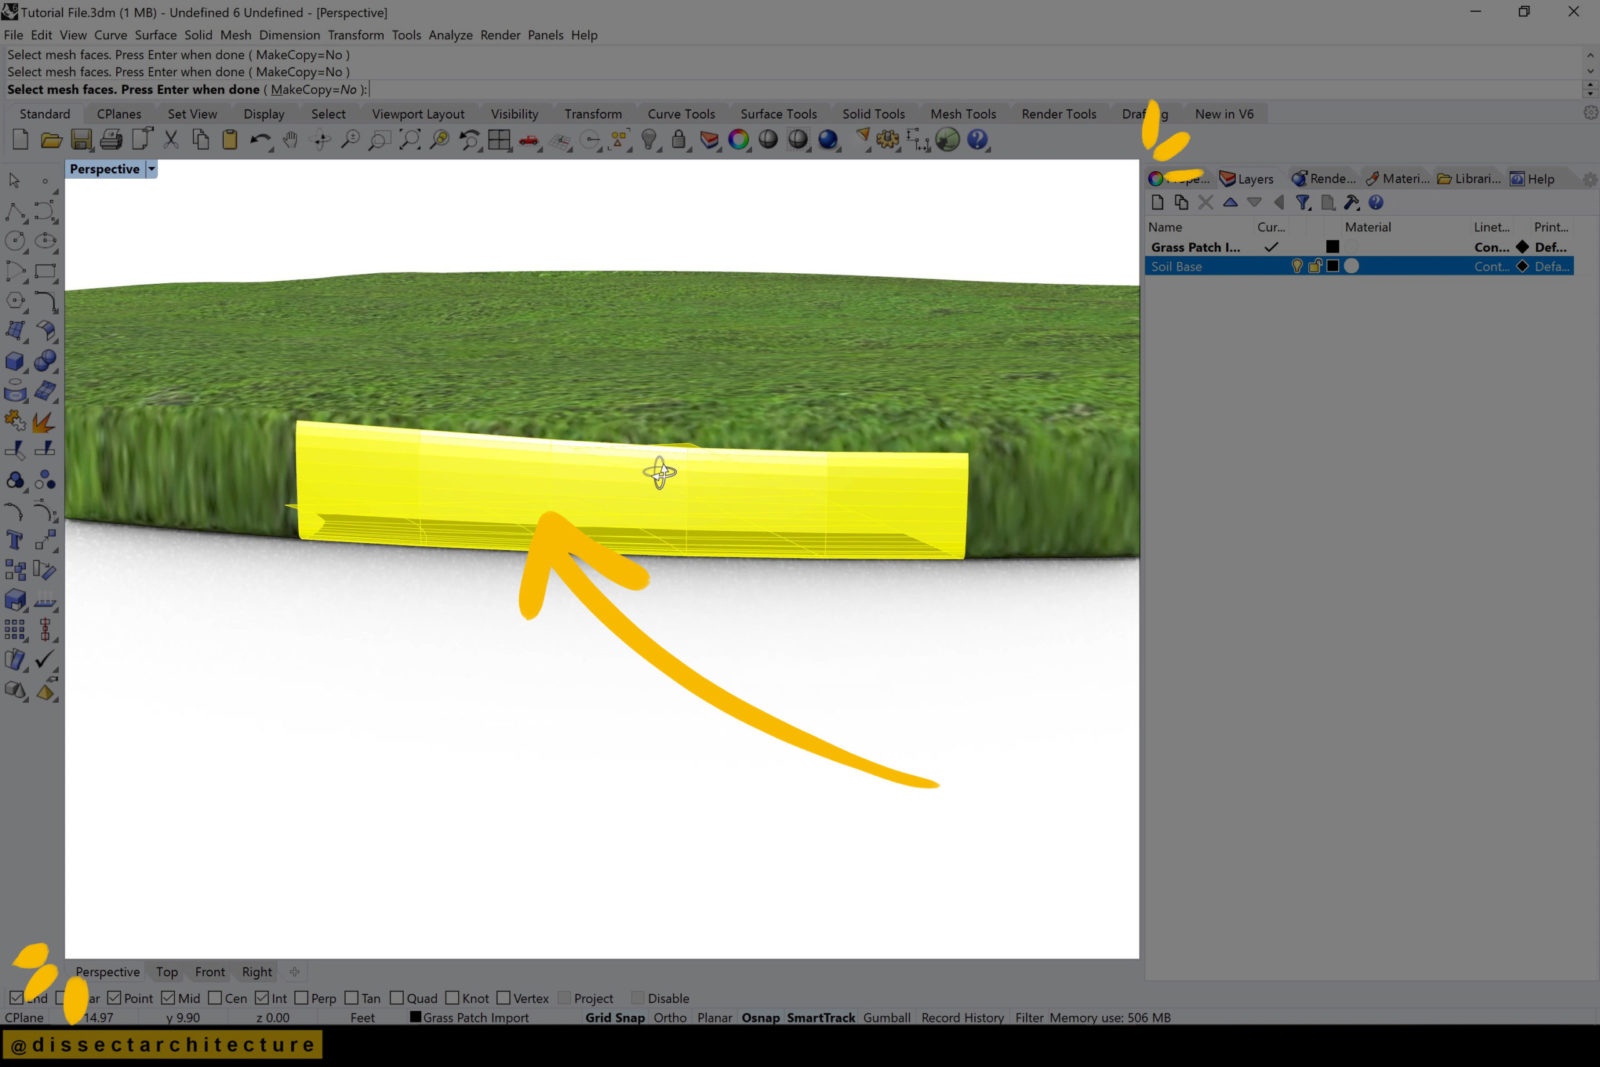
Step 10
Now click on the faces that will become the soil base, this doesn’t have to be perfect.
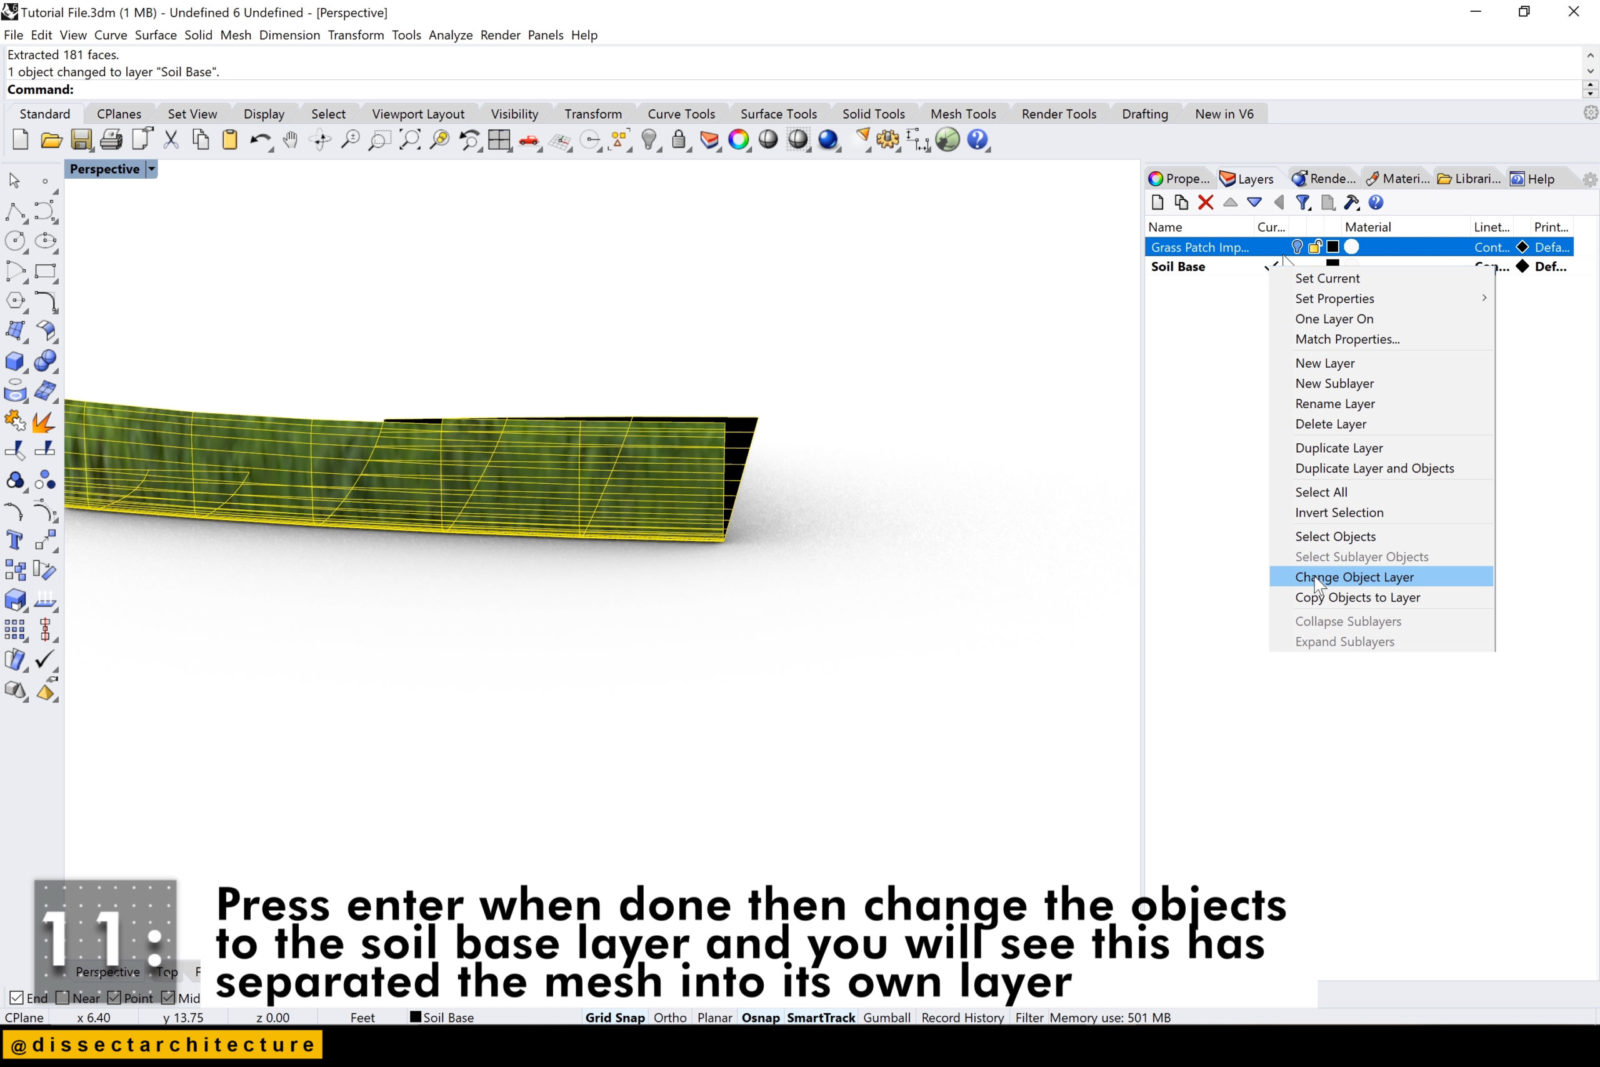
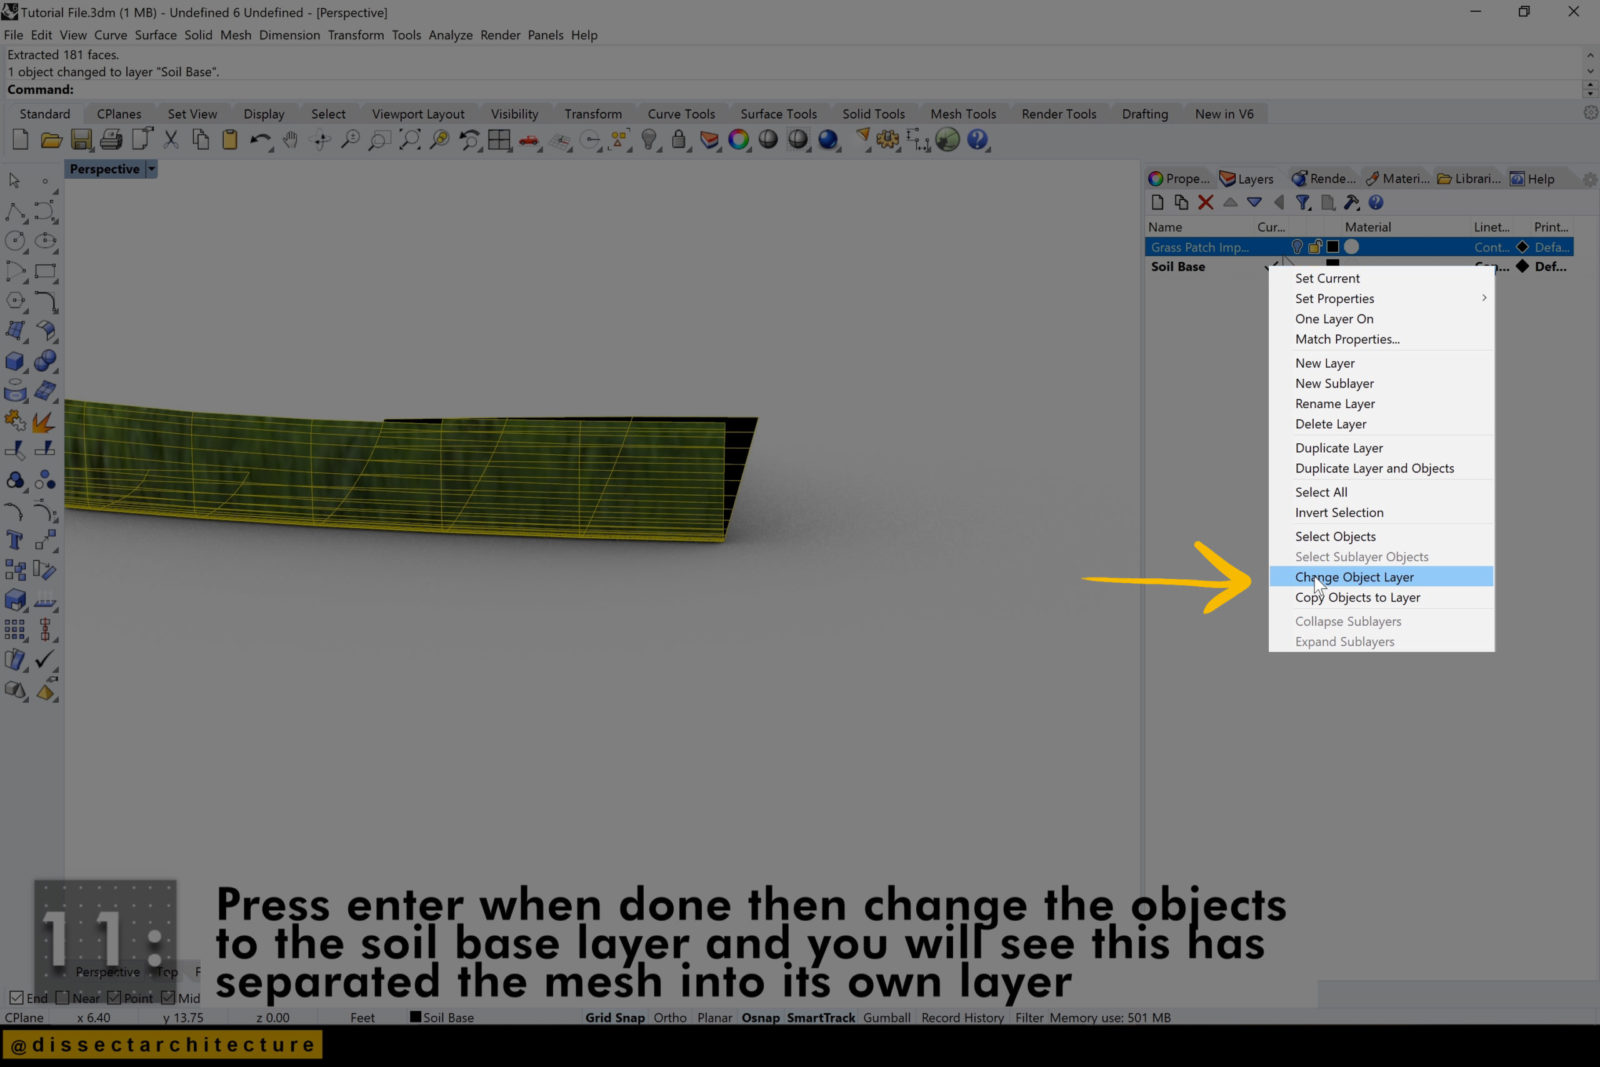
Step 11
Press Enter when done then change the objects to the soil base layer and you will see this has separated the mesh into its own layer.
Step 12
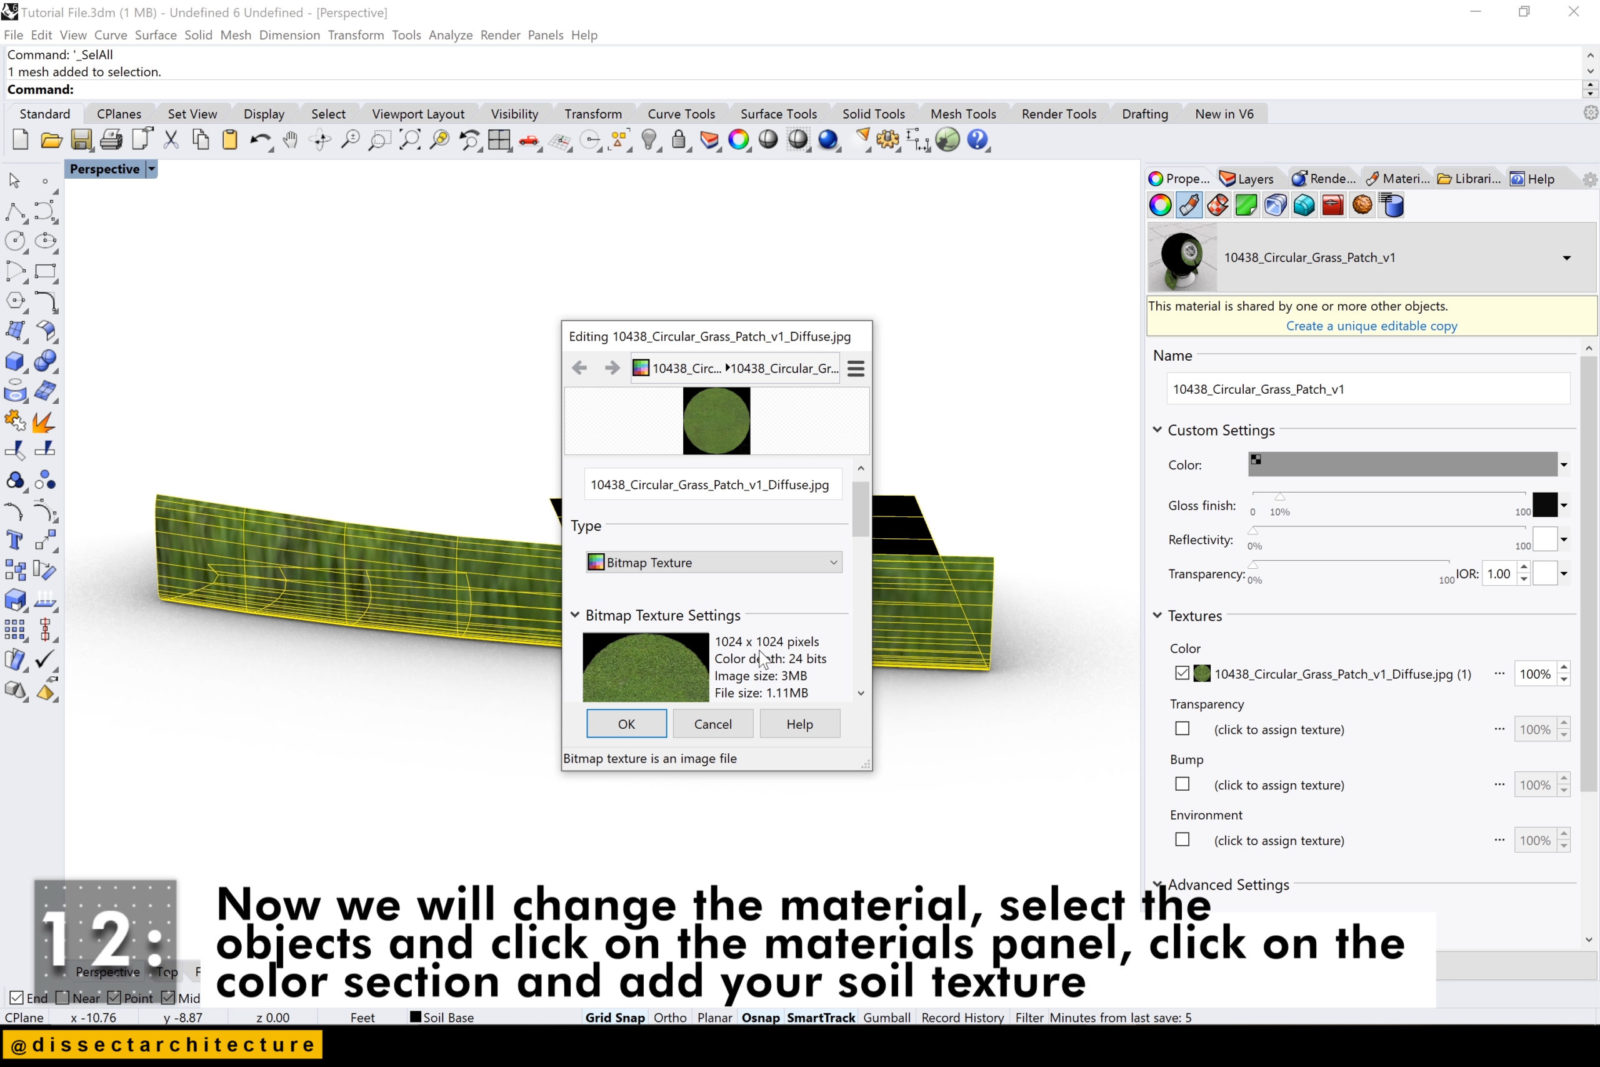
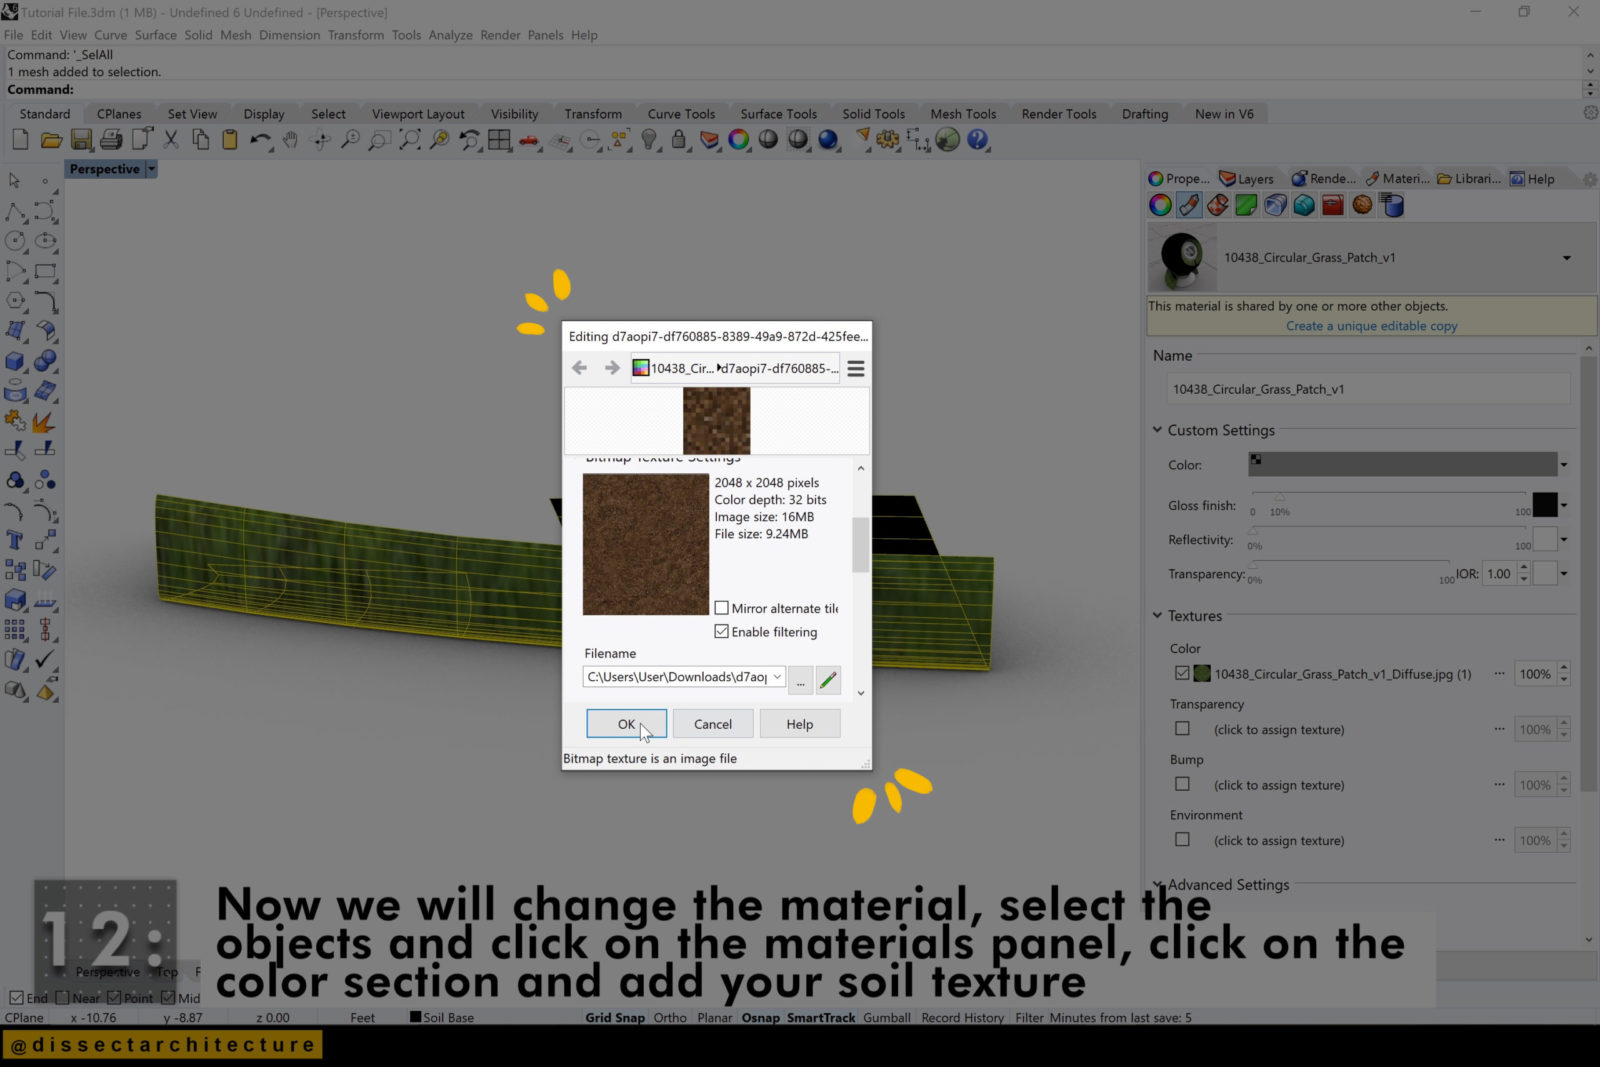
Now we will change the material.
Select the objects and go to the Material Panel, click on the color section and add your soil texture through the File Explorer.
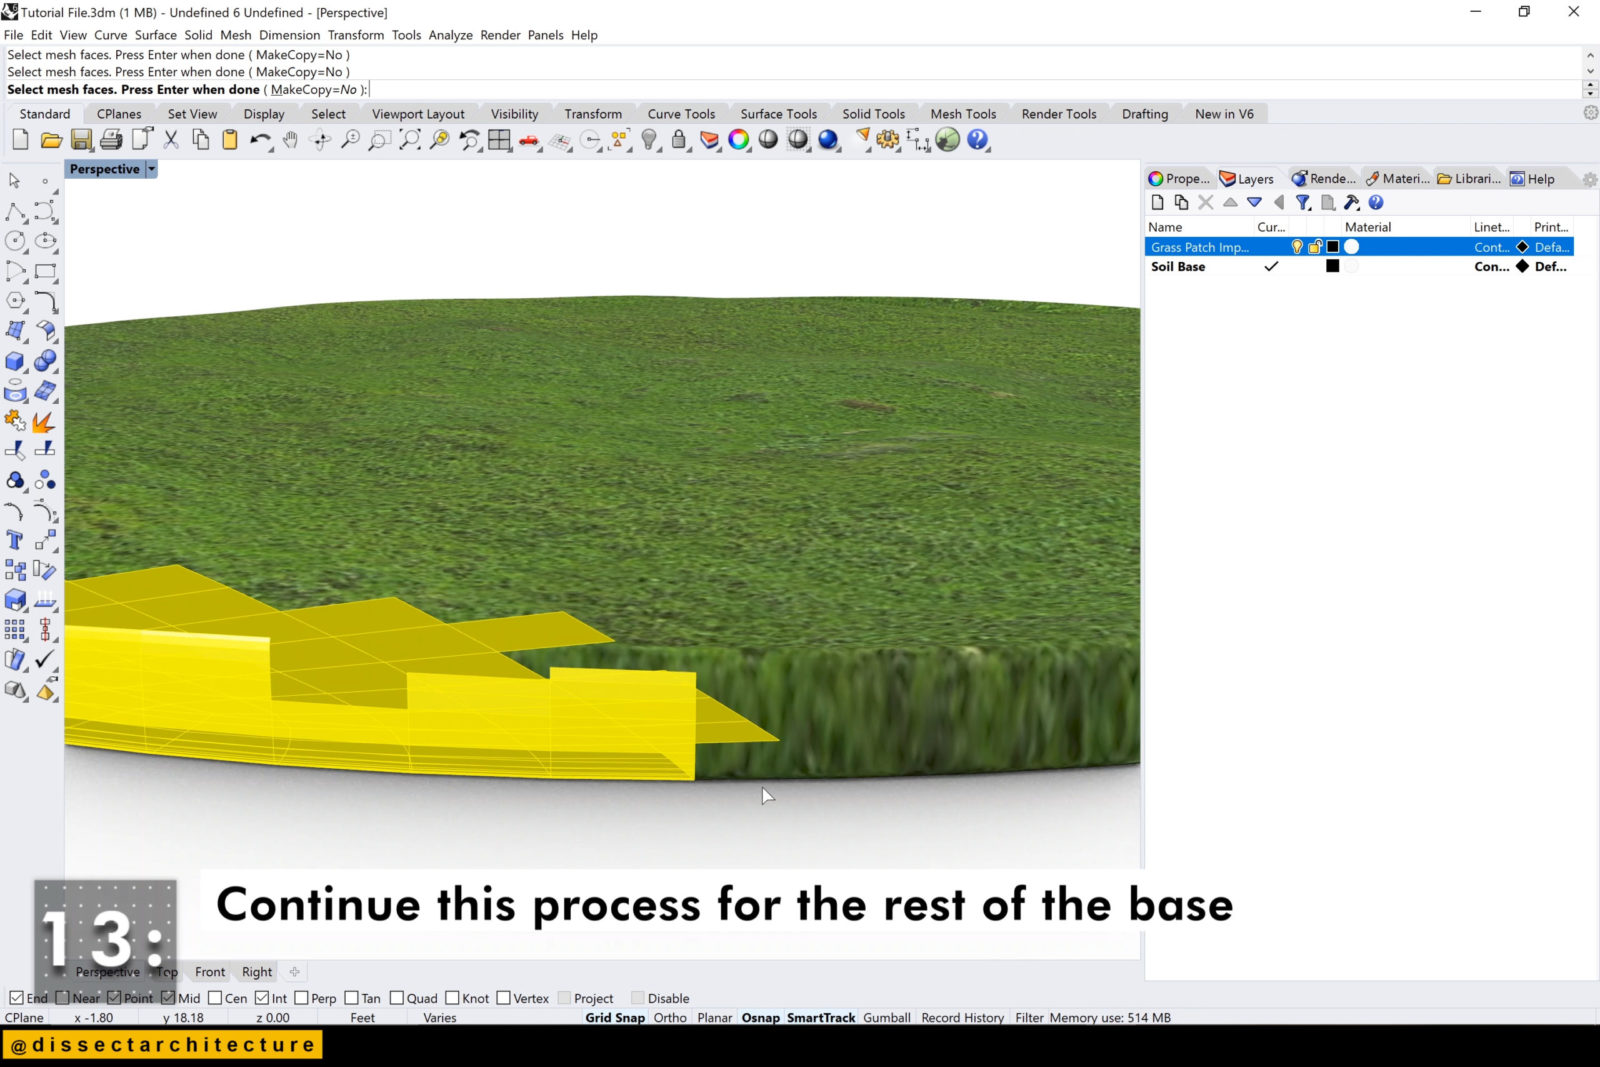
Step 13
Contine this process for the rest of the base.
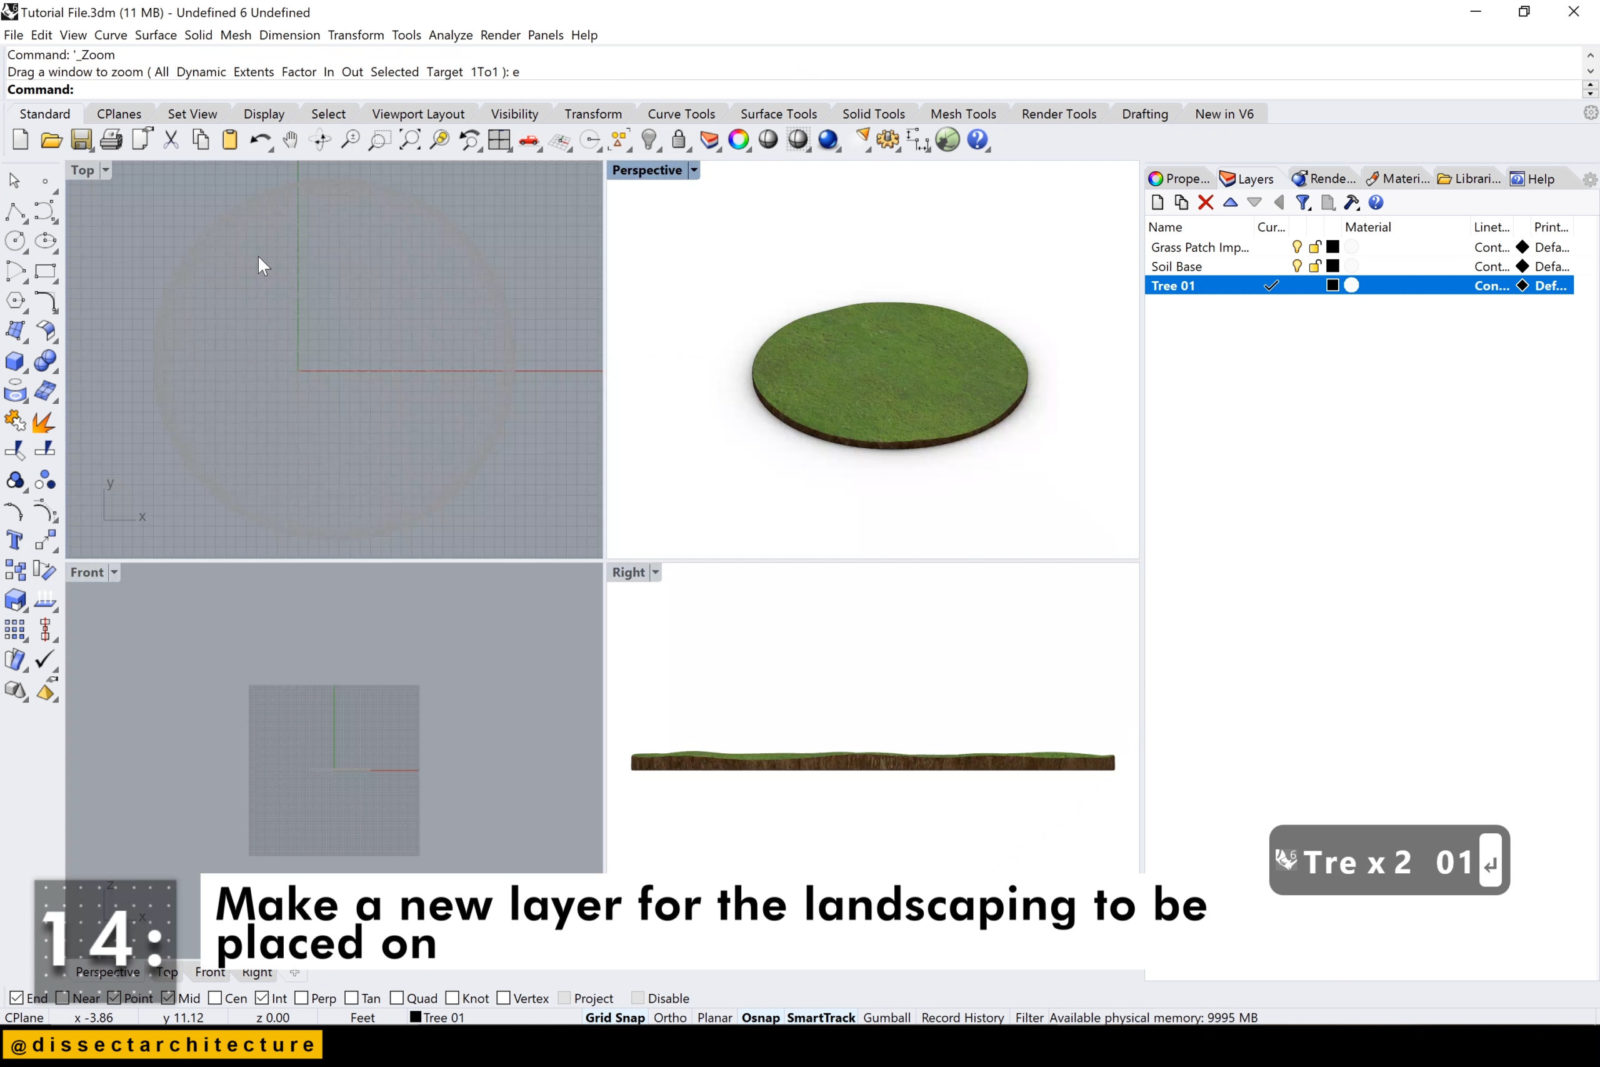
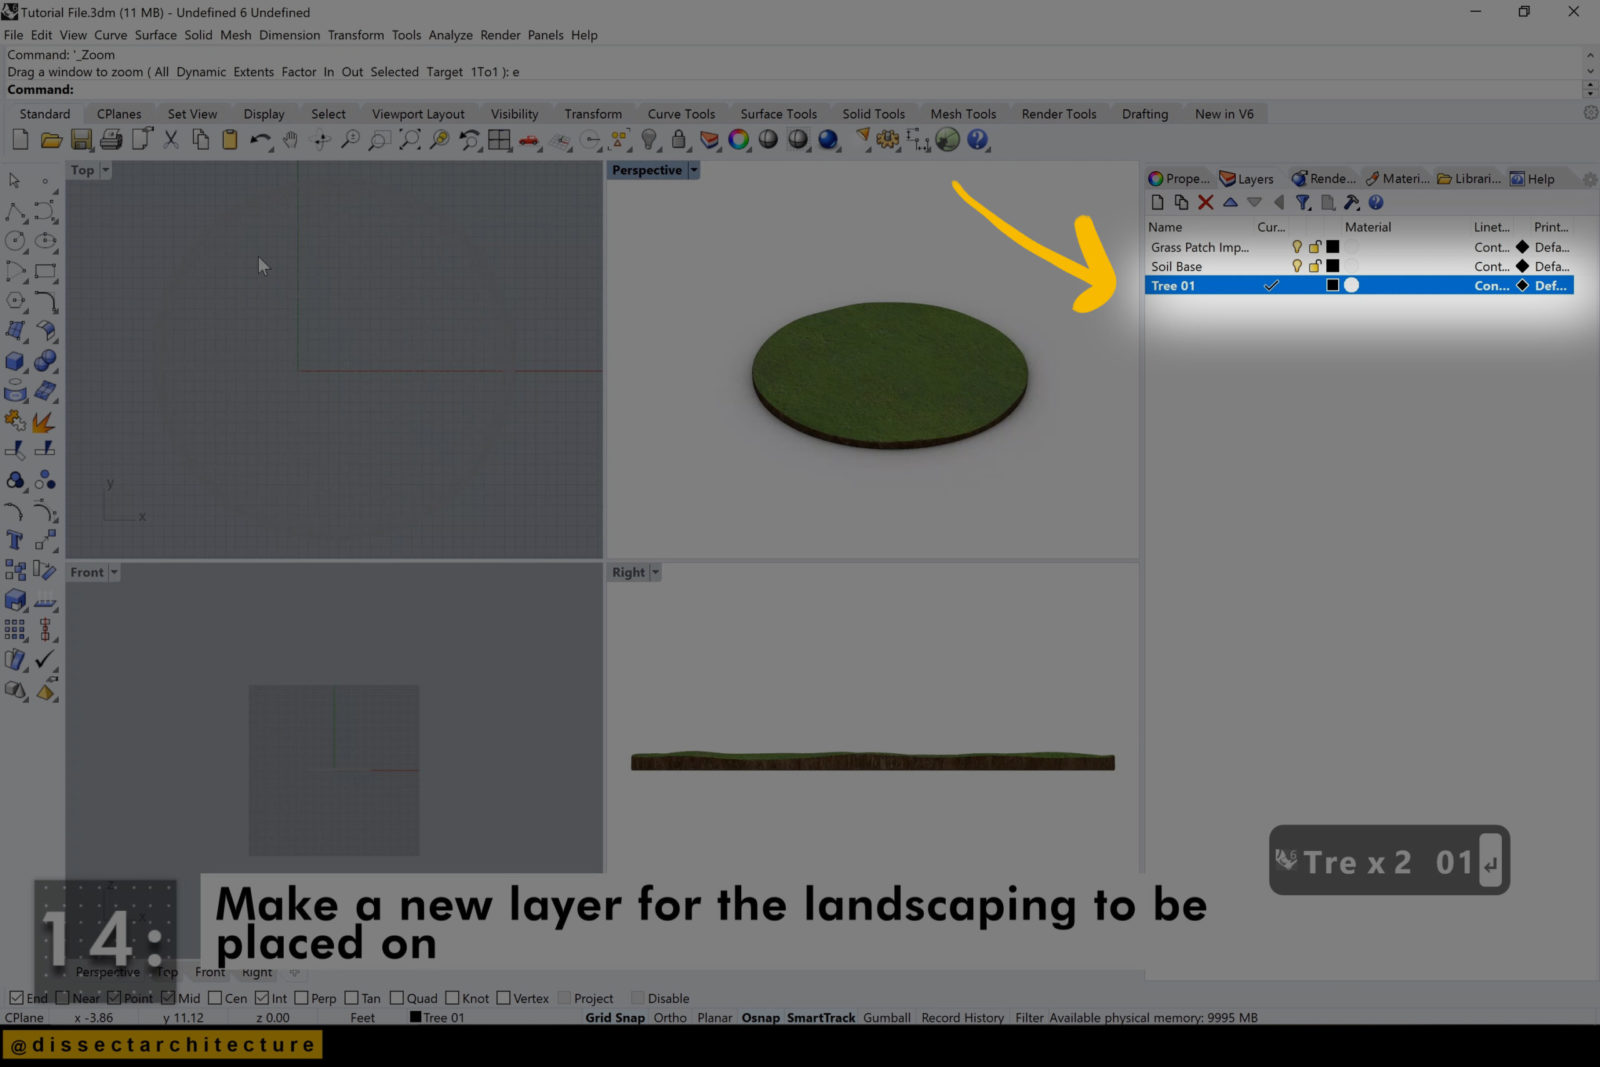
Step 14
Make a new layer for the landscaping to be placed on.
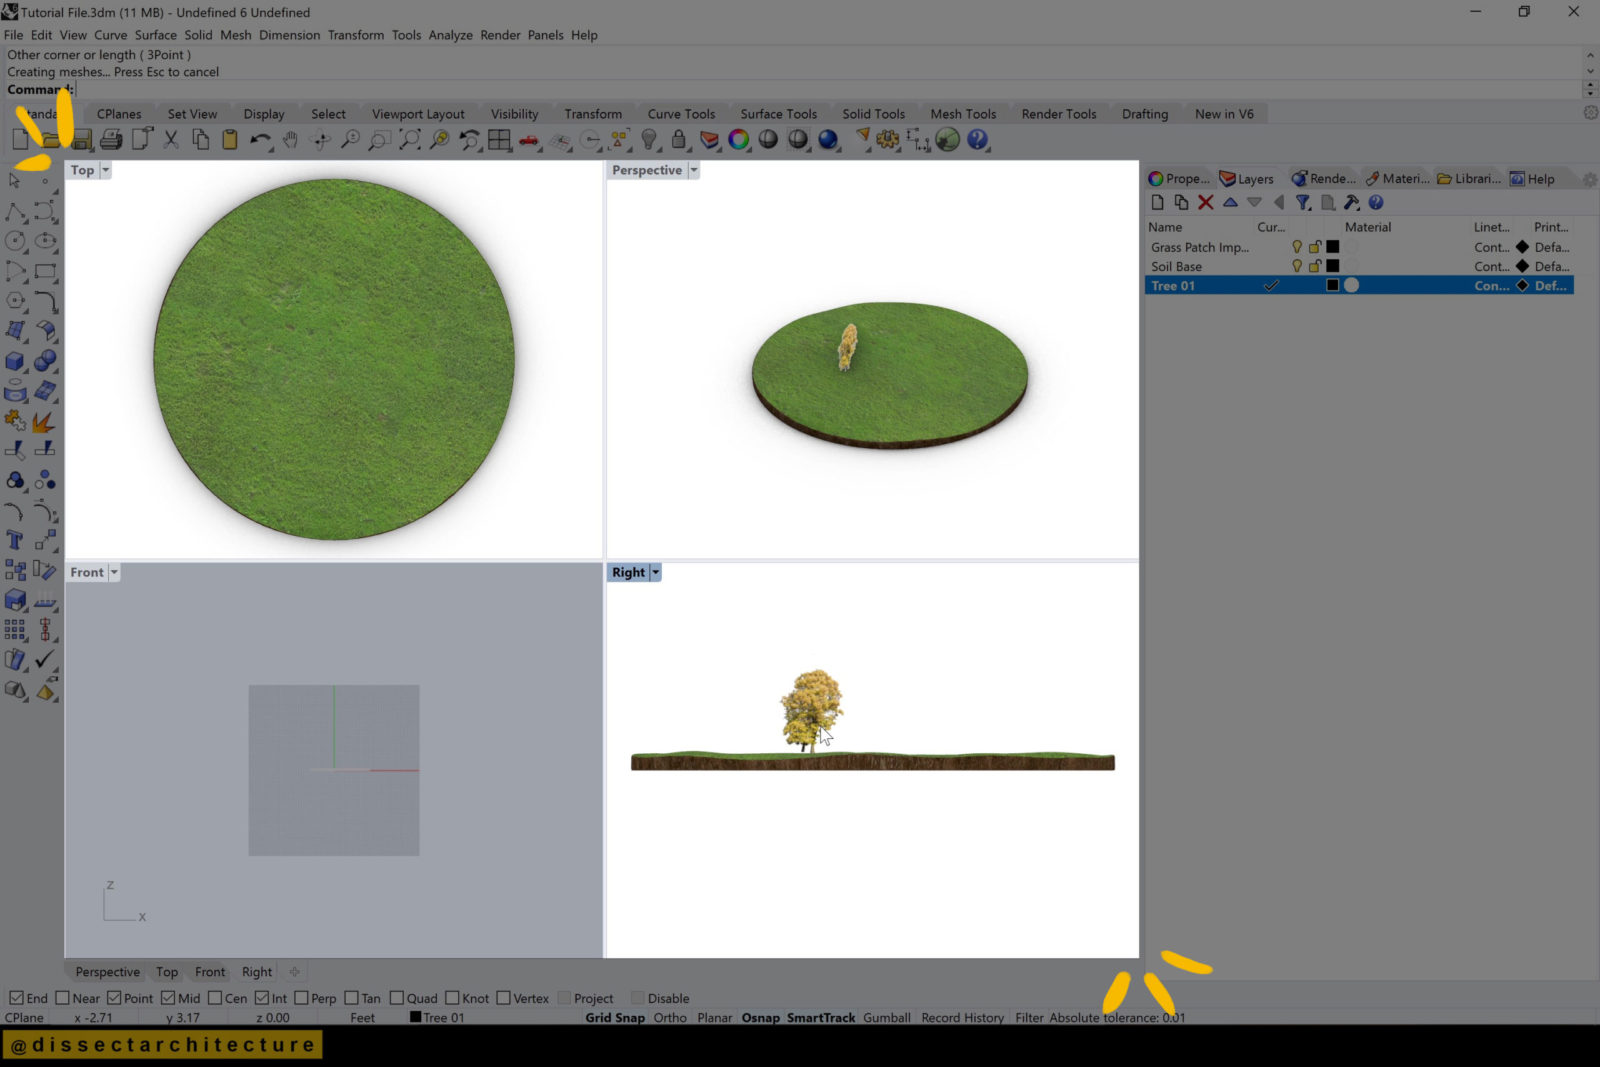
Step 15
Now we will start to create a landscape on the disk.
Use the Picture command in the command line to insert a .png with a transparent background of your landscape element.

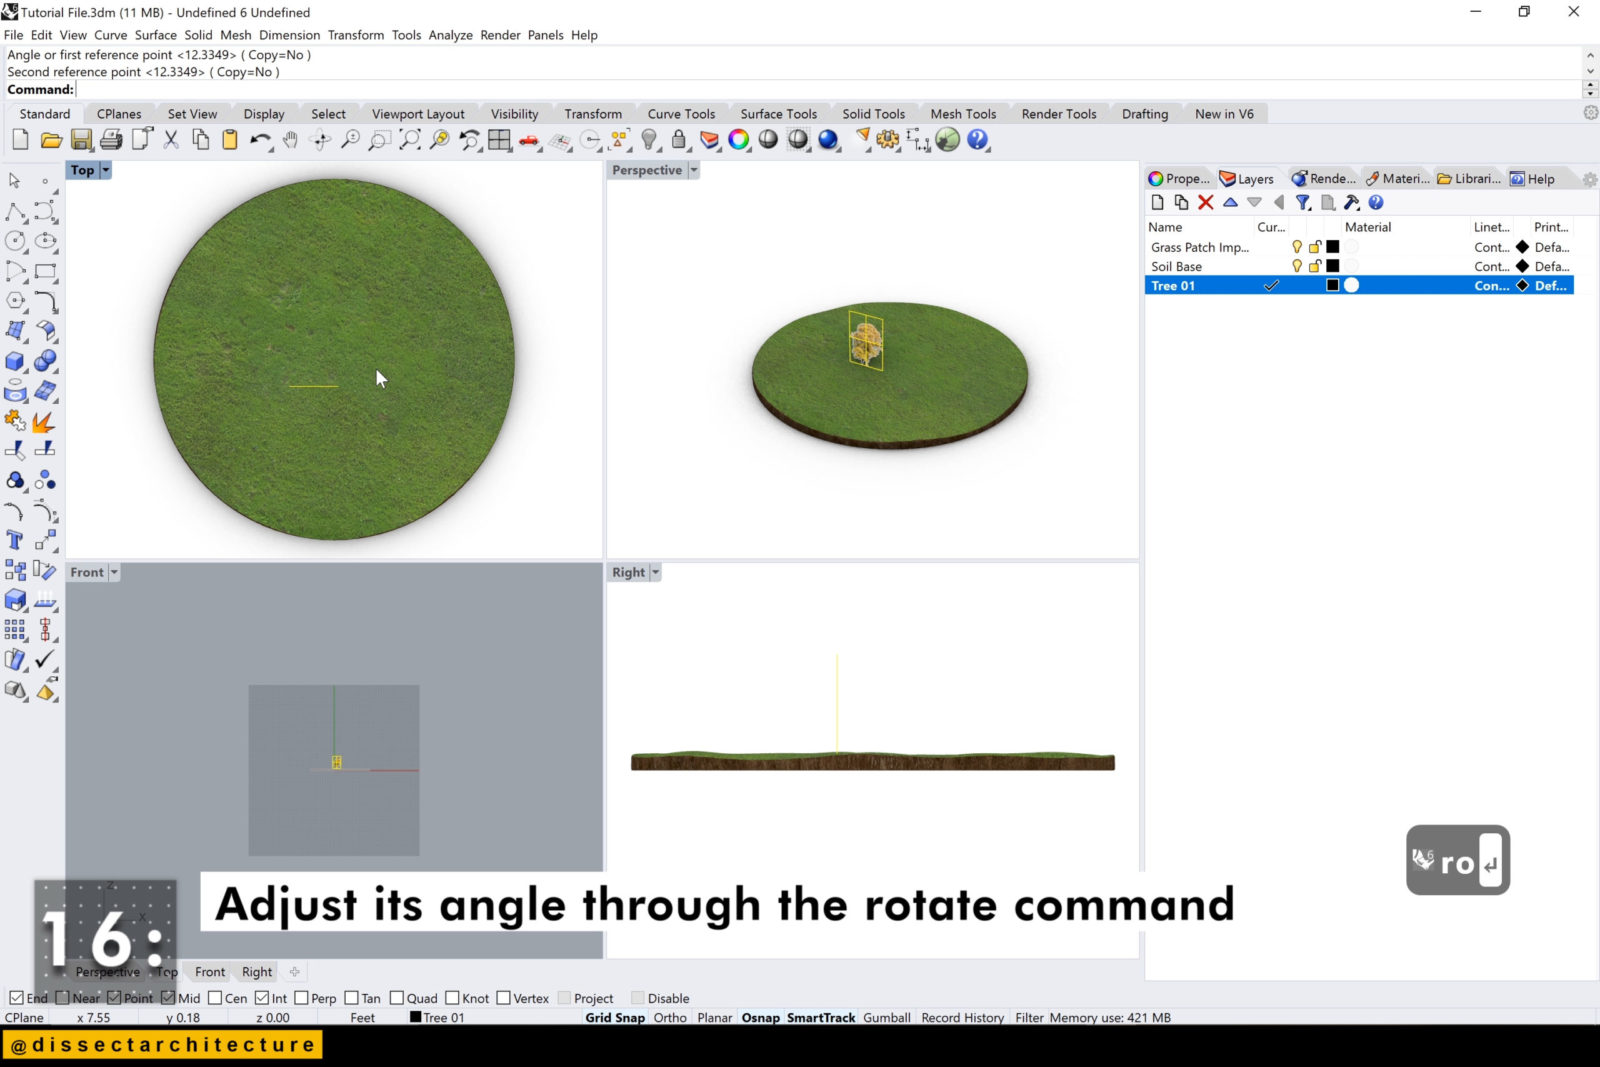
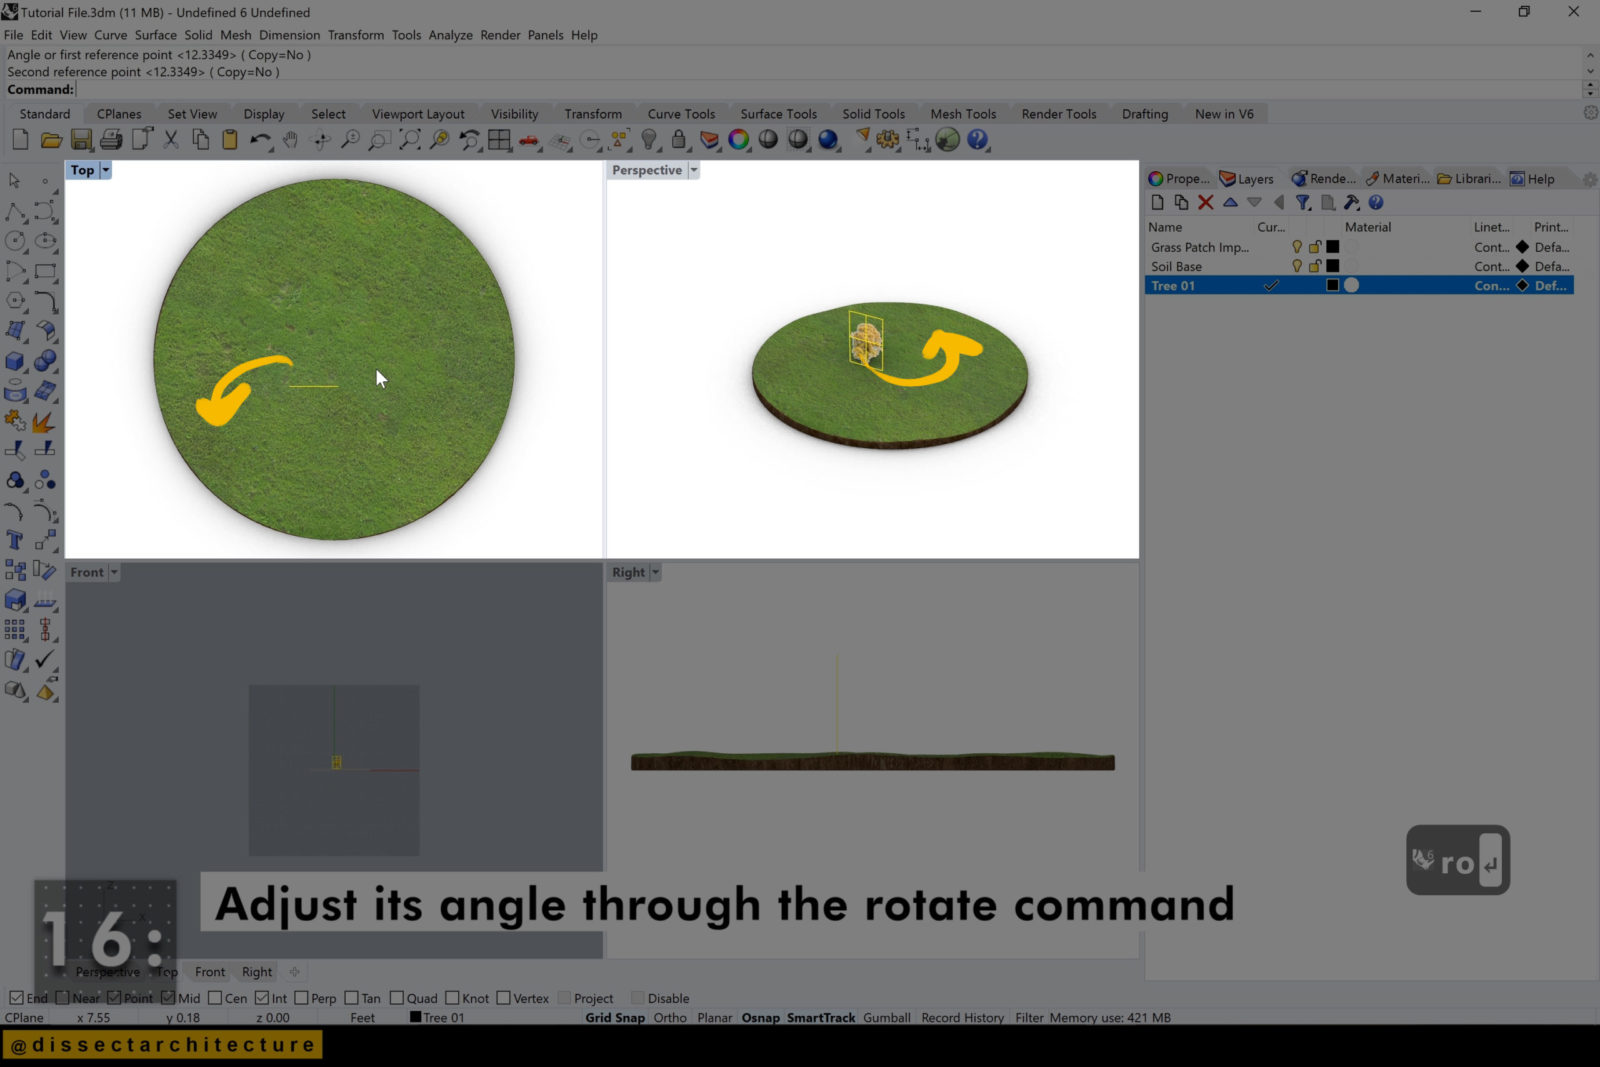
Step 16
Adjust its angle with the Rotate command.
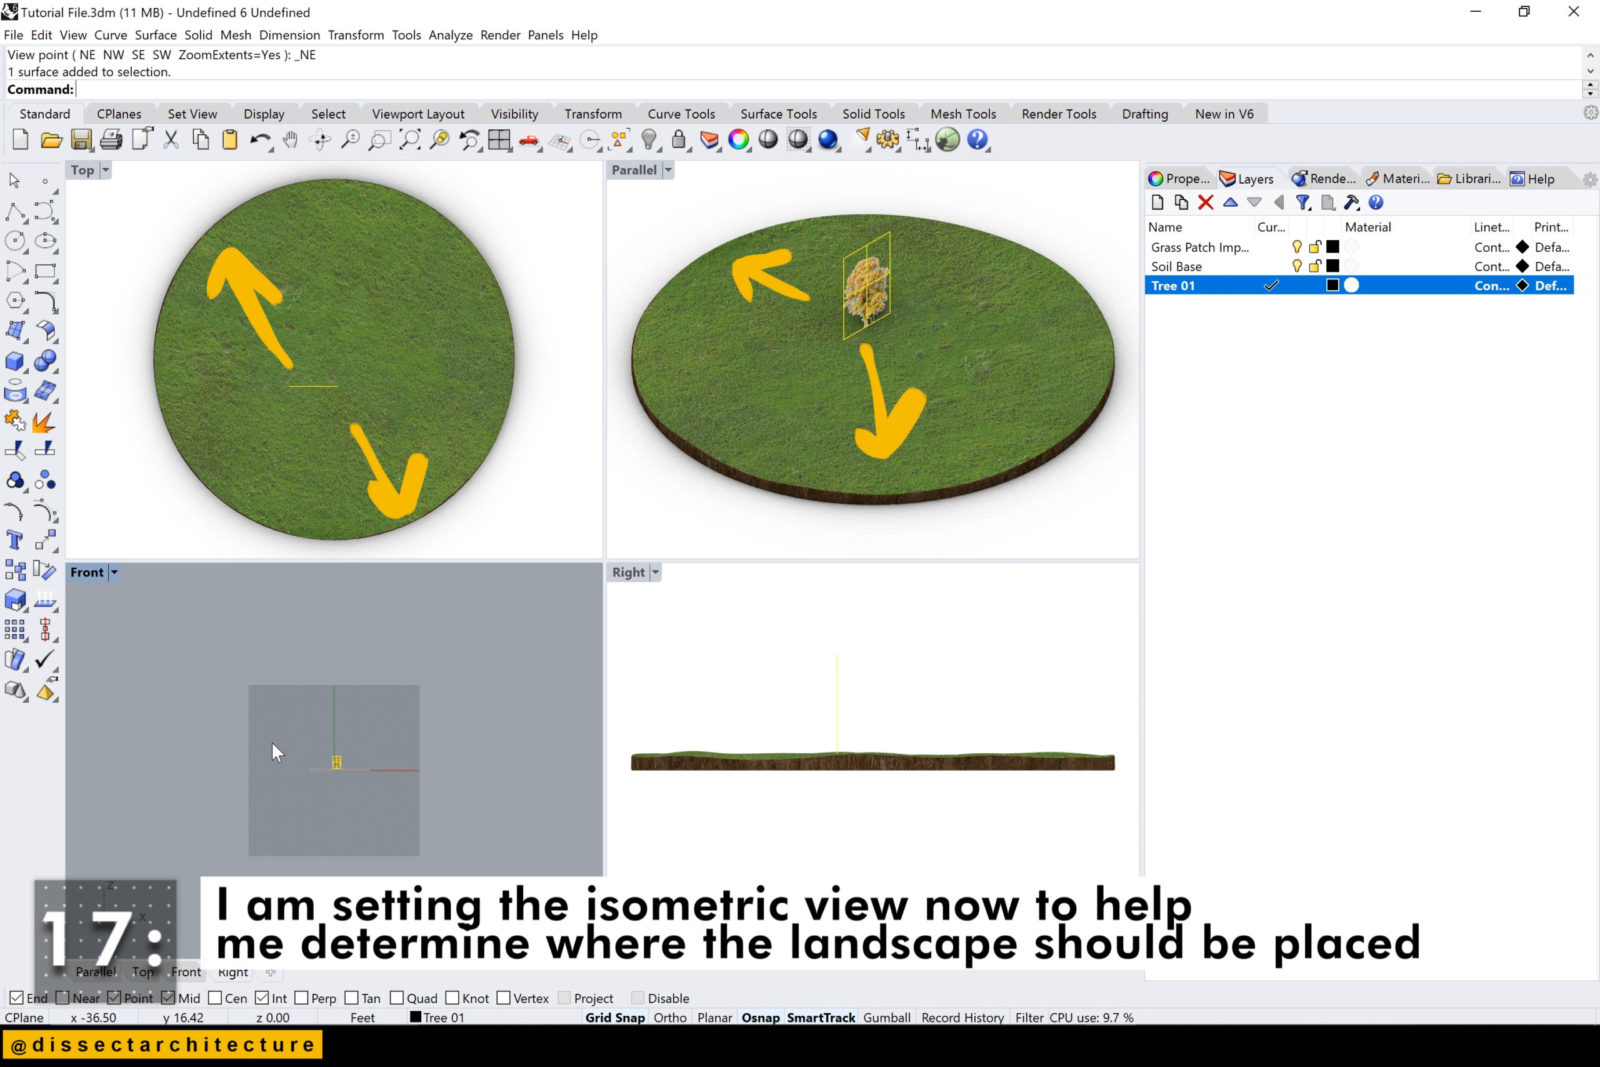
Step 17
I am changing the perspective view to isometric to help determine where and how the landscape should be placed.

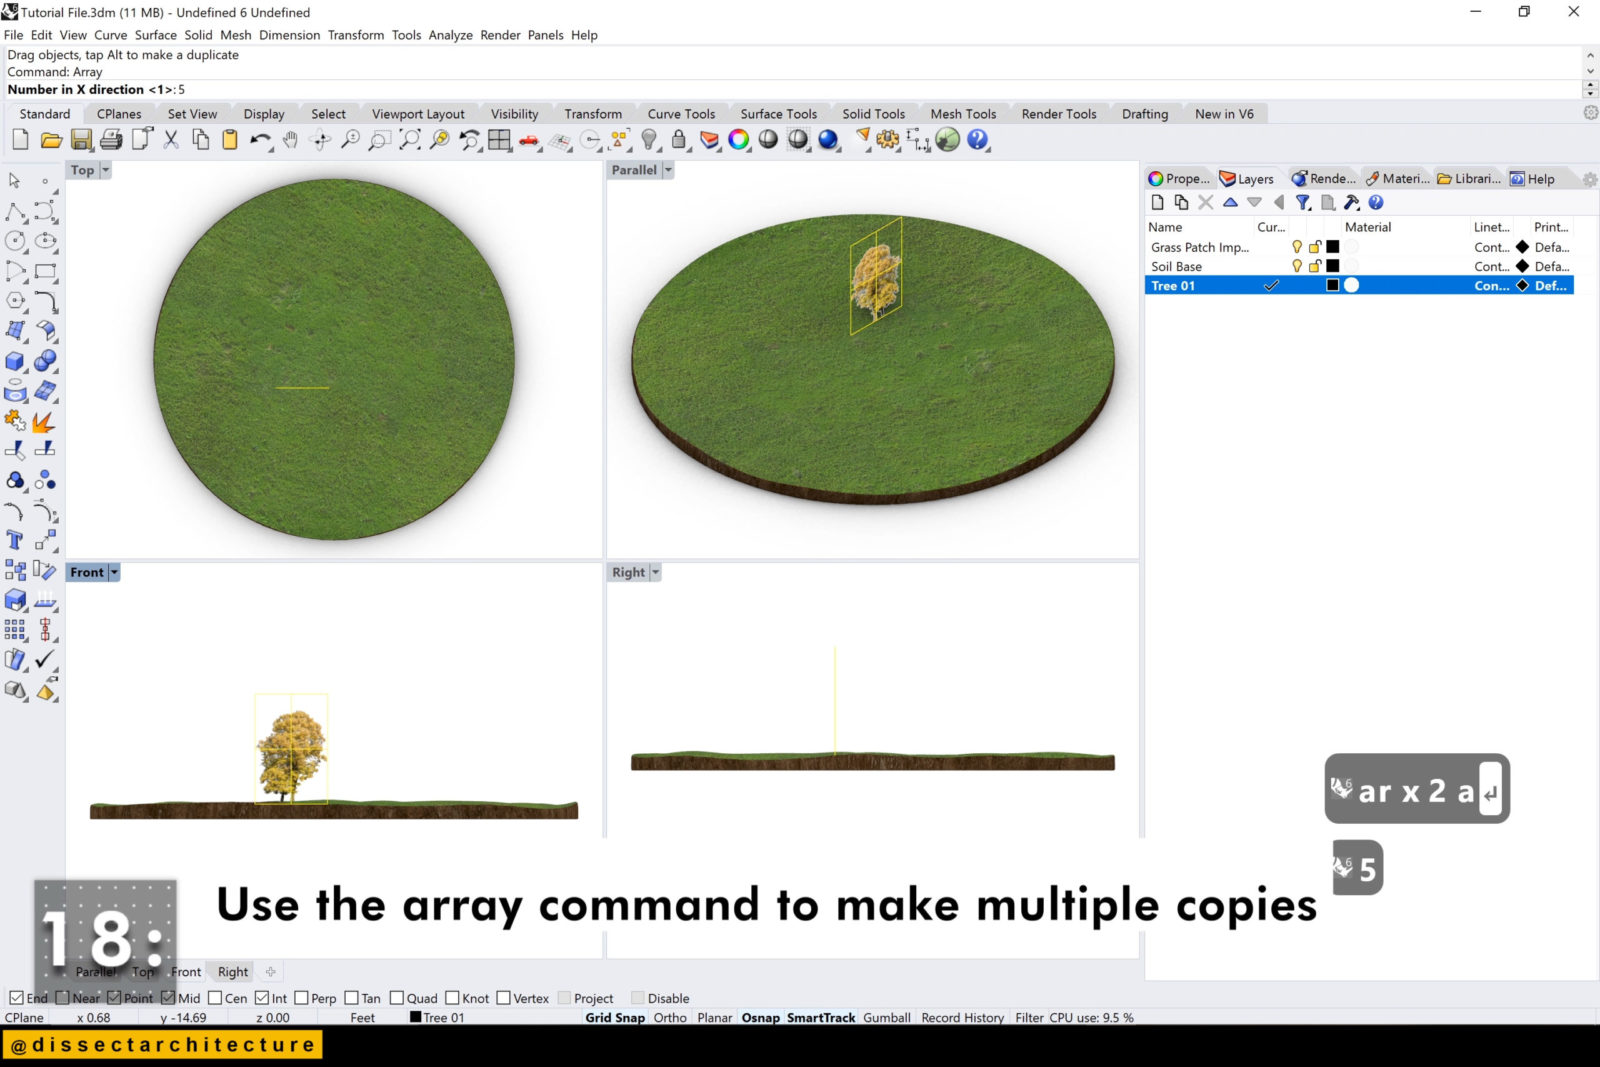
Step 18
Use the Array command to make multiple copies of the imported .png image.
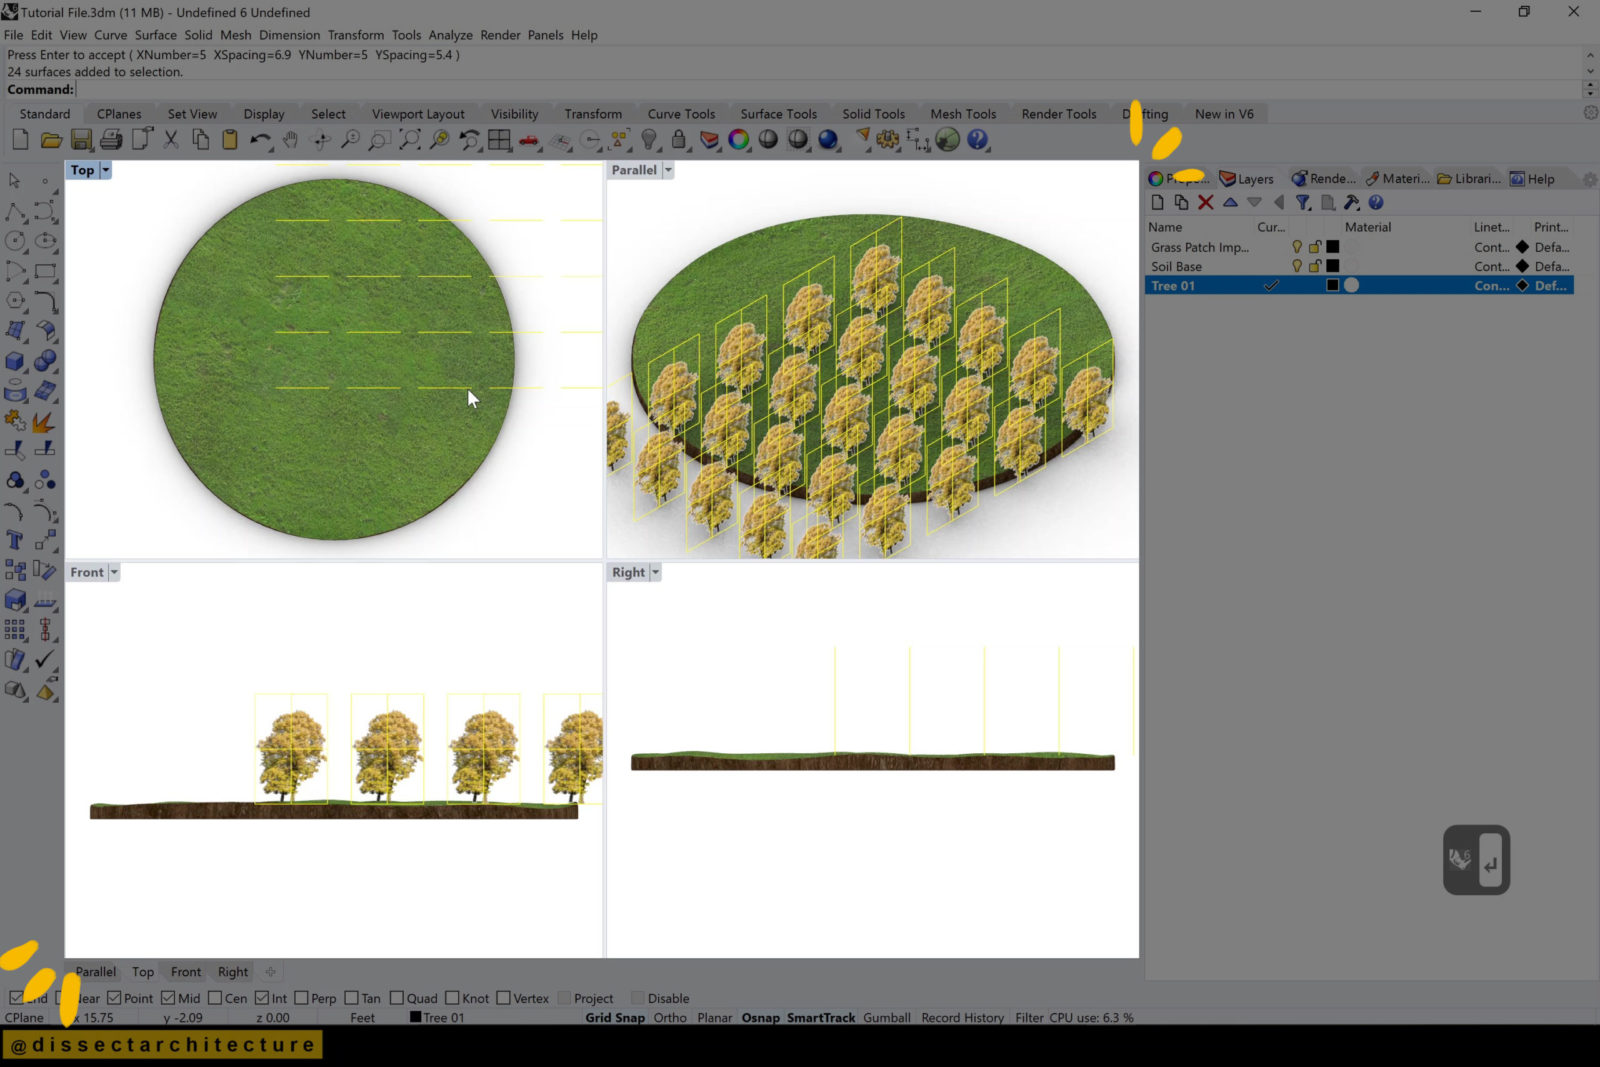
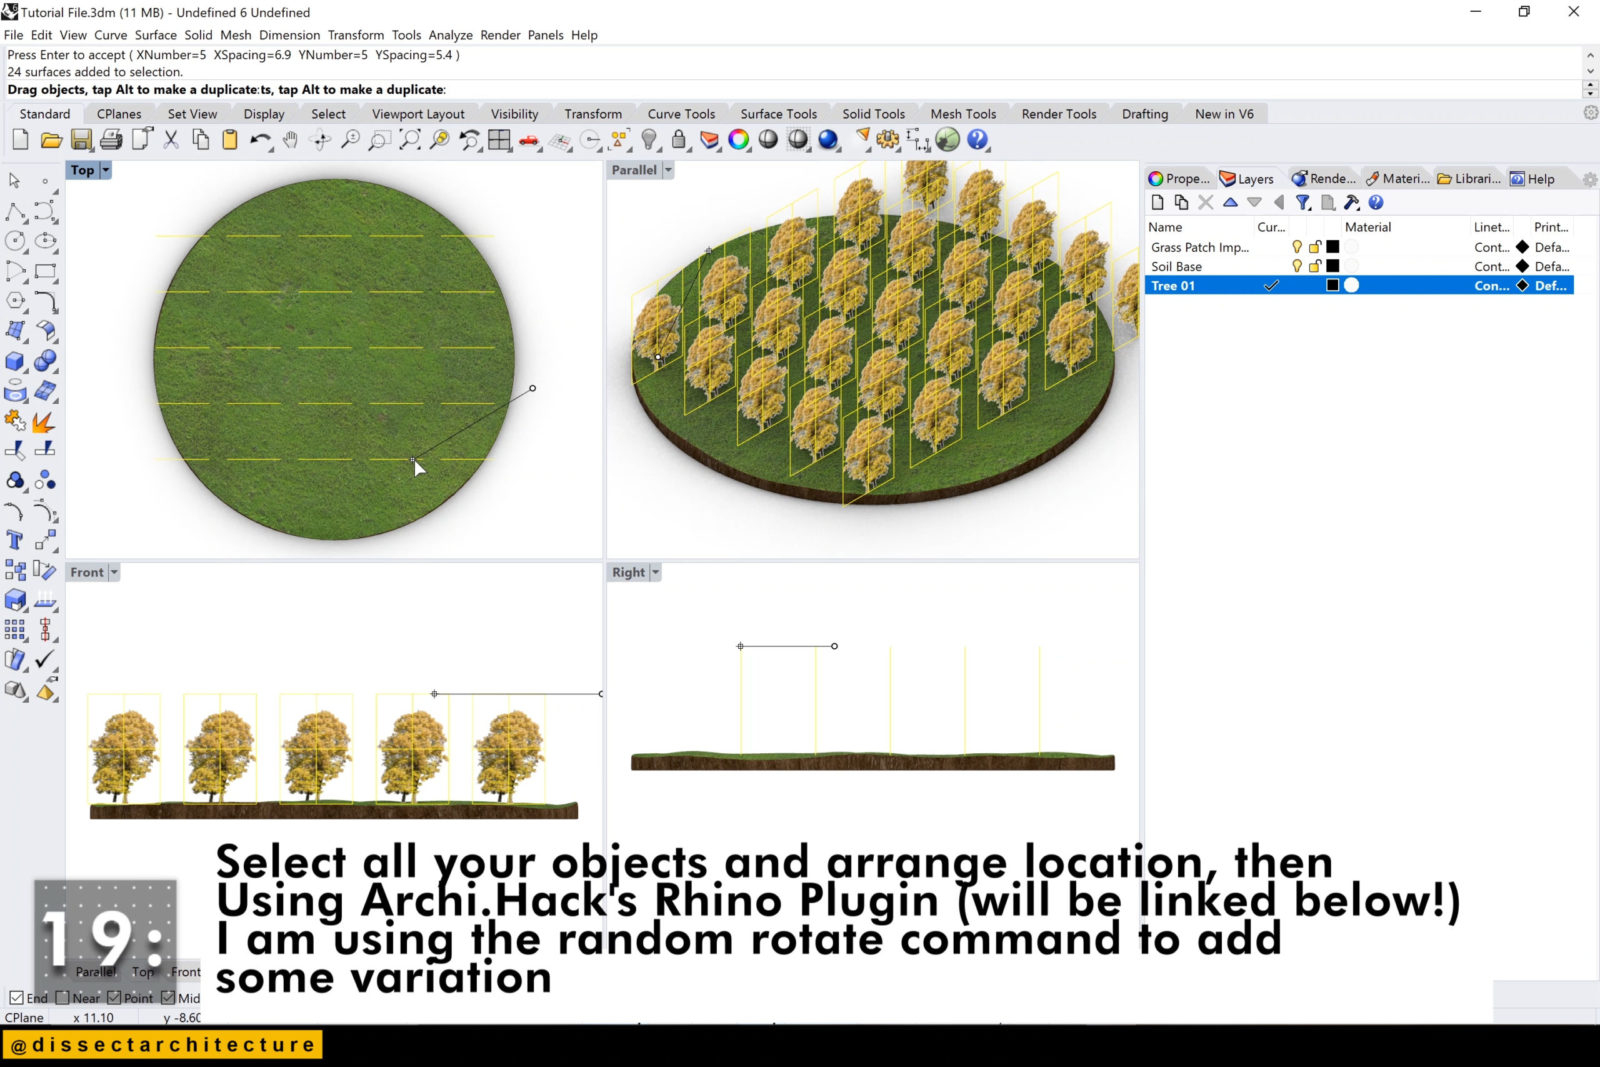
Step 19
Select all your objects and arrange their location, the using ArchiHack’s Rhino Plugin.
I am using the RandomRotate command to add some variation to the arrayed image.
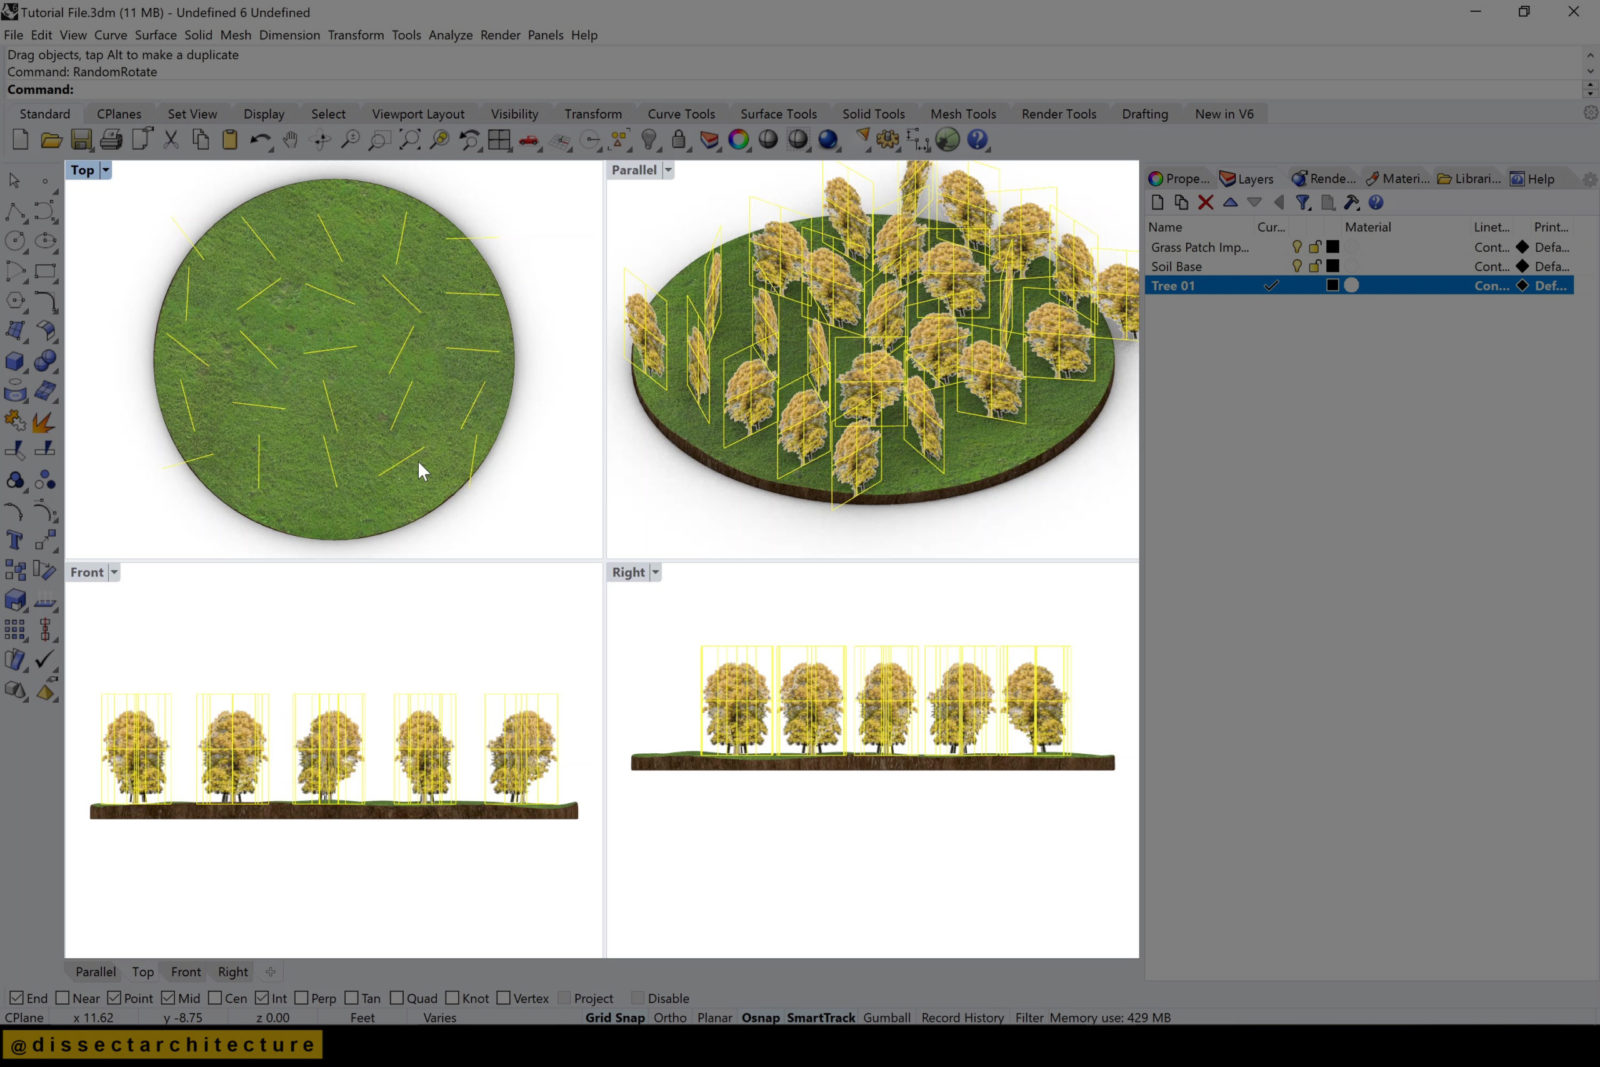
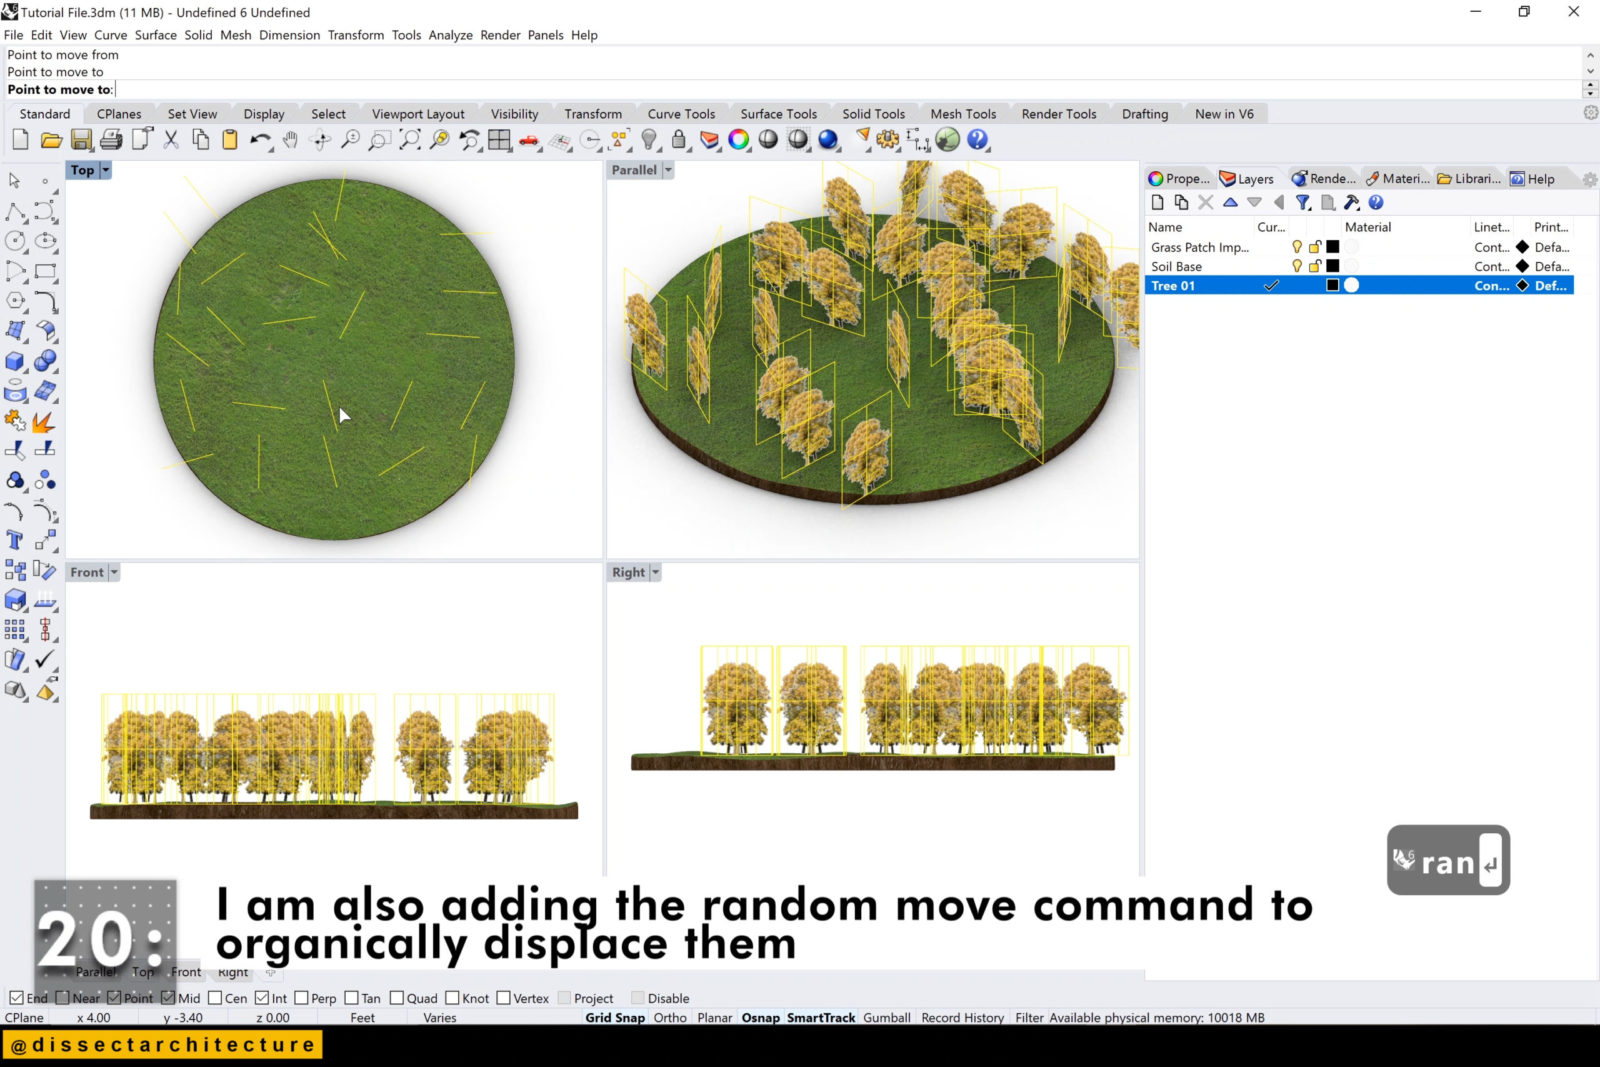
Step 20
I am also adding the RandomMove command to organically displace them.
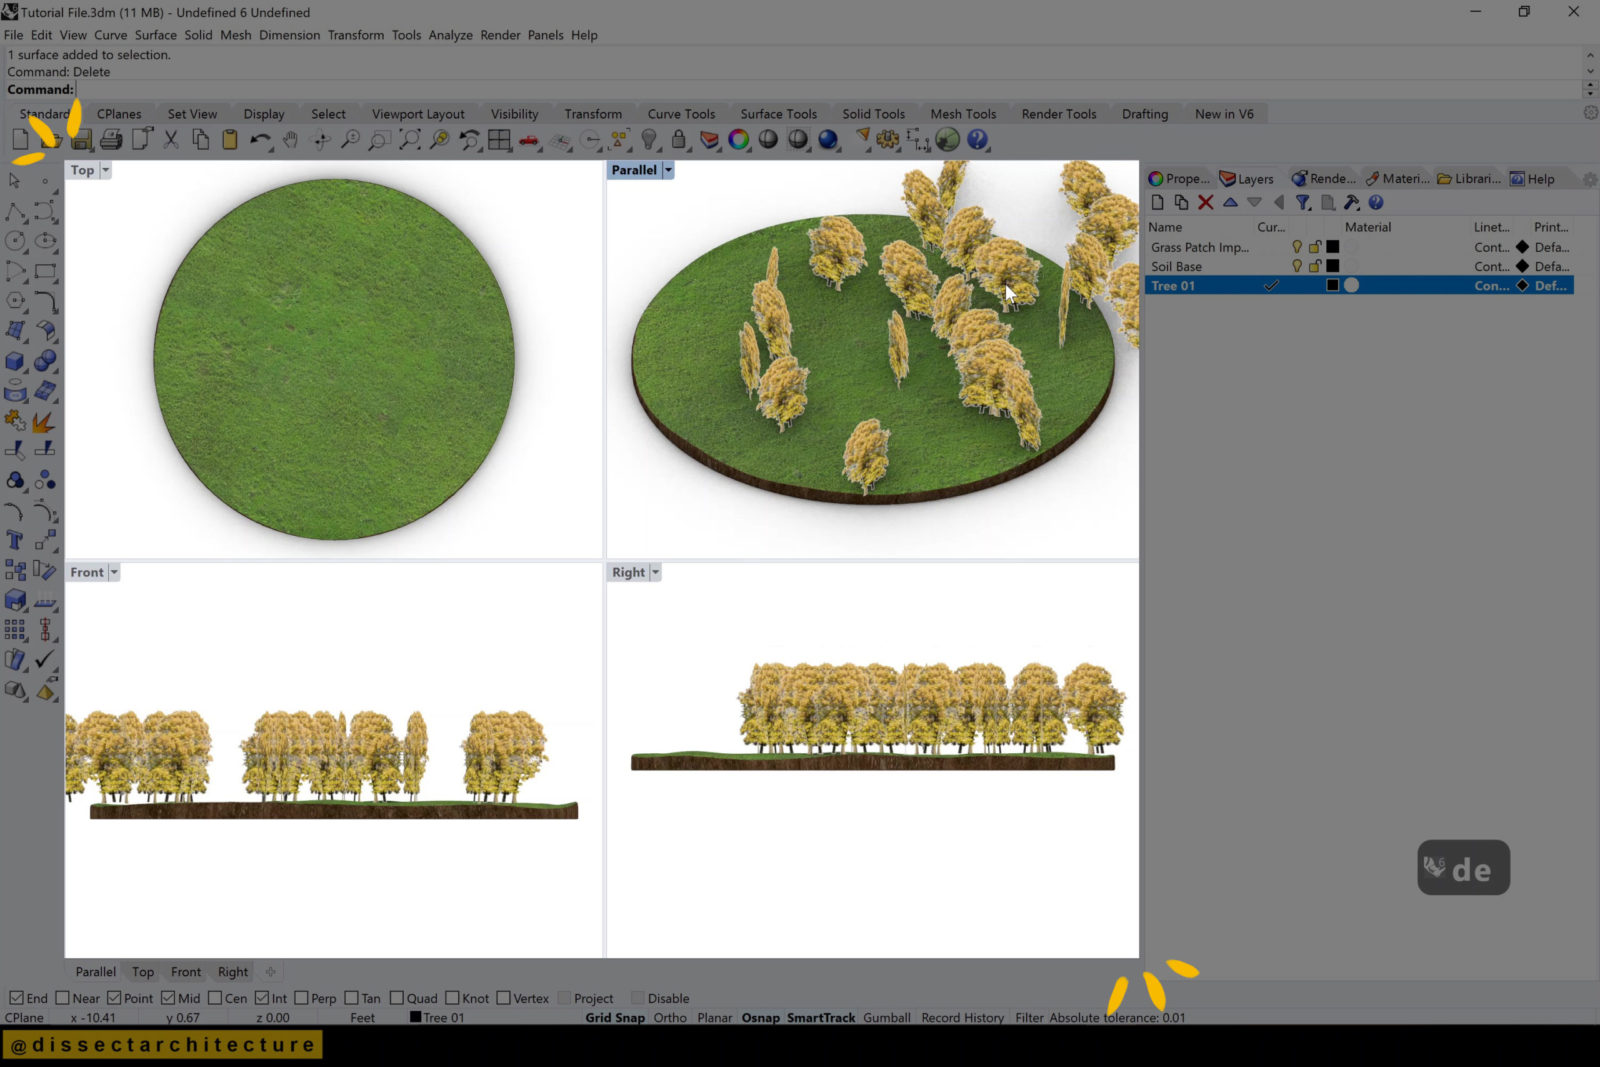
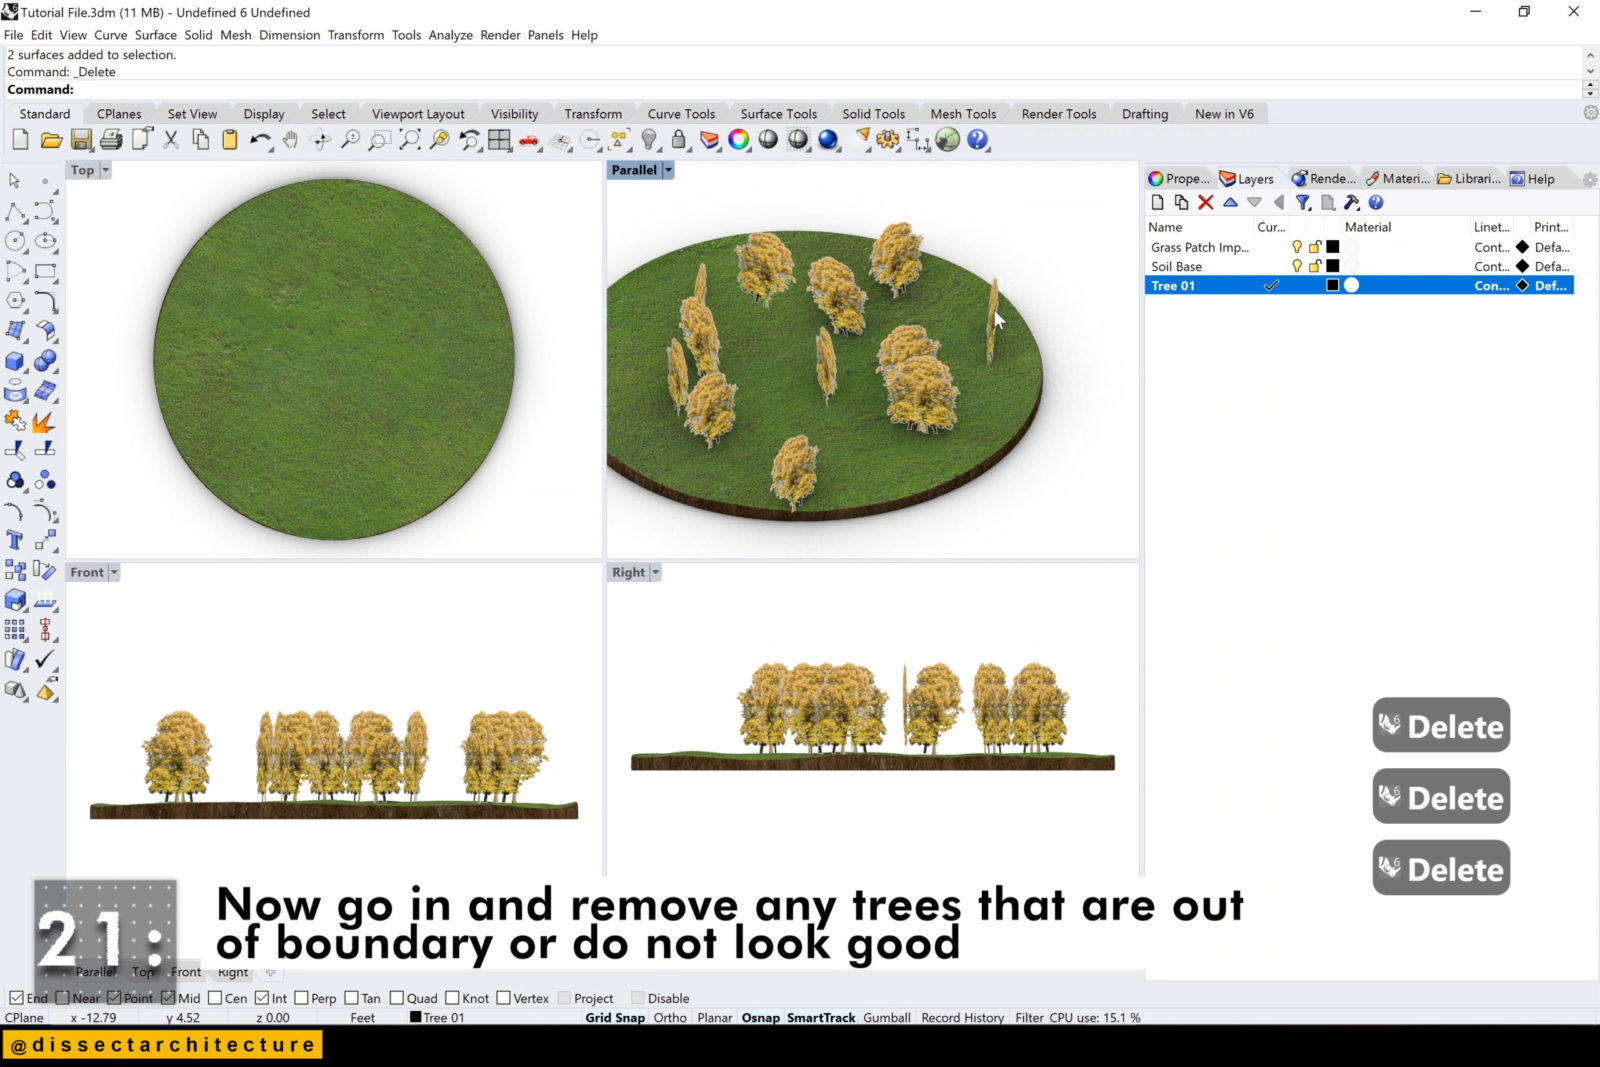
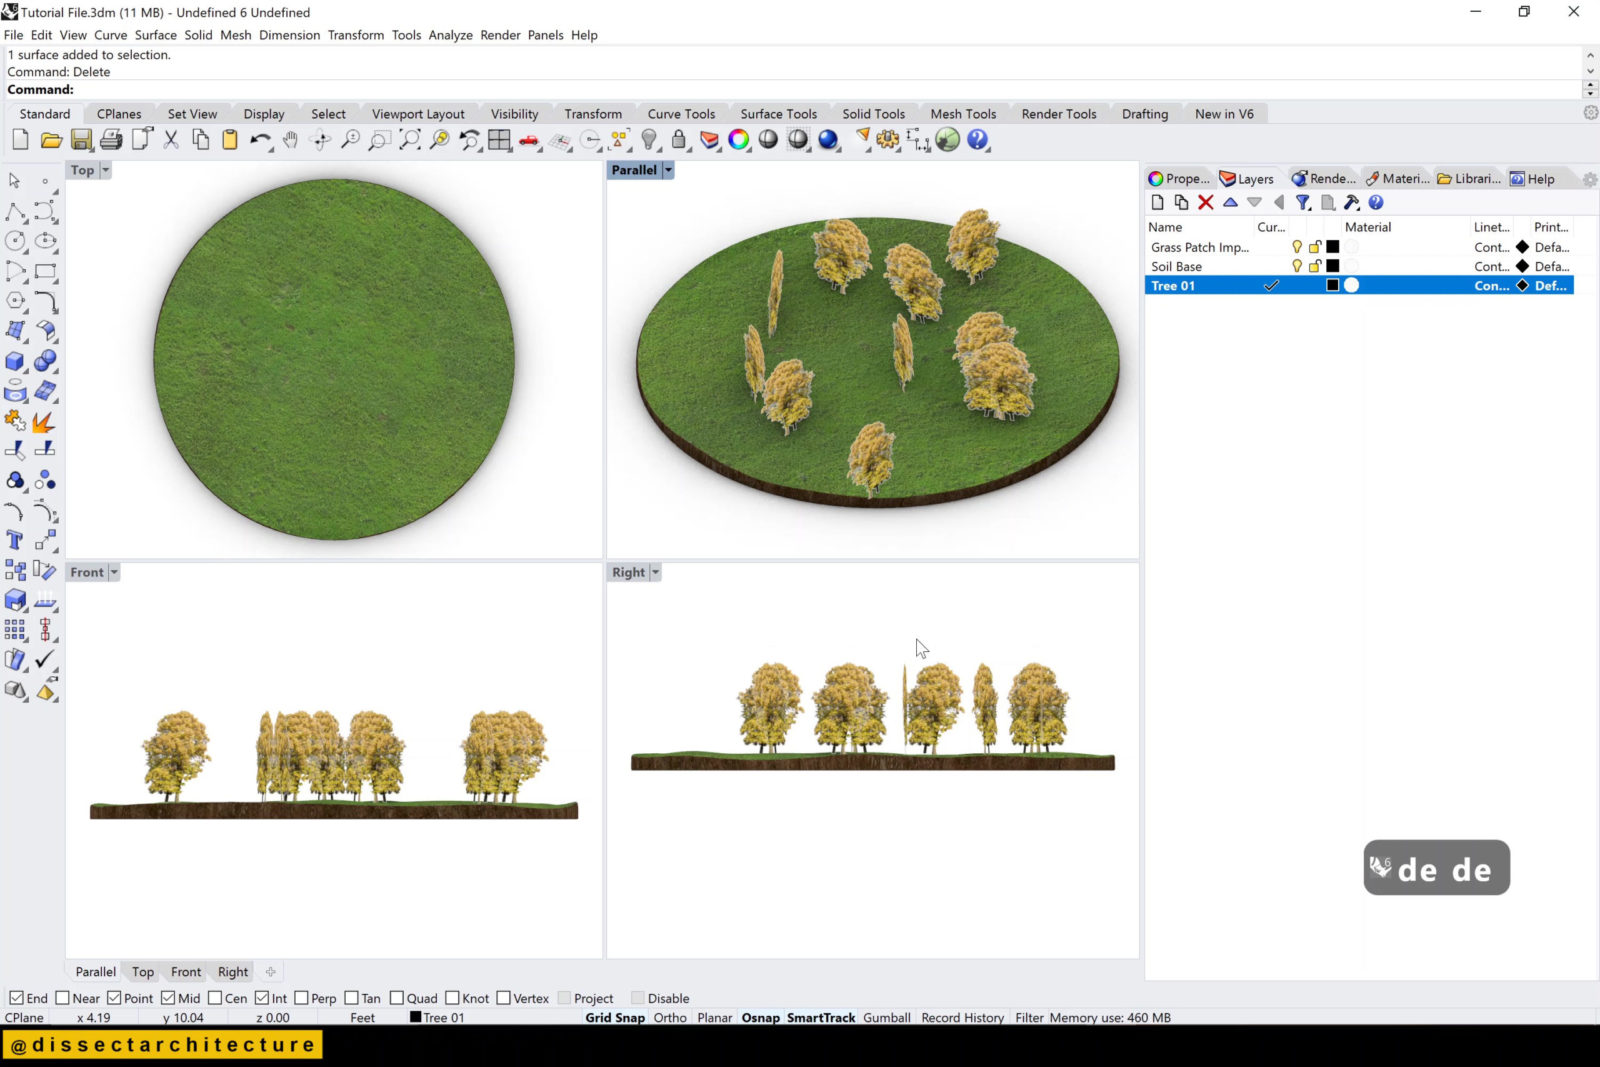
Step 21
Now go in and remove any trees that are out of boundary or have a weird placement.
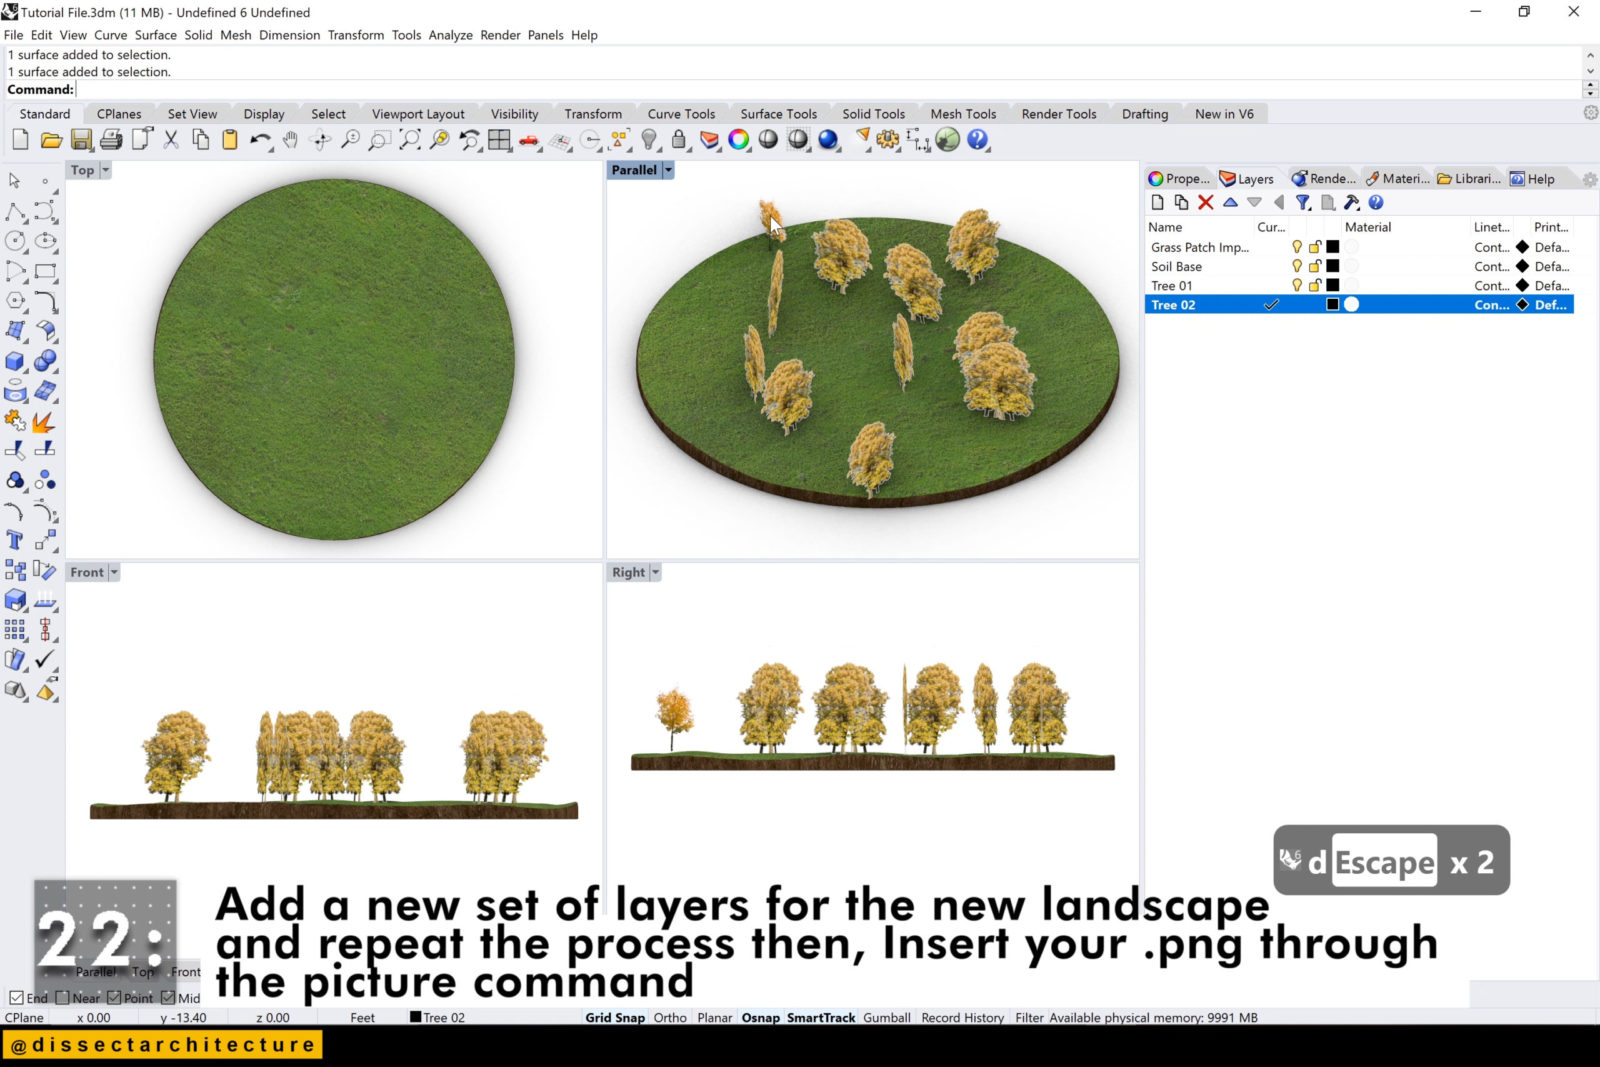
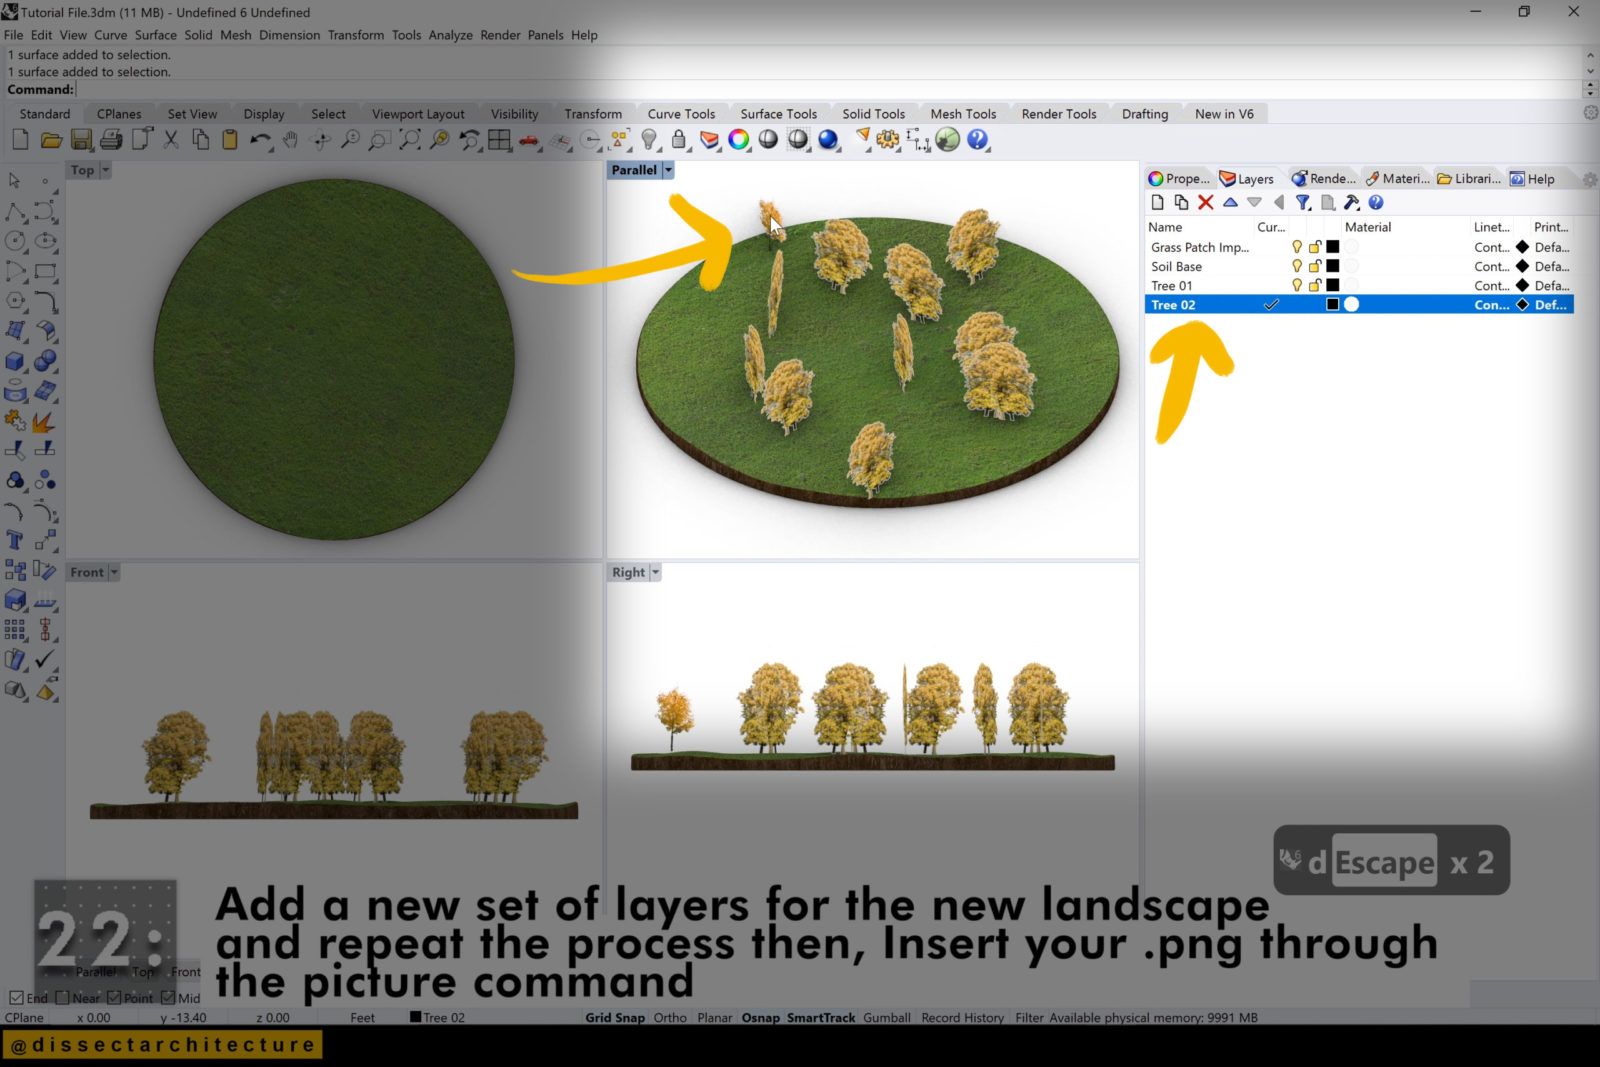
Step 22
Add a new layer to add additional landscape elements and repeat the process of inserting a.png through the Picture command.
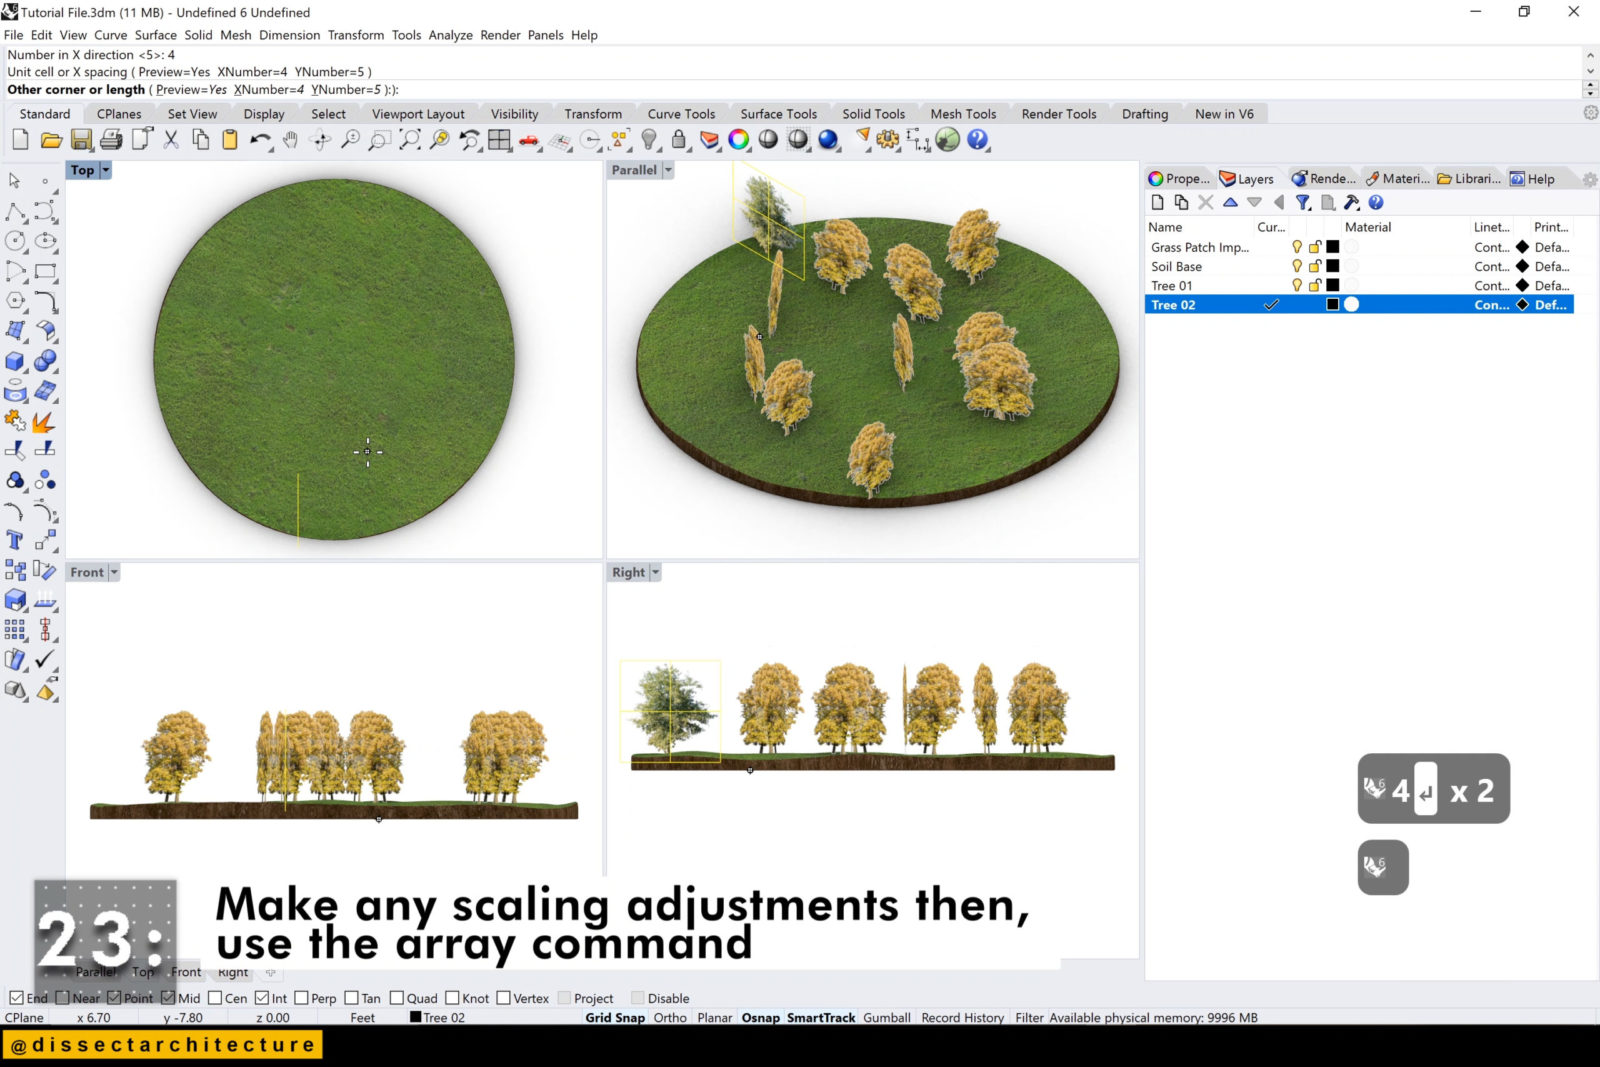
Step 23
Make any scaling adjustment then use the Array command once again with your imported images.
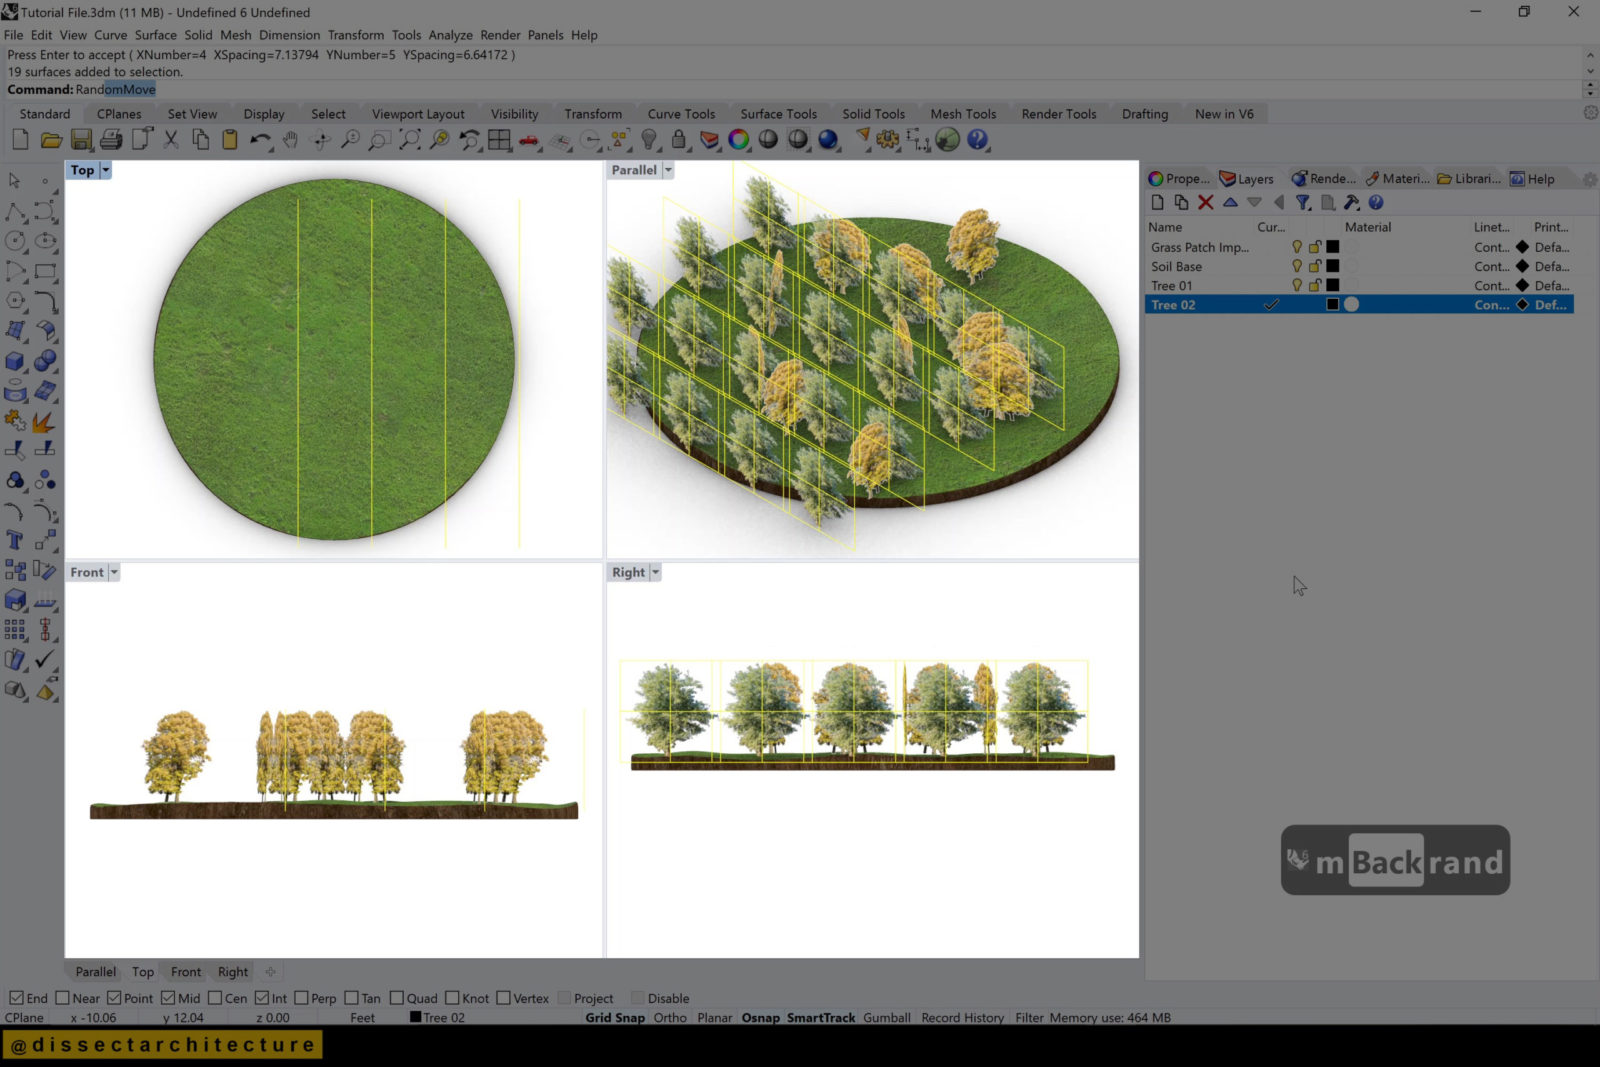
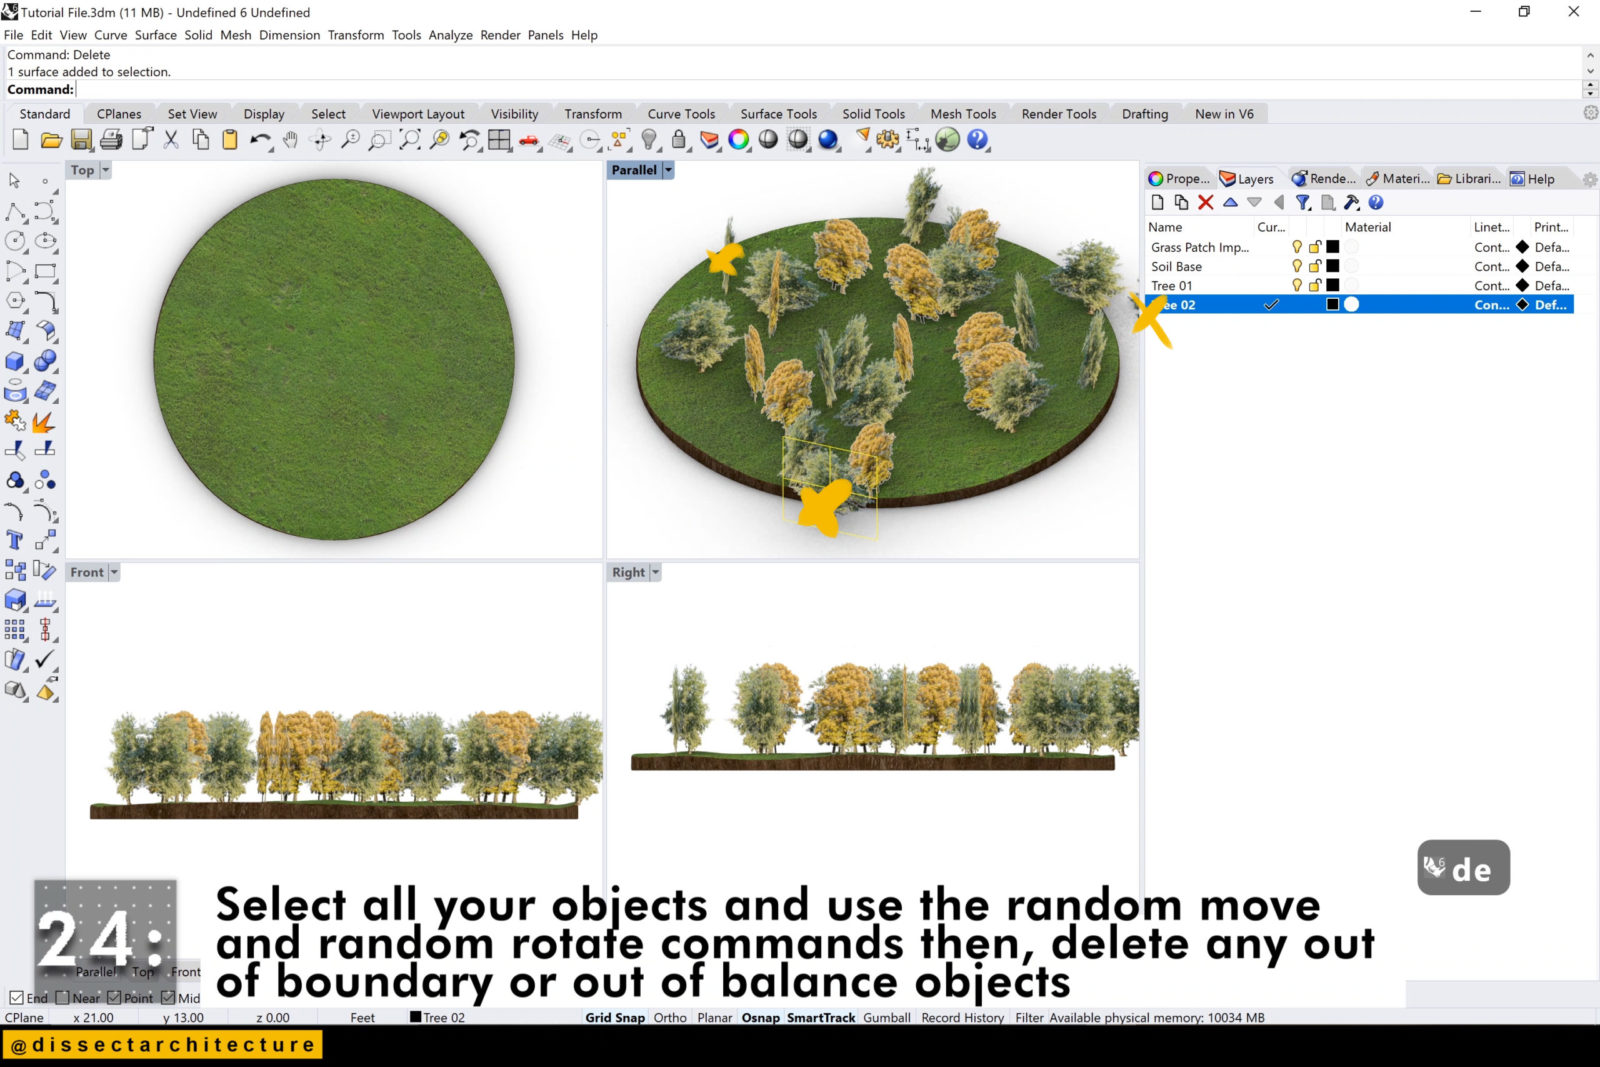
Step 24
Select all your objects and use the RandomMove and RandomRotate commands then delete any out of boundary or out of balance objects

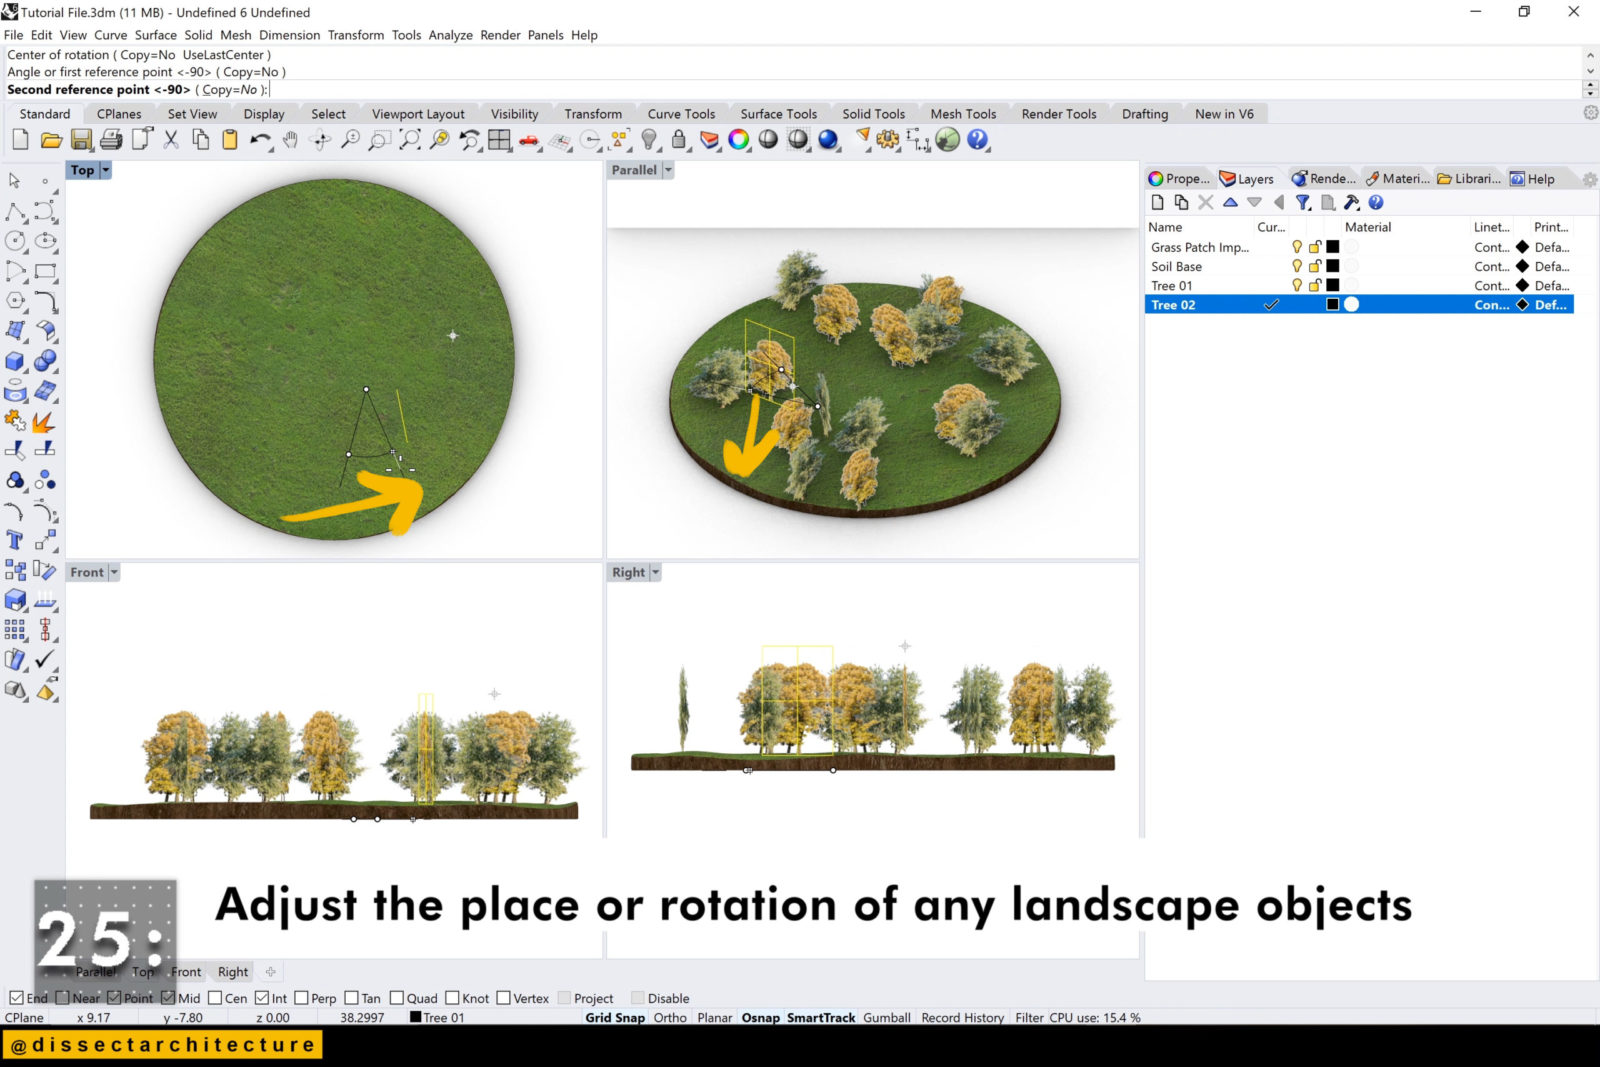
Step 25
Adjust the place or rotation of any landscape elements.

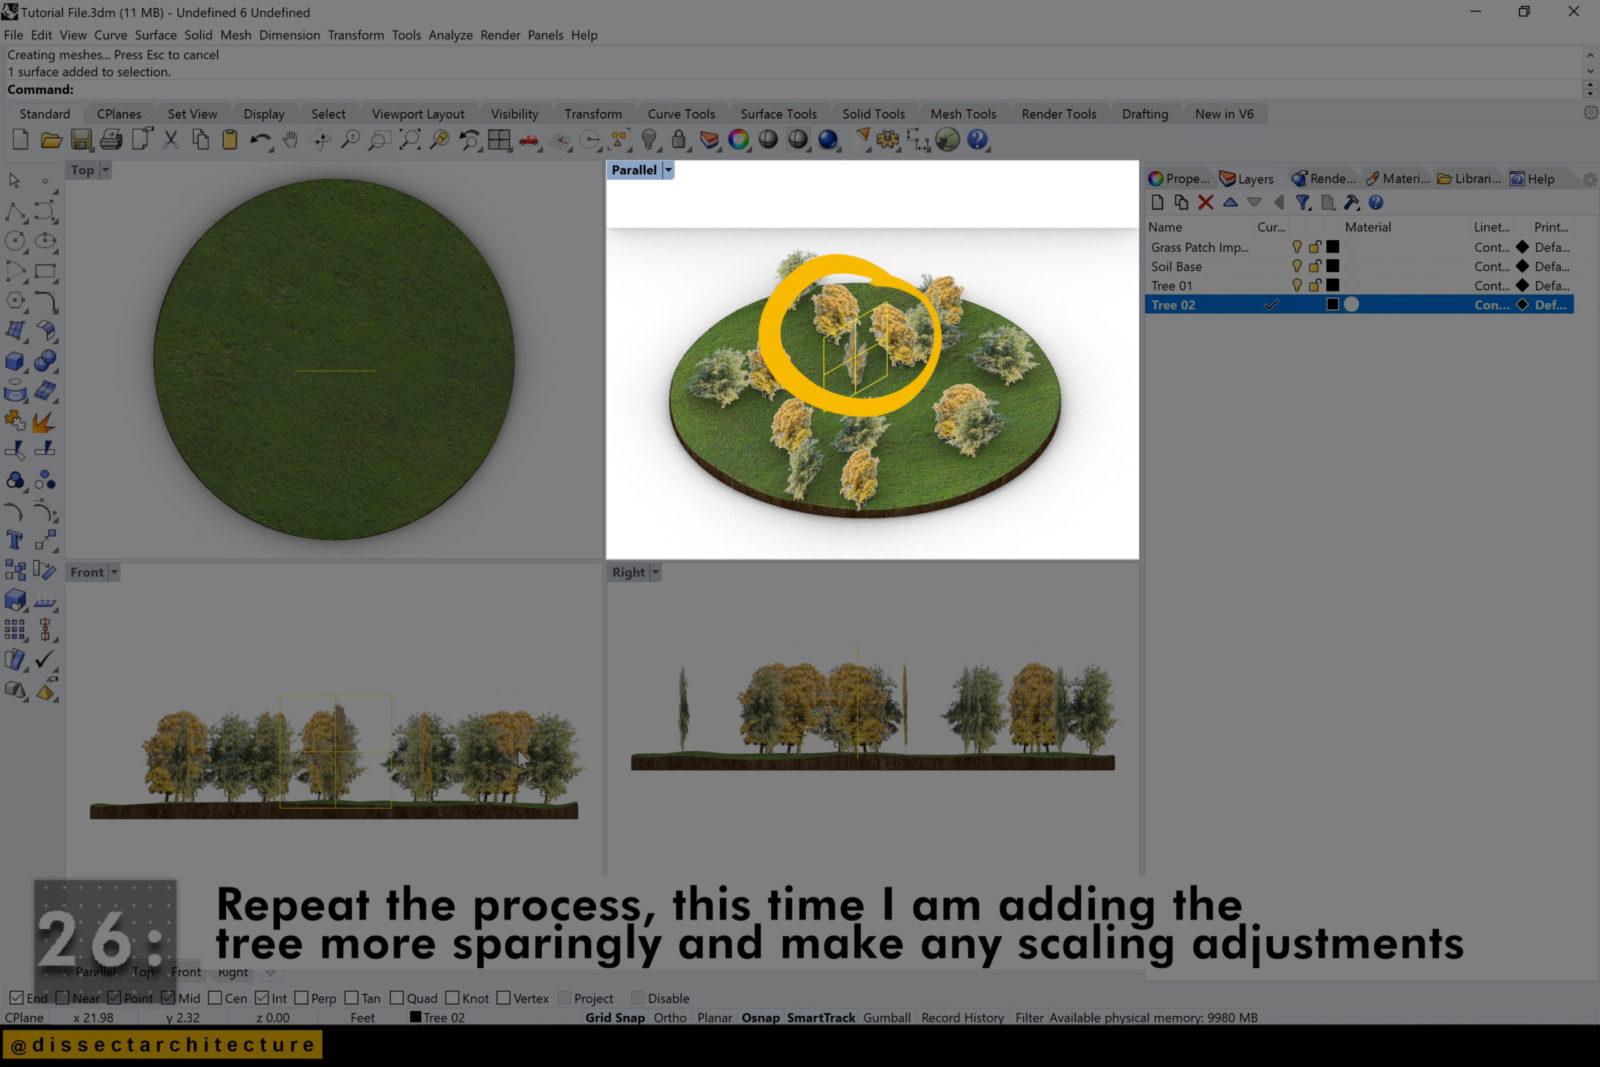
Step 26
Repeat the process, this time I am adding the trees more sparingly and making small scaling adjustments

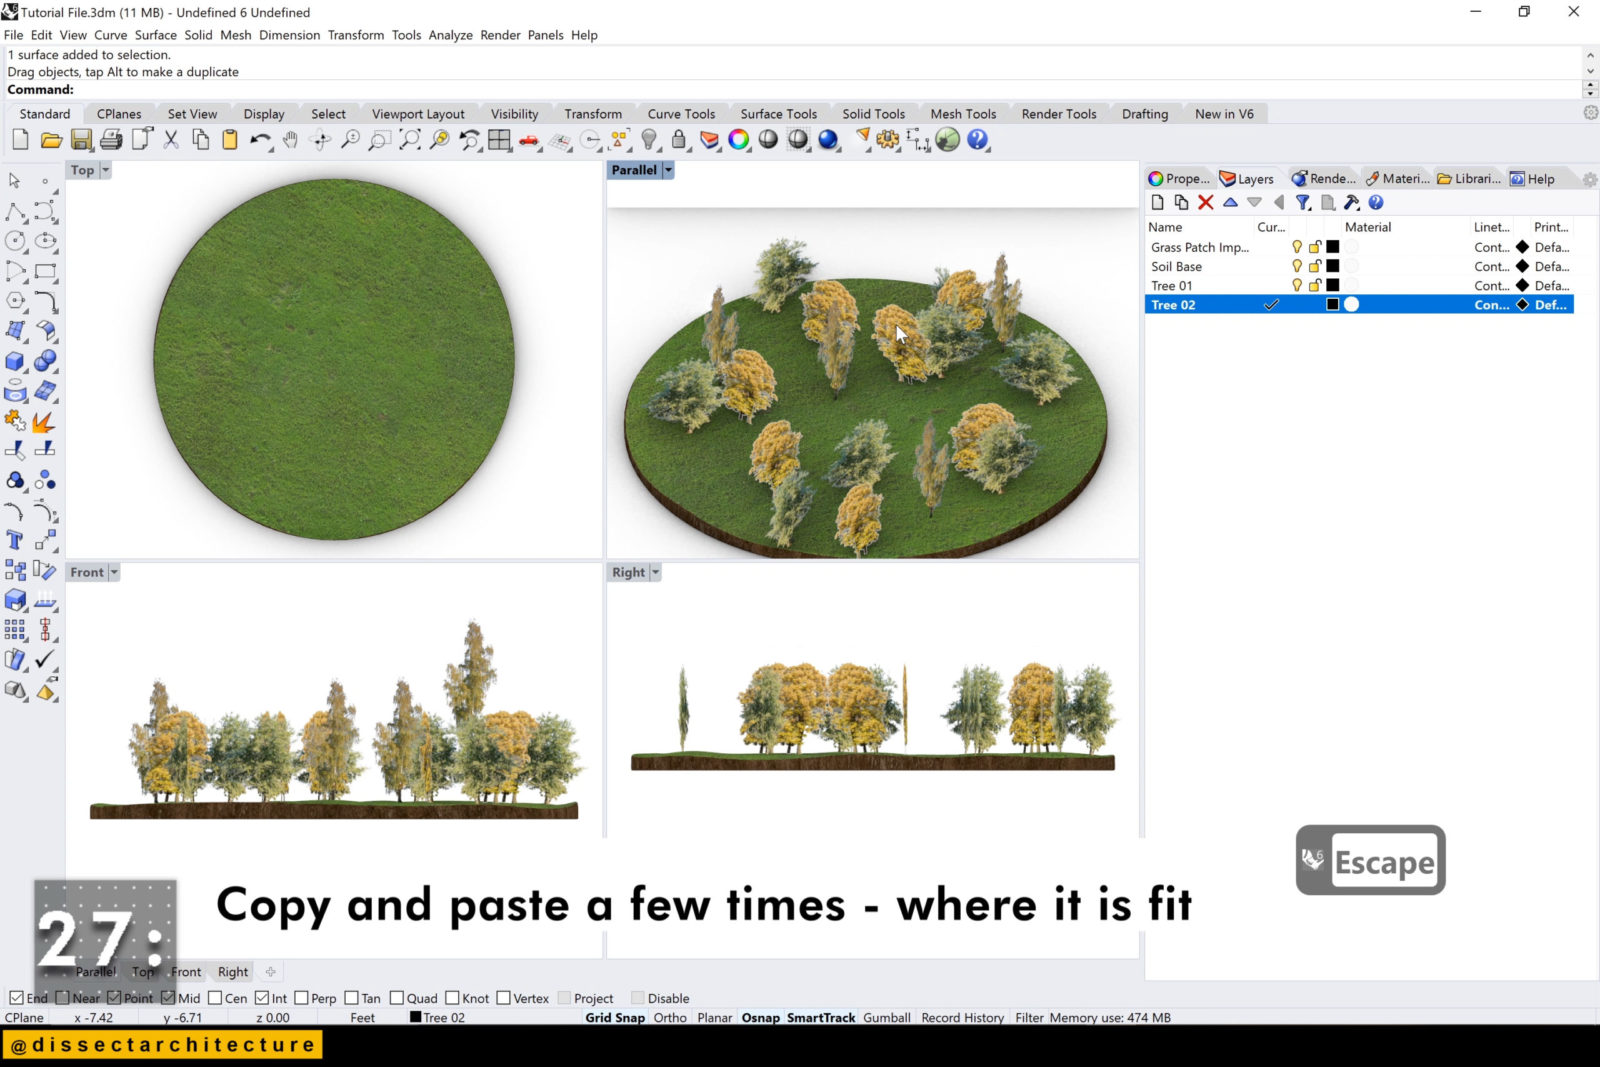
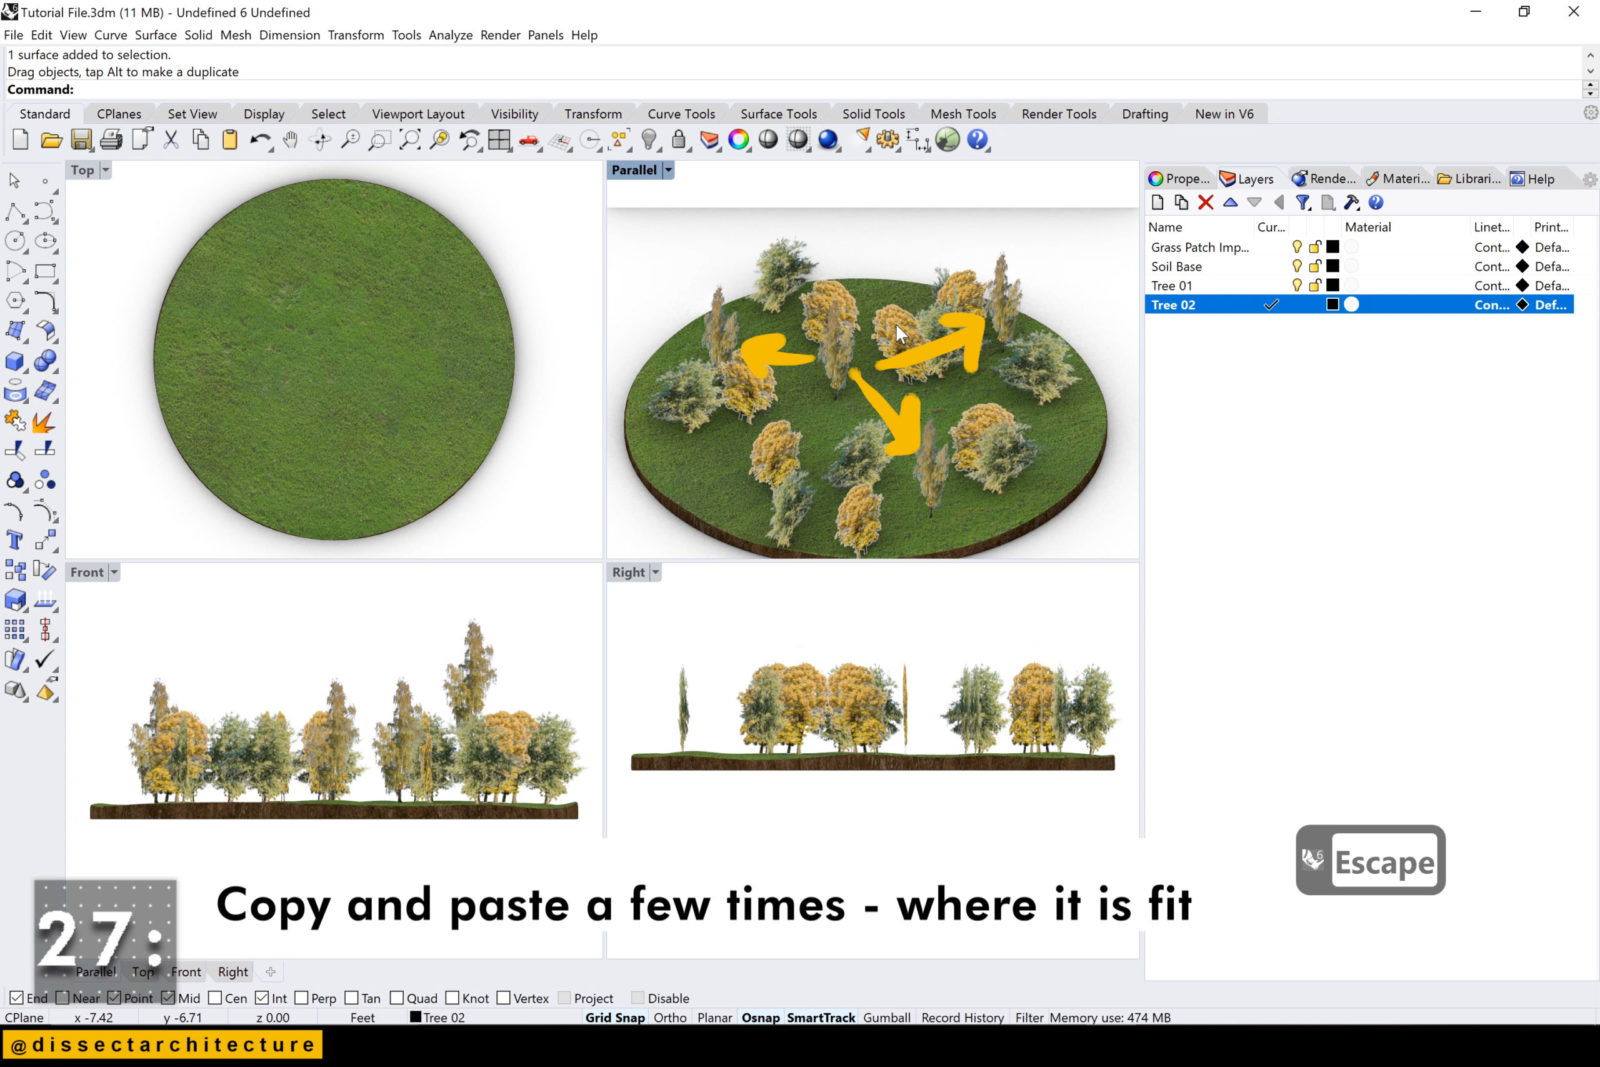
Step 27
Fill up any space or empty areas by copying and pasting landscape elements.
Step 28
Once all your landscape elements have been added make any final adjustments to your disk.
Move, rotate, delete, or copy any objects.

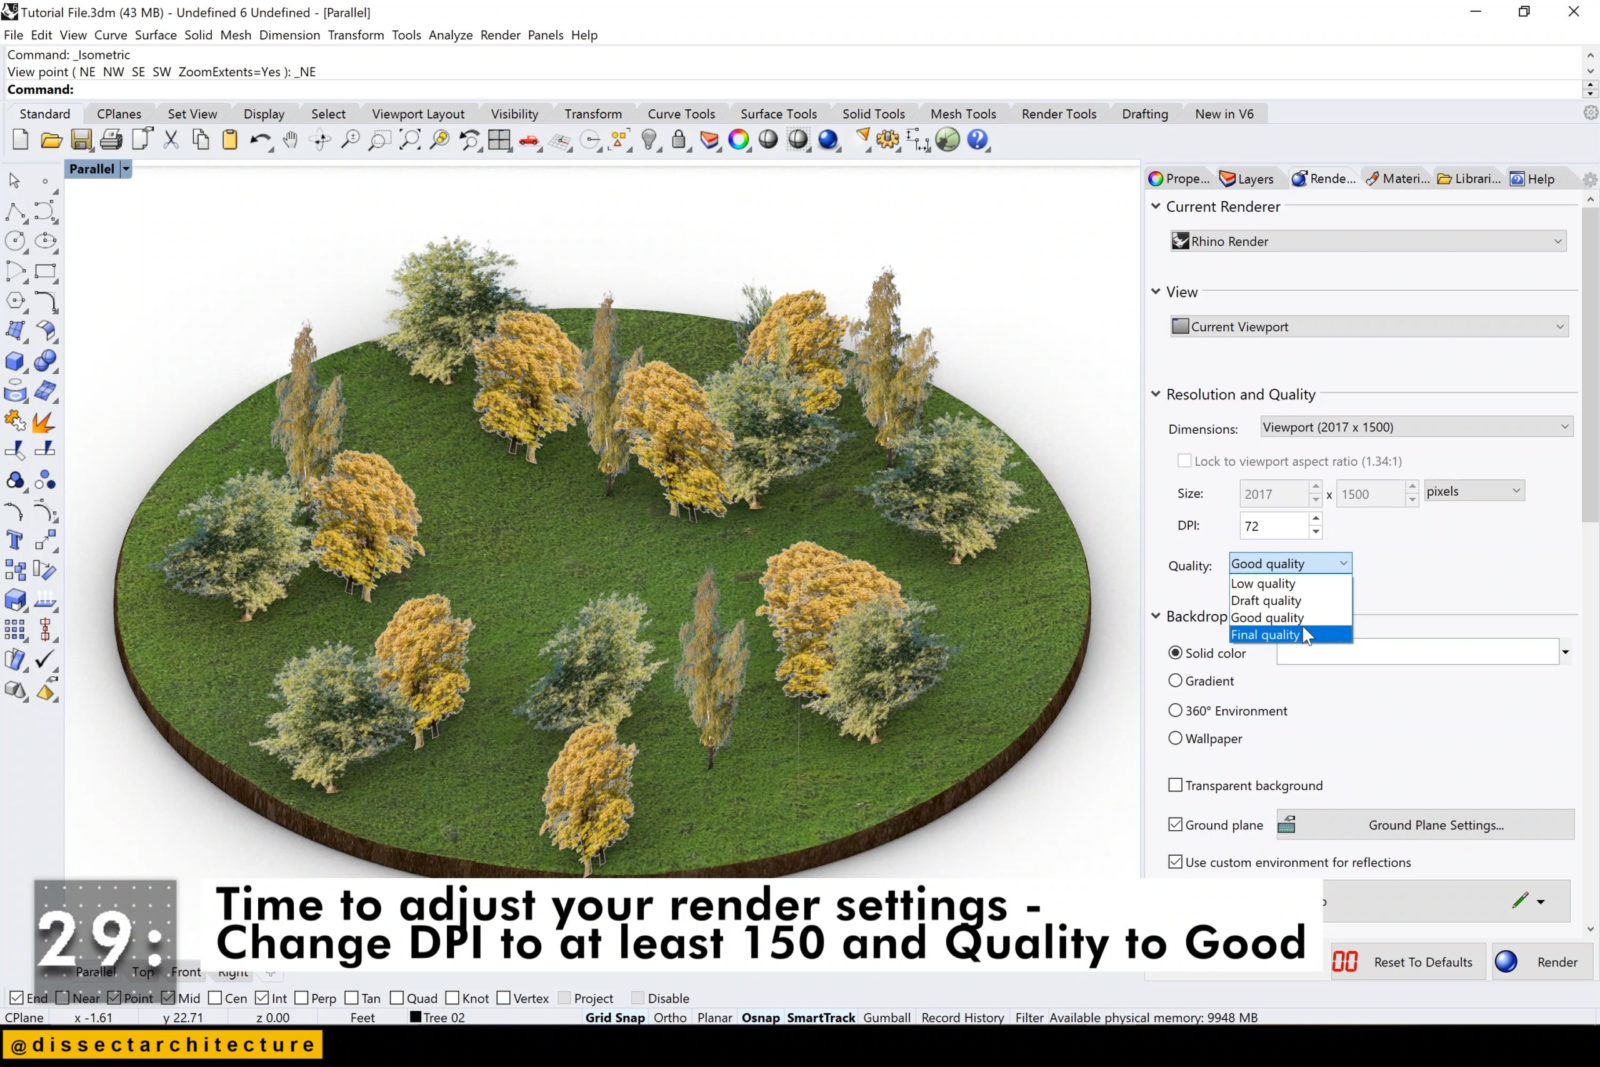
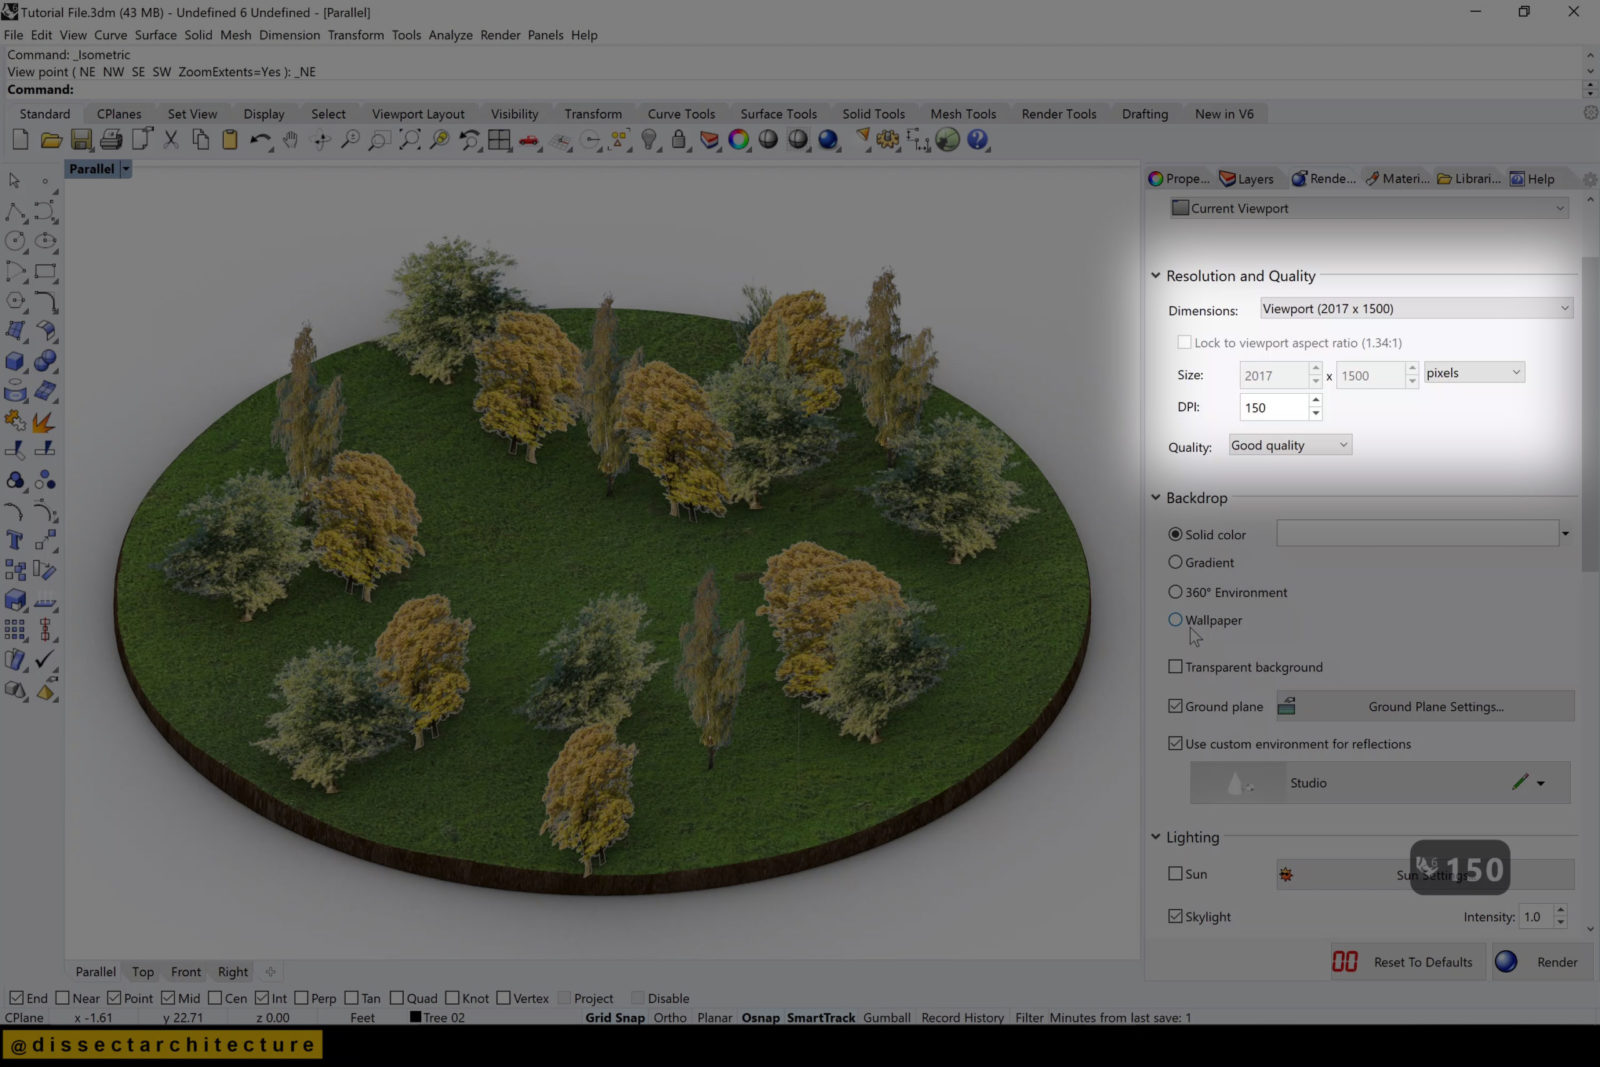
Step 29
Now go ahead and adjust your render settings through Render panel.
Change your DPI to at least 150 and Quality to Good or Final Quality.
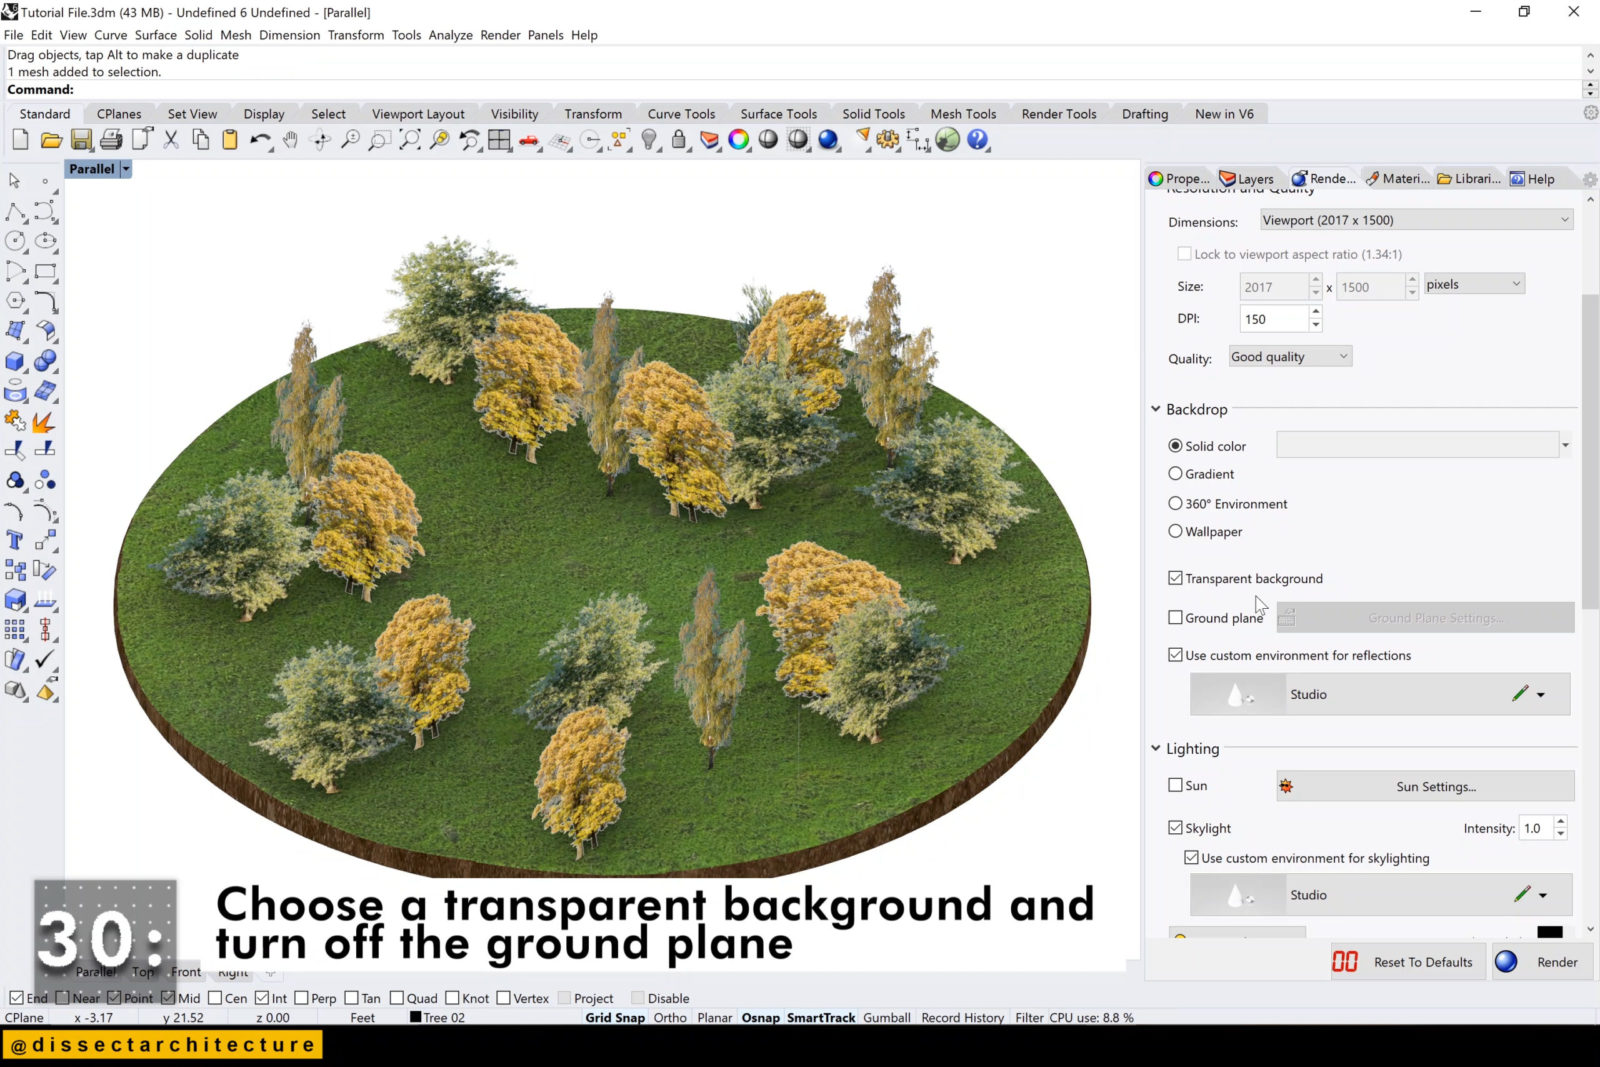
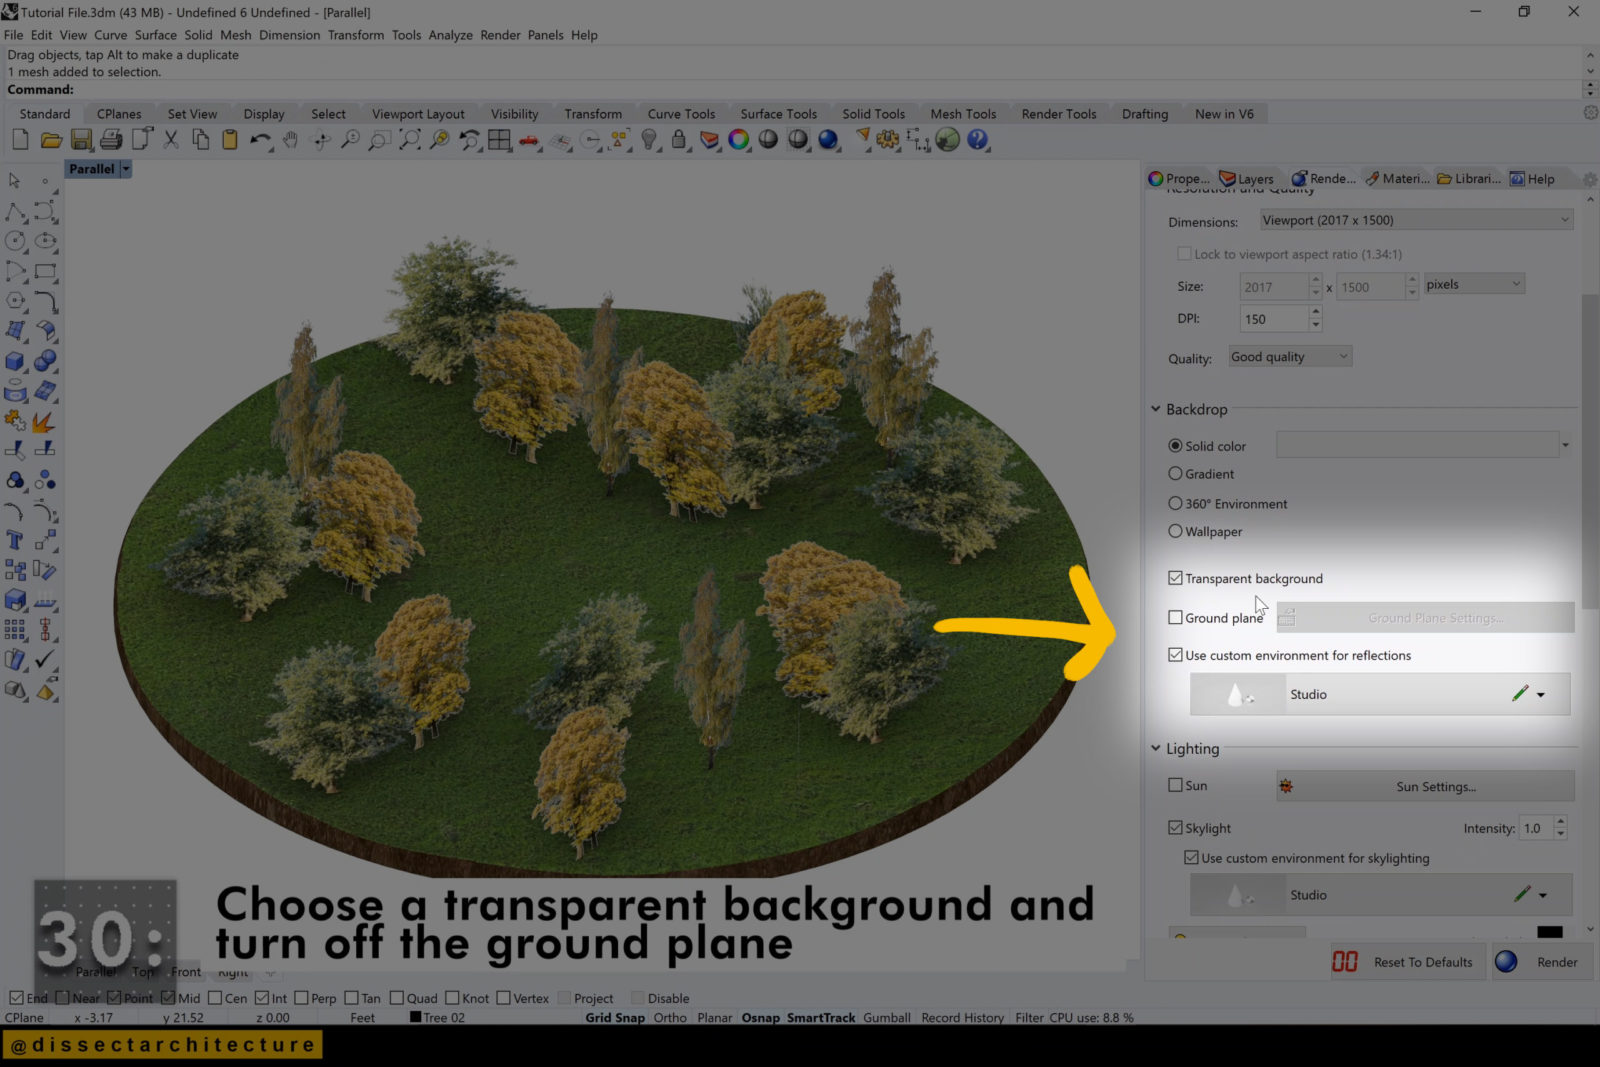
Step 30
Make sure transparent background is checked and turn the Ground Plane off.
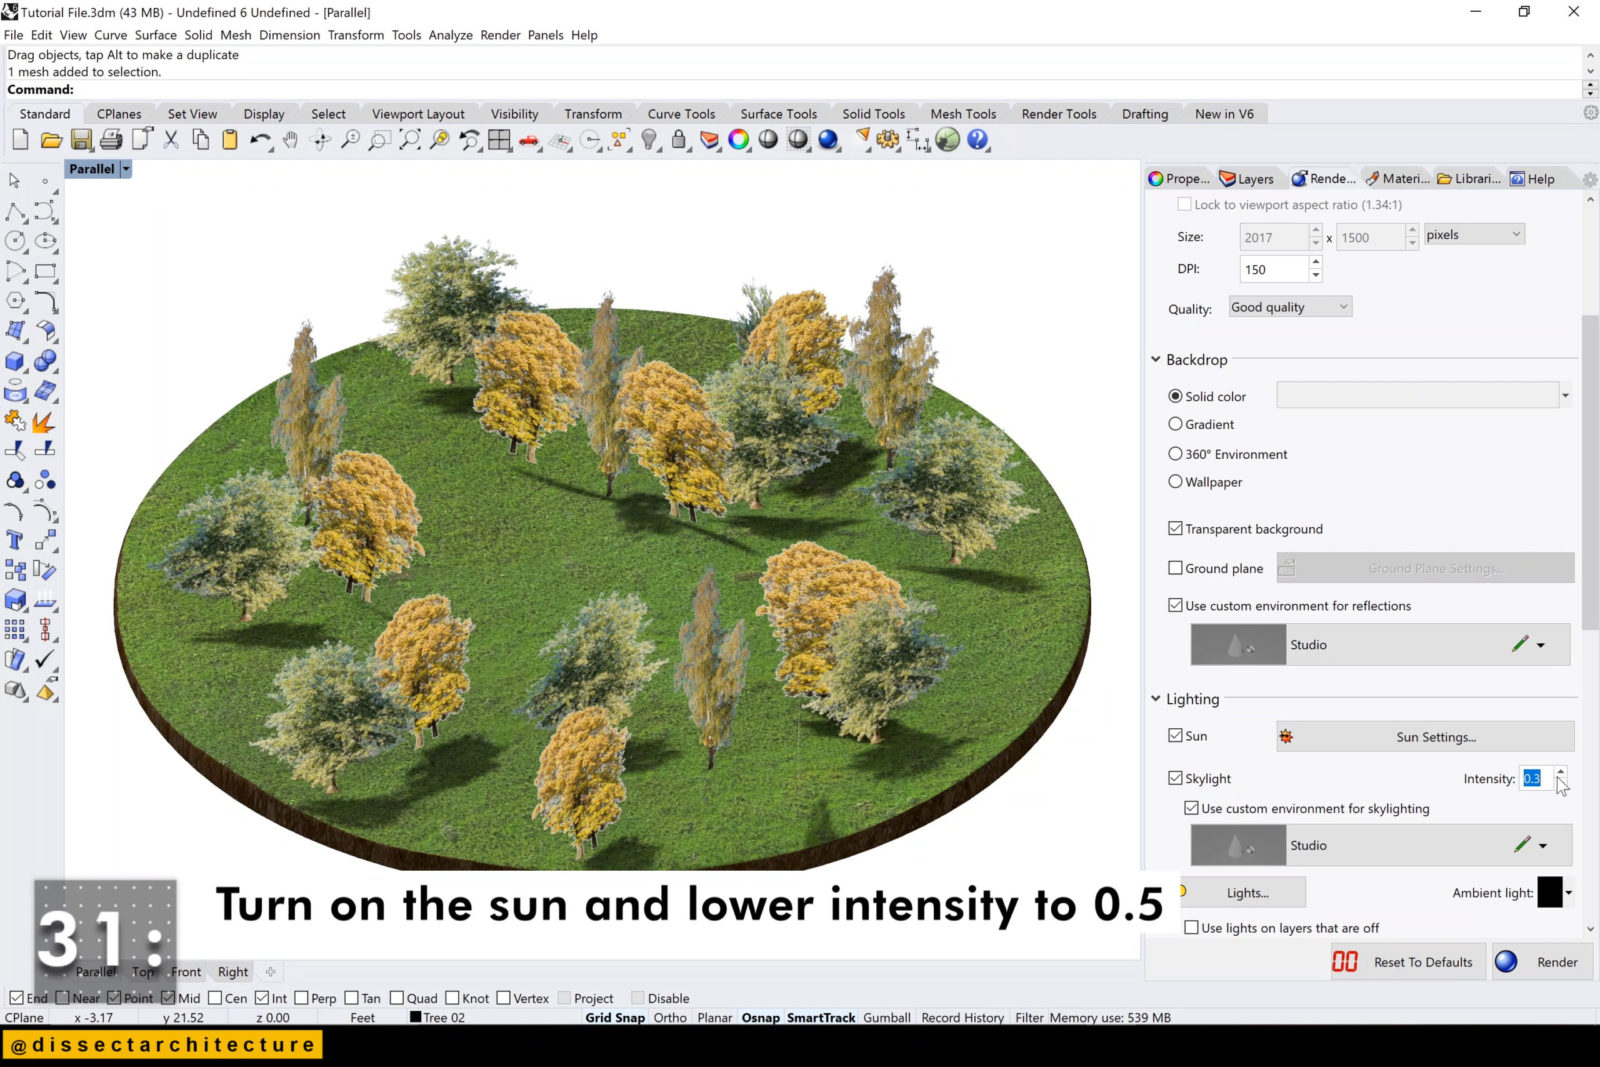
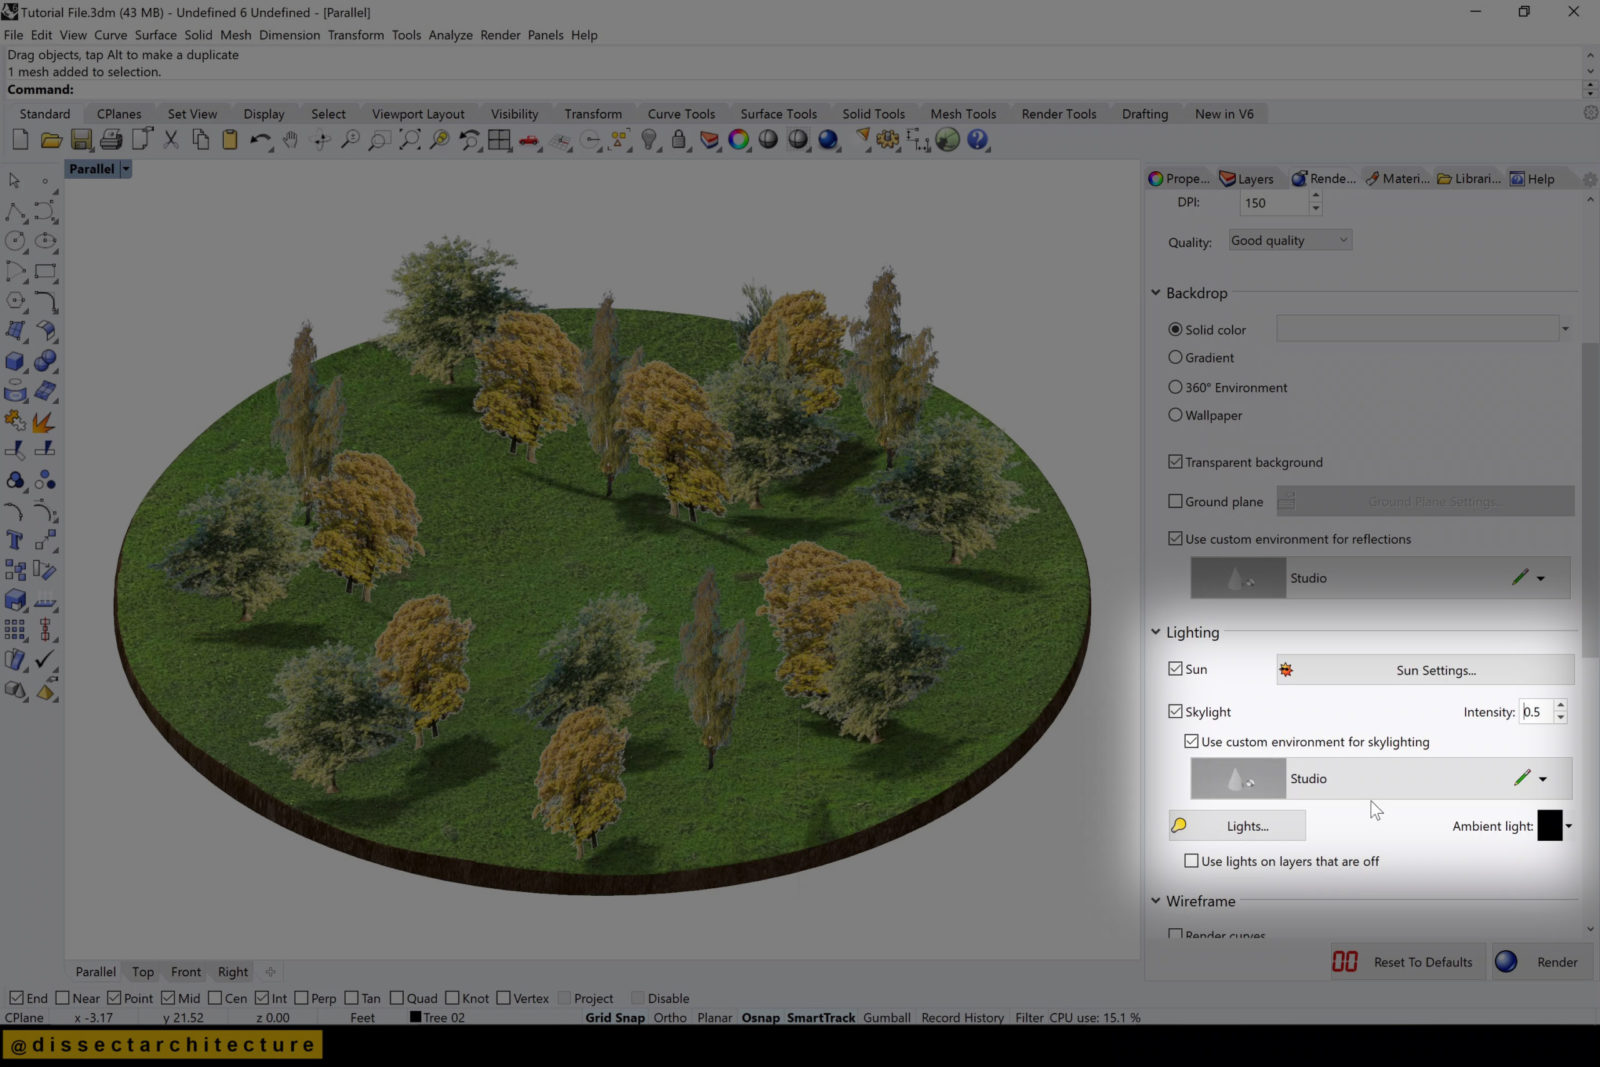
Step 31
Make sure to also turn off the sun option under lighting, check the Skylight, and lower the intensity to 0.5.
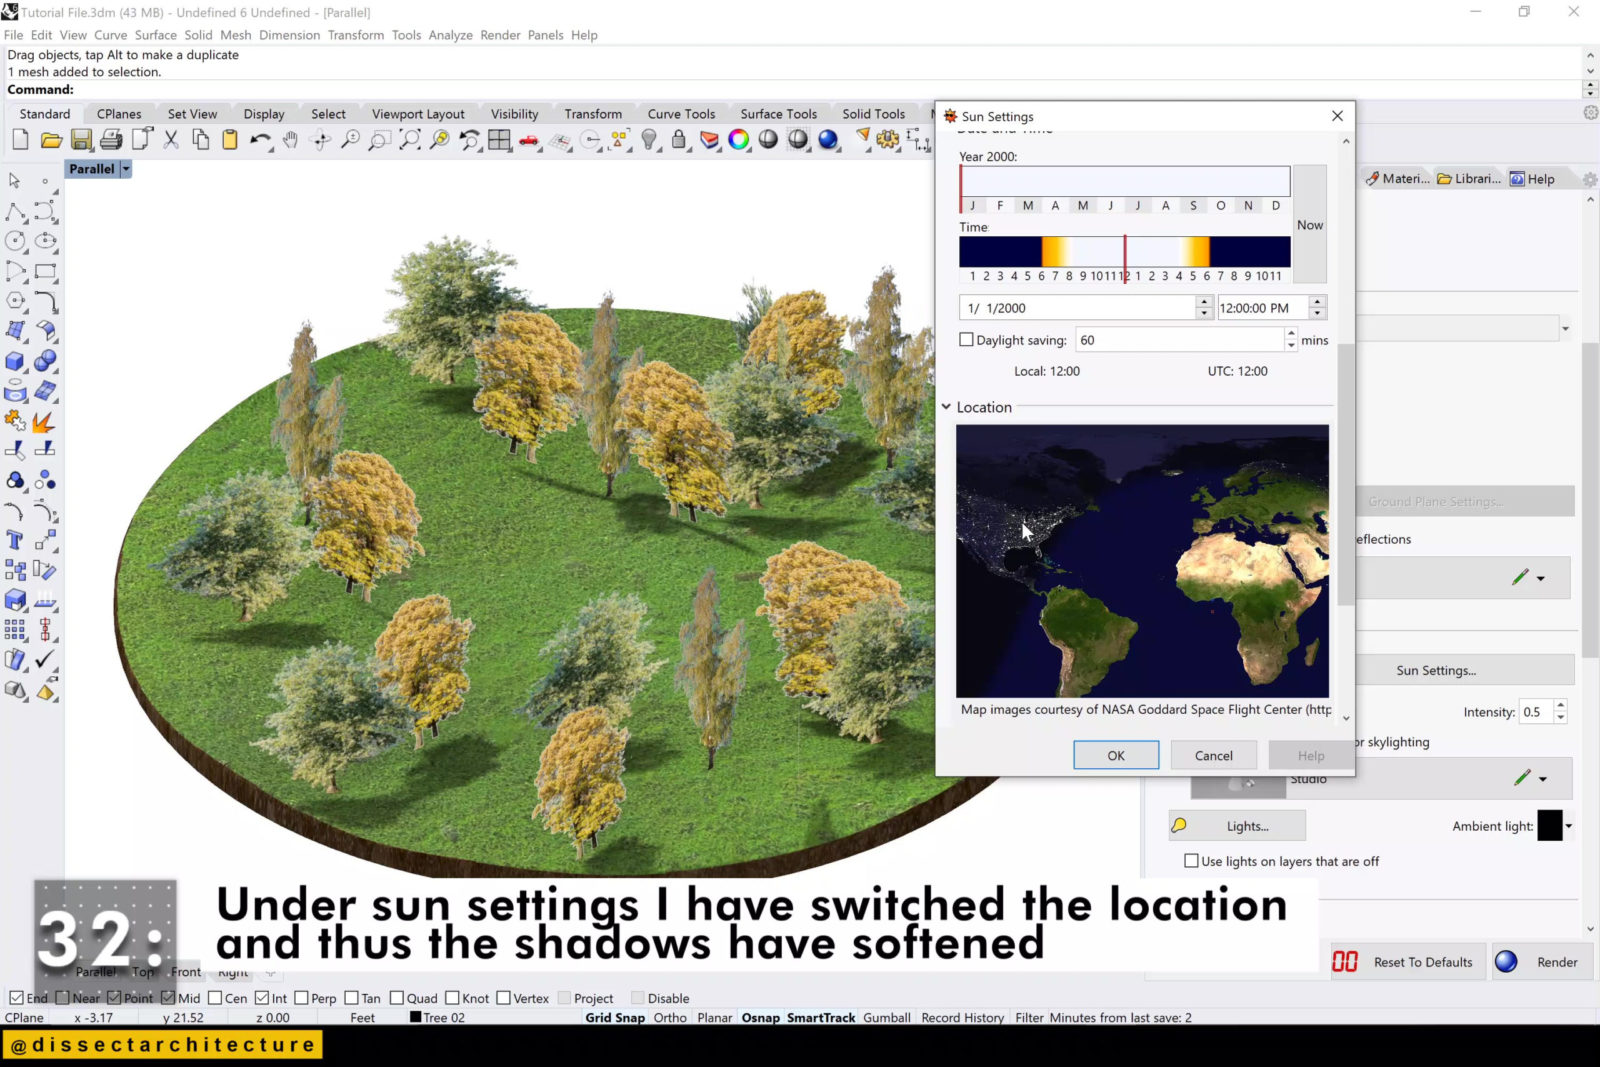
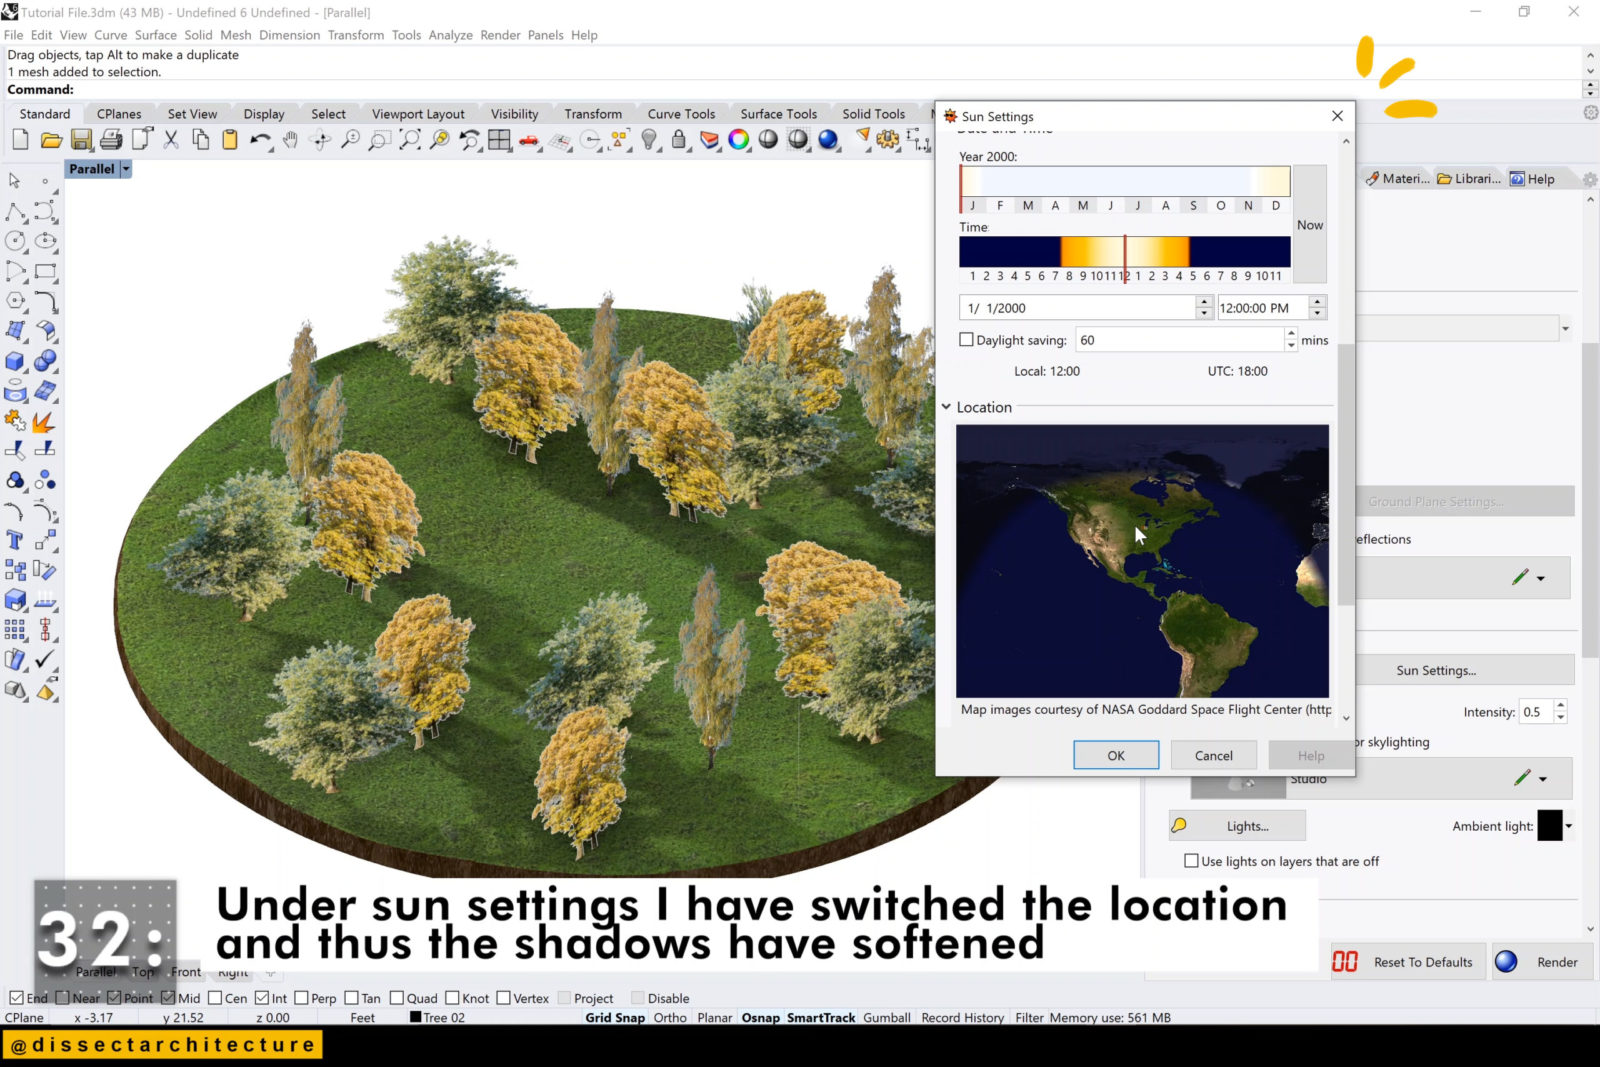
Step 32
Under the Sun Settings panel I have switched the location of the file and thus the shadows have softened a bit.
Don’t be scared to experiment with this setting.
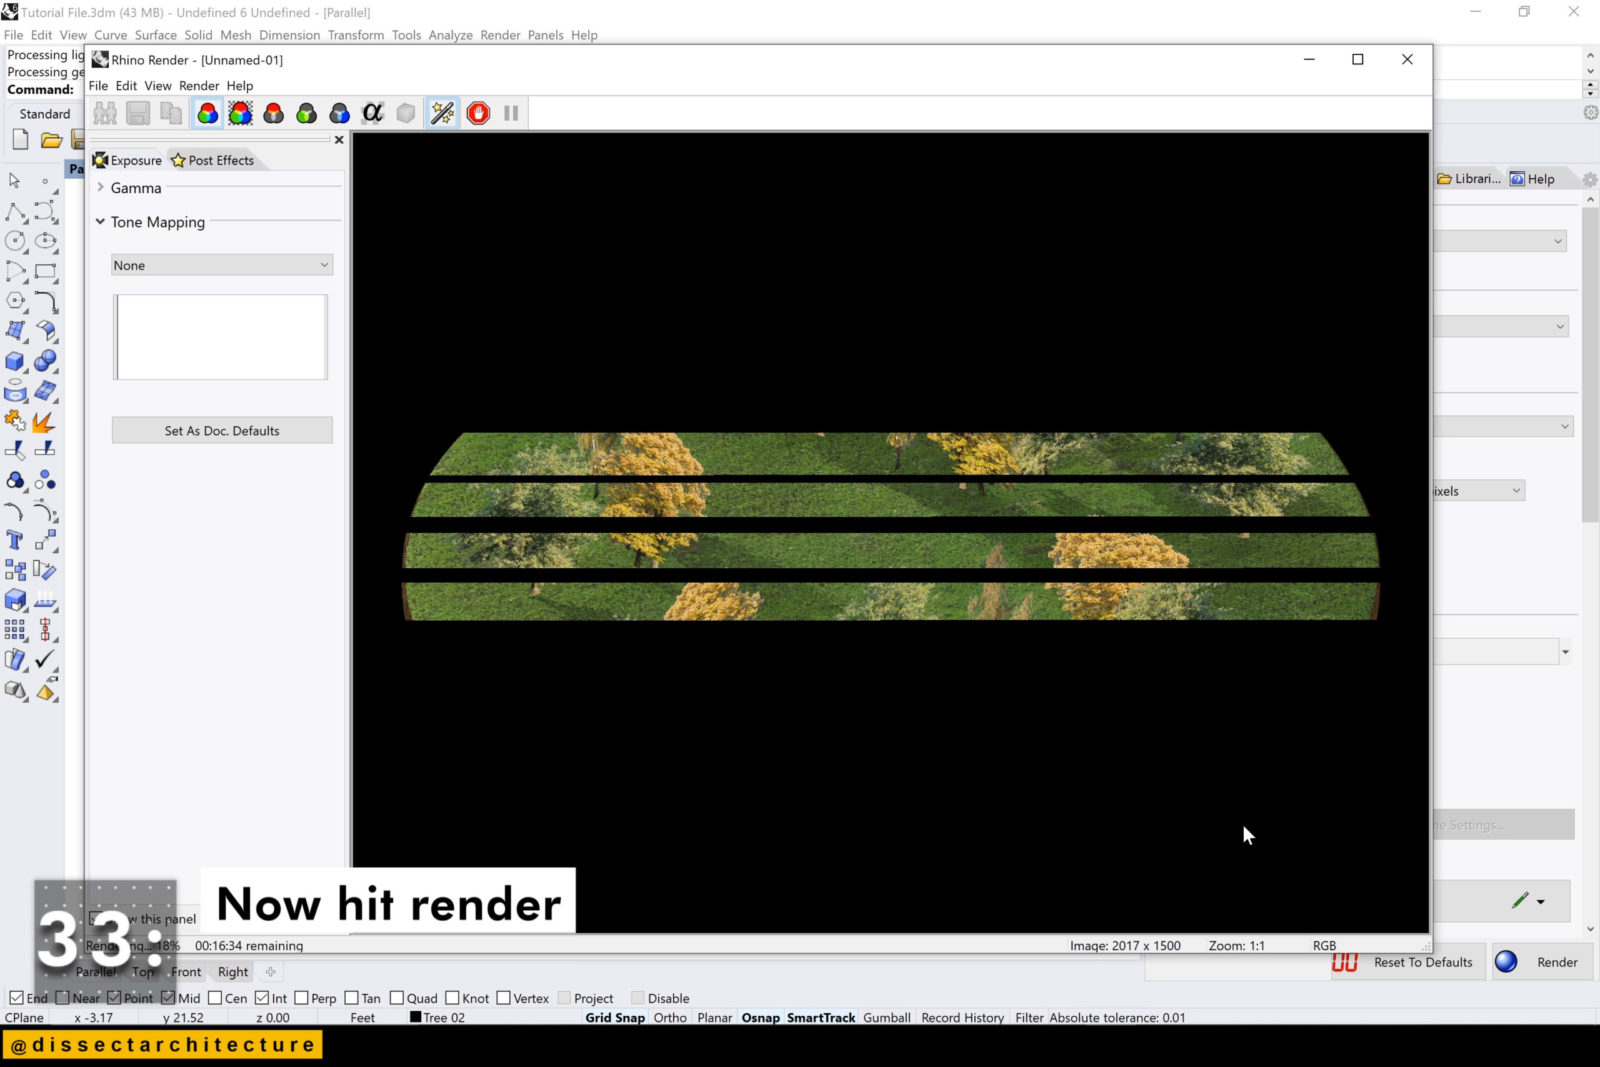
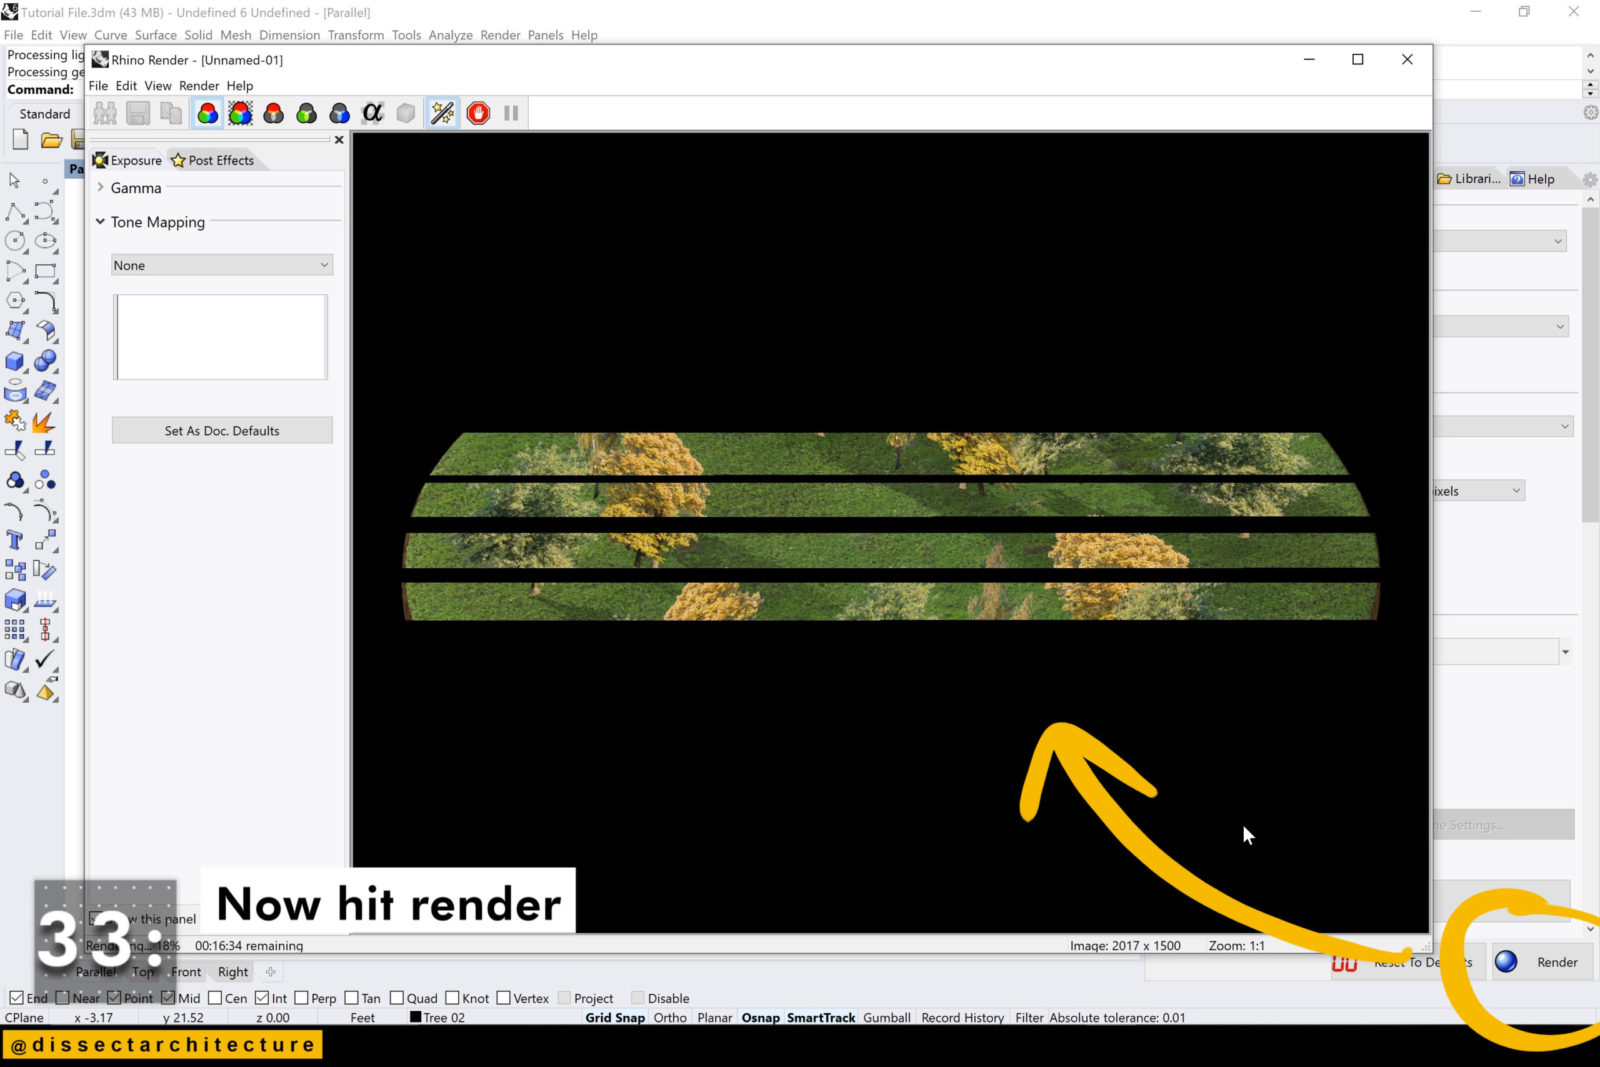
Step 33
Now hit Render and wait for you file to render.
Afterwards, save it somewhere you can later reference.
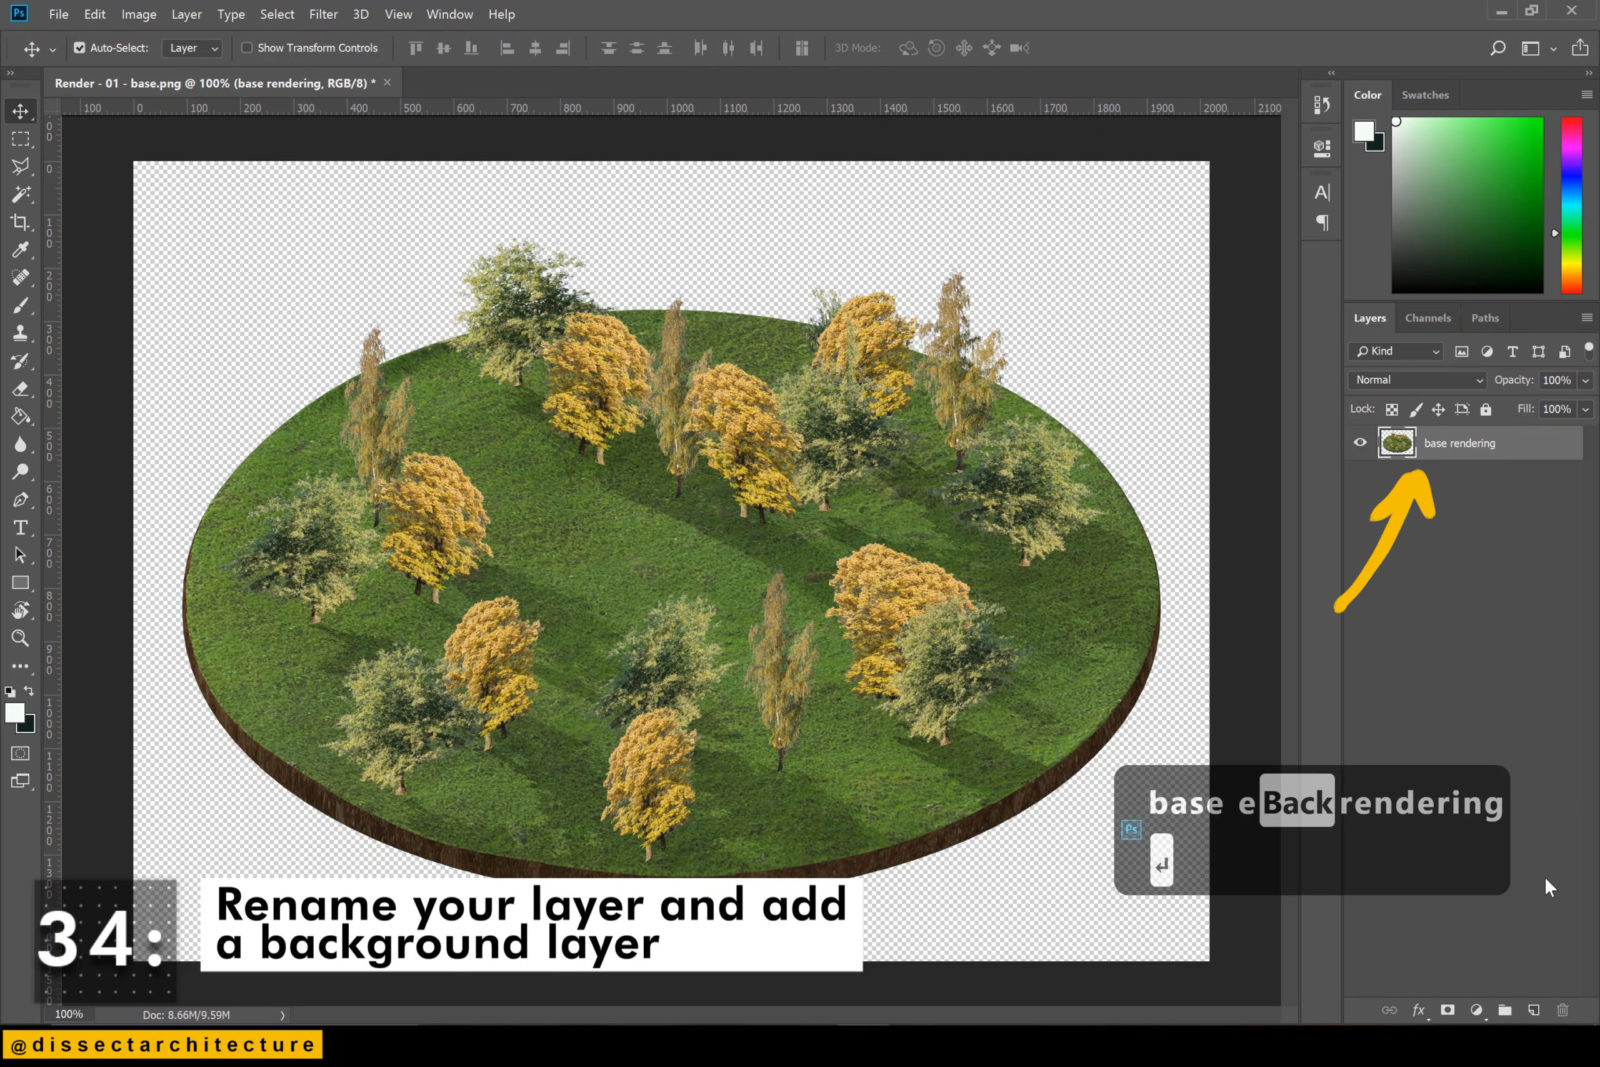
Step 34
Now open Photoshop and open the file you just rendered. Rename your layer and add a background layer.
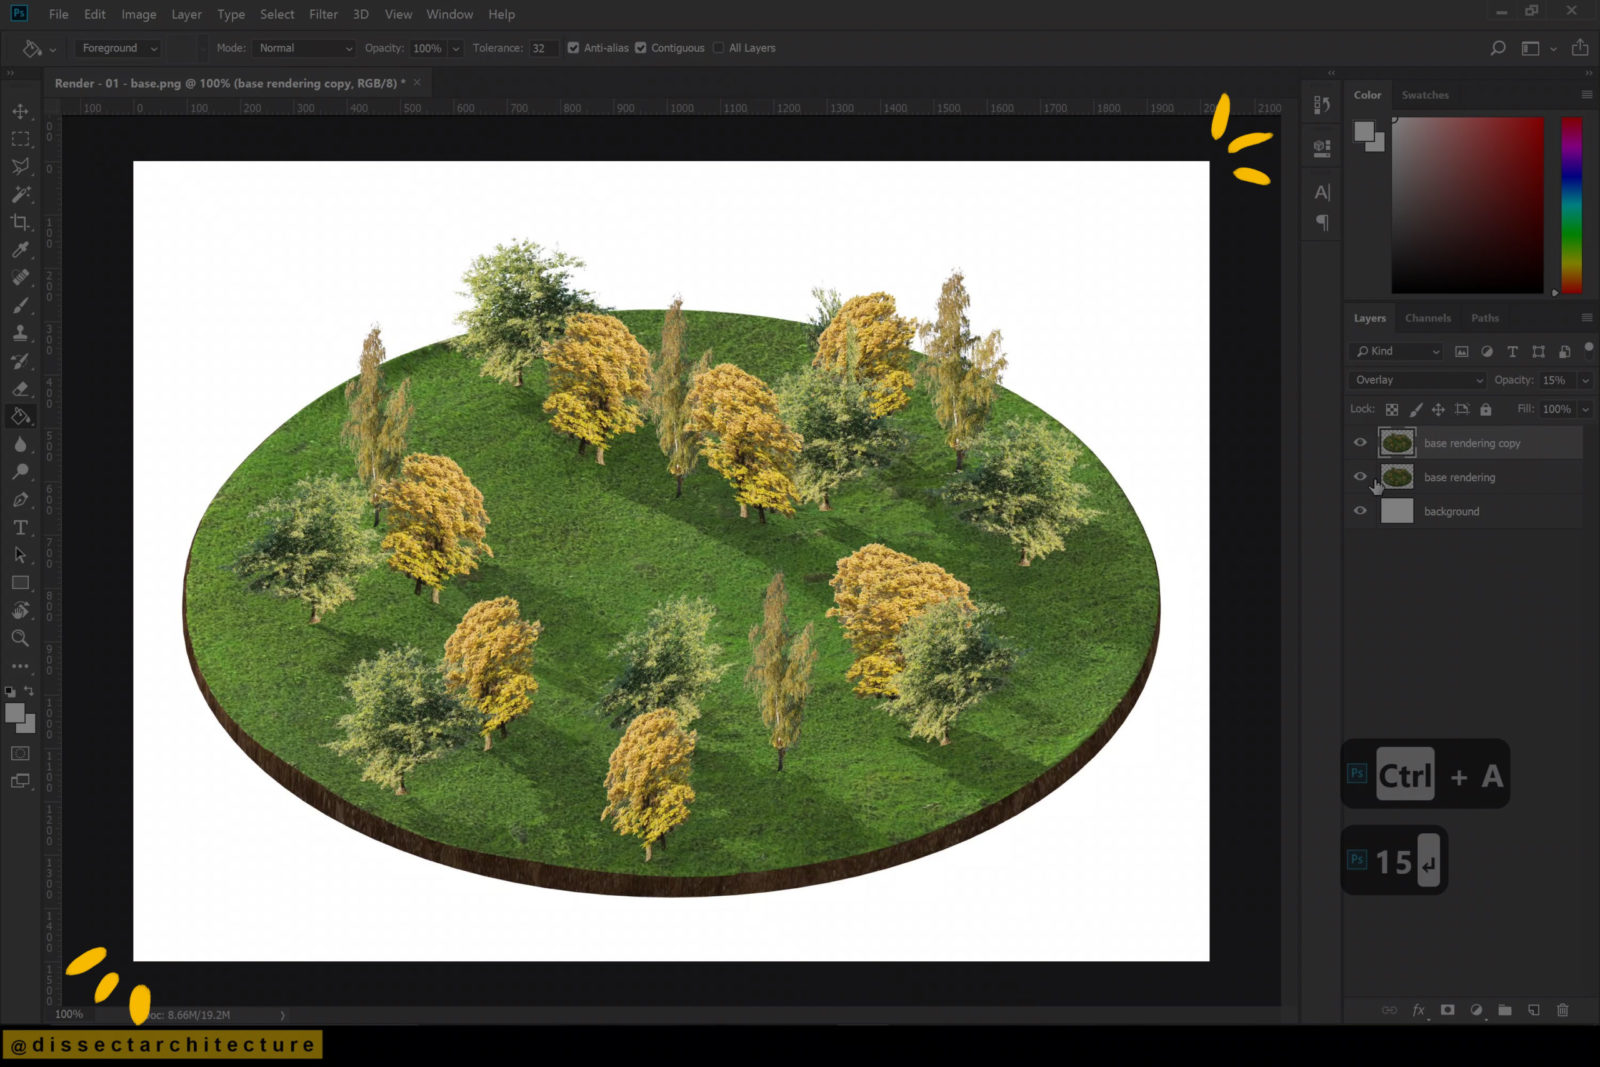
Step 35
Make a duplicate of your layer by using the CTRL+J shortcut, change the blending mode of the layer to Overlay, and change the opacity to 15%.

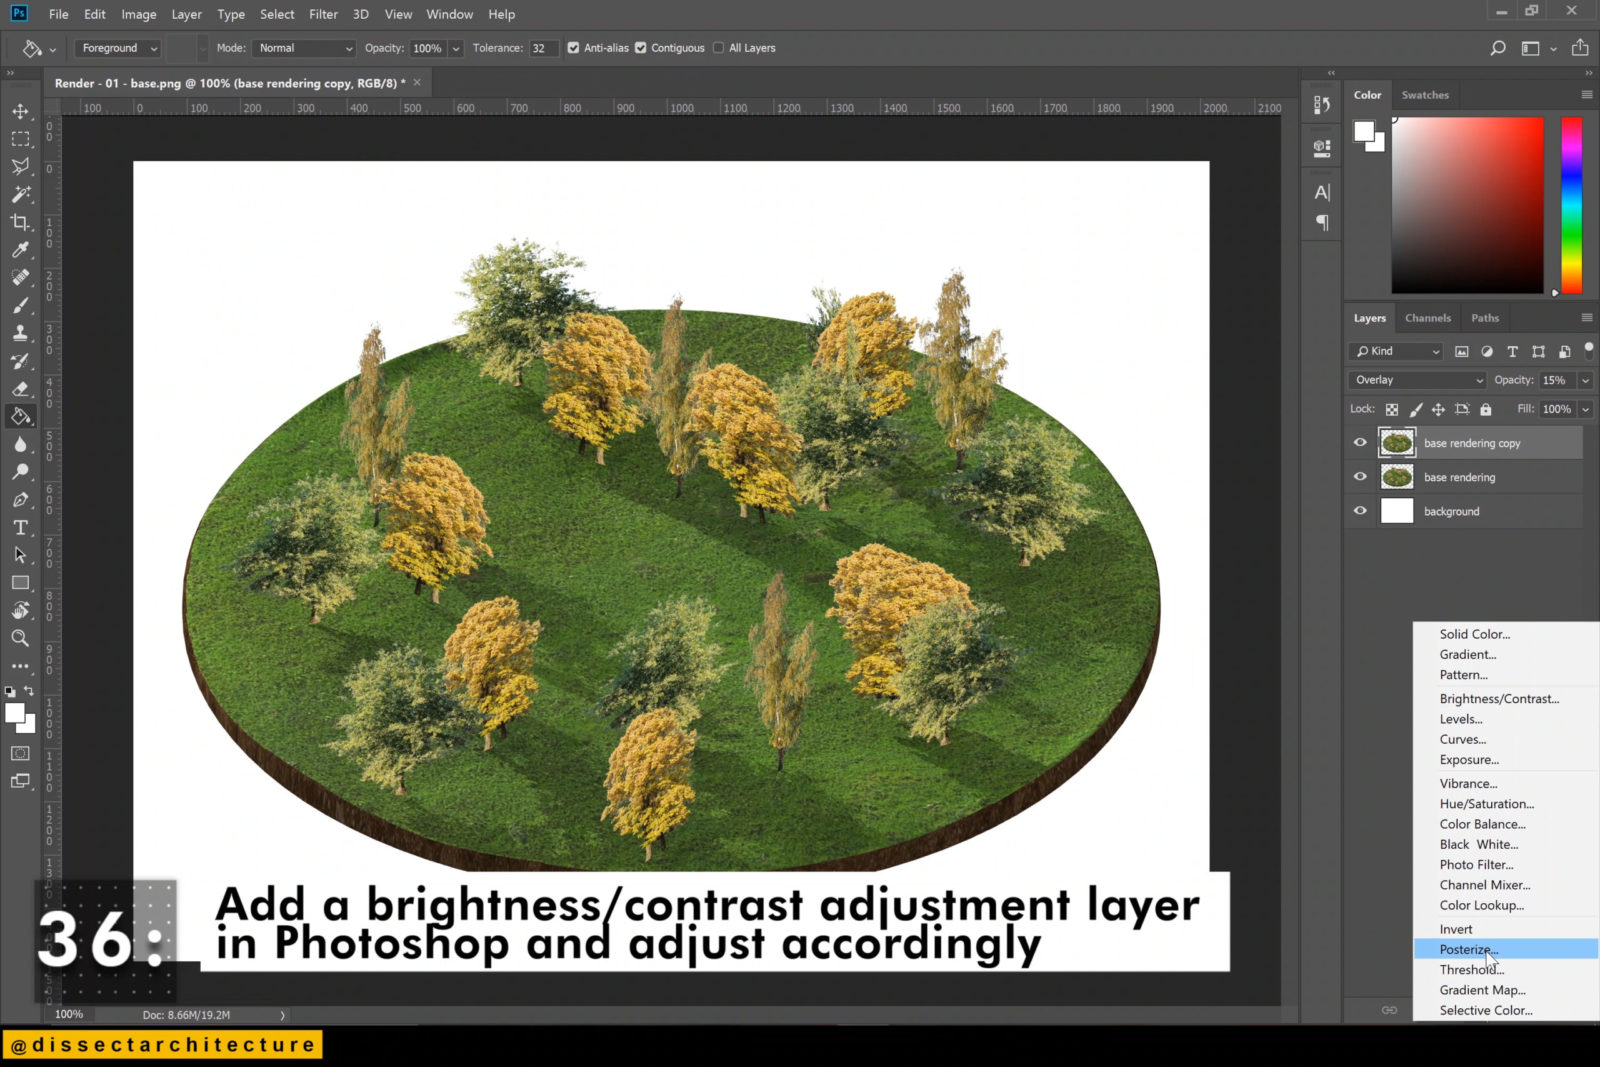
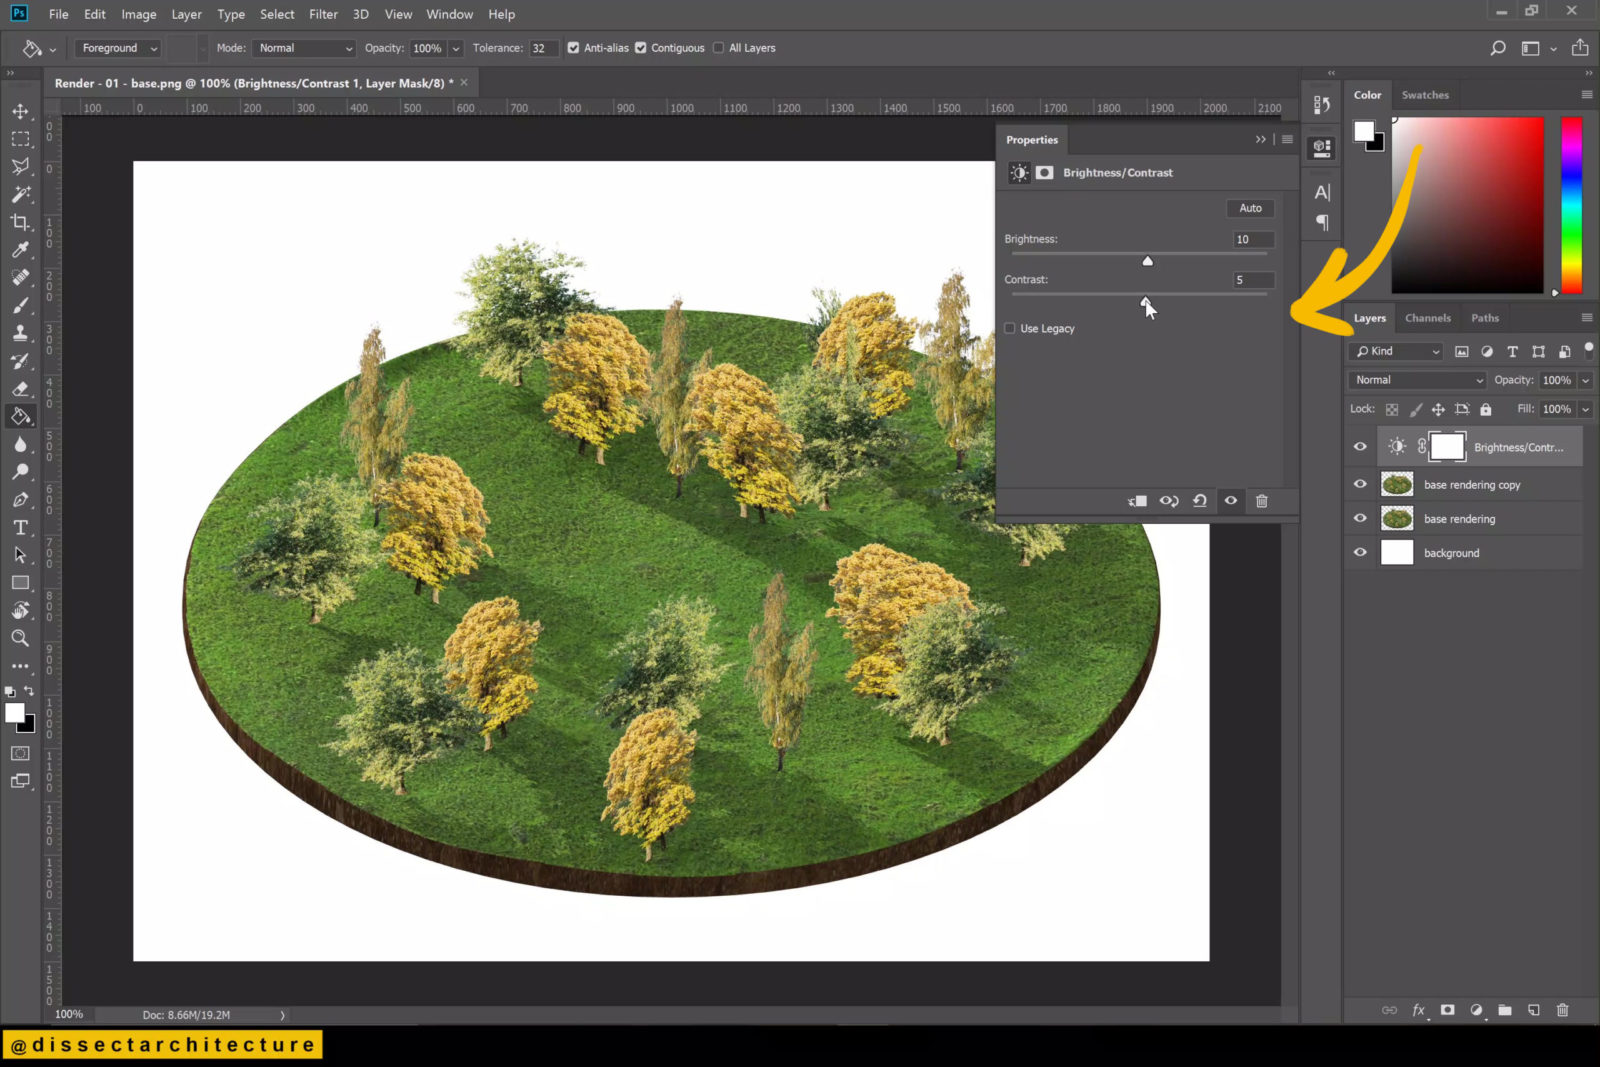
Step 36
Then add a Brightness/Contrast Adjustment Layer and adjust the settings to slightly brighten your image.
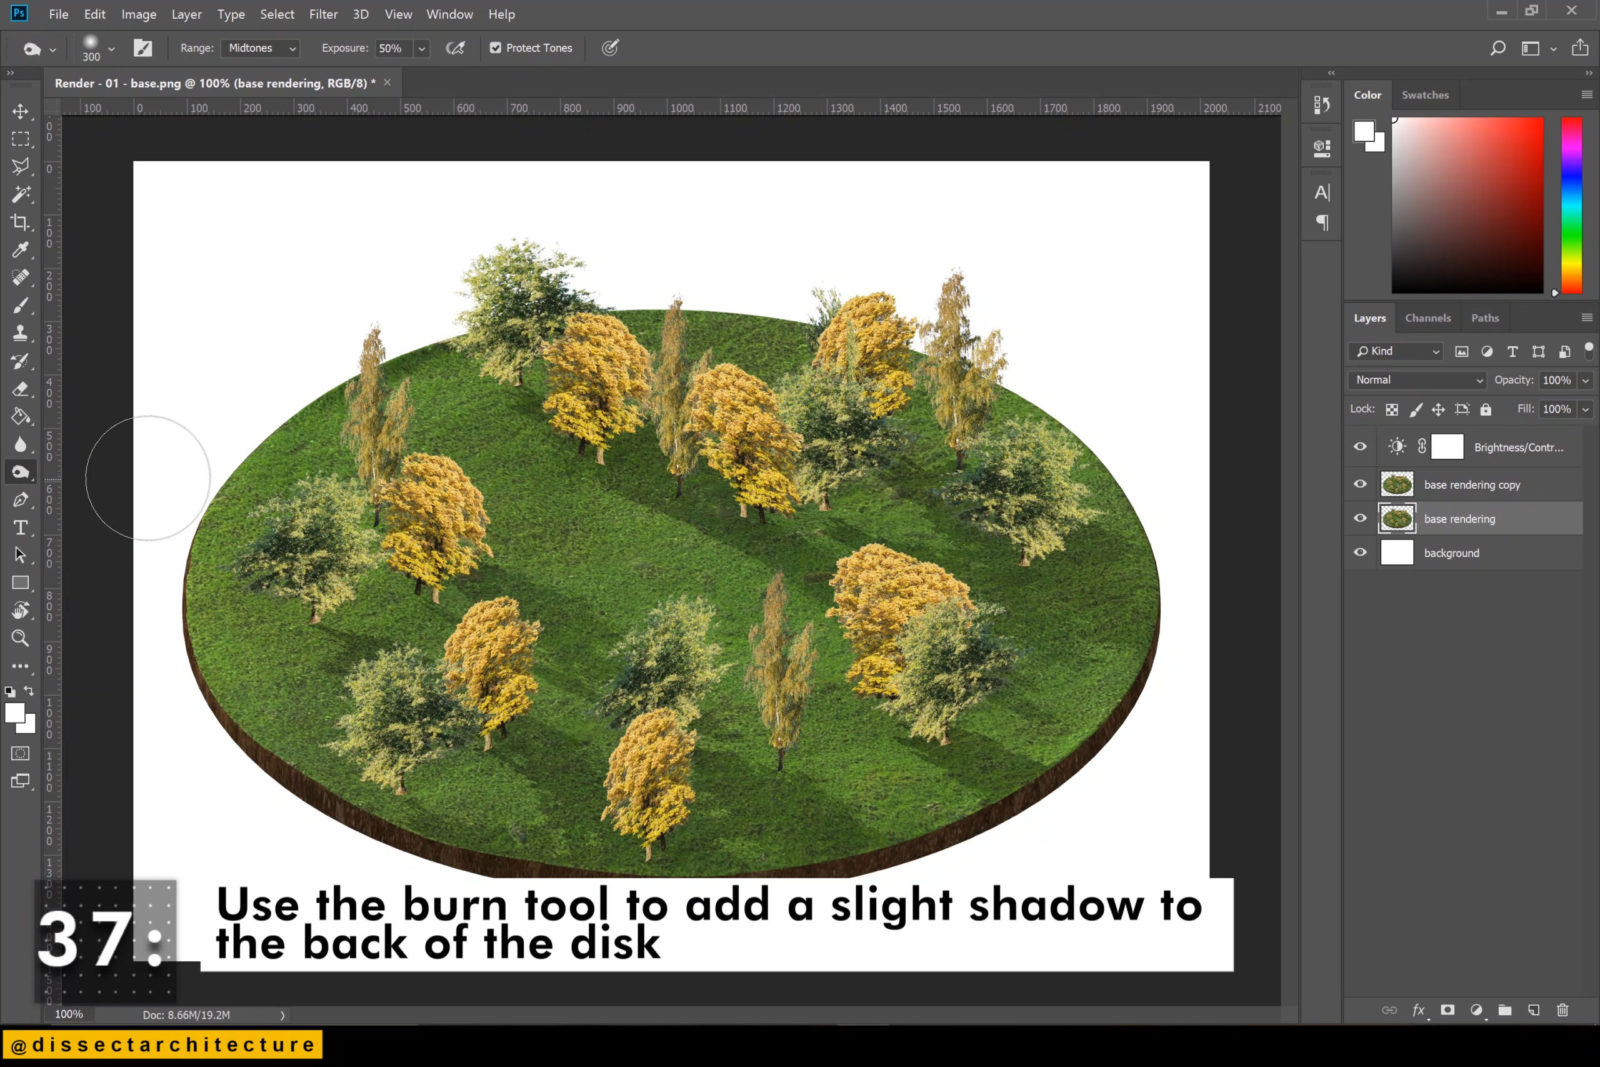
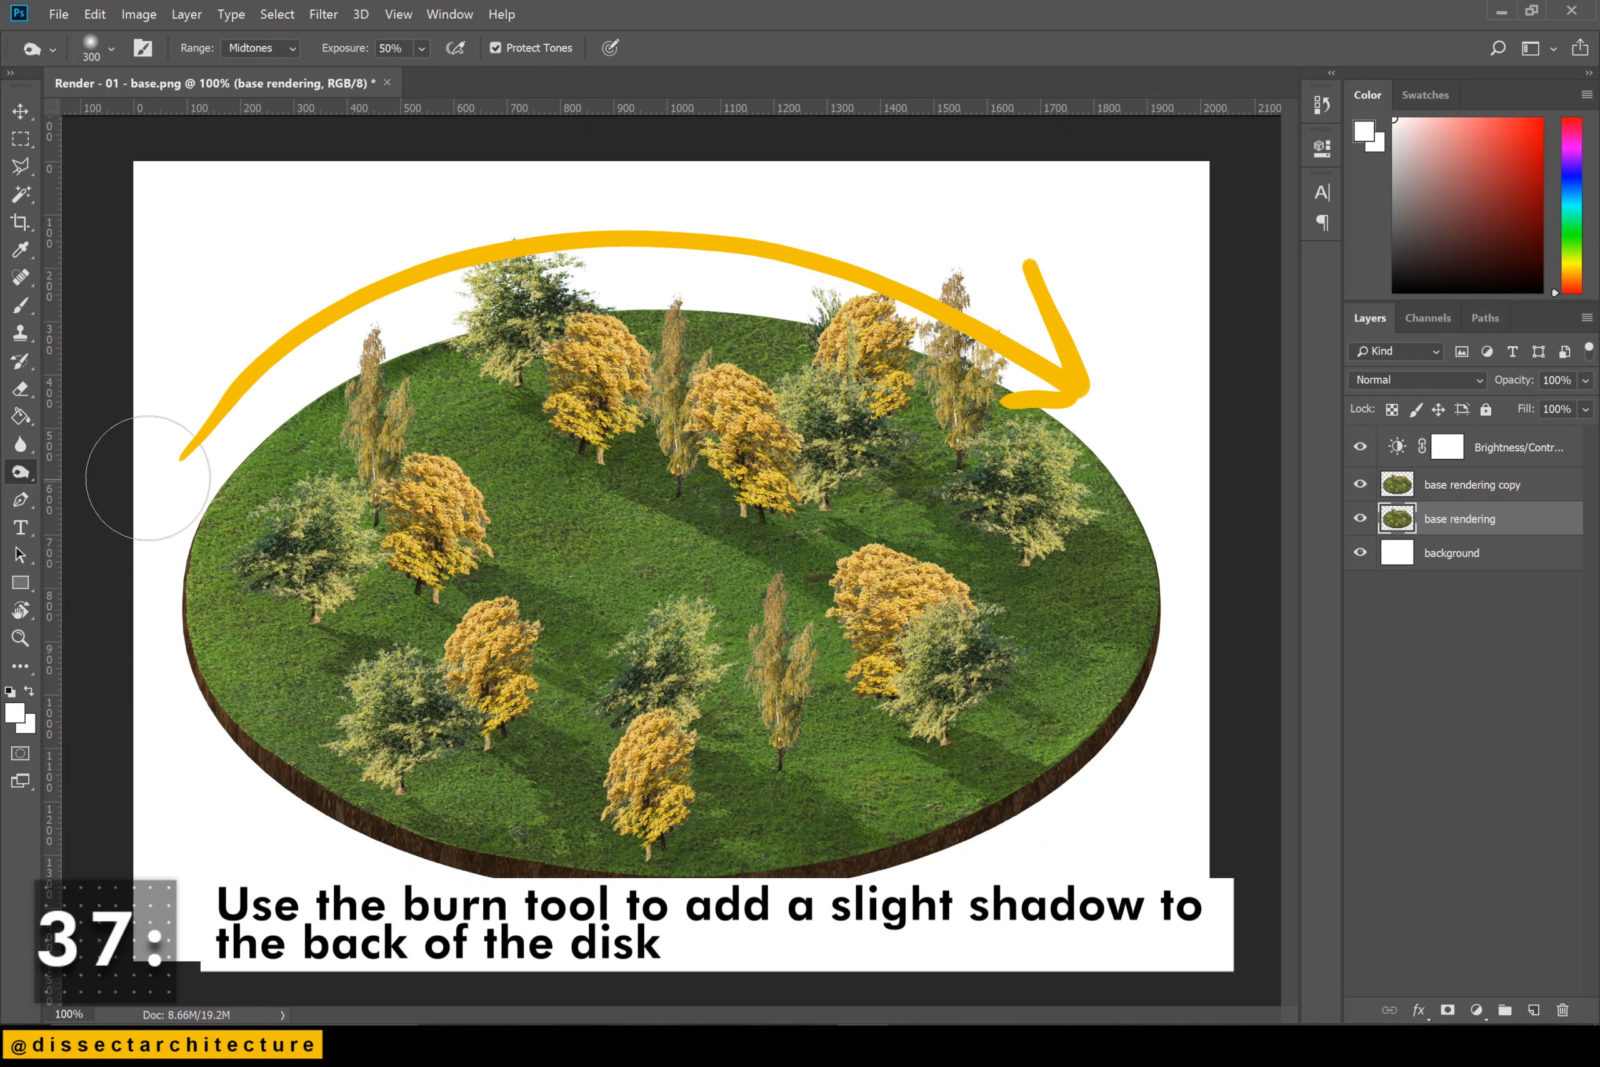
Step 37
Use the Burn Tool to add a slight shadow to the back of the disk.
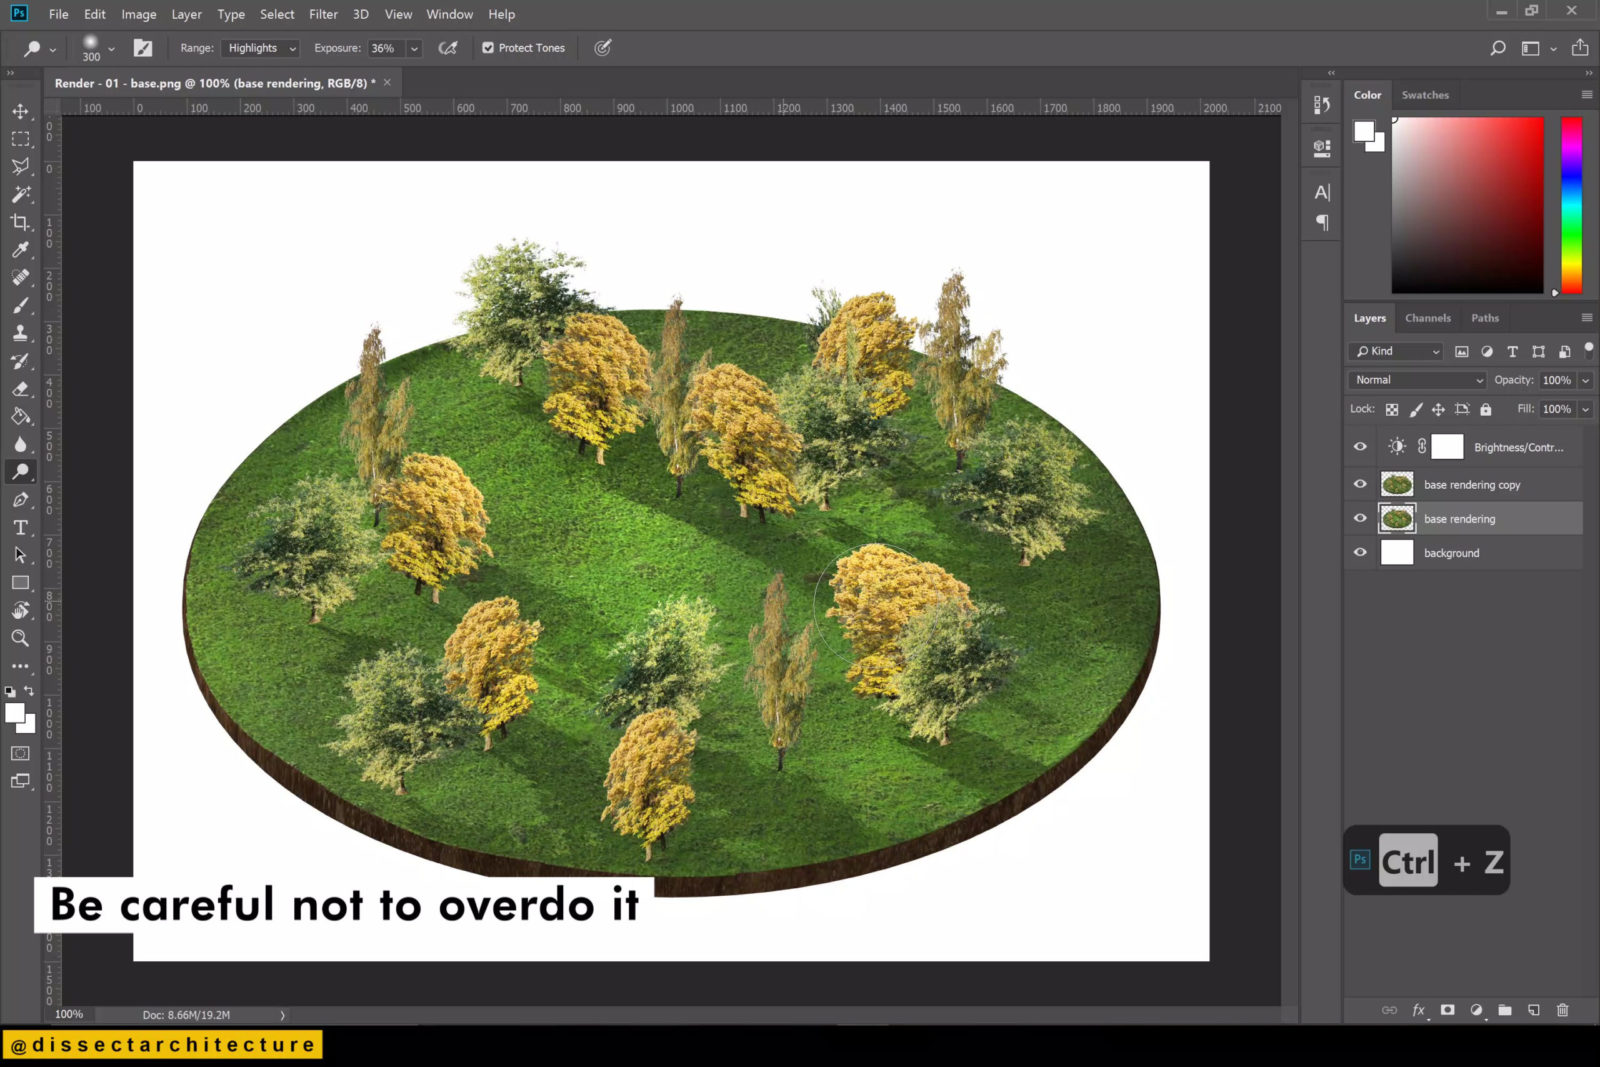
Step 38
Now use the Dodge Tool to add some highlight to the disk.
Be careful not to overdo it.

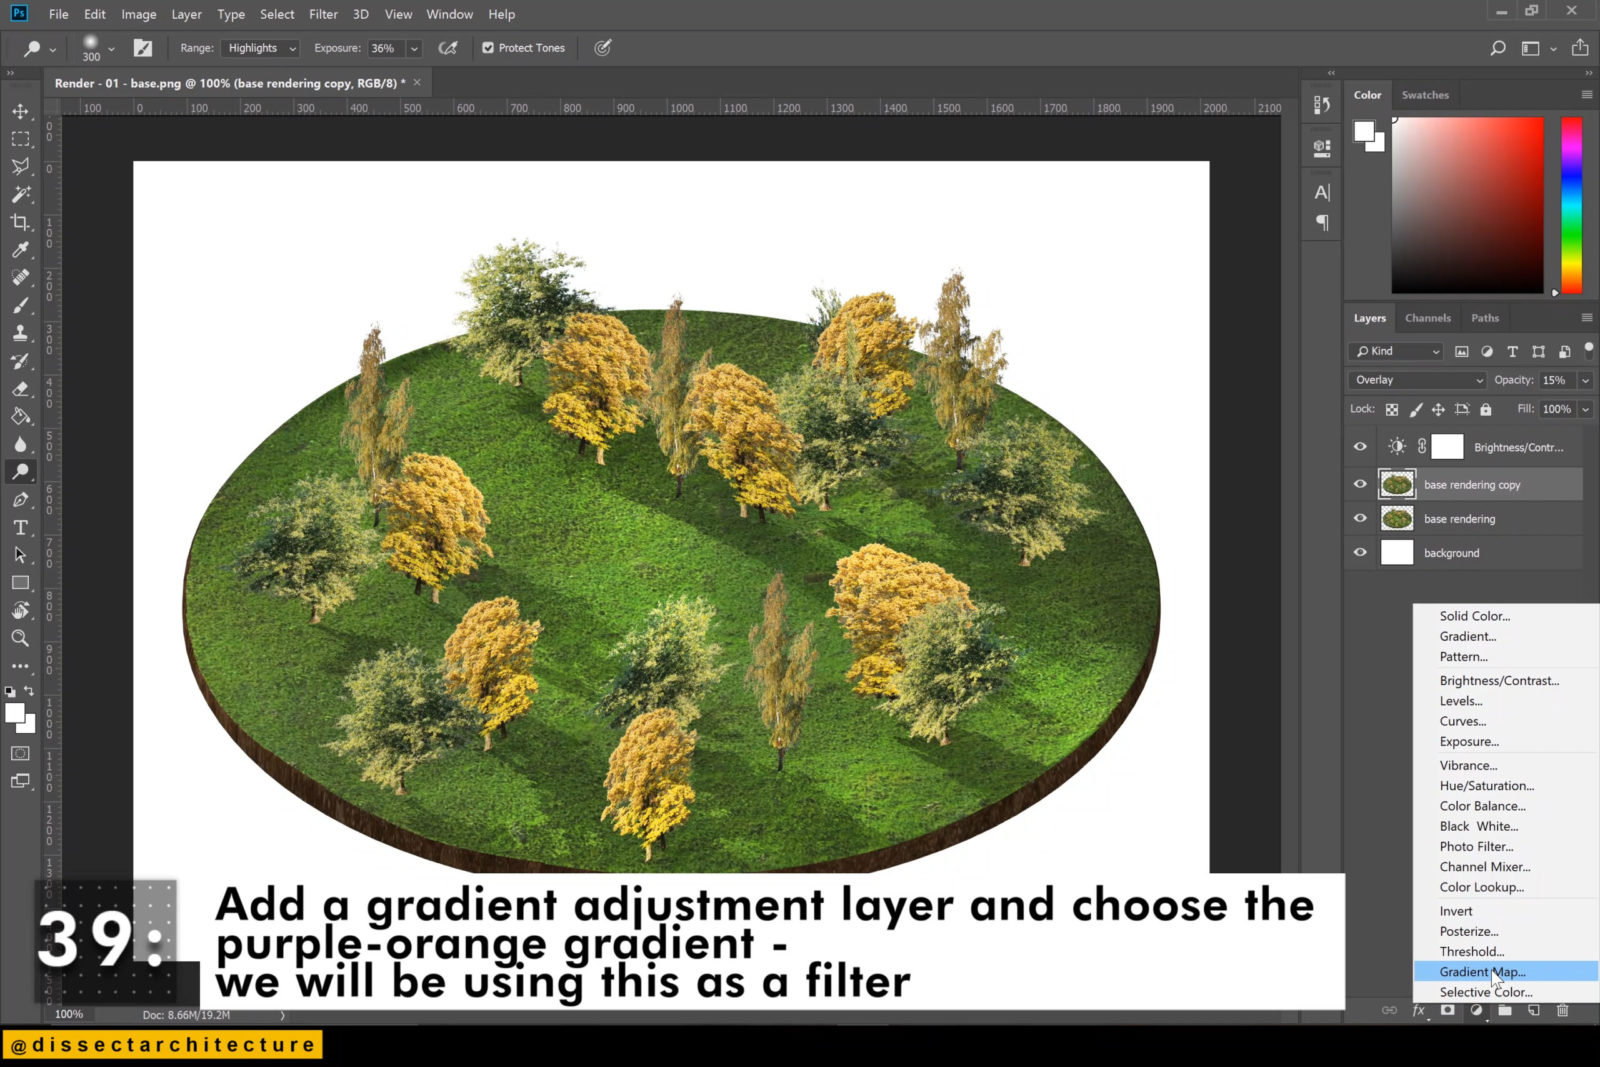
Step 39
Add a Gradient Adjustment Layer and choose the purple-orange gradient. We will be using this as a filter.
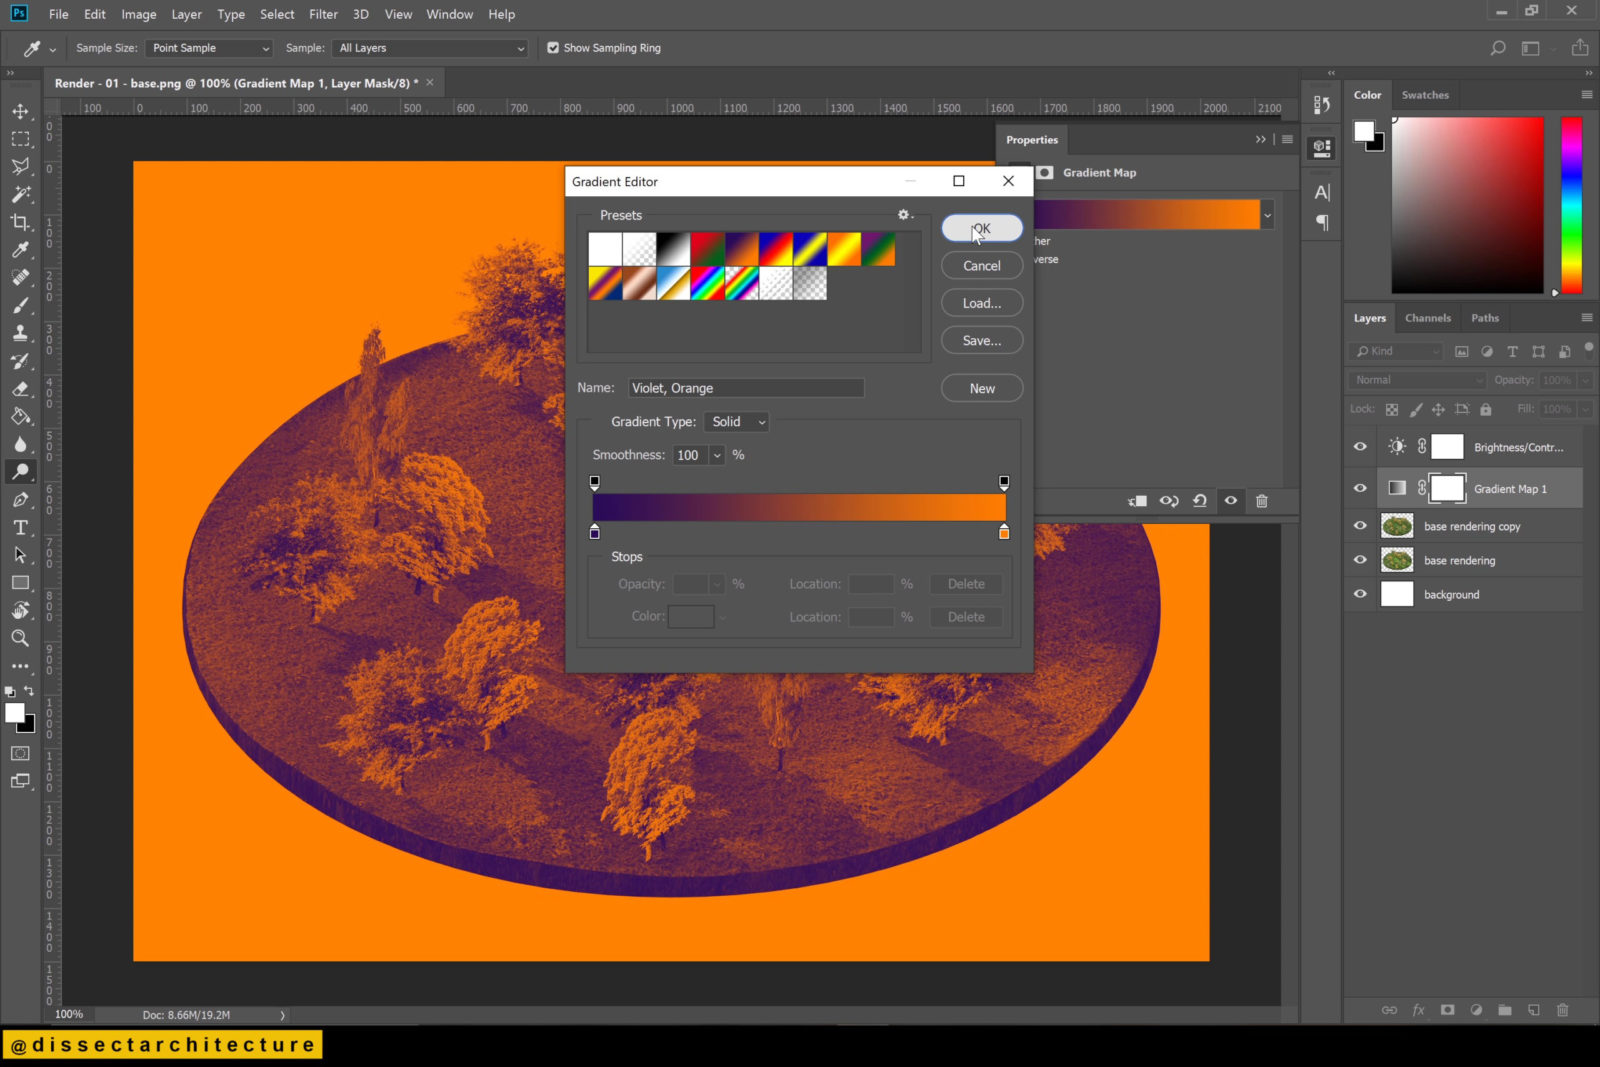
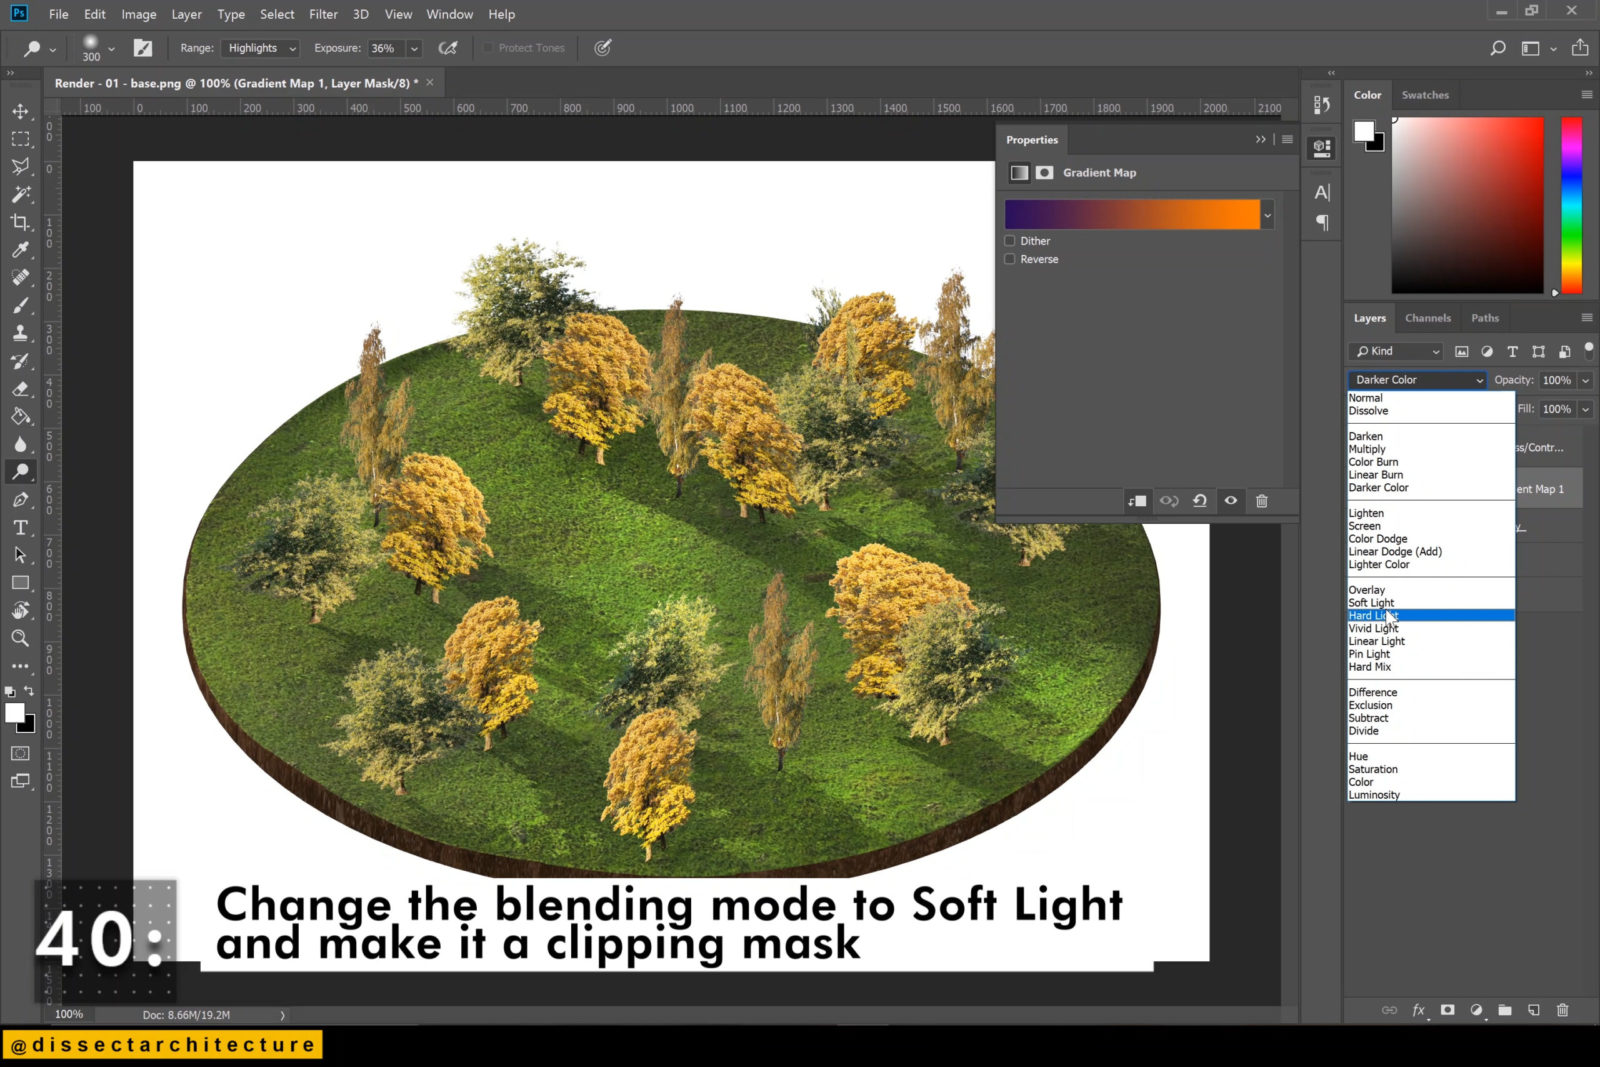
Step 40
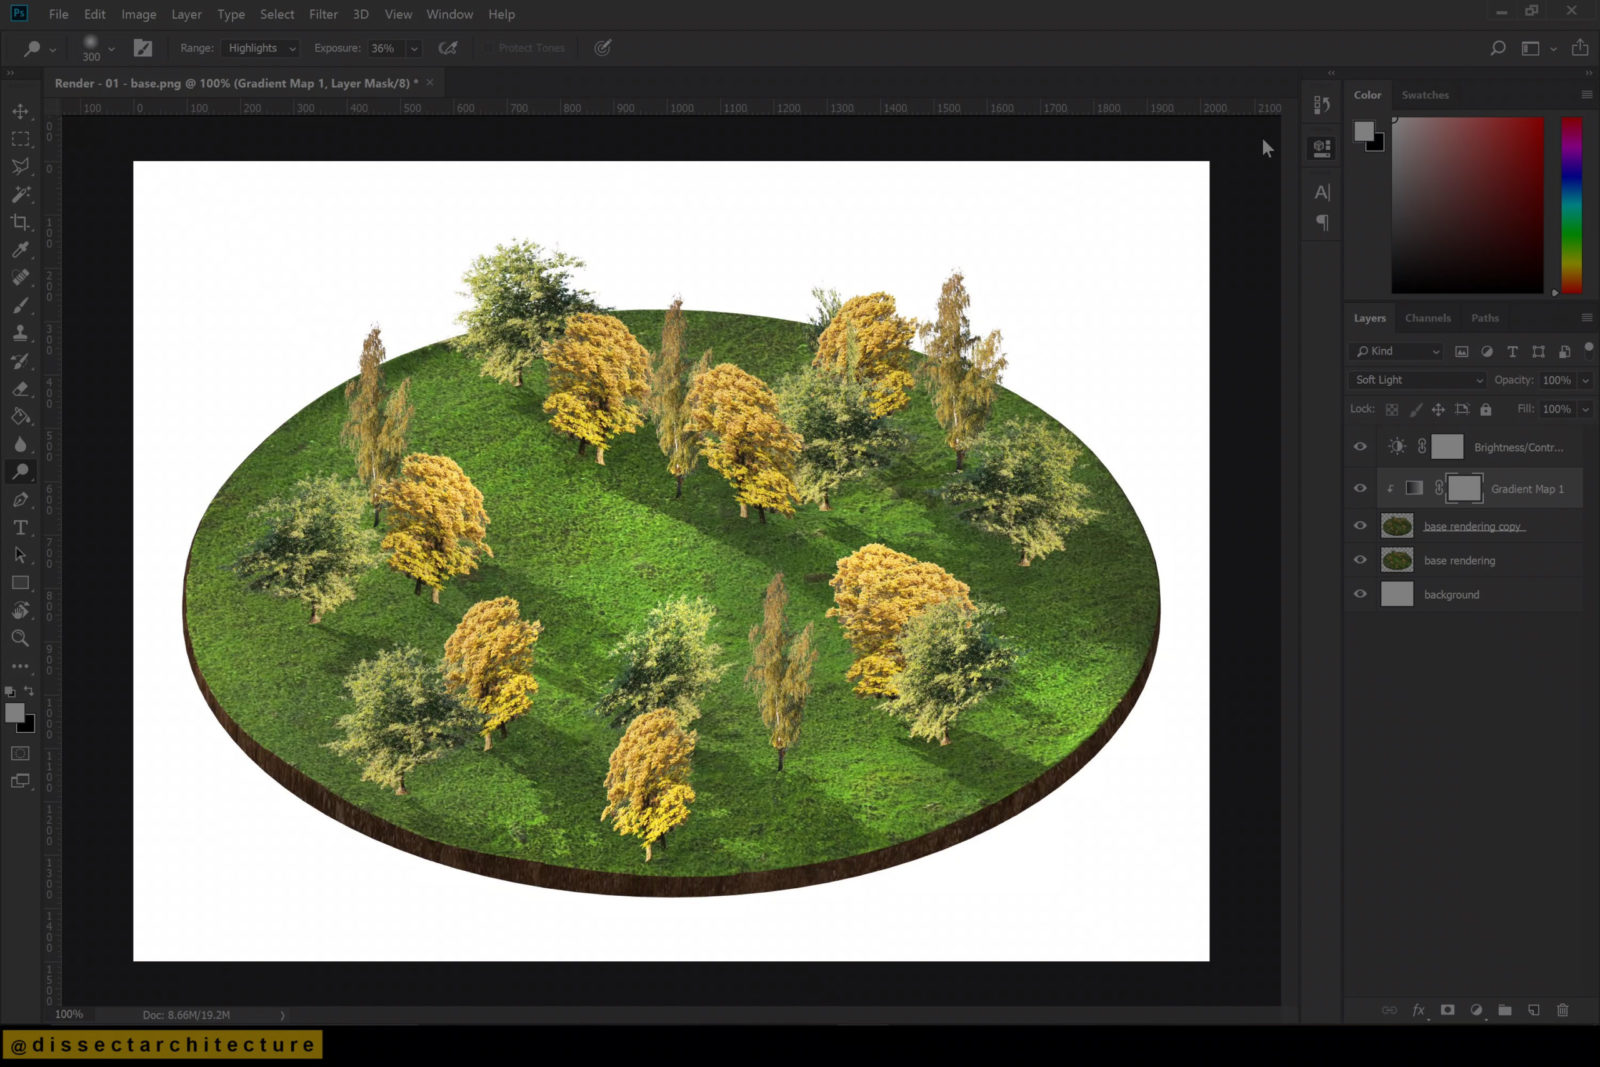
Change this gradient layer into a clipping mask and change the blending mode of the layer to Soft Light.
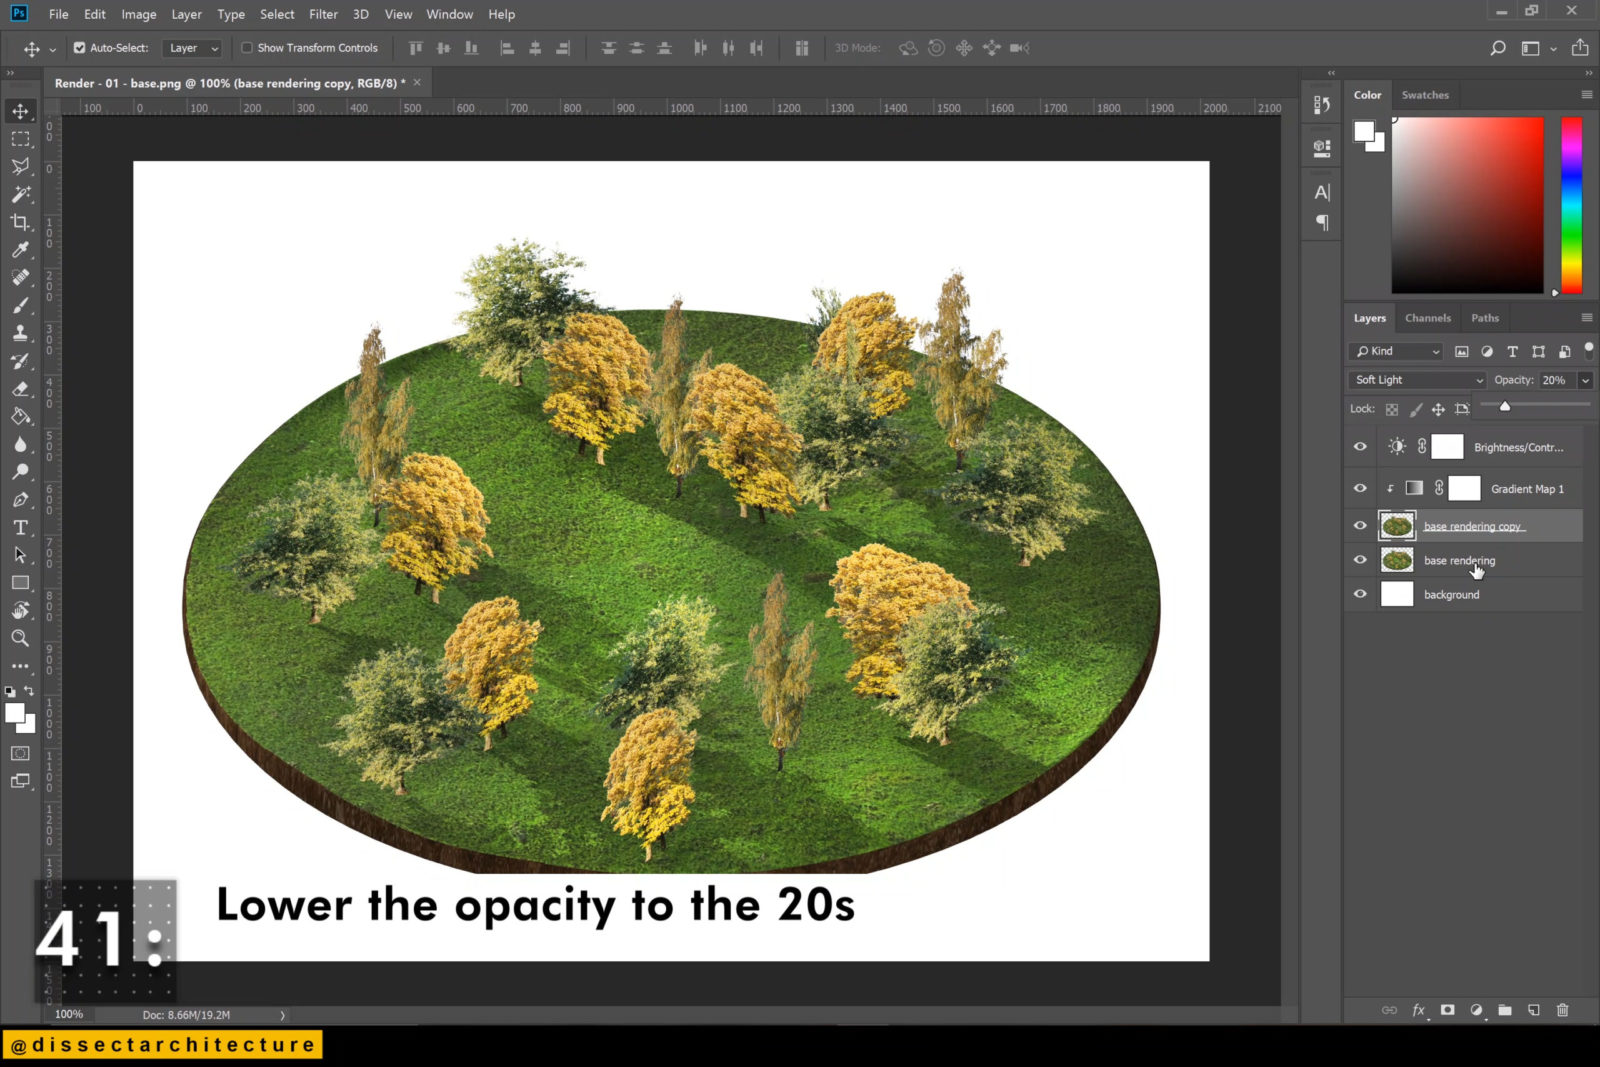
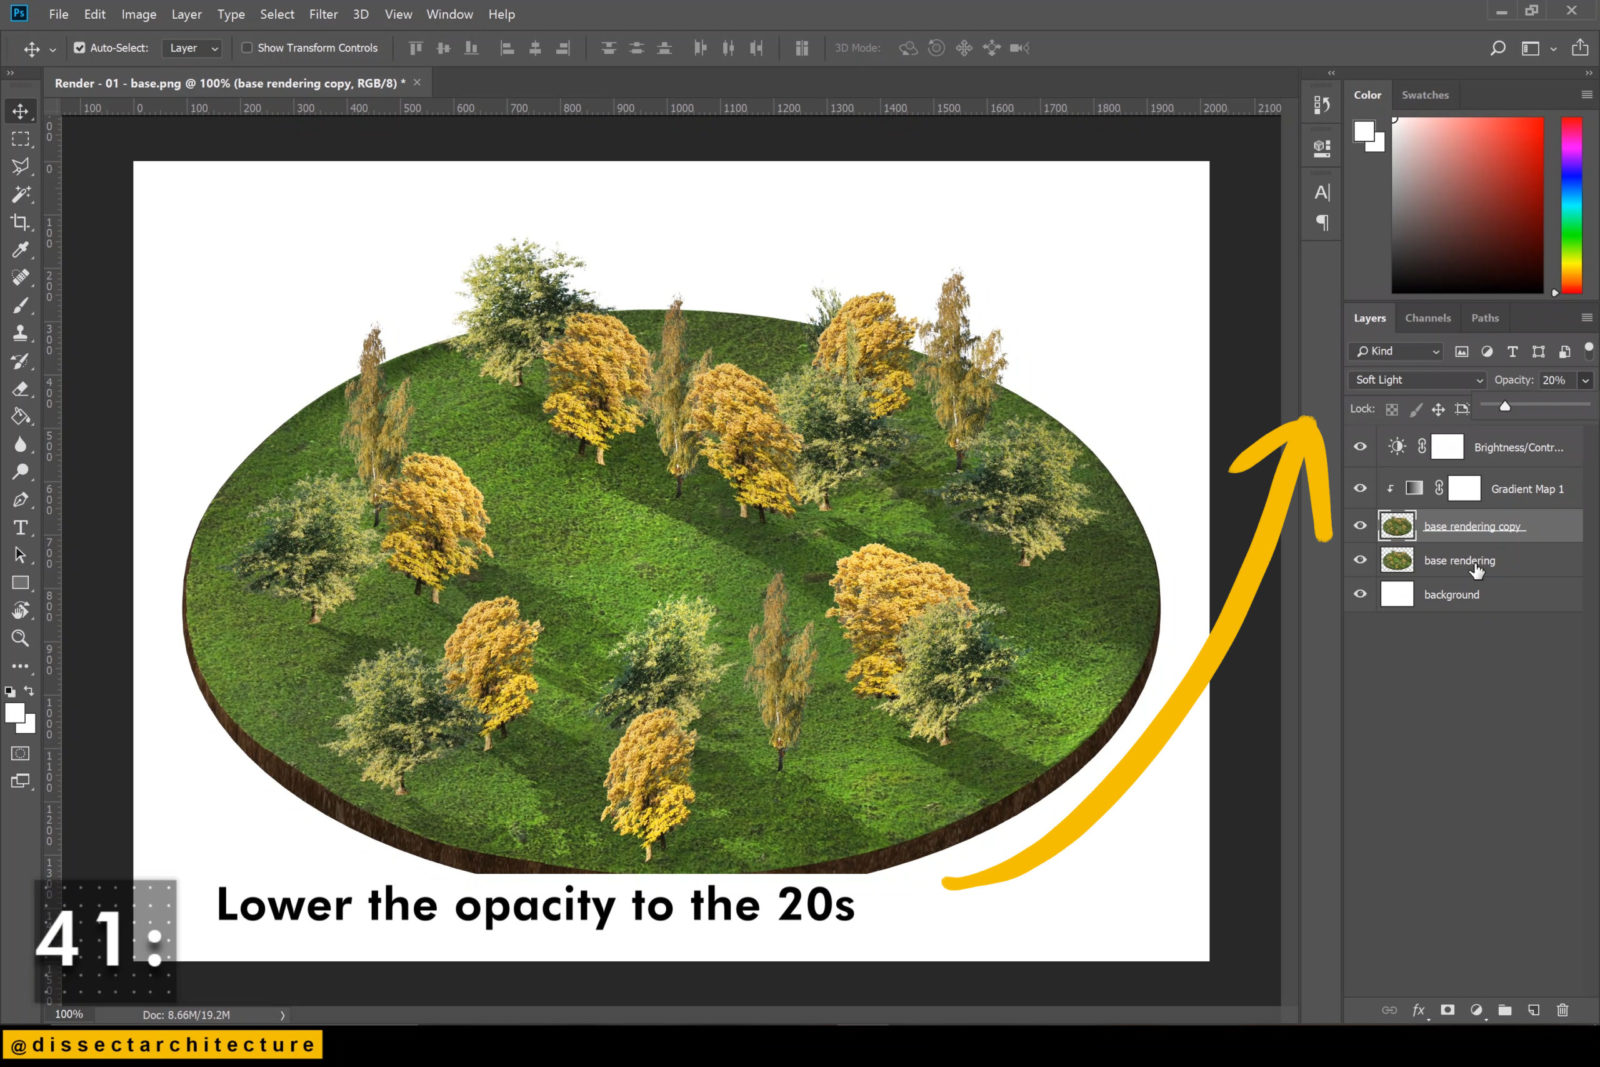
Step 41
Low the opacity of this layer to 20%.
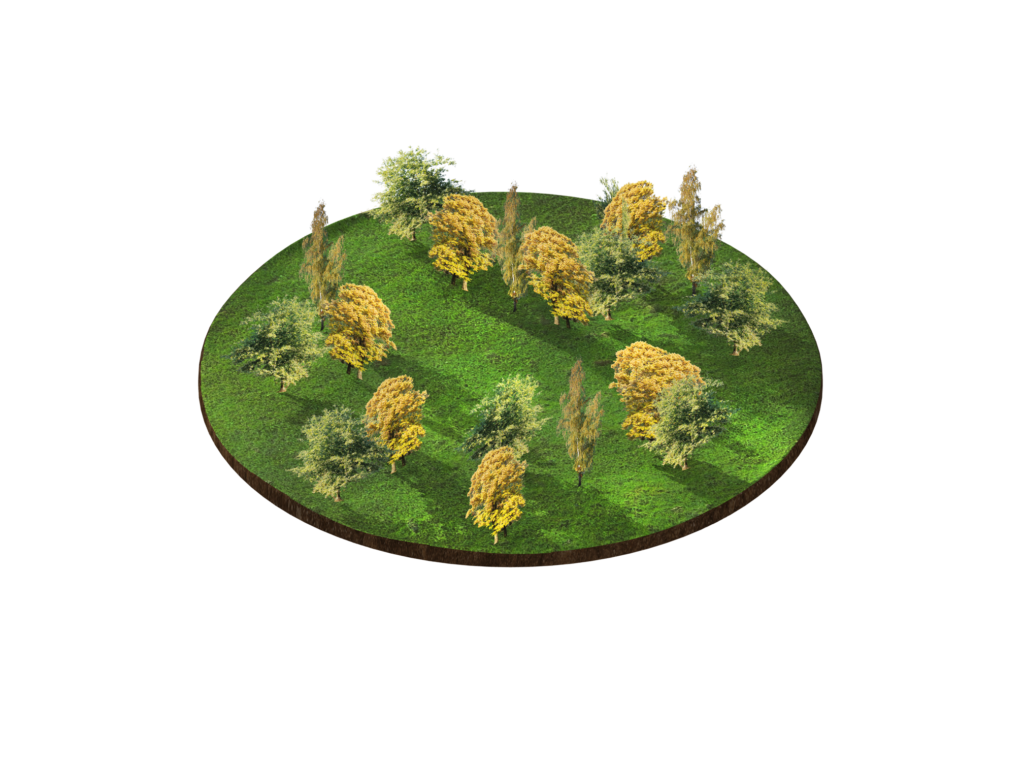
You have now worked through the process on how to create a landscape disk and can apply the same techniques to create more!