How to Add Textures in Rhino
Objective:
This is a continuation of the tutorial, How to Model an Axon in Rhino, and the 2nd part of the series. This tutorial will show you how to add textures in Rhino.
This texture mapping technique can be applied to various projects to achieve different results. The interior axon render can be created through the material library to add textures in Rhino.
Software Used:
Step 01
Open the 3D model that needs textues in Rhinoceros 3D.
Step 02
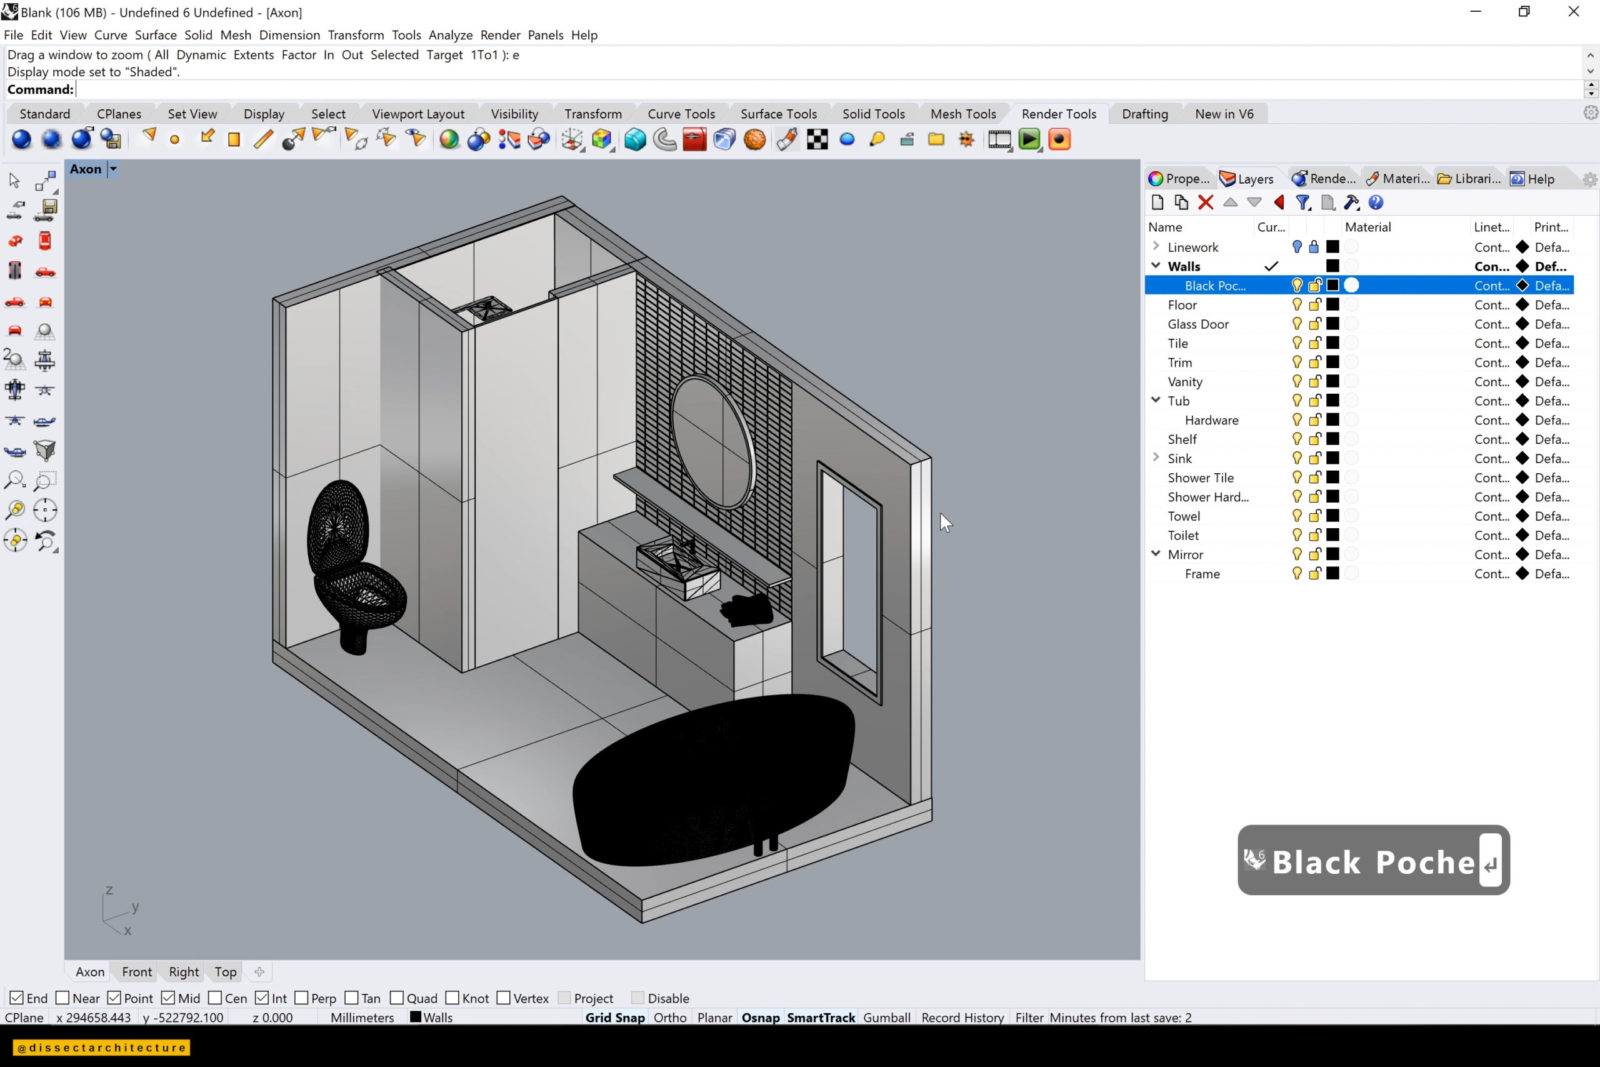
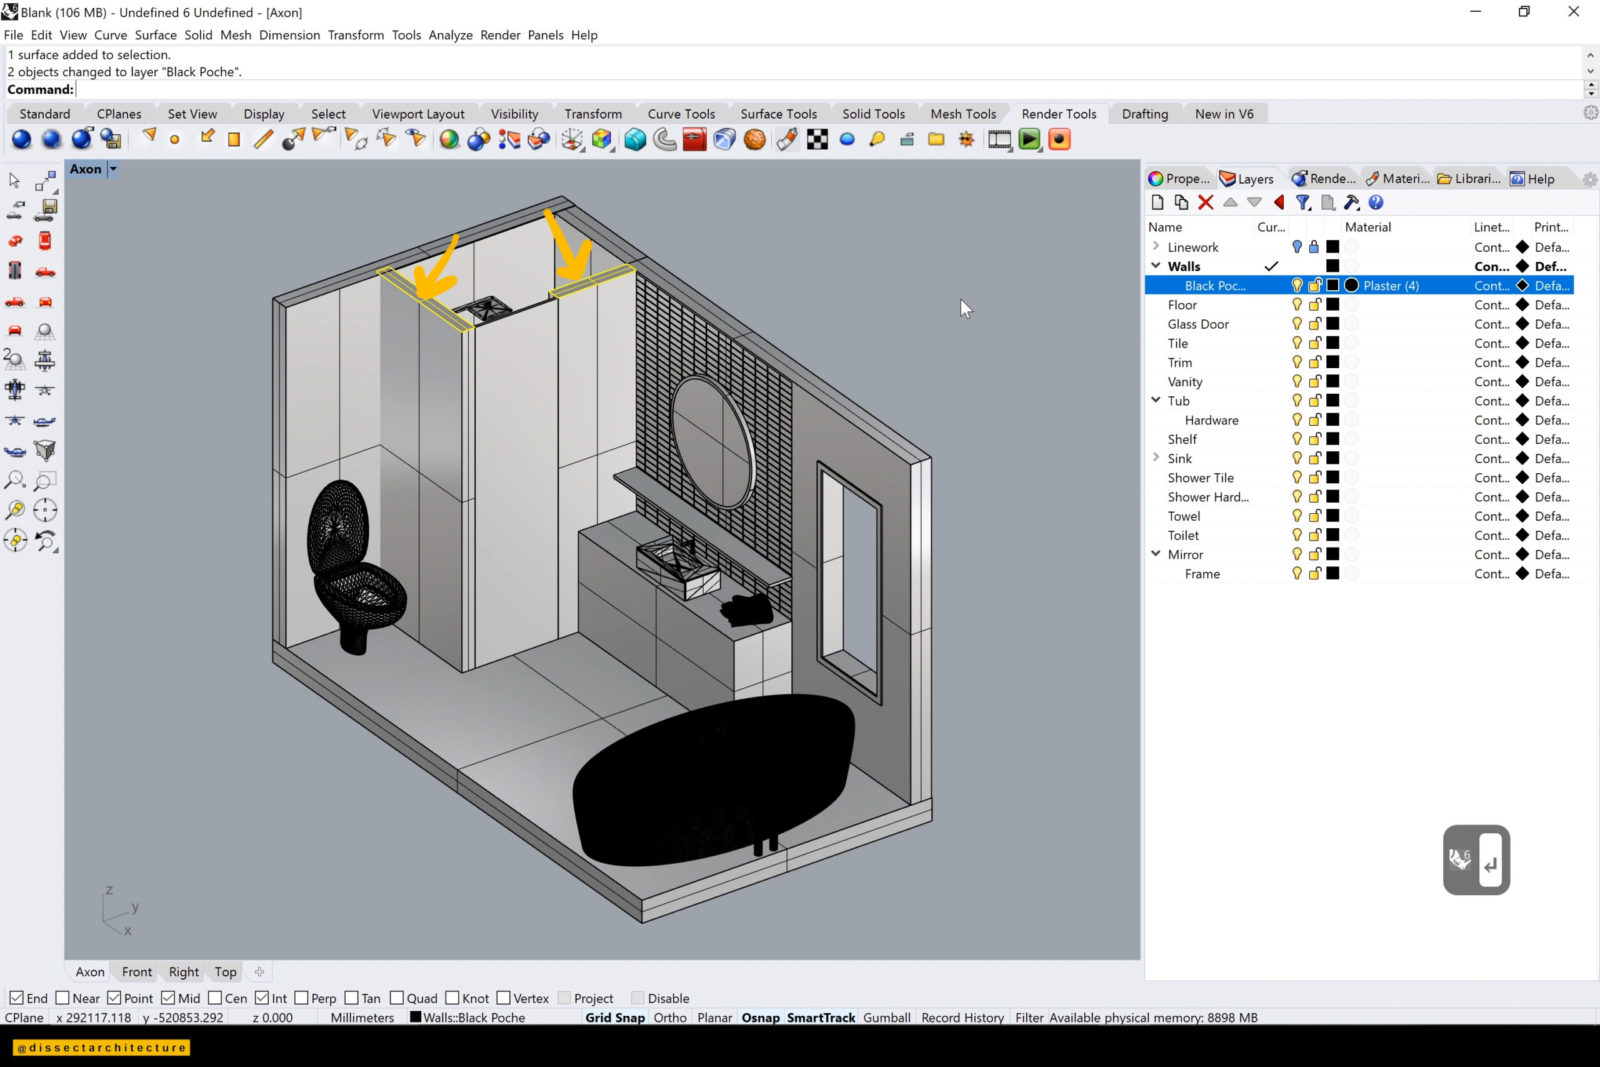
We will be adding a poche color to highlight the cut in the walls.
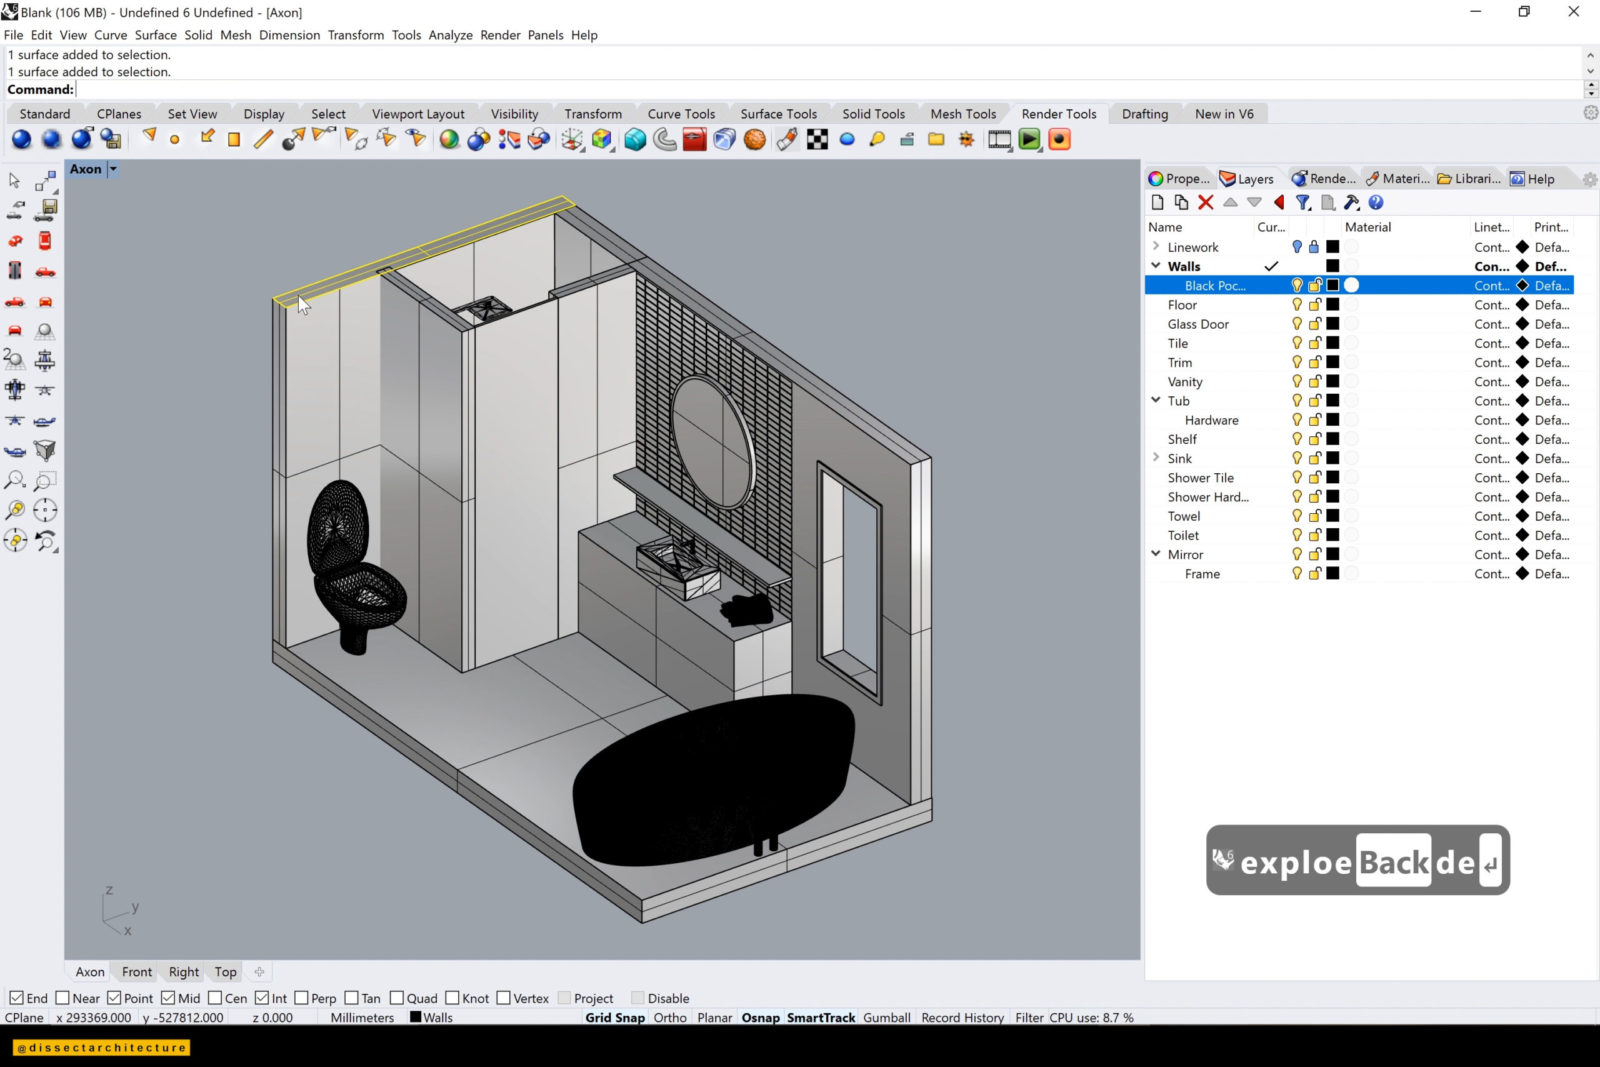
Add a new layer for the poche. As all surfaces of the wall are joined together, explode your 3D walls using the Explode command.
Step 03
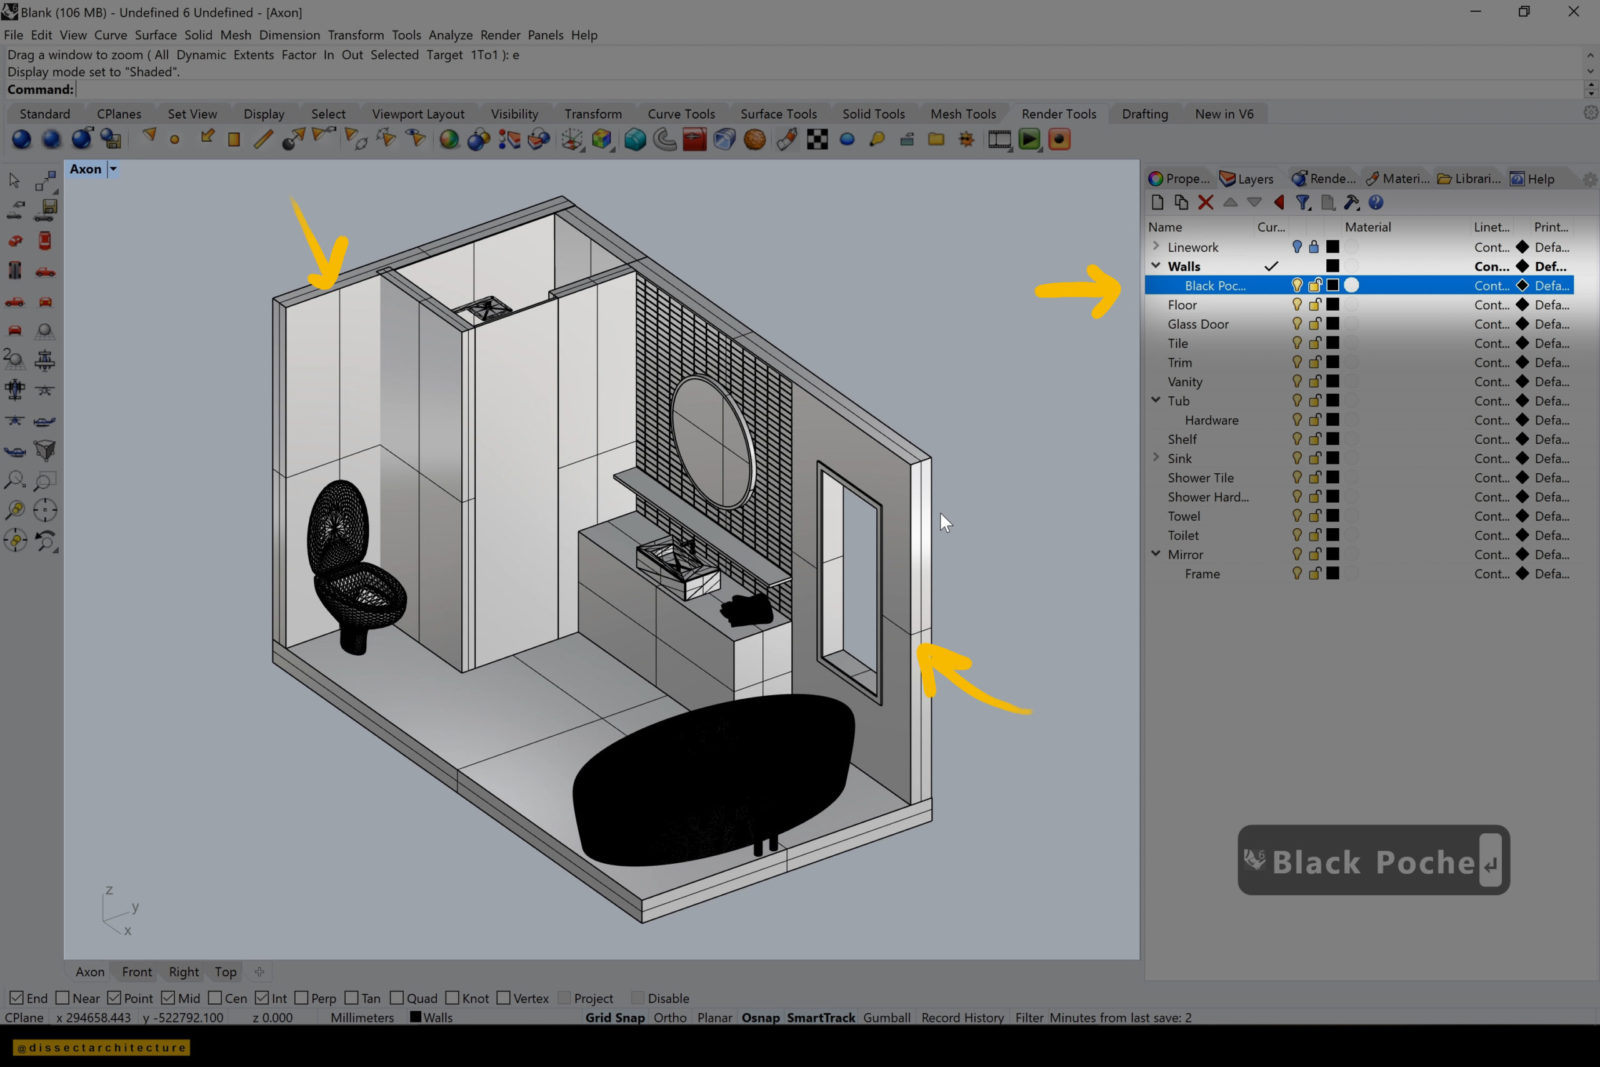
Then select the surfaces that become the designated poche. Change your selections to the newly-created poche layer by right-clicking the layer and selecting Change Object Layer.
Open the Layer Material Panel and set the layer’s render color material to black.
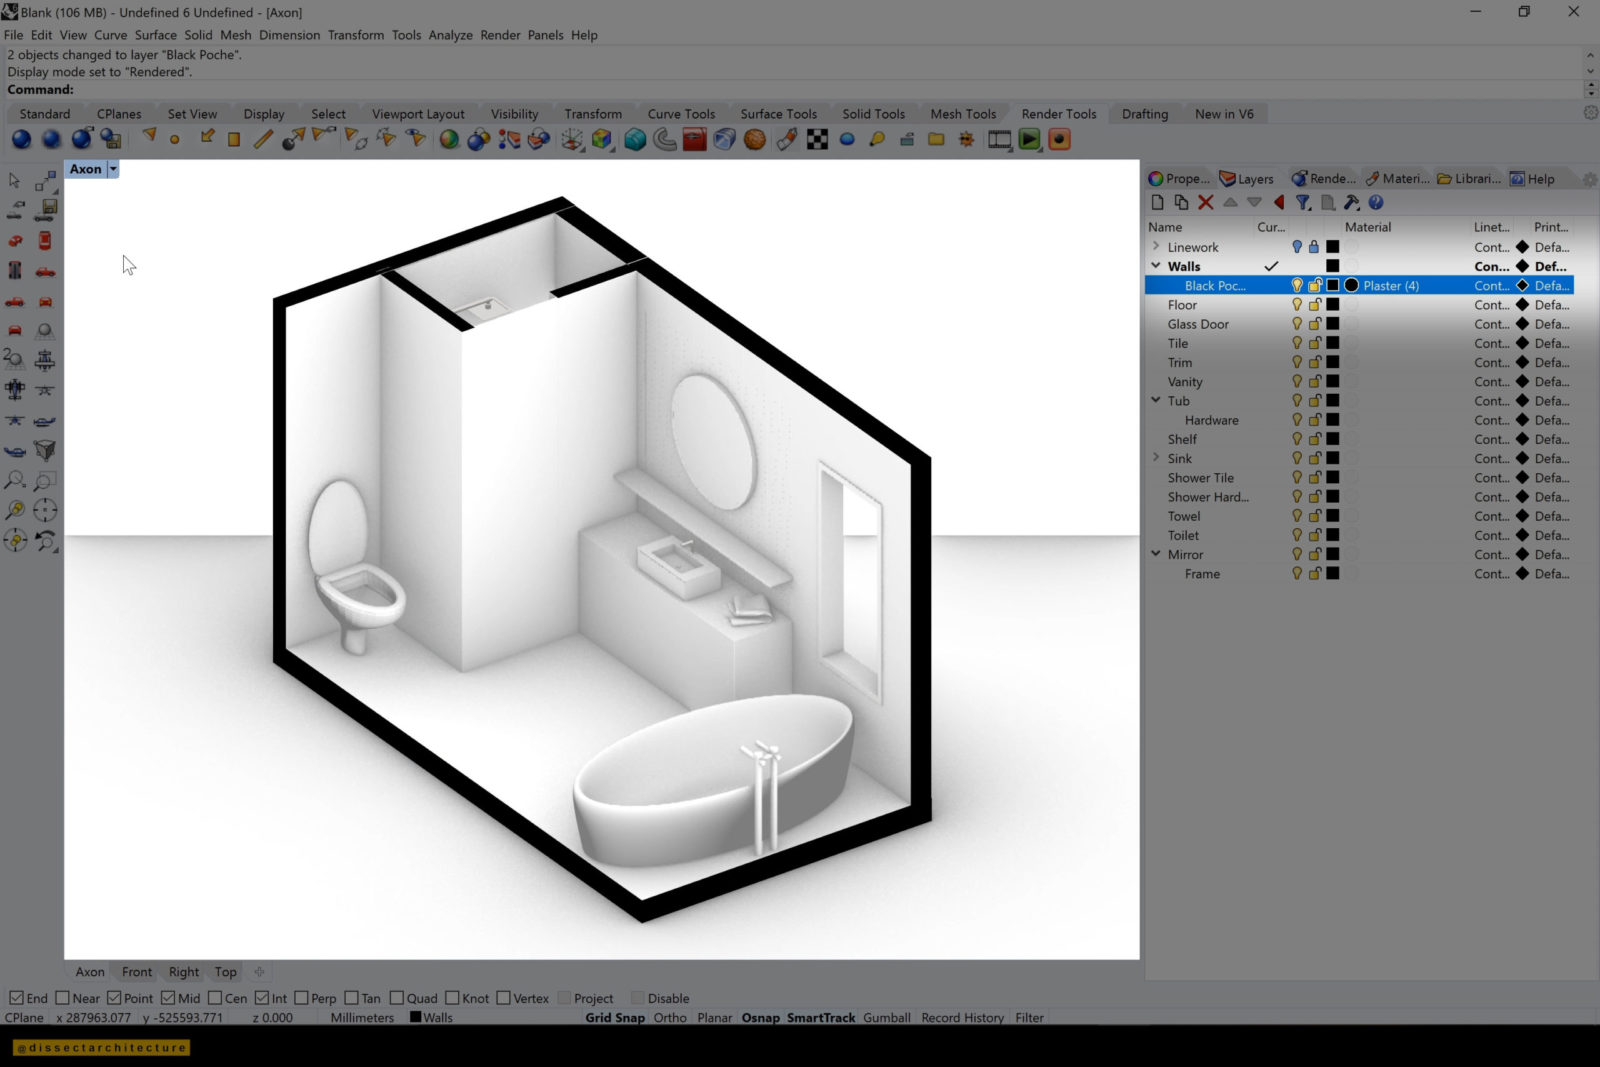
Step 04
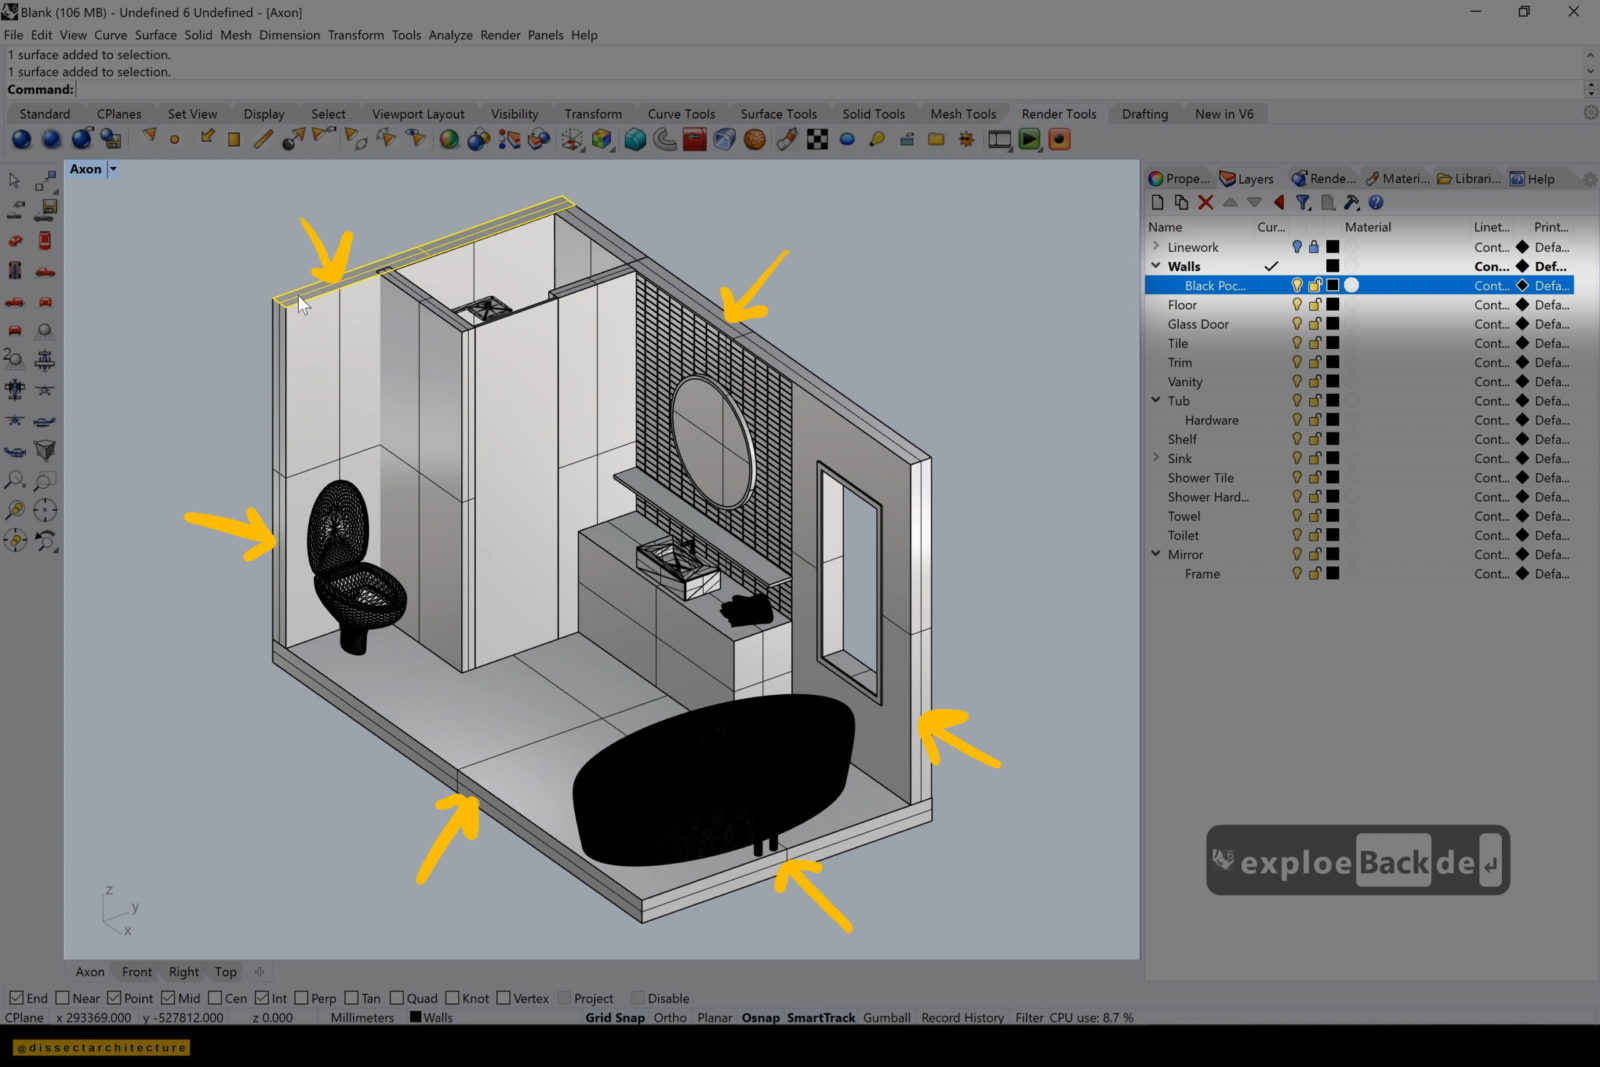
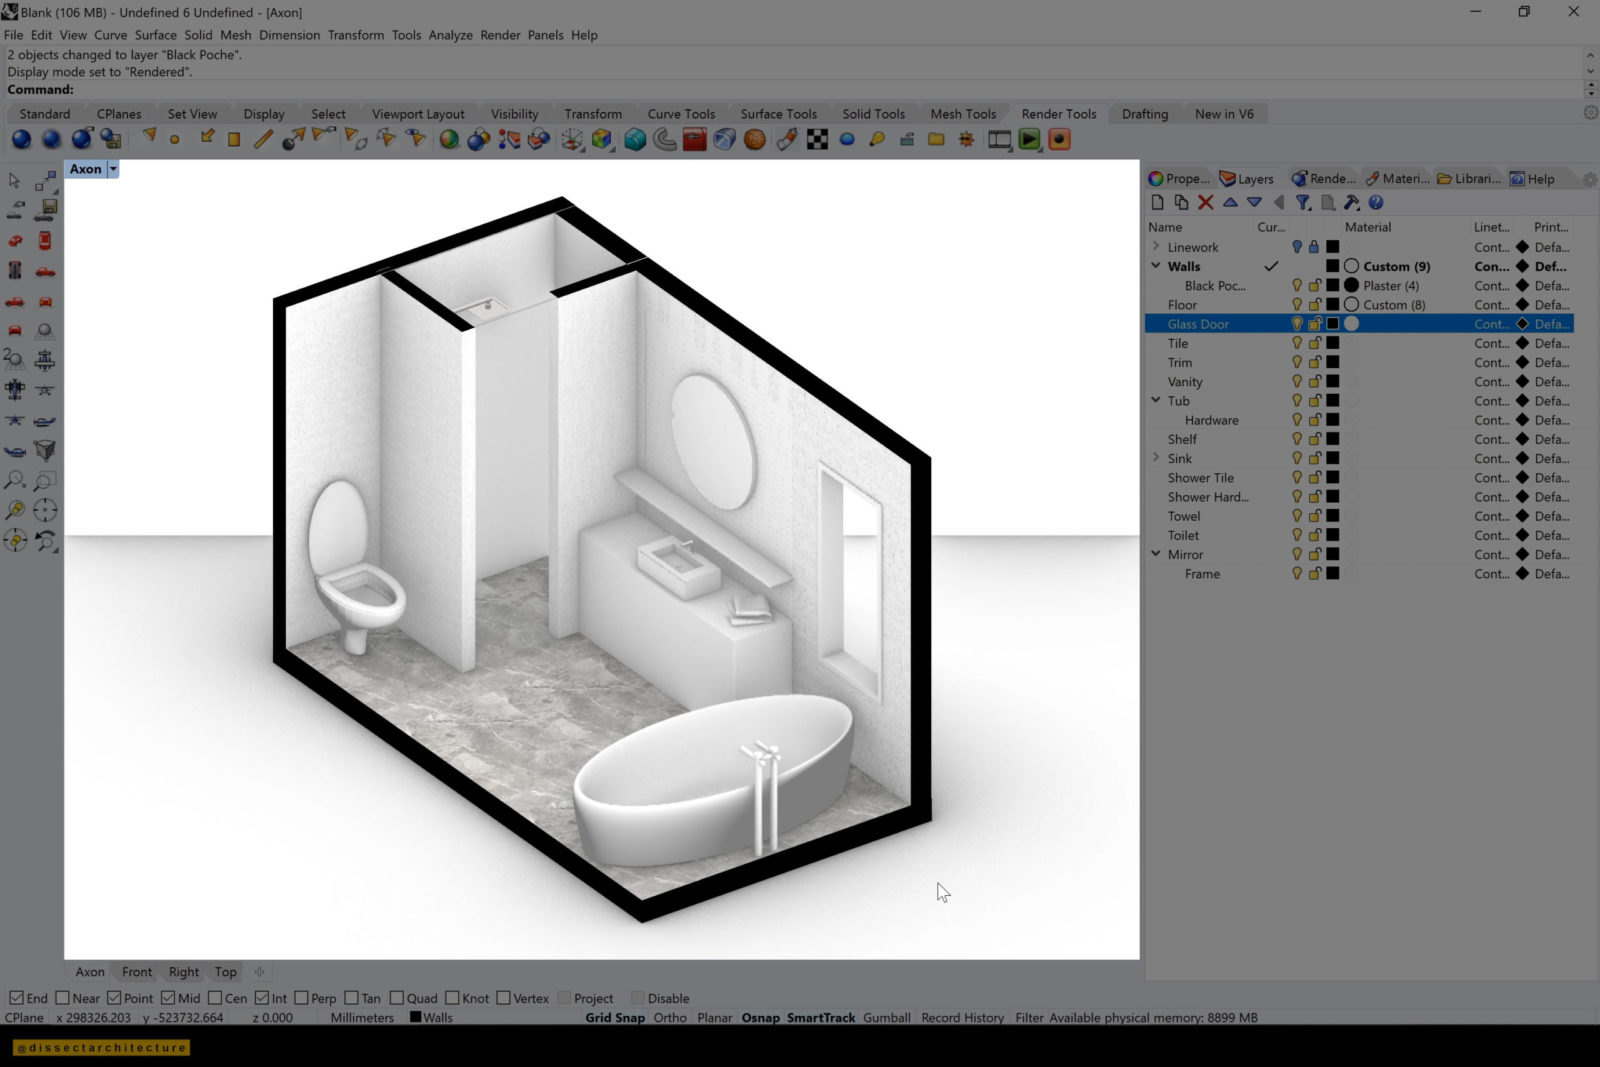
Continue the process until you have changed all the surfaces that will become the poche.
Afterwards set the view to Render and you will see the now added poche.
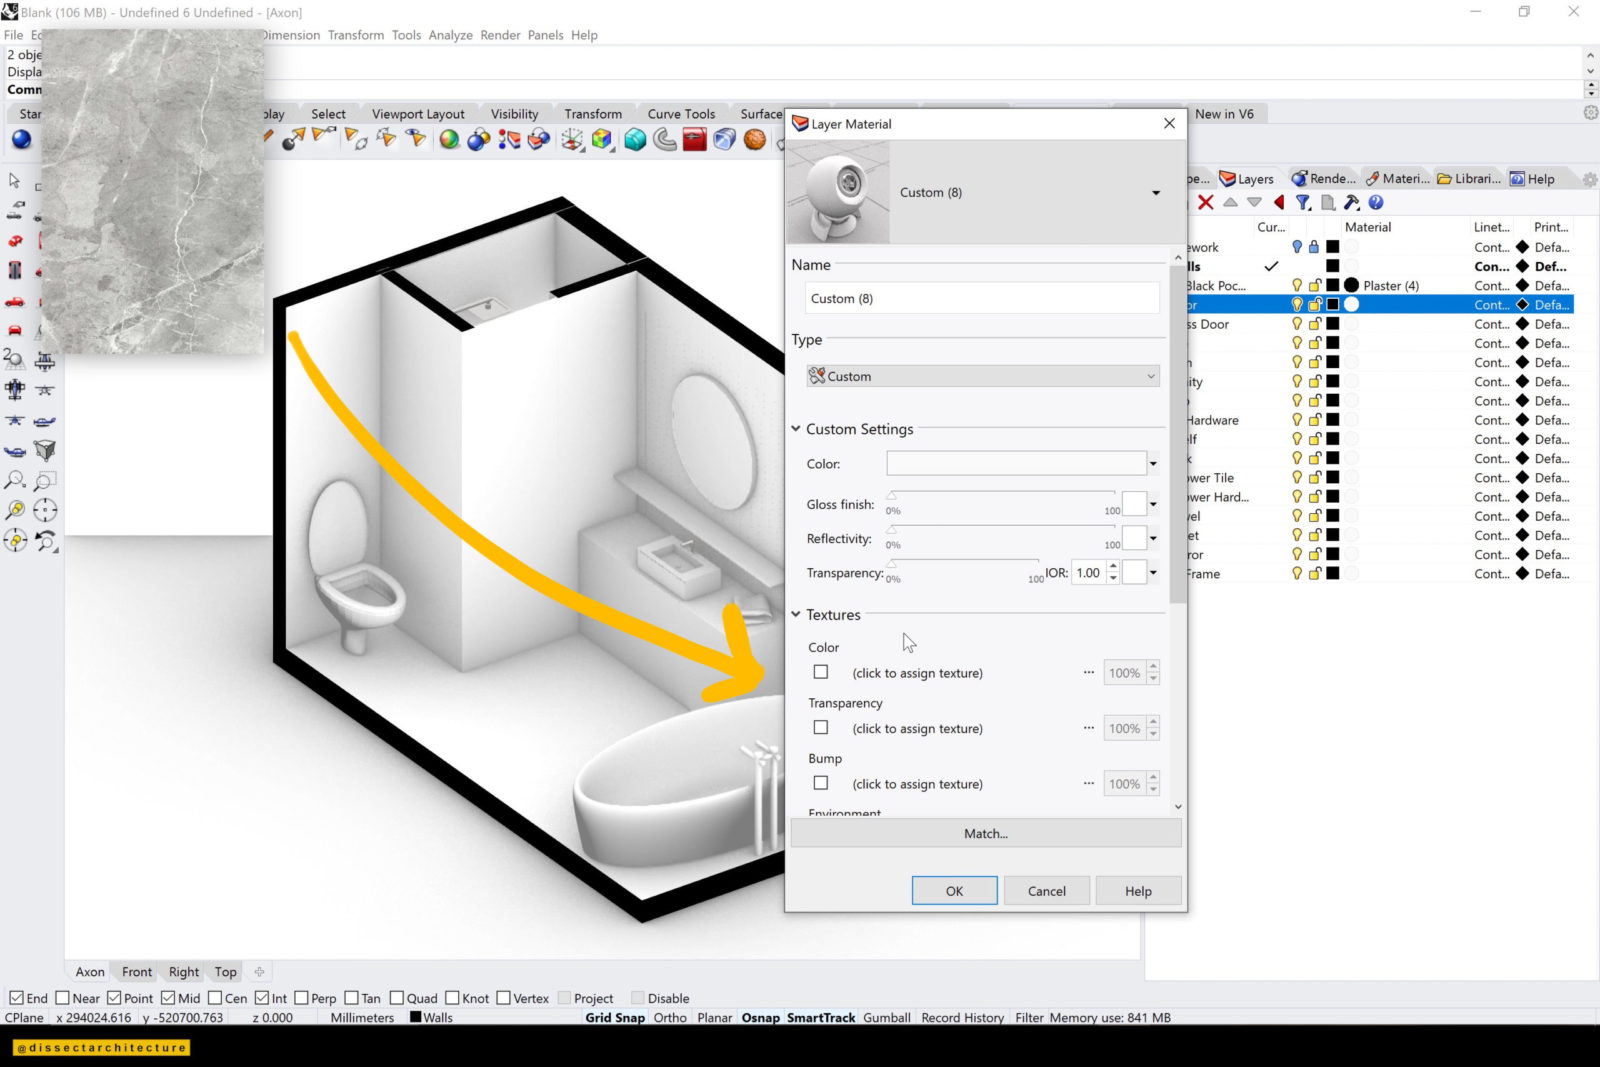
Step 05
We will now start the process depicting how to add textures in Rhino!
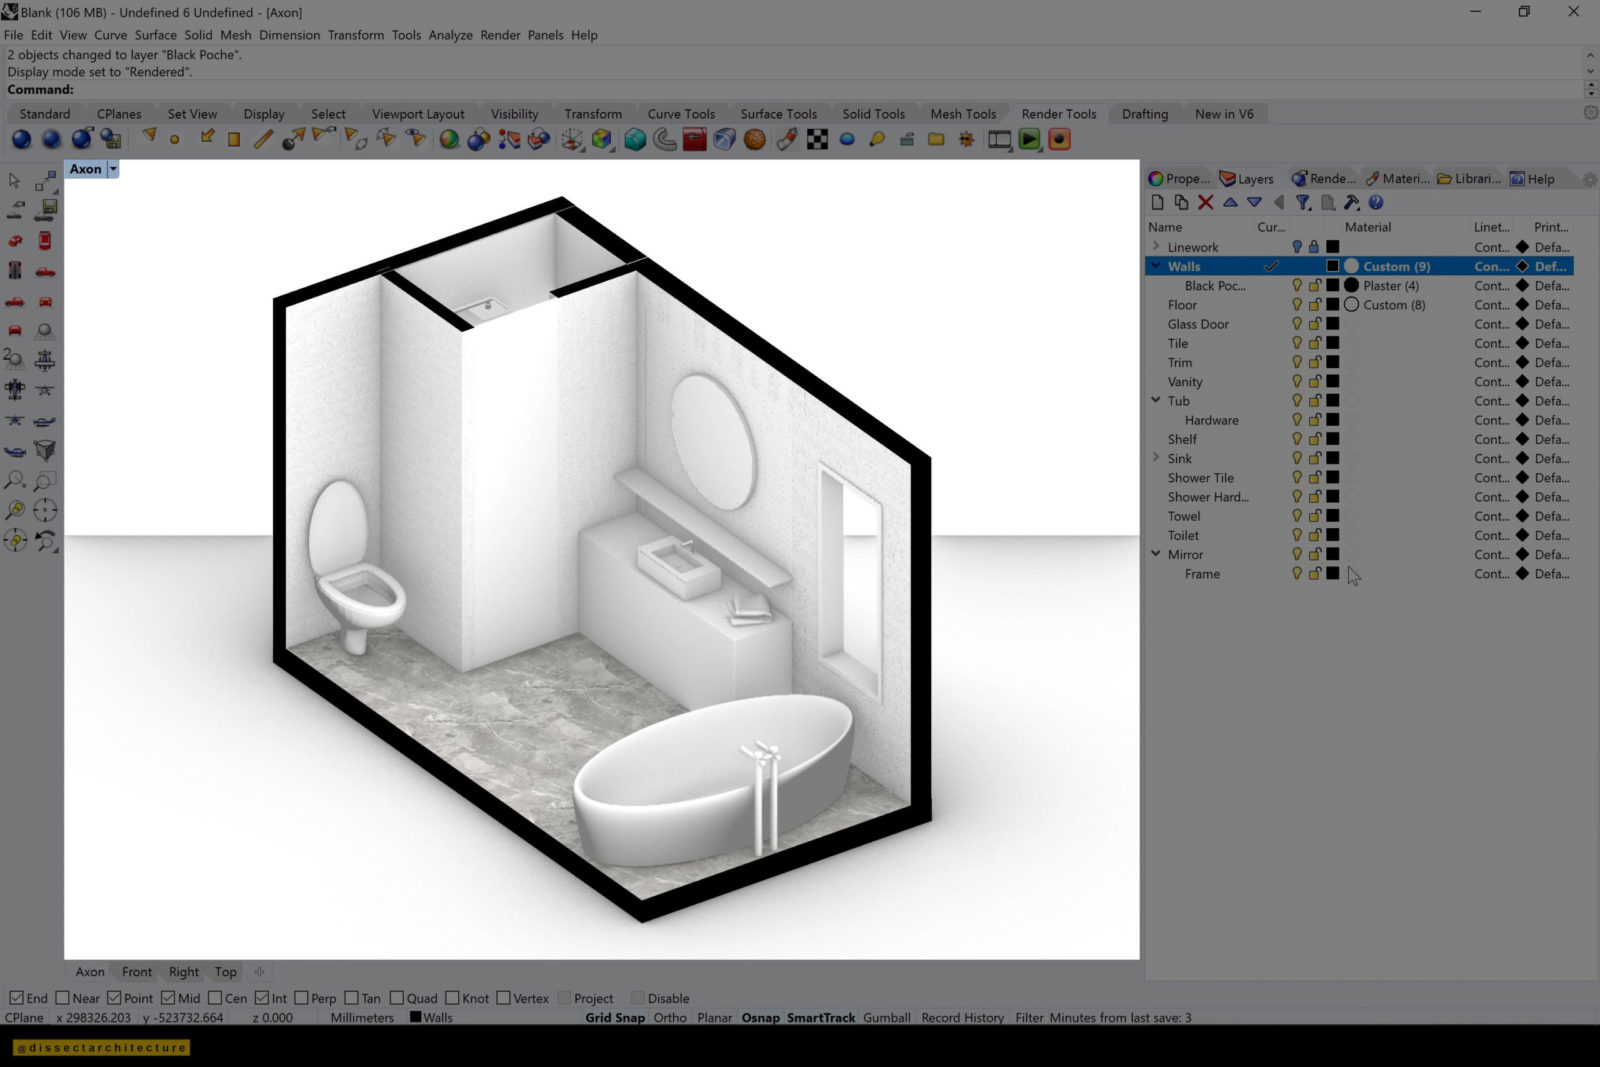
I am starting with the floor. Double-click on the Floor layer and open the Layer Material Panel. Then, change the type of material to Custom and click Assign Texture next to the Color option. This will open the File Explorer and you can go ahead and select the image of the material you’d like assign it – I am adding a concrete texture.
Afterwards, click OK and you will see the texture applied to the floor now.

Step 06
Now I am adding a plaster texture to the walls using the previous technique.
The walls now have a slight plaster texture.

Step 07
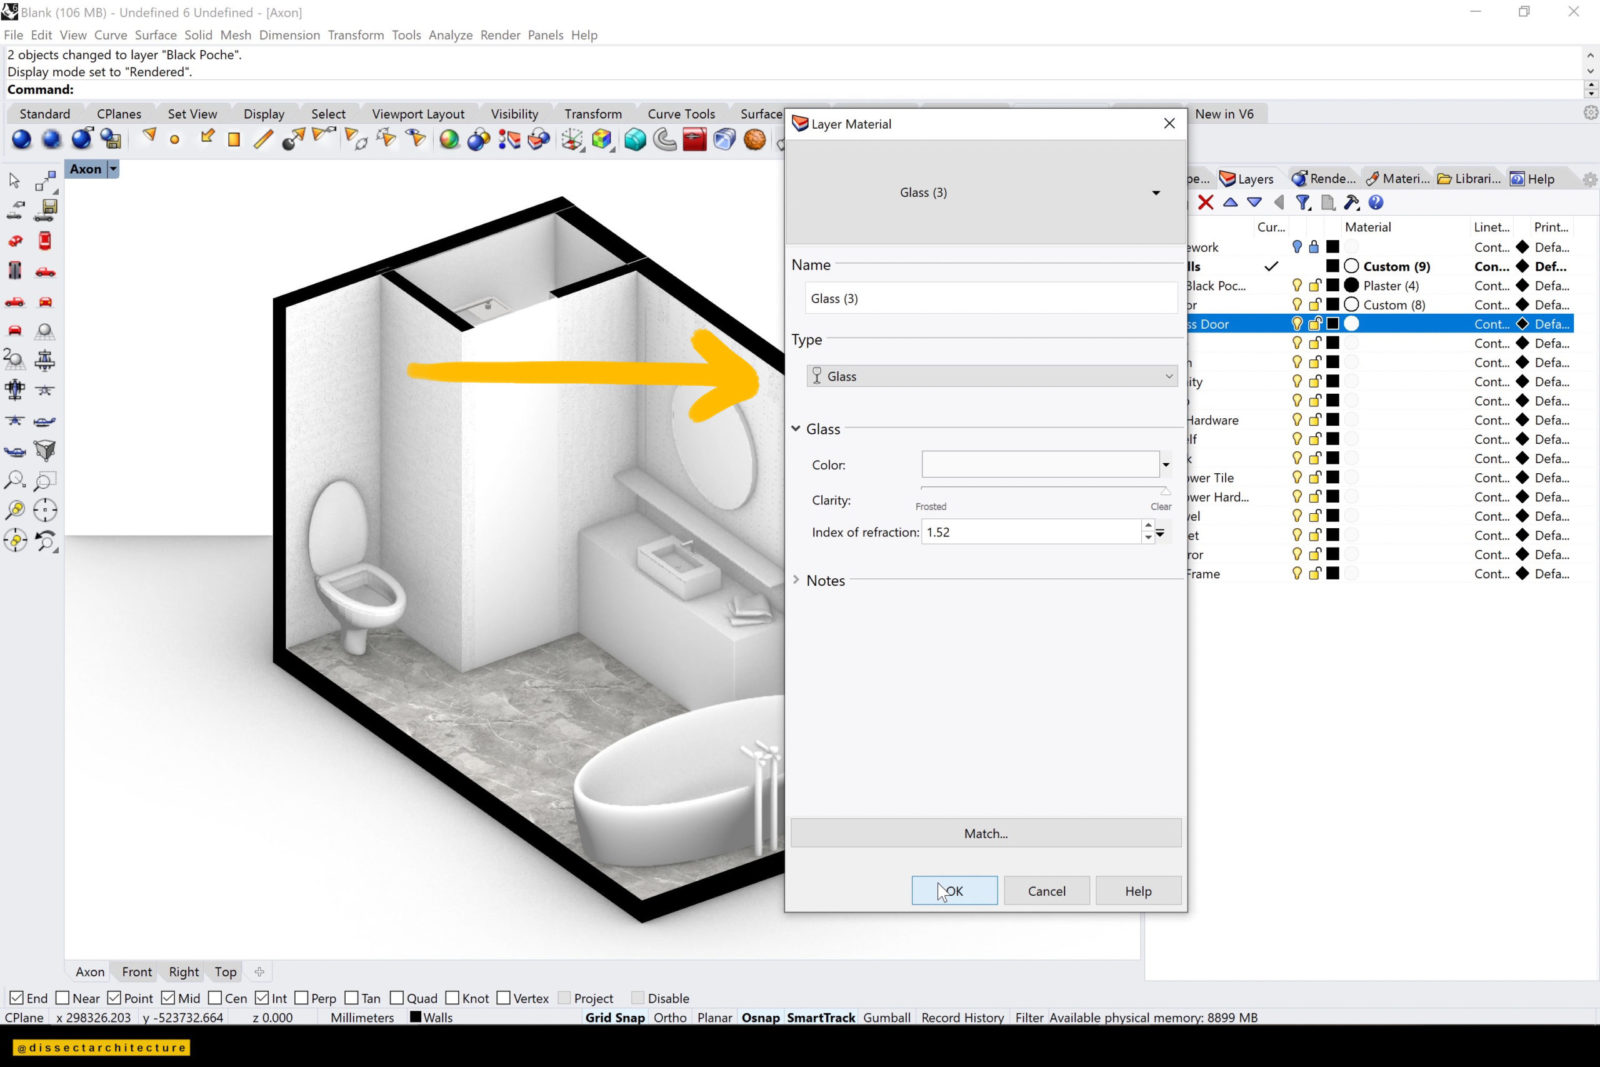
Next, we will add the glass materiality to the shower door.
Double-Click on the layer with glass shower door to open the Layer Material Panel then under type select Glass. Then click OK.
Step 08
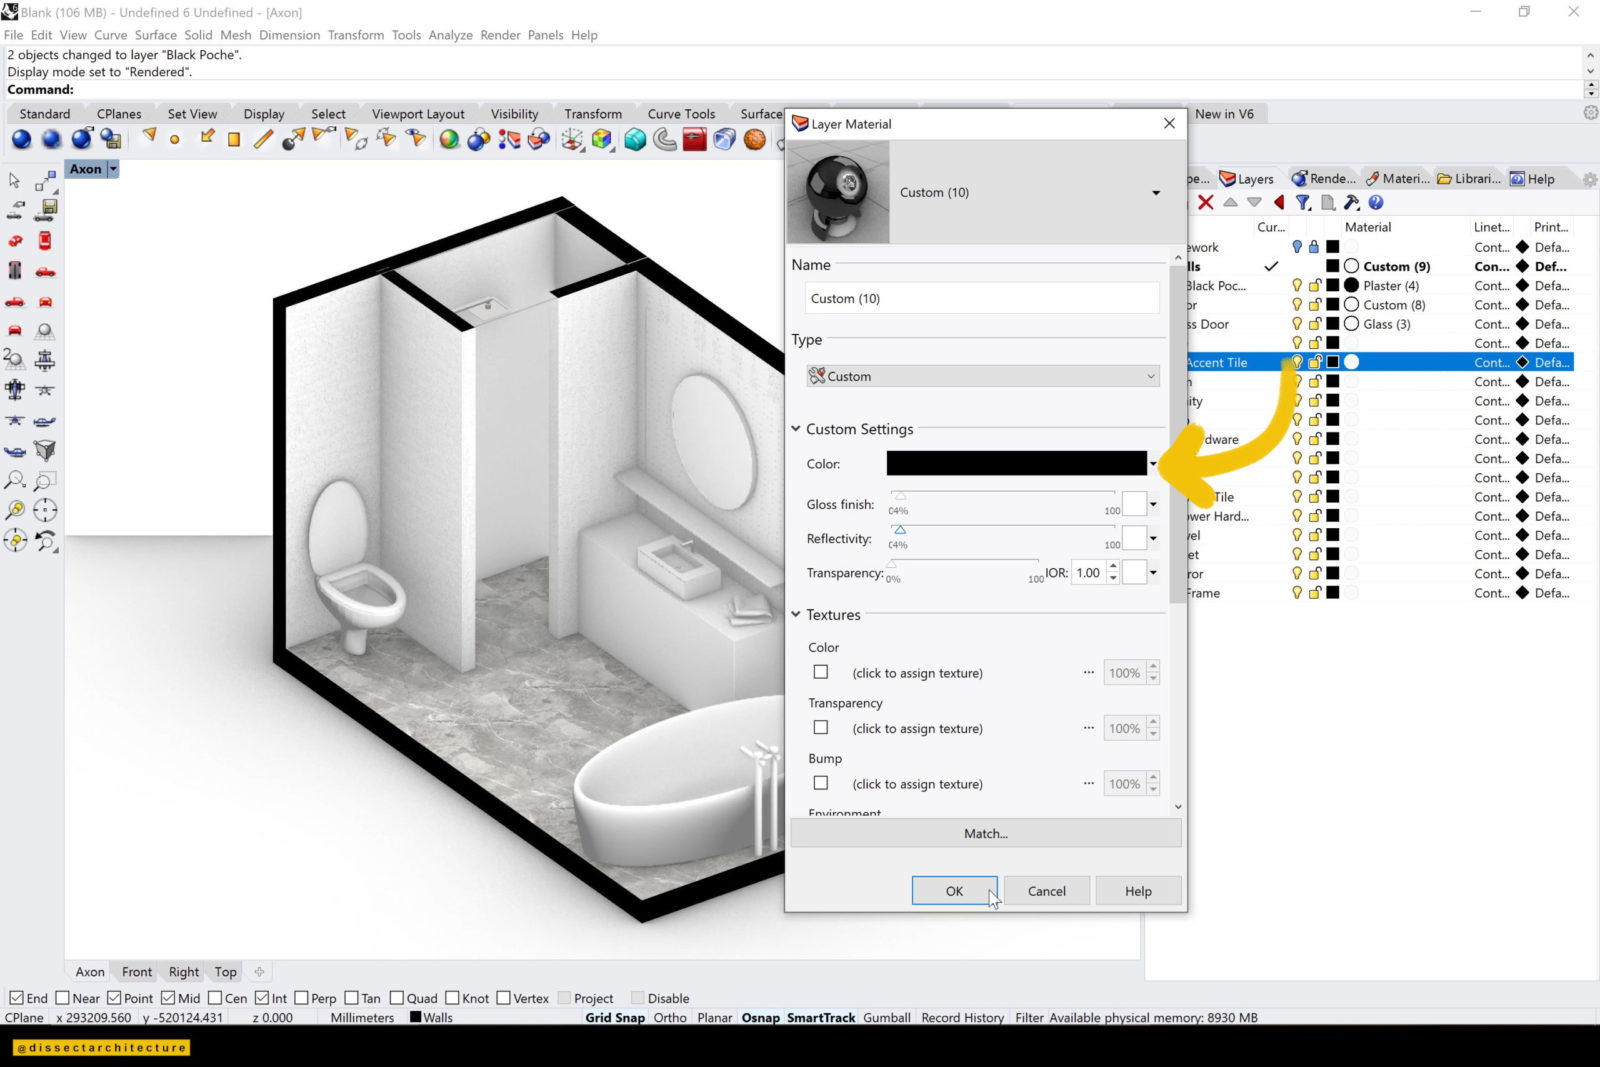
Then, I am adding materiality to the tile on the wall.
First I created a new layer which will become the layer for the Accent tile. I opened the Layer Material Panel and kept the material type to plaster and changed the color to black. Afterwards, I increased the Gloss finish to 4% and Reflectivity to 4%. There are no objects are in this layer yet, so I am selecting the tiles that will become the accent tile and changing them into the new layer.

Step 09
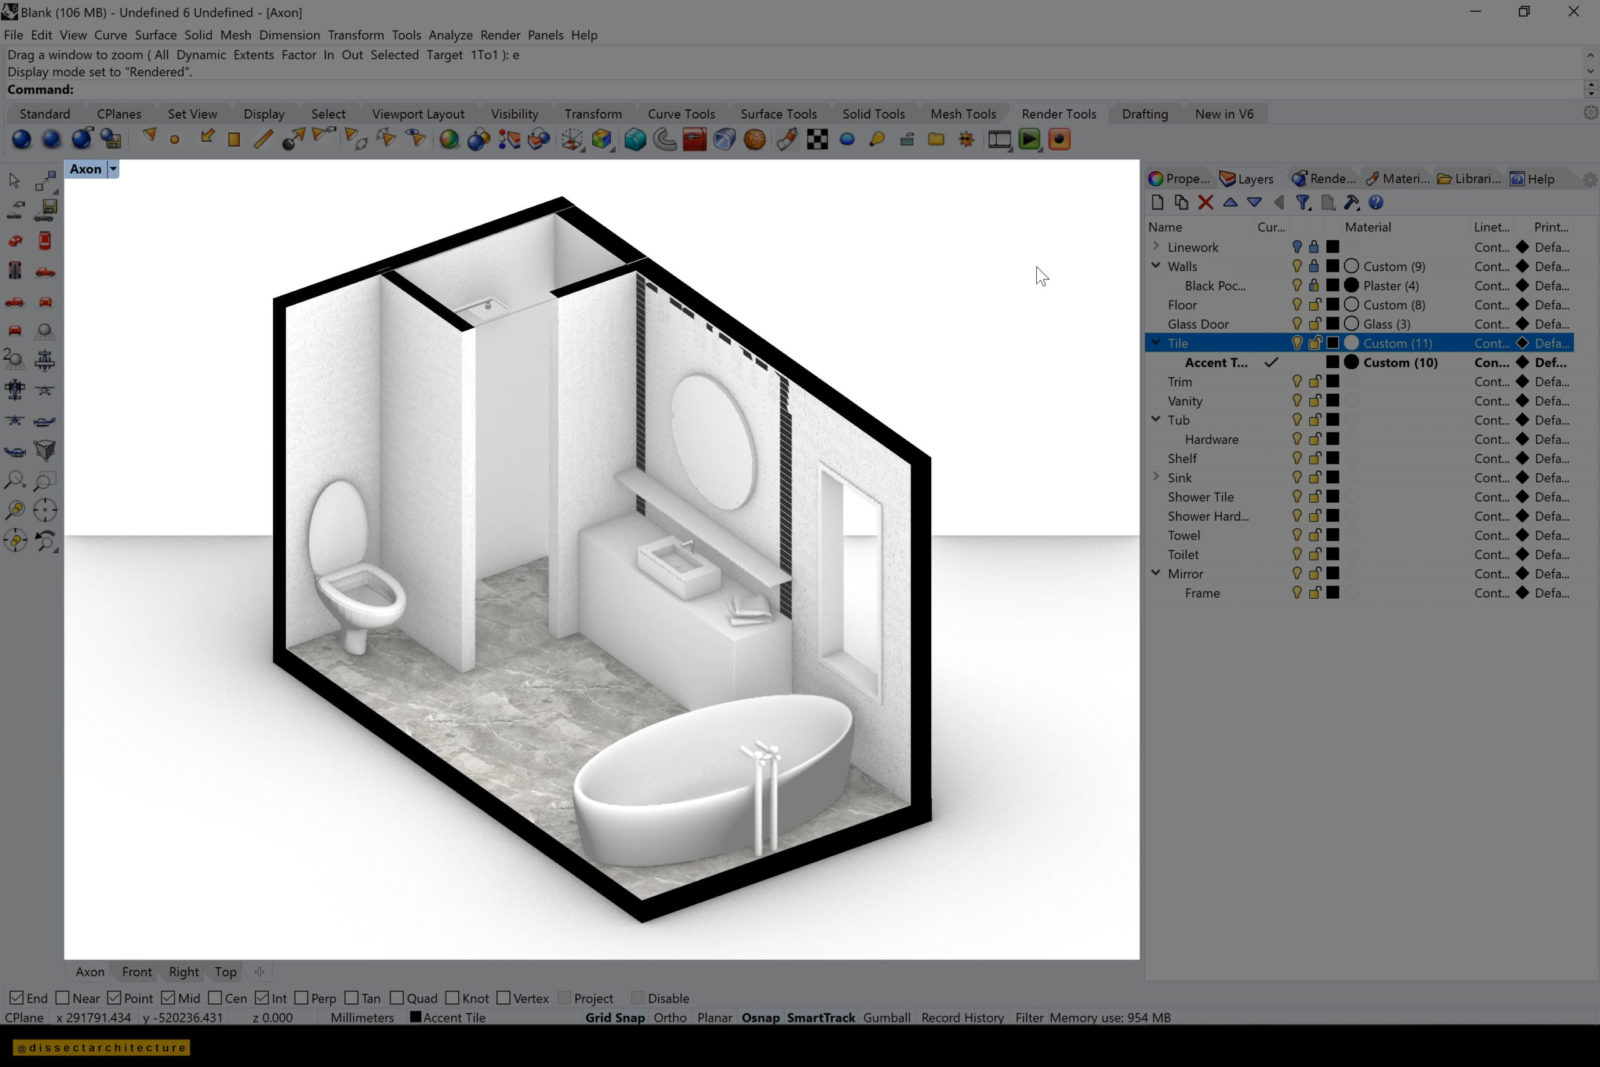
The rest of the tiles will have a white gloss finish. Again, I am opening the Layer Material Panel, changing the type of the material to custom, and then adjusting the Gloss Finish to 5% and Reflectivity to 4%.

Step 10
Then I am adjusting the materiality of the window’s trim, following the same technique as before. This time I am changing the material type to Metal, and changed the color to Steel, I am also adjusting the amount of roughness.

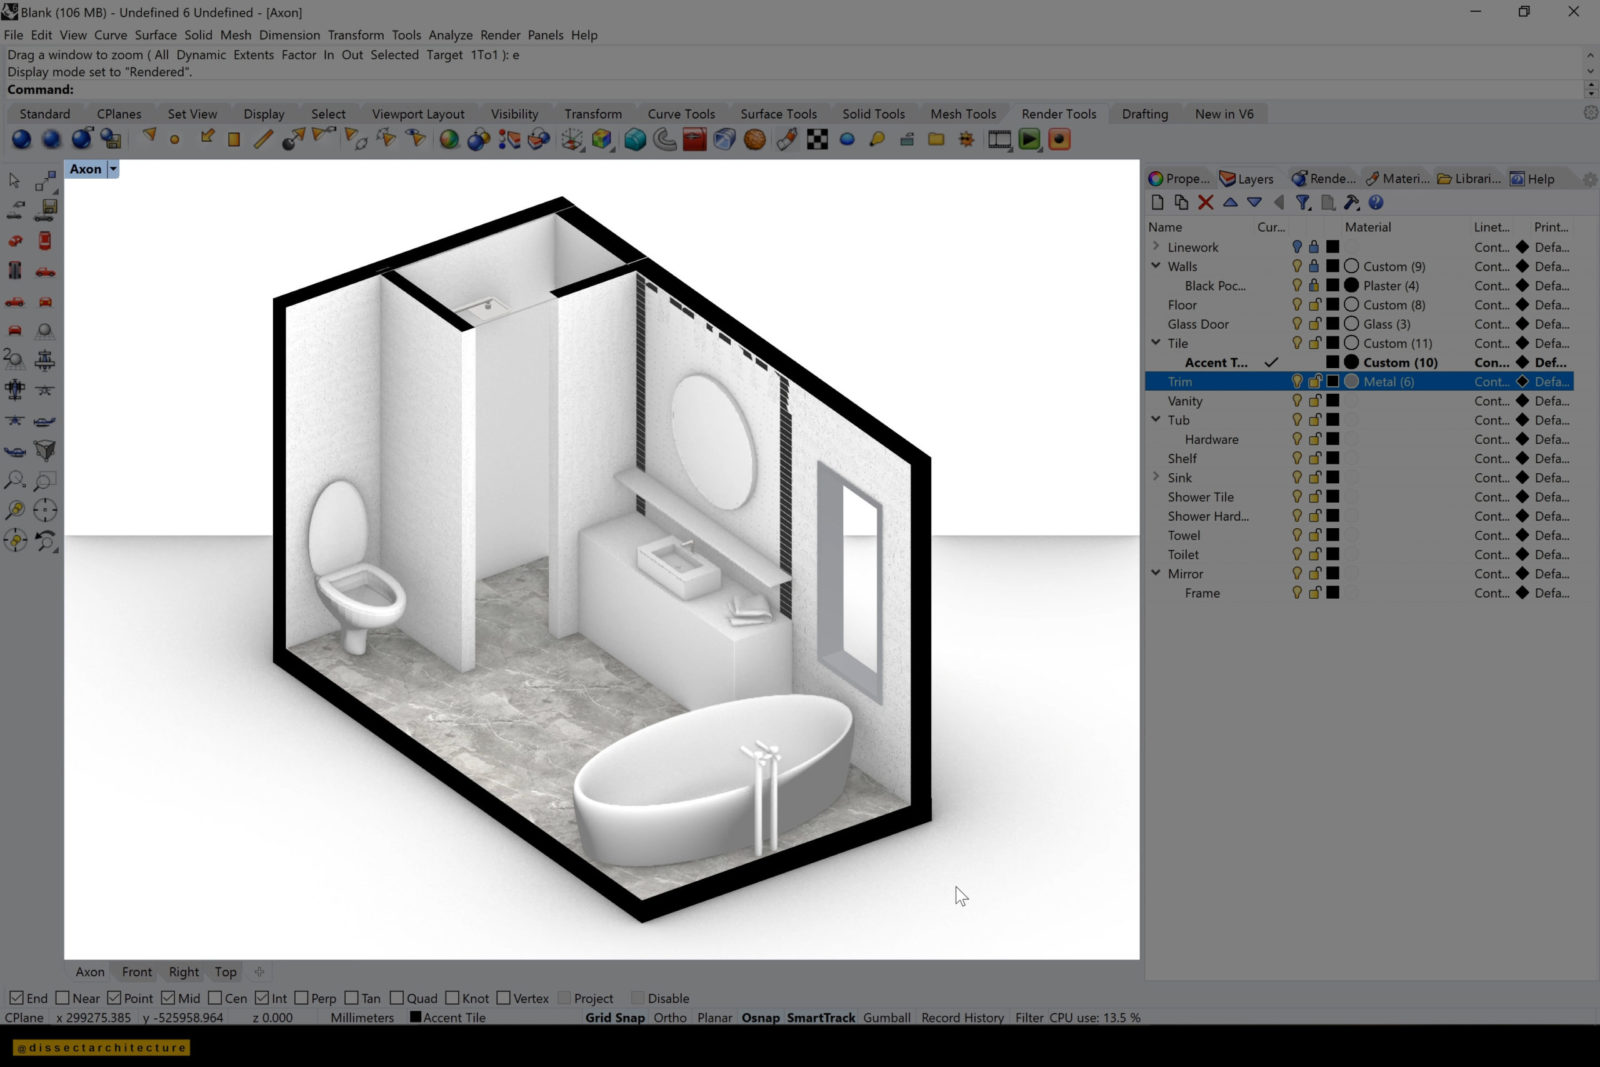
Step 11
I am continuing the process for the rest of the objects that need textures – continuing with the vanity.
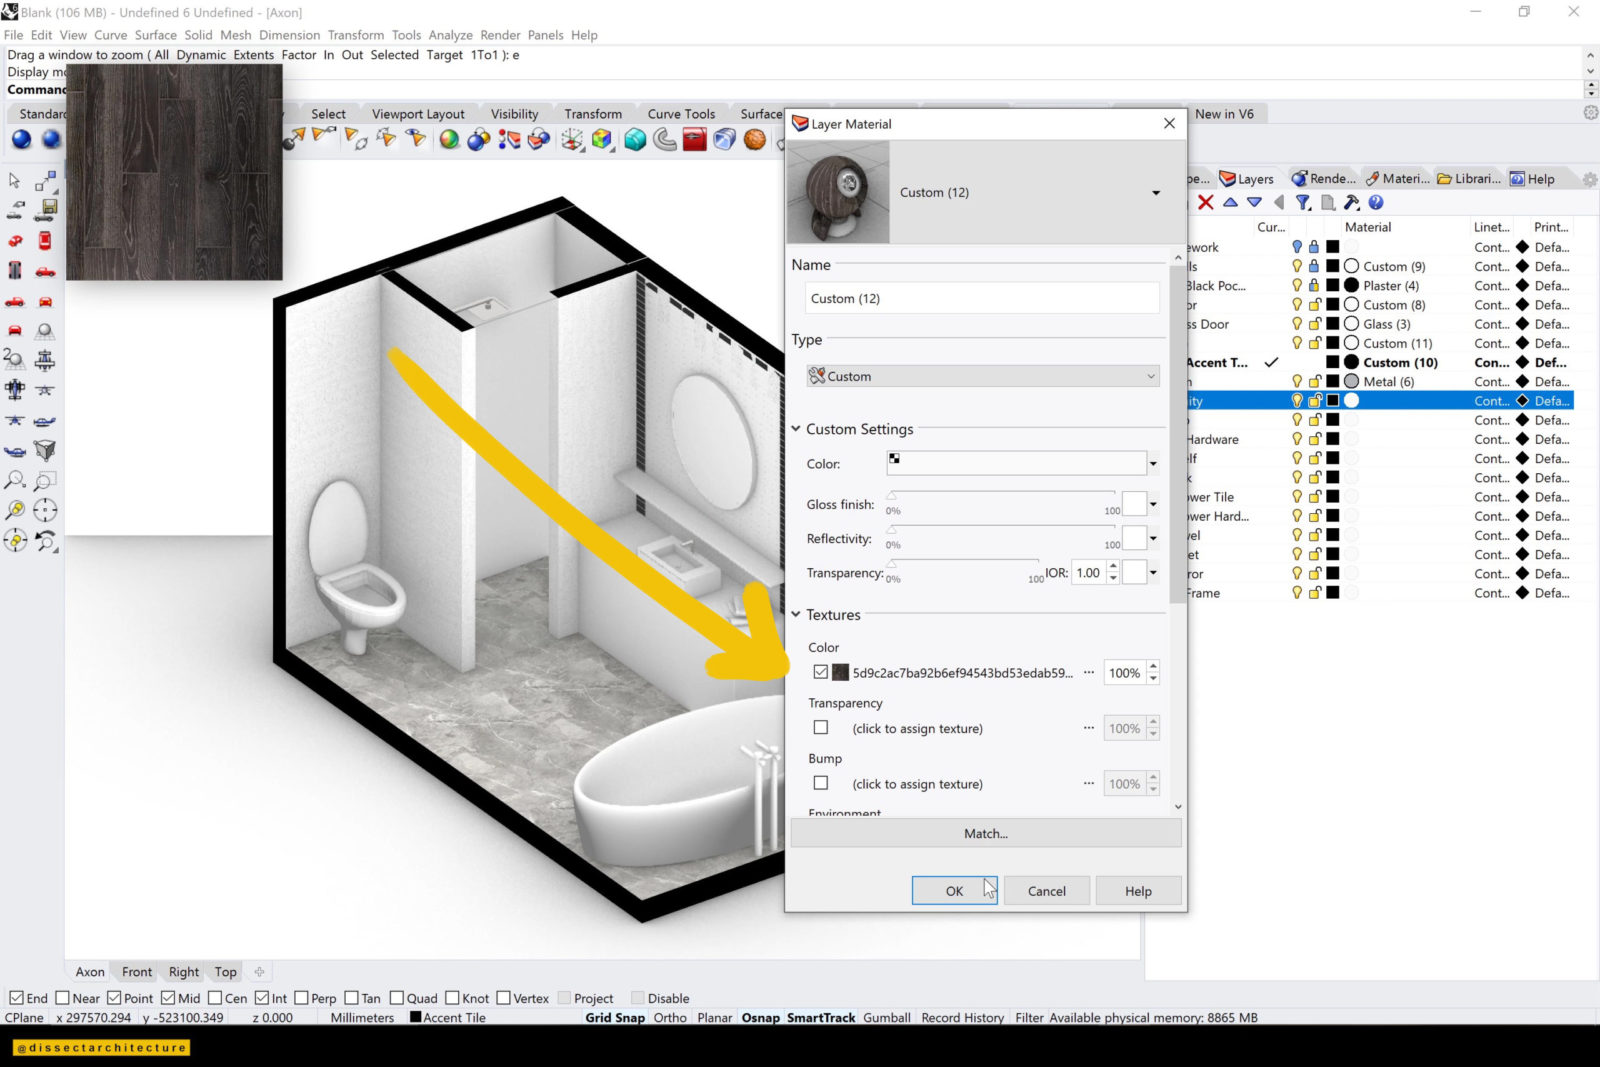
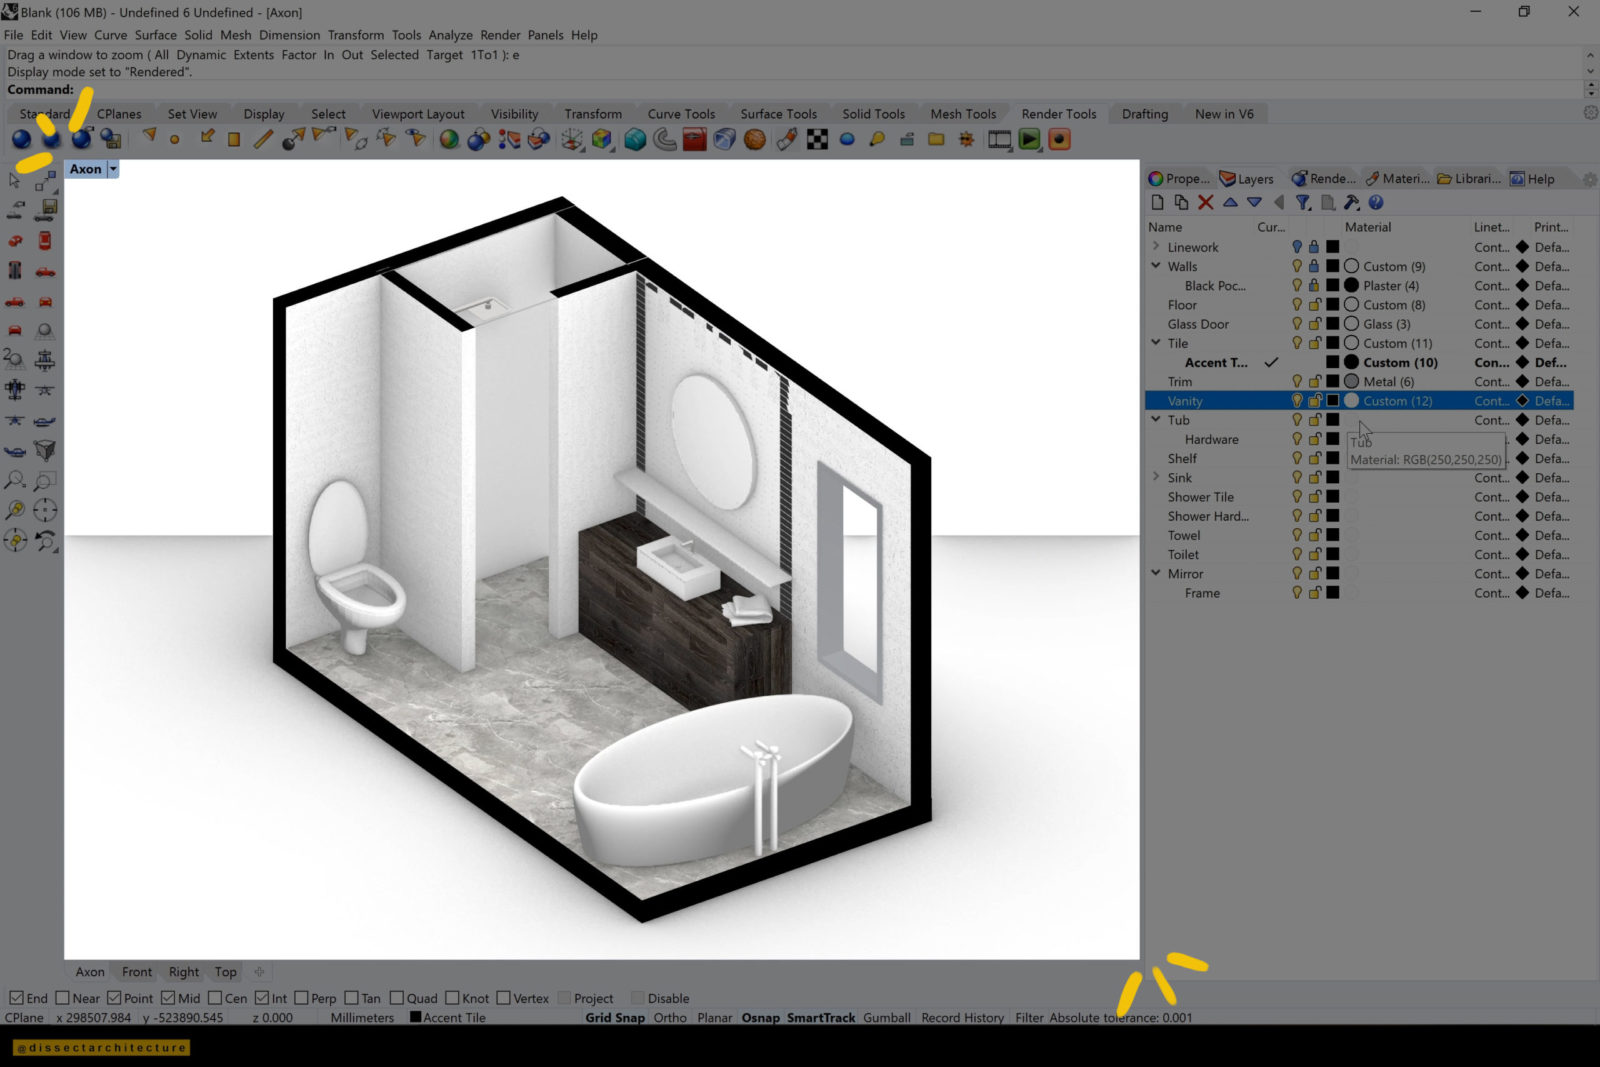
Step 12
Now I am adding a slight gloss to the tub and adding a metal texture to the hardware.


Step 13
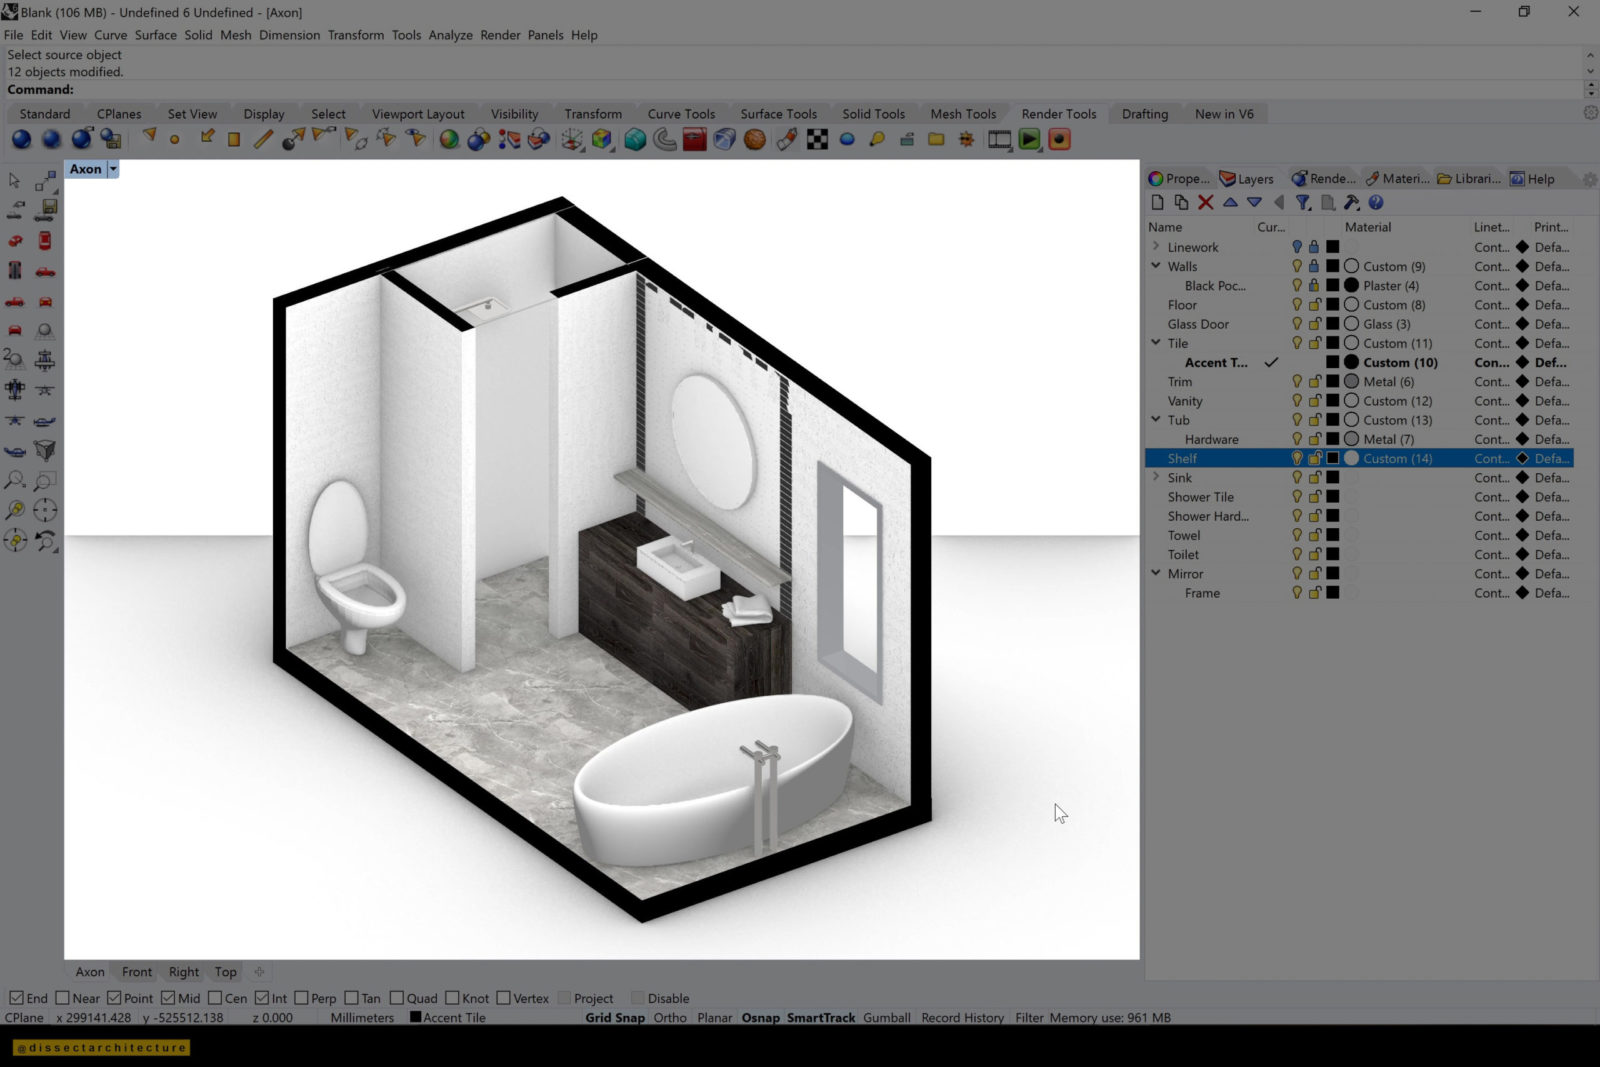
Afterwards I am adding a concrete marble texture to the shelf under the mirror through the Layer Material Panel.
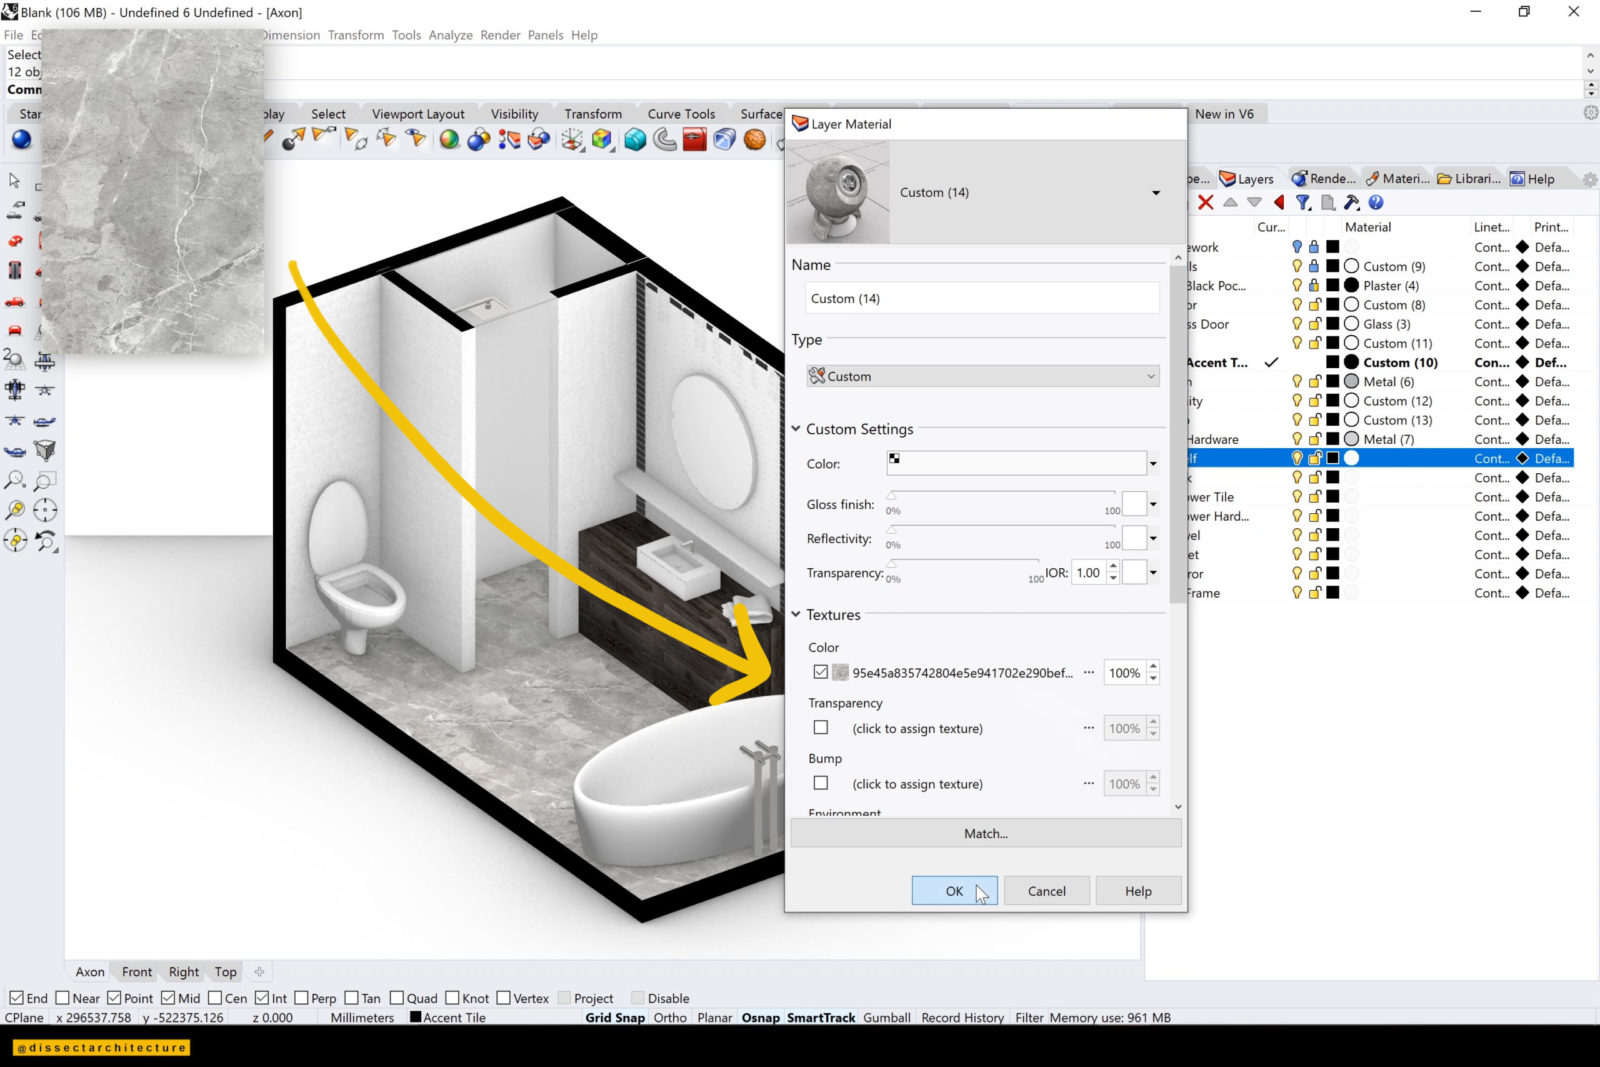
Step 14
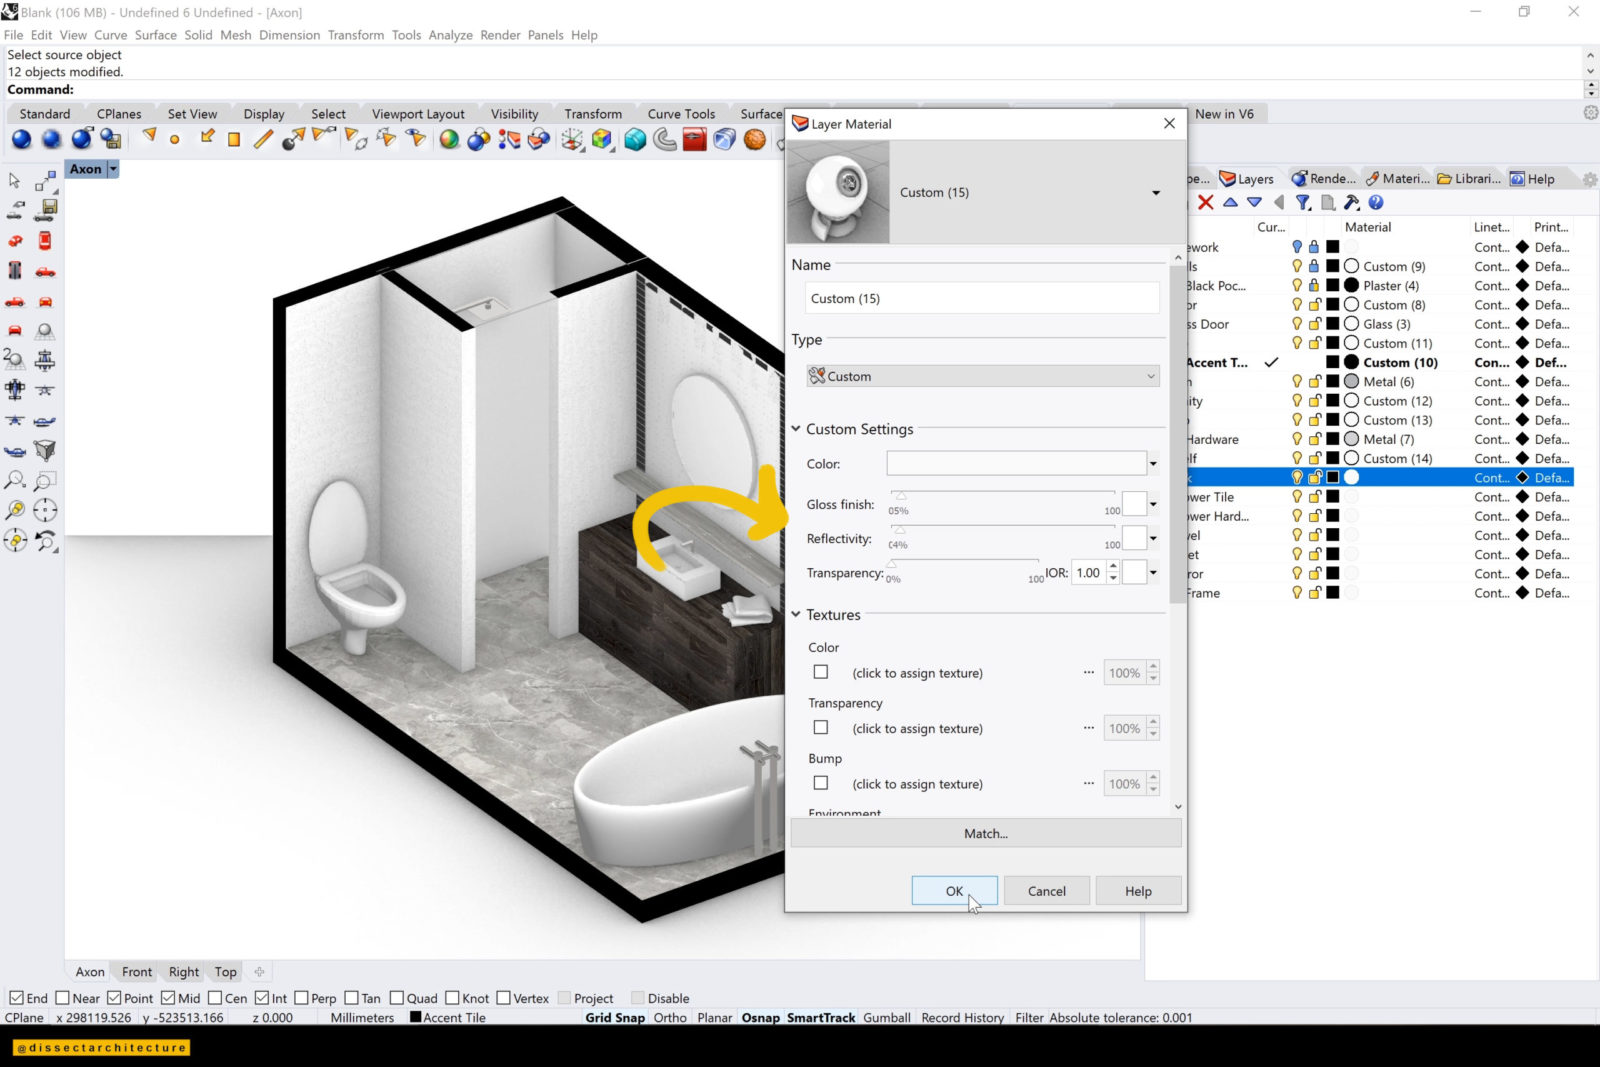
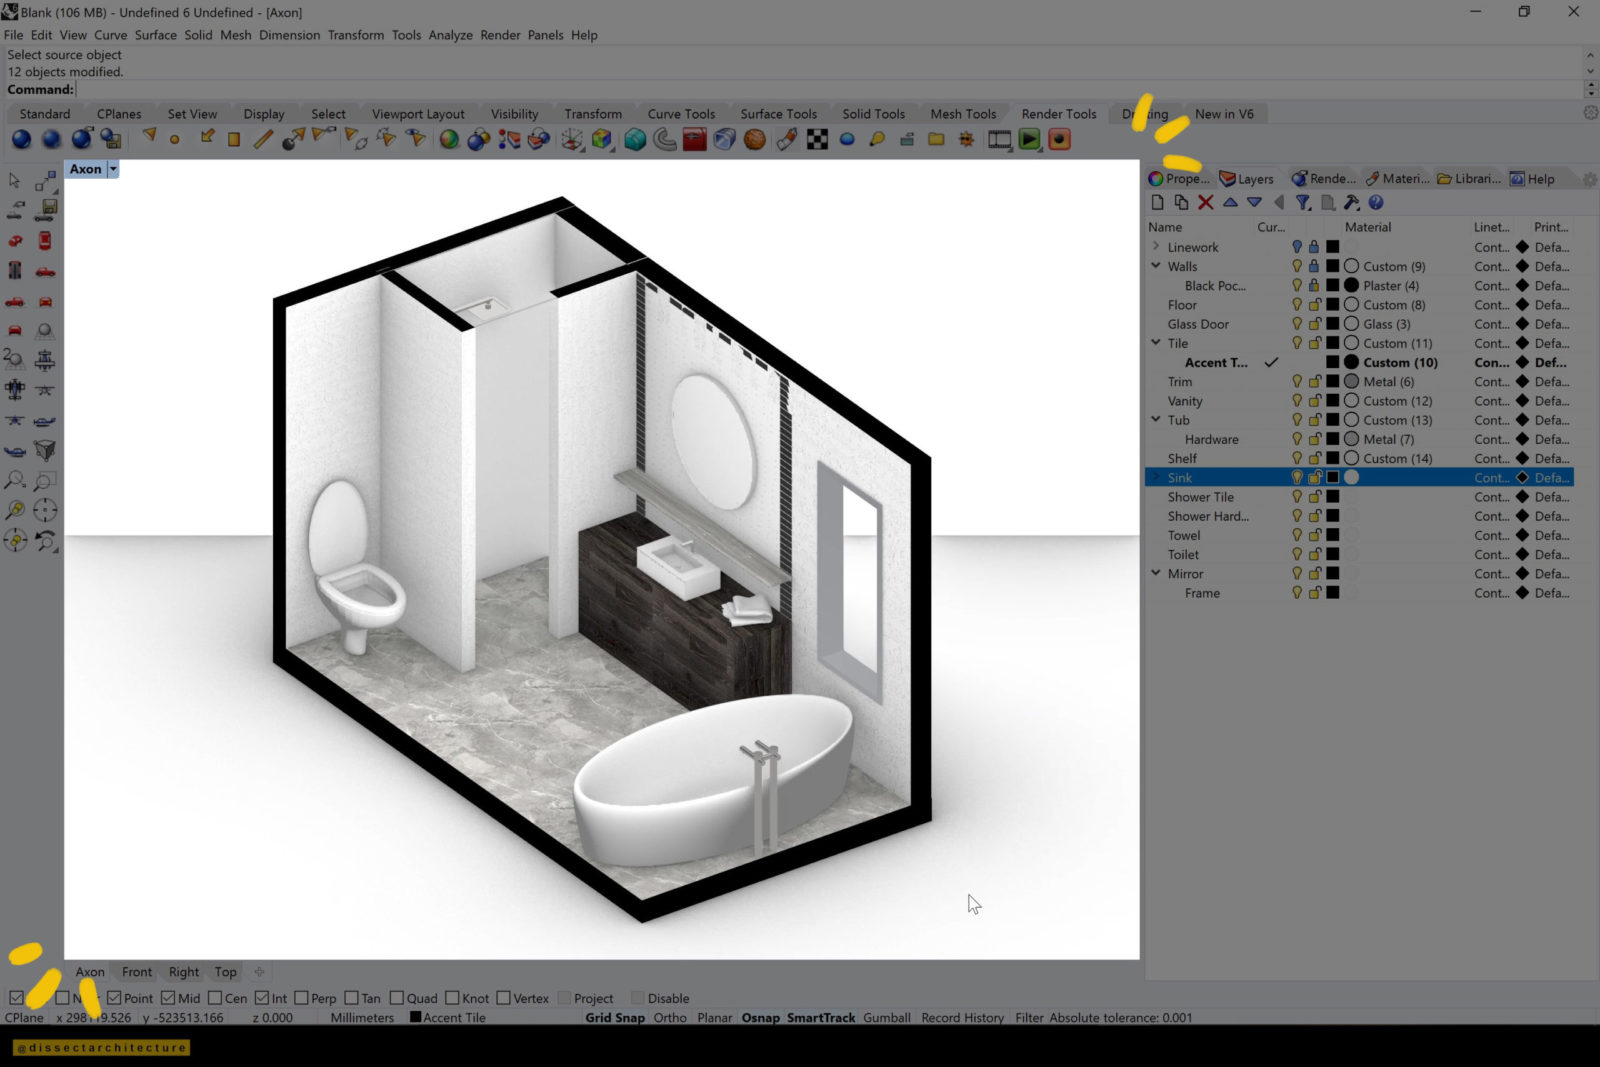
I am keeping the white color of the sink on the vanity, but adding a slight gloss through the Layer Material Panel.
Step 15
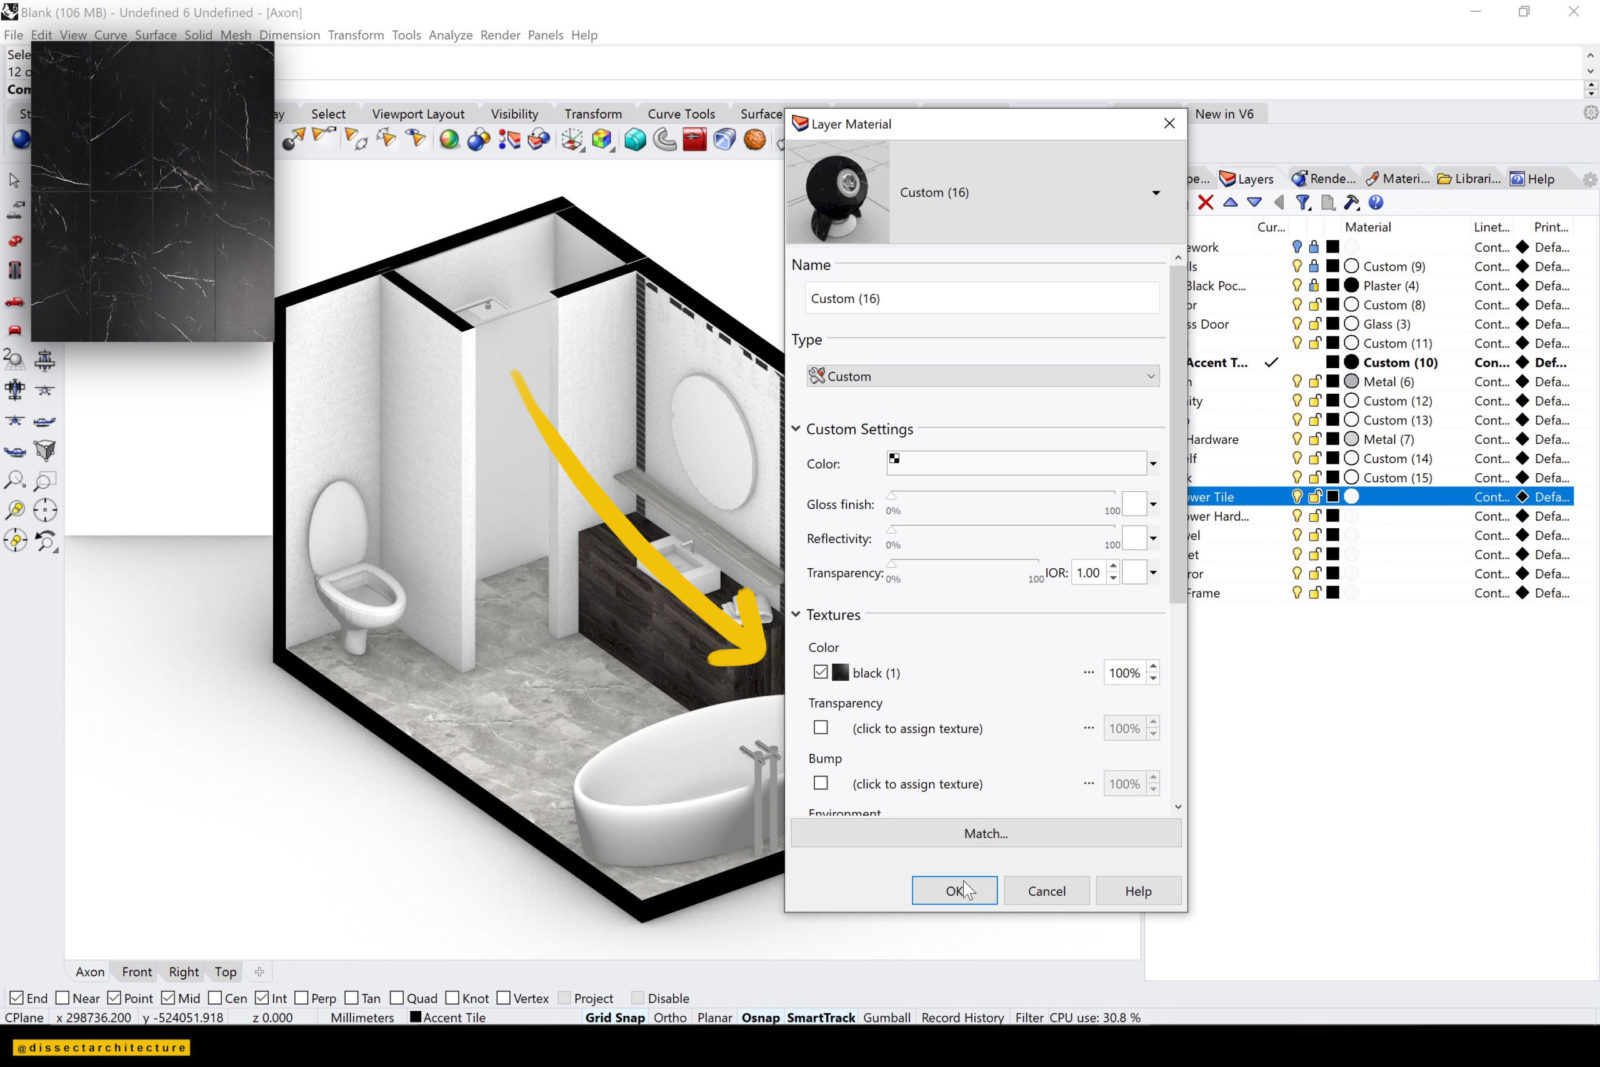
Continue to add material to the shower tile through the Layer Material Panel.
Step 16
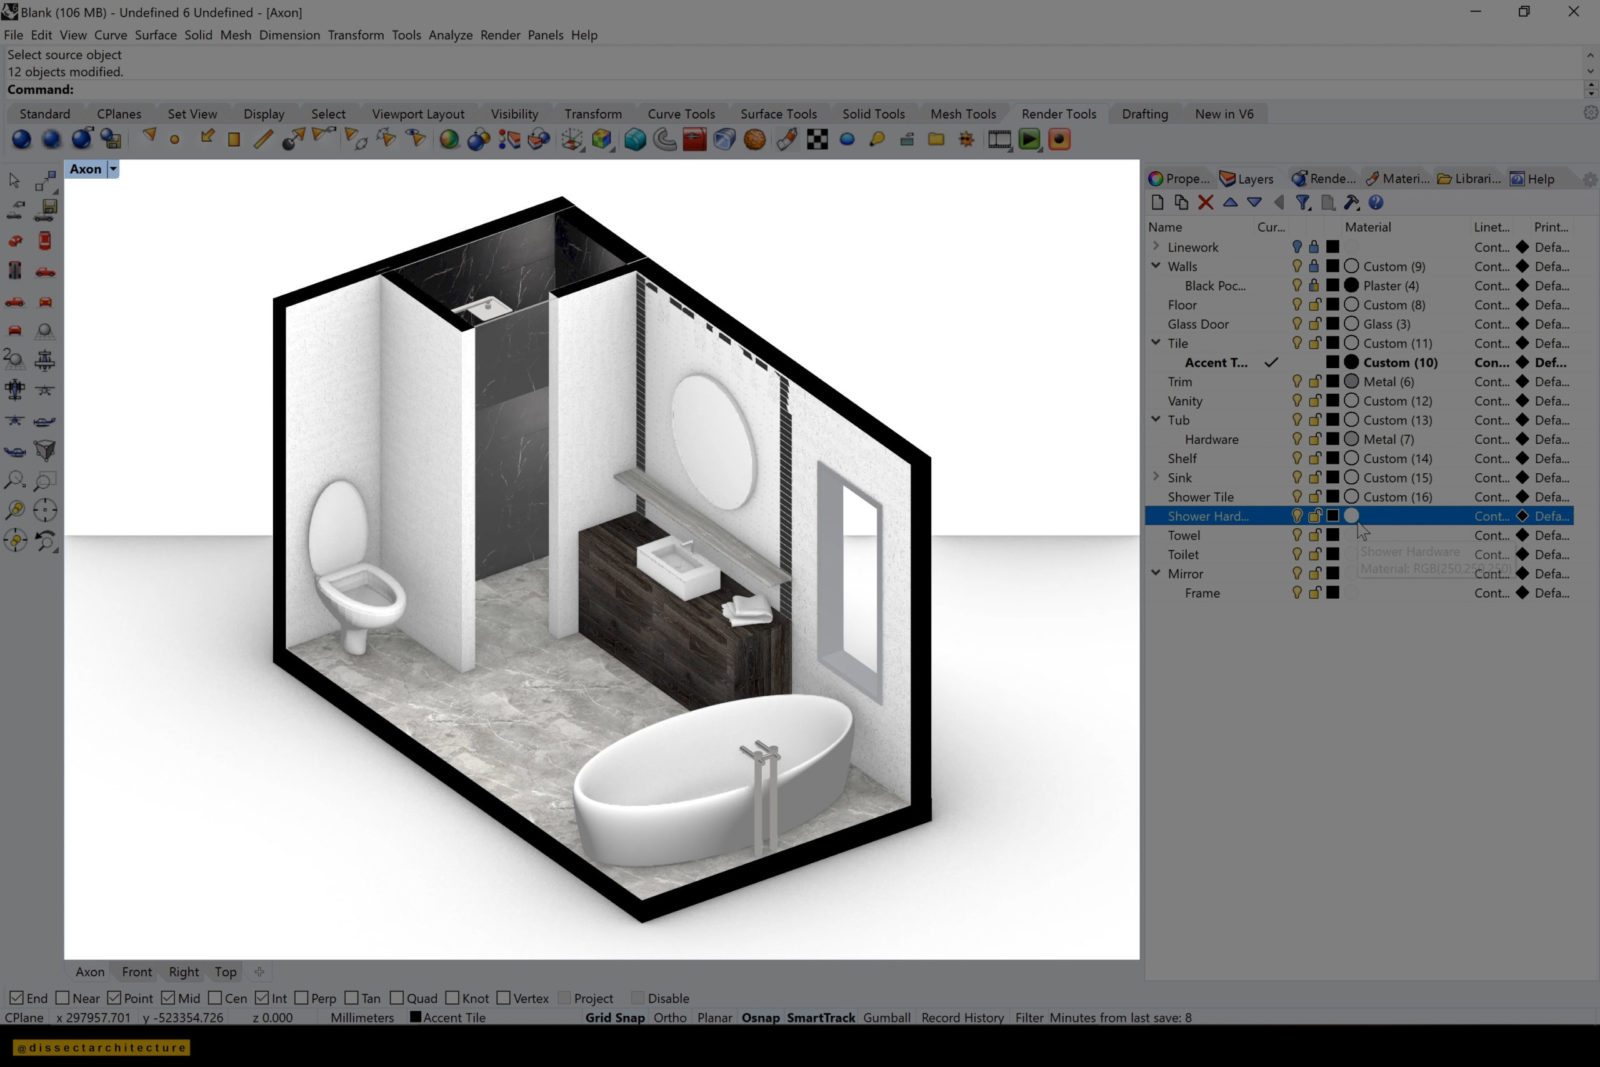
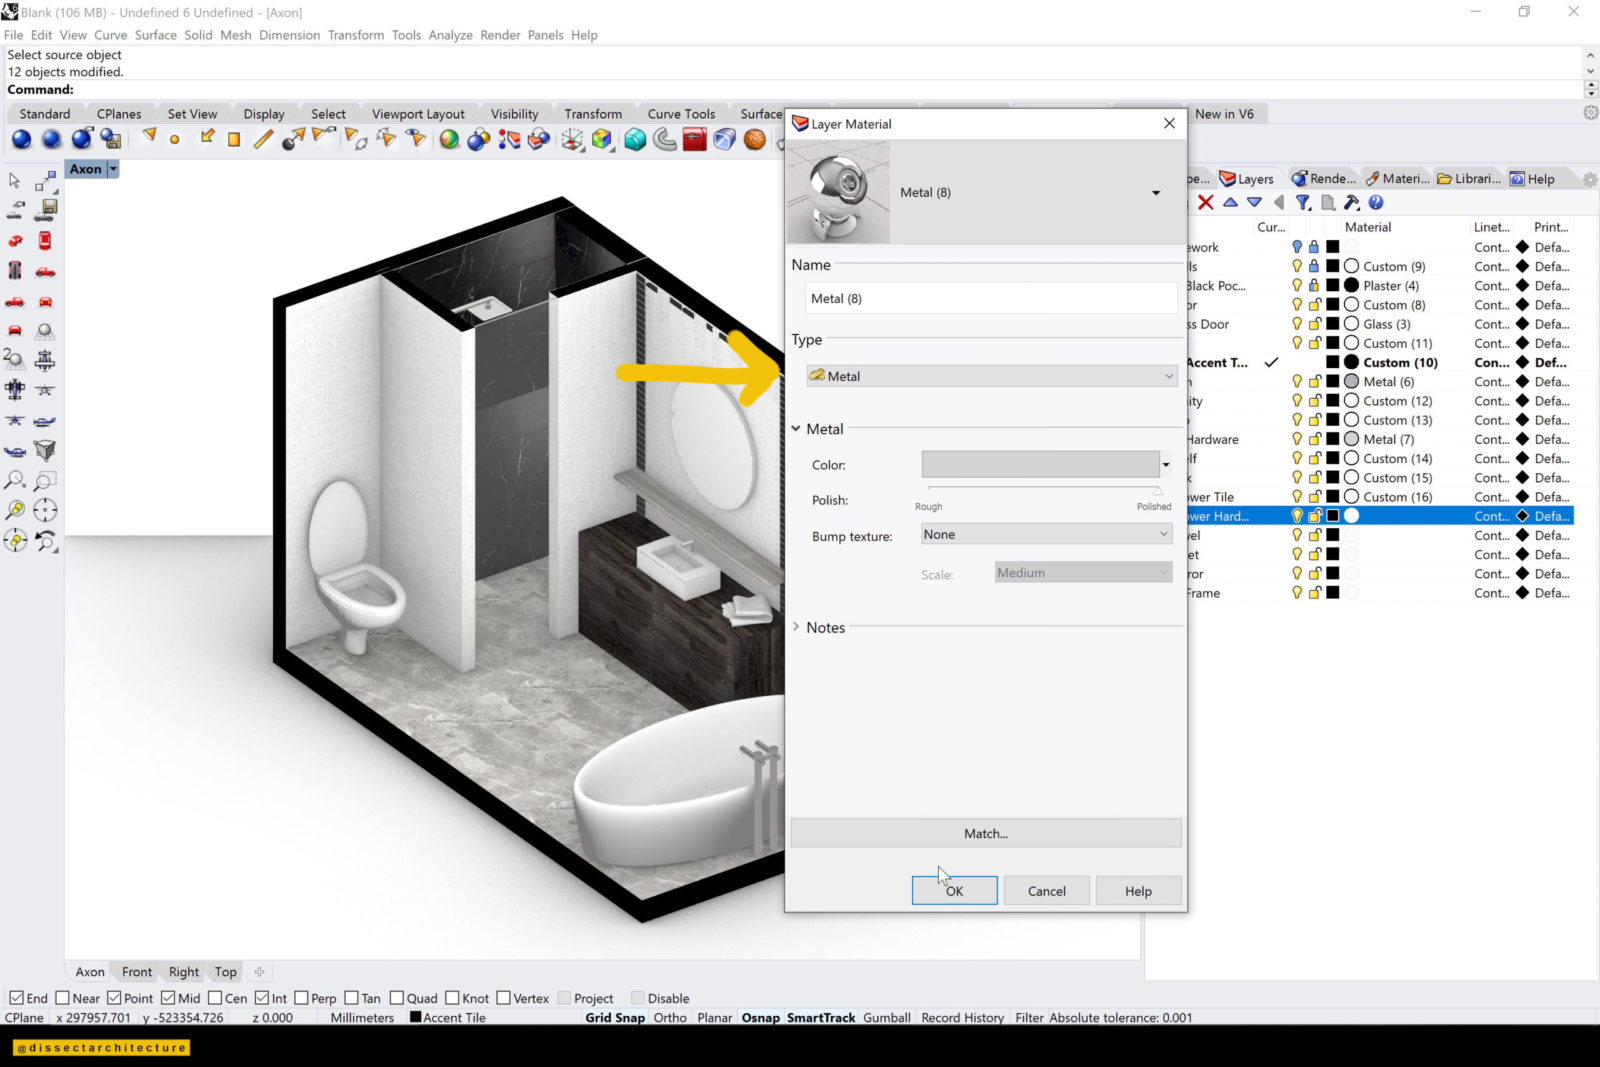
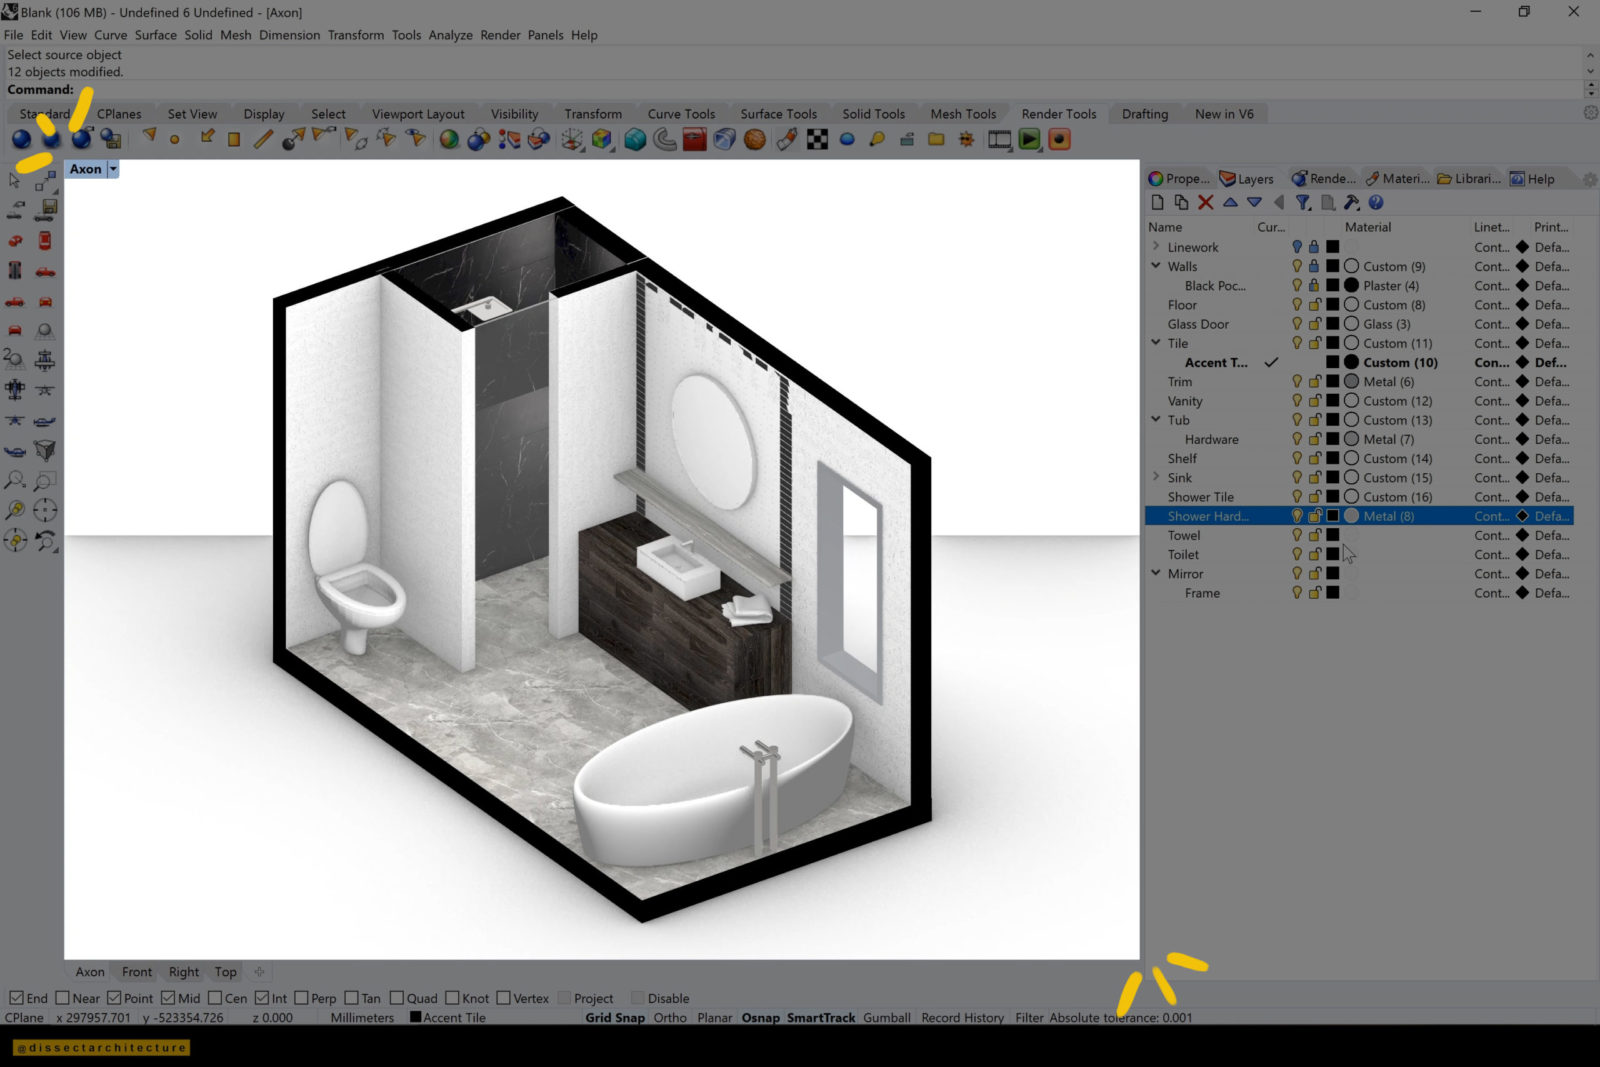
Then, I am adding a metal texture to the shower hardware.
Step 17
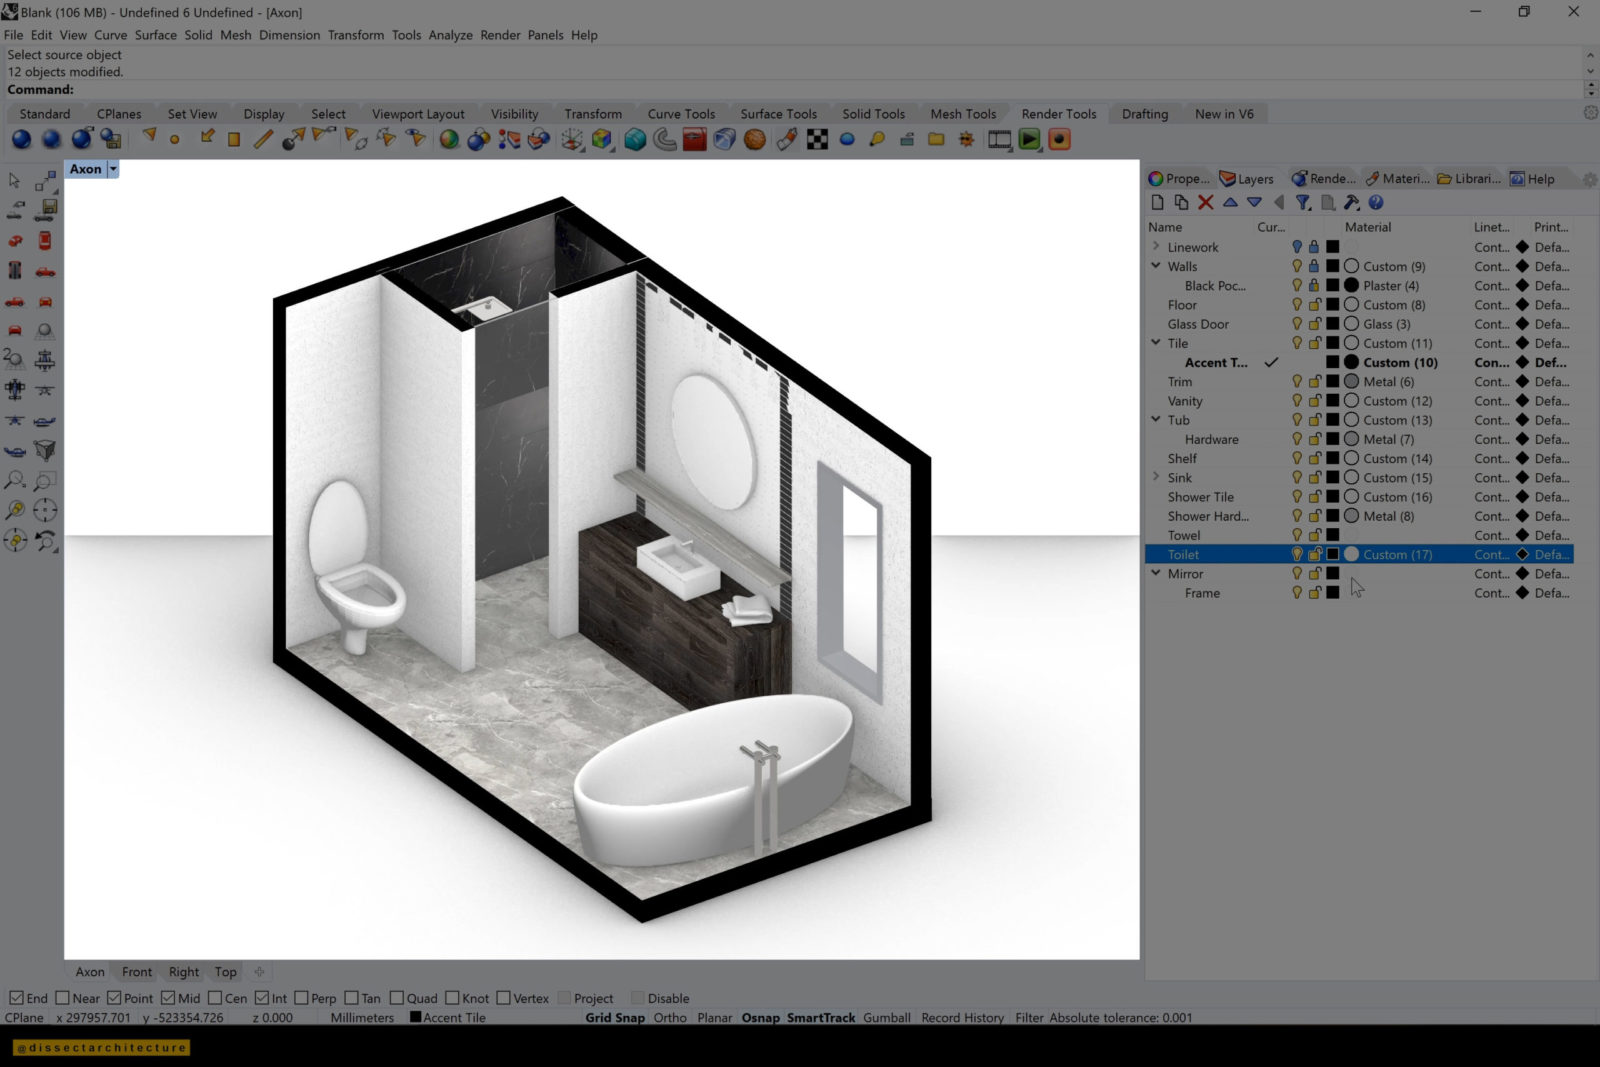
Continue the process by adding a slight gloss to the toilet.

Step 18
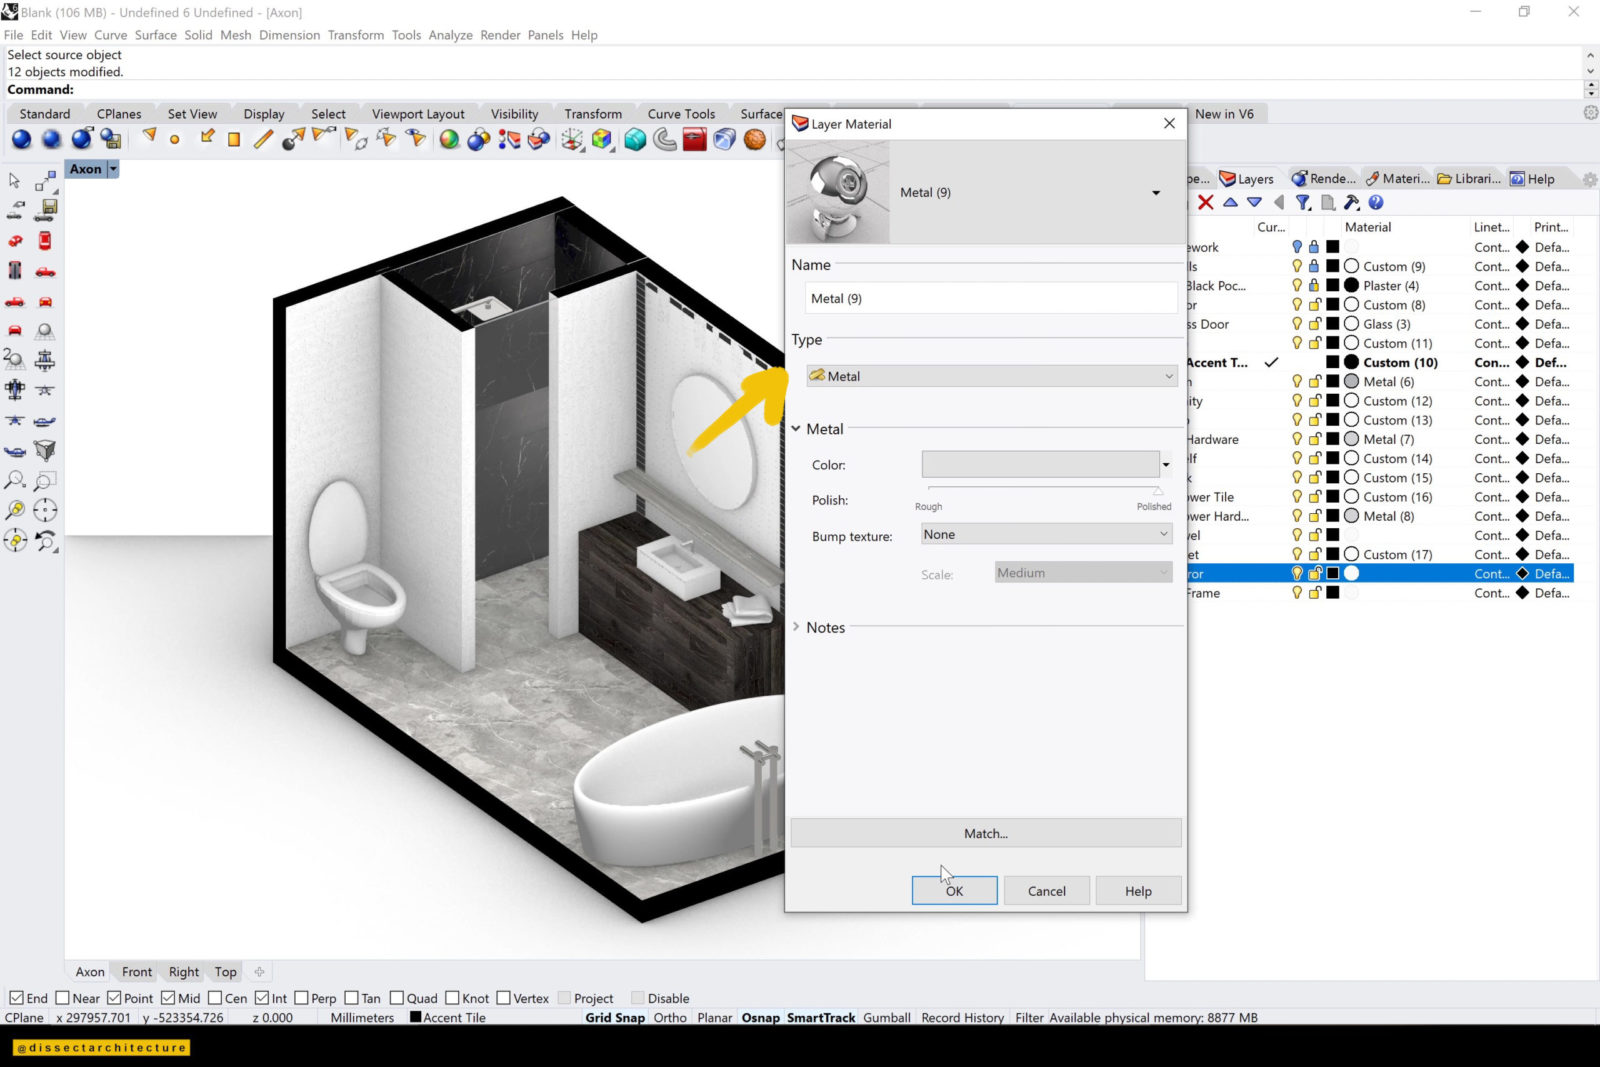
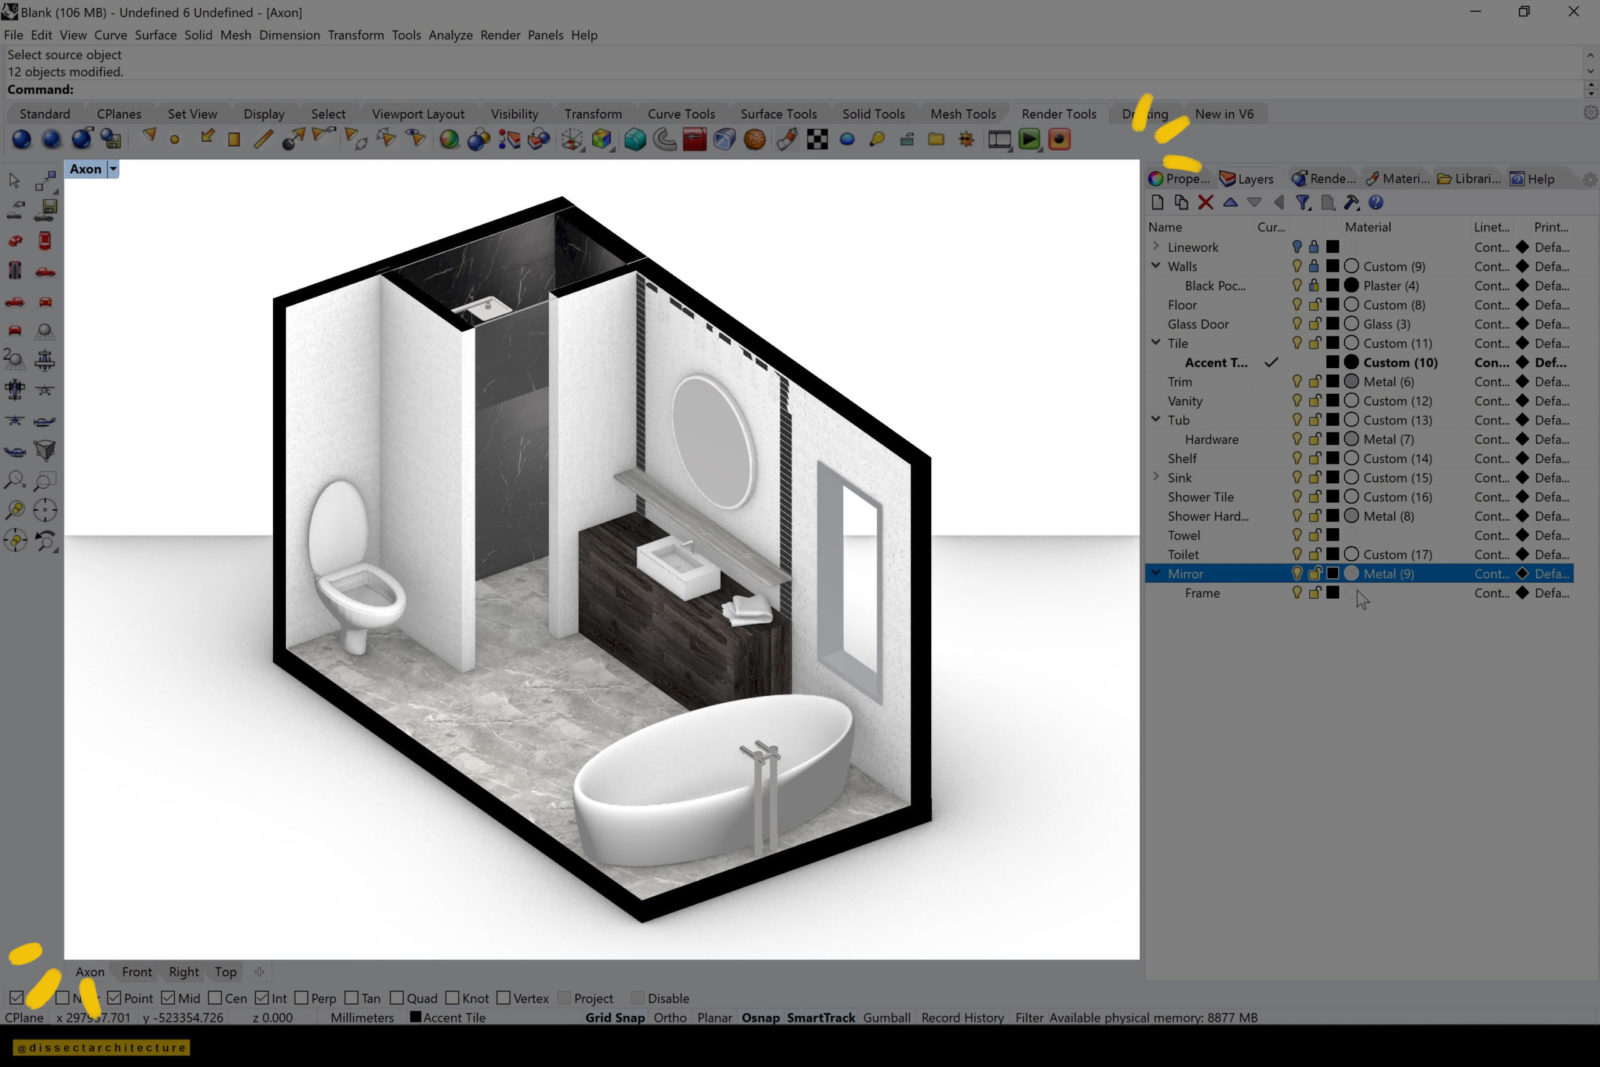
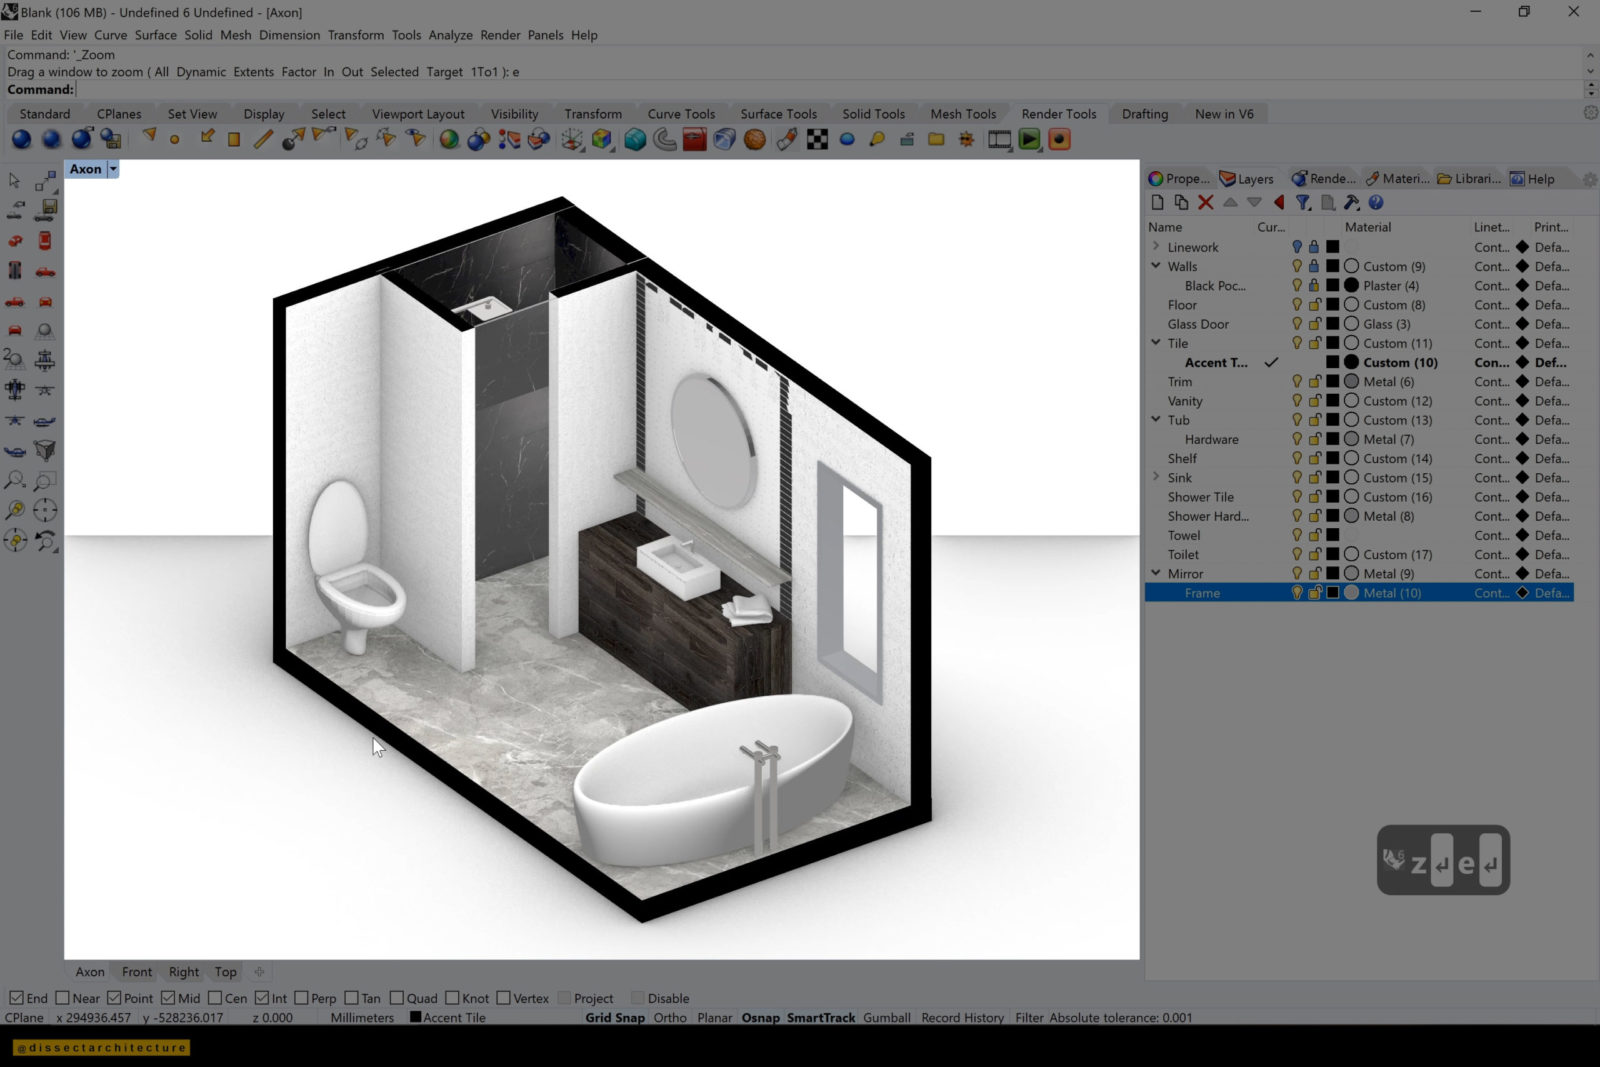
Next I am adding a reflective texture on the mirror on the Layer Material Panel by changing the type of material to metal and selecting the color to Aluminum. Afterwards, I am adding a texture to the trim of the mirror.
Continue adding any materials to the rest of your objects. I am done adding materiality for now.
Step 19
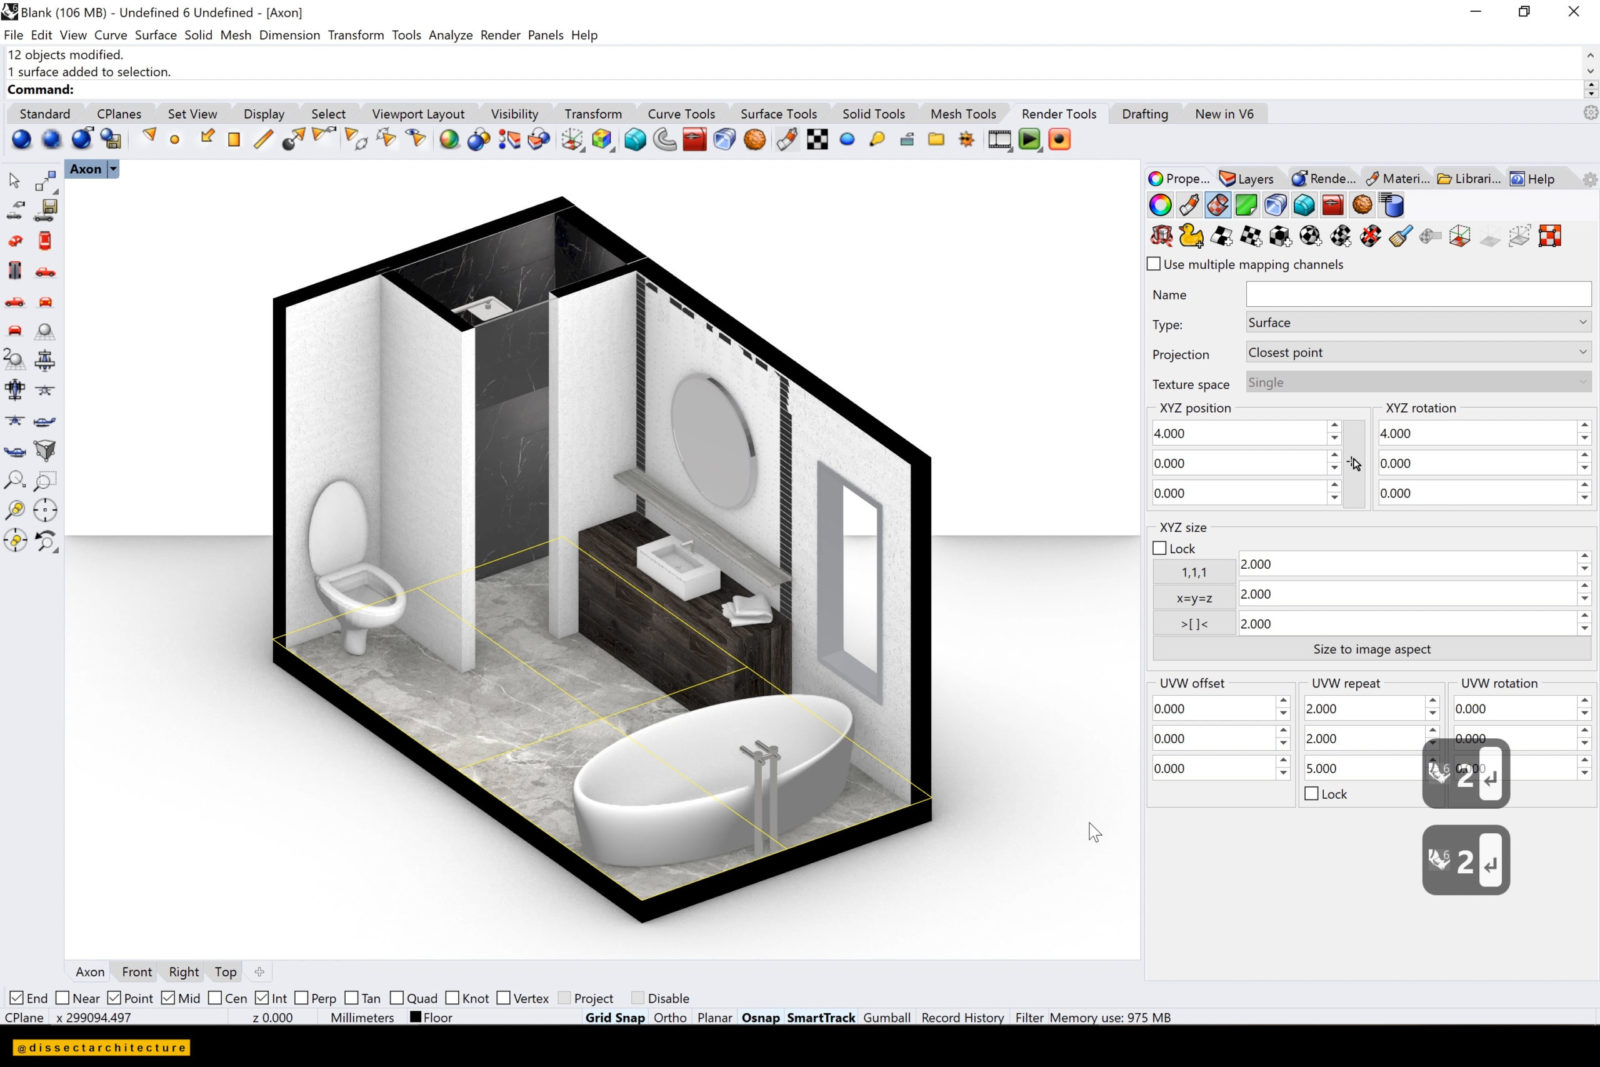
At this point make any final adjustments.
You can control the repetition of a texture through the Texture Mapping Panel and changing the number in the UVW repeat.

Step 20
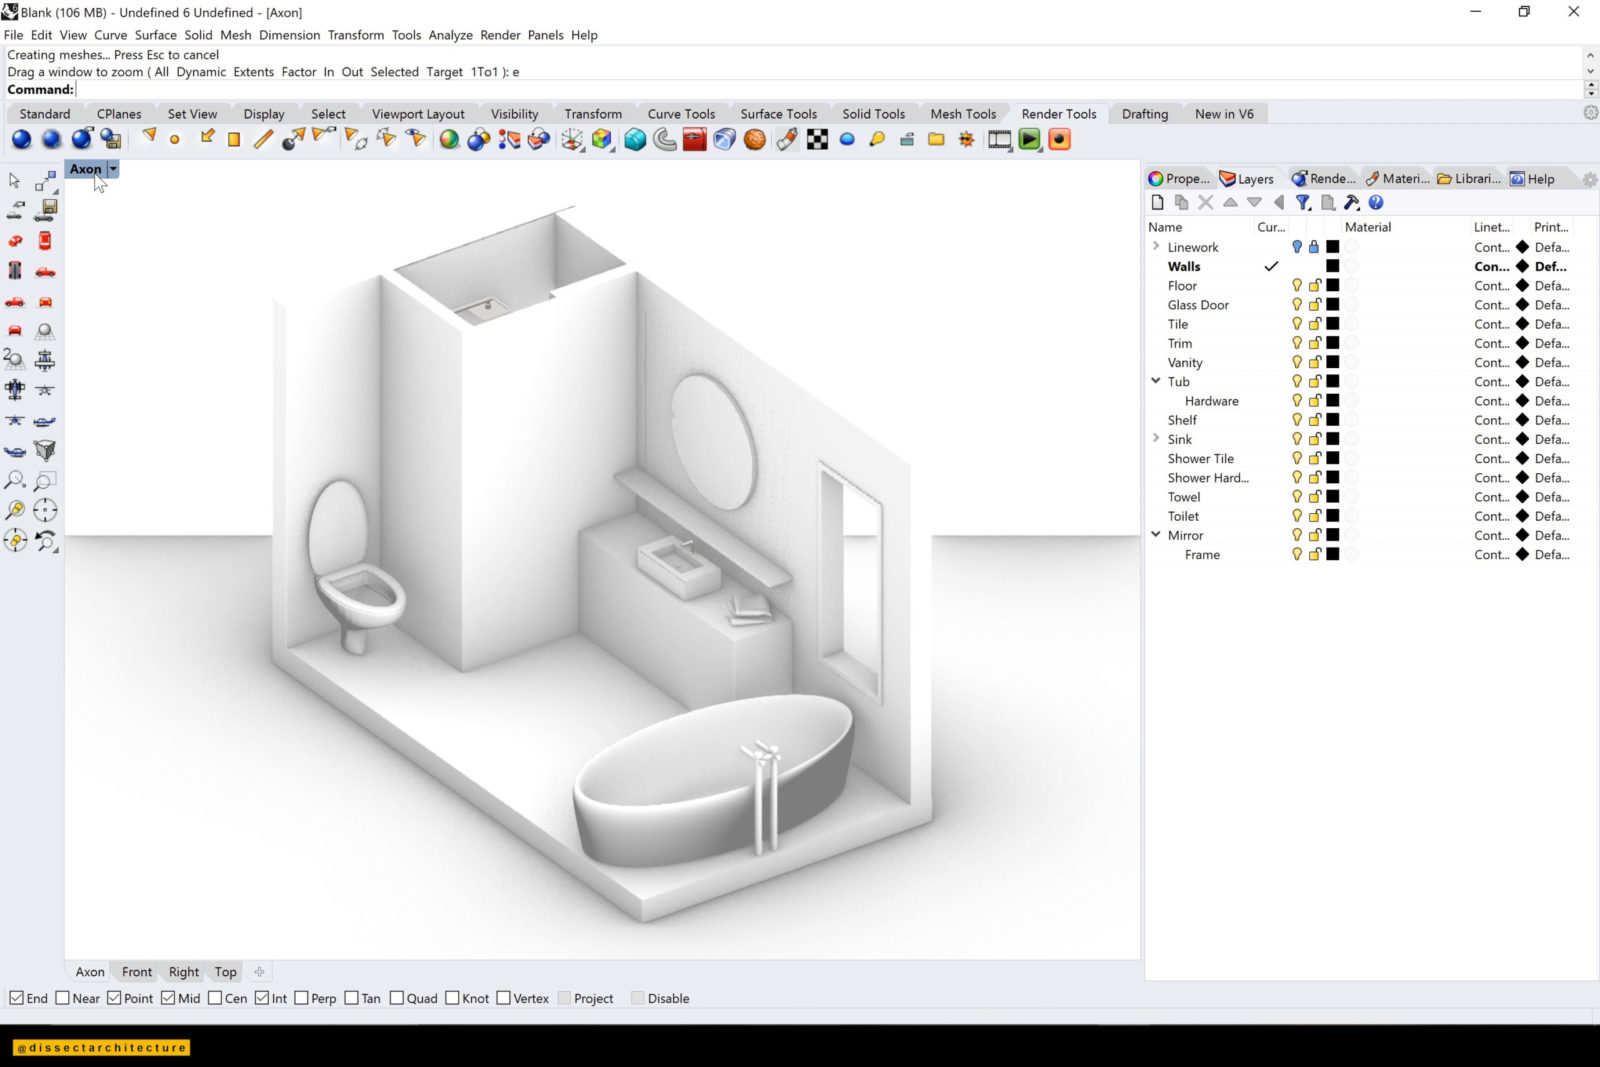
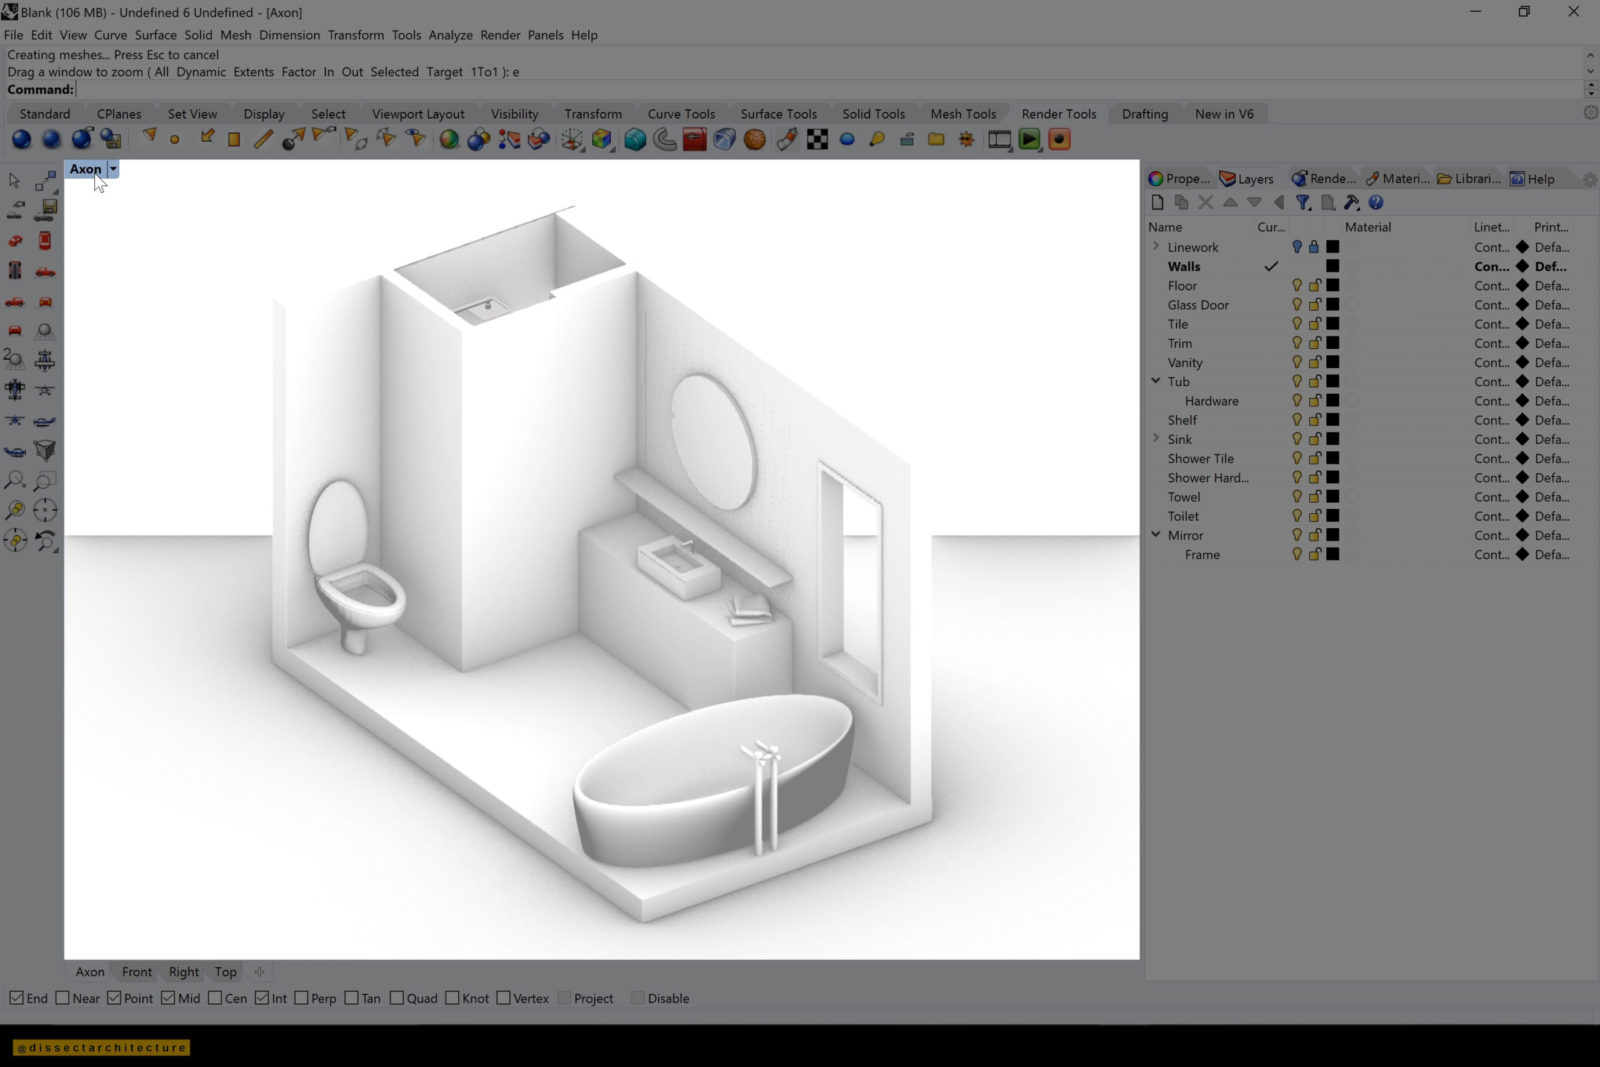
Now we will go on to render the model!
First set your view, Rhino gives you a variety of choices for views. I have chosen an isometric view.

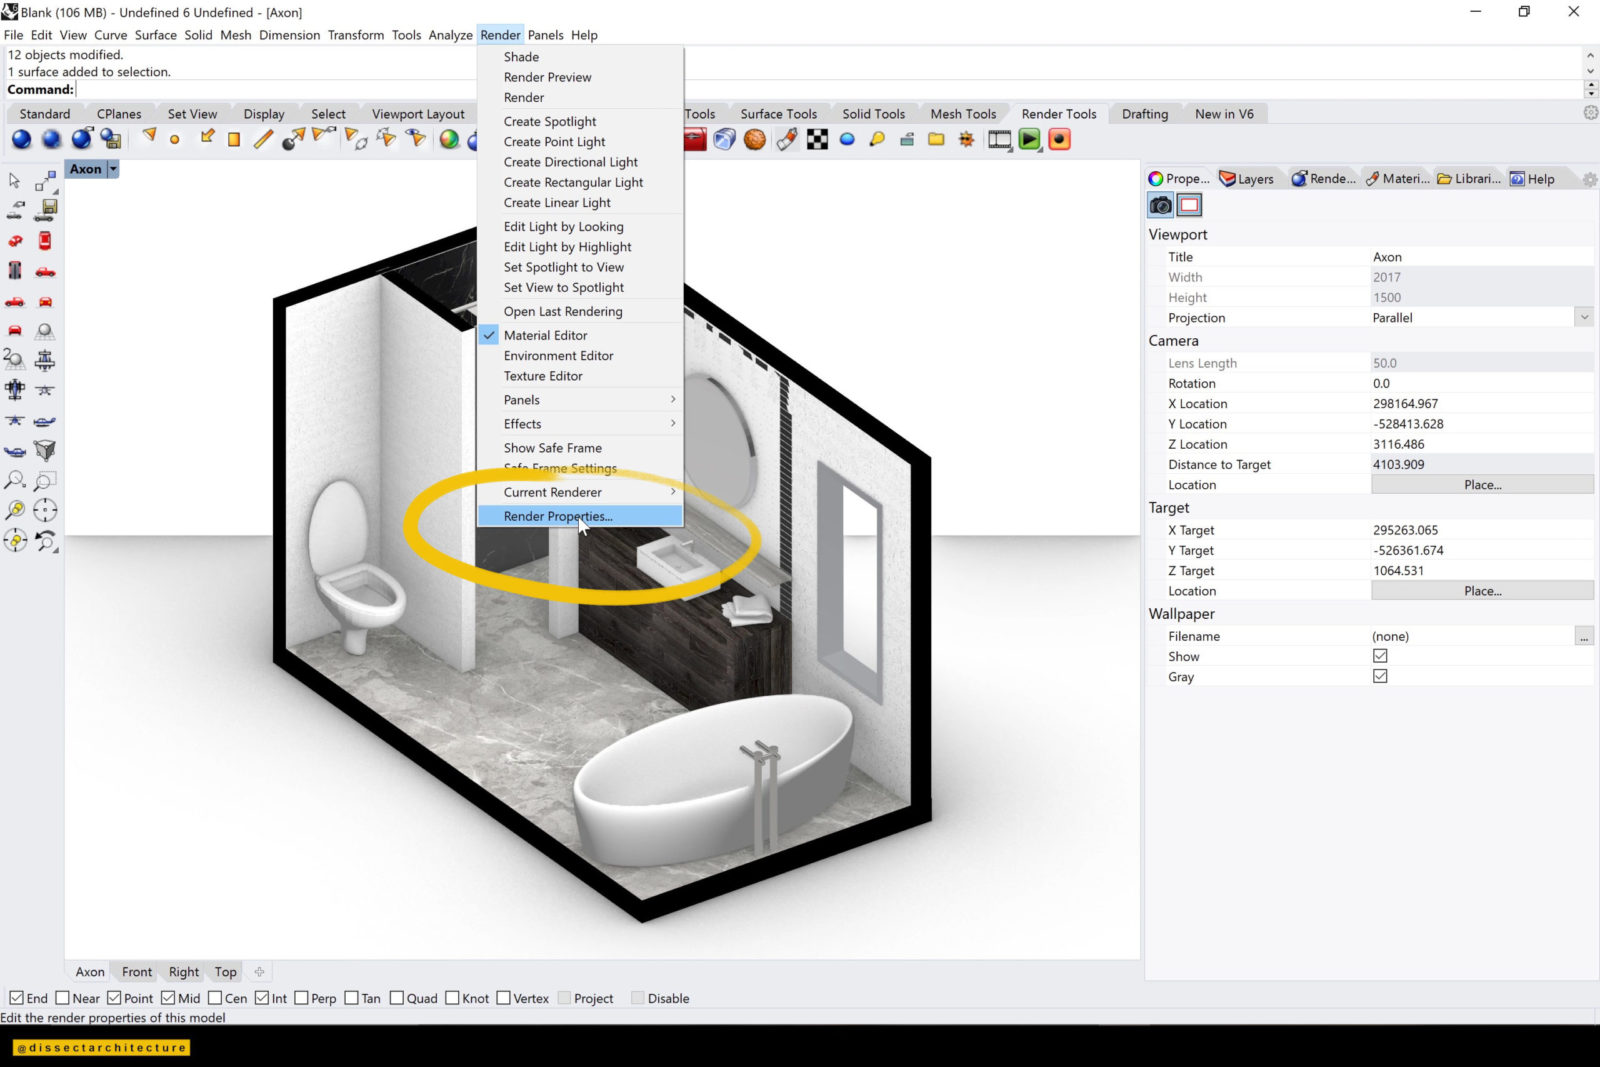
Step 21
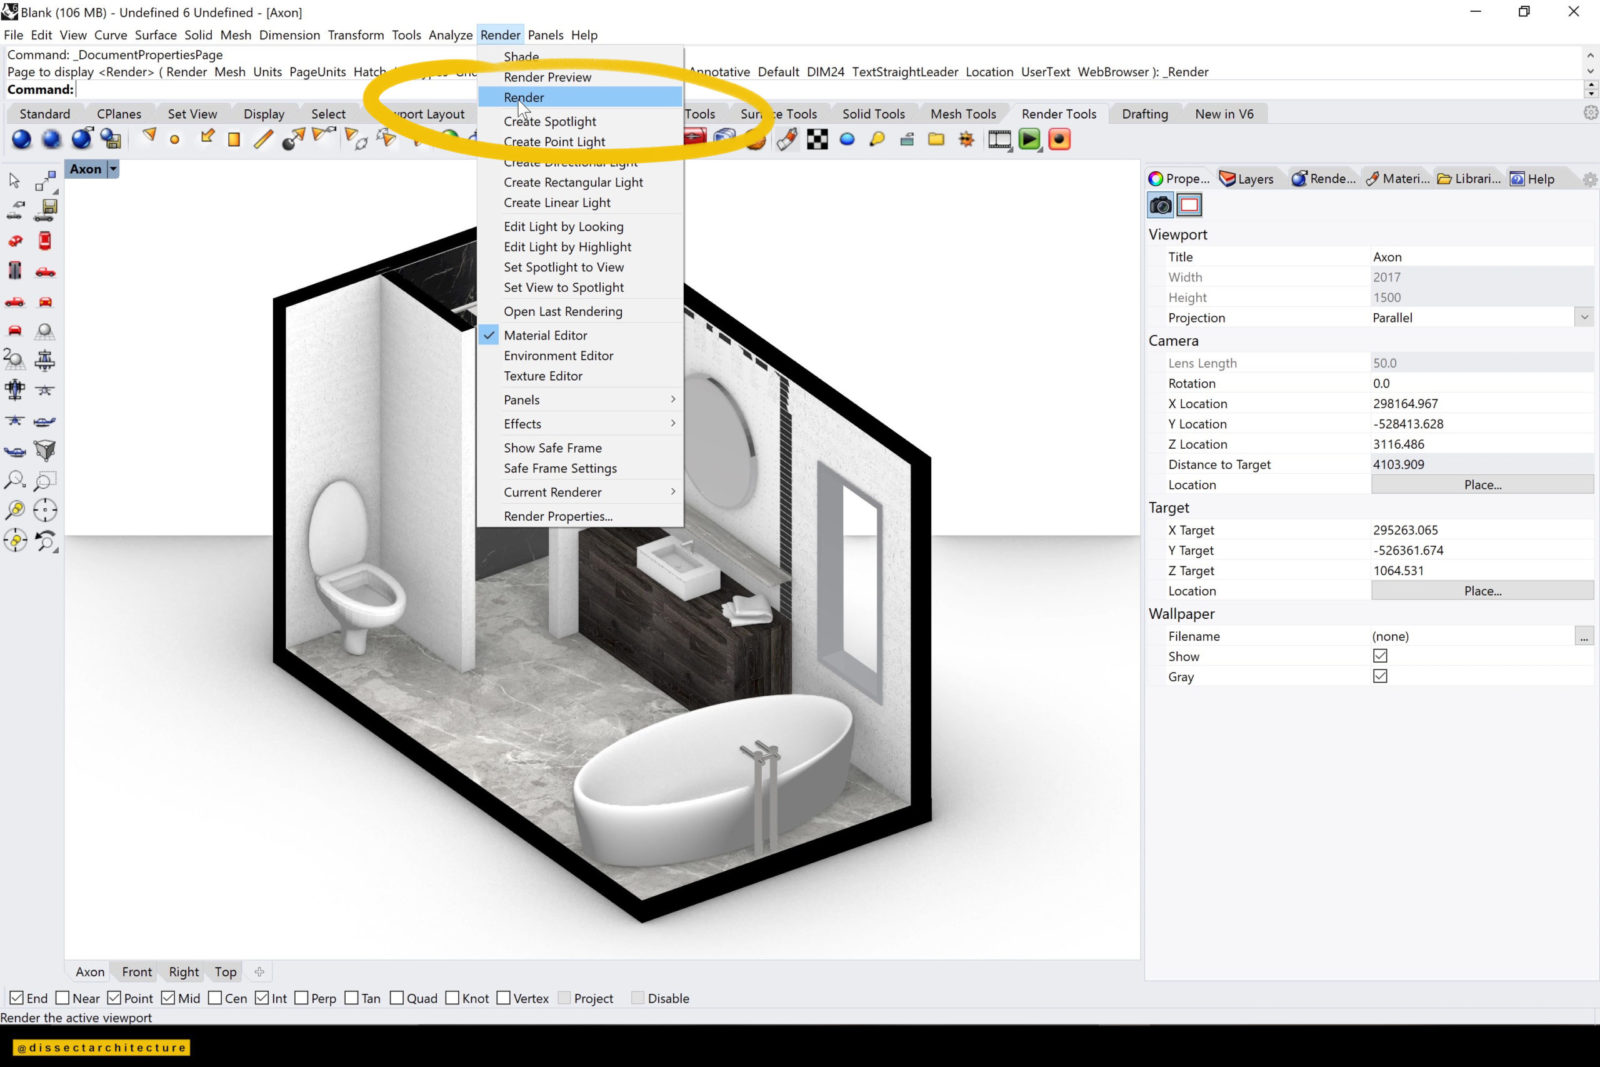
Set your Render Properties by going to the Render Menu and selecting Render Properties.
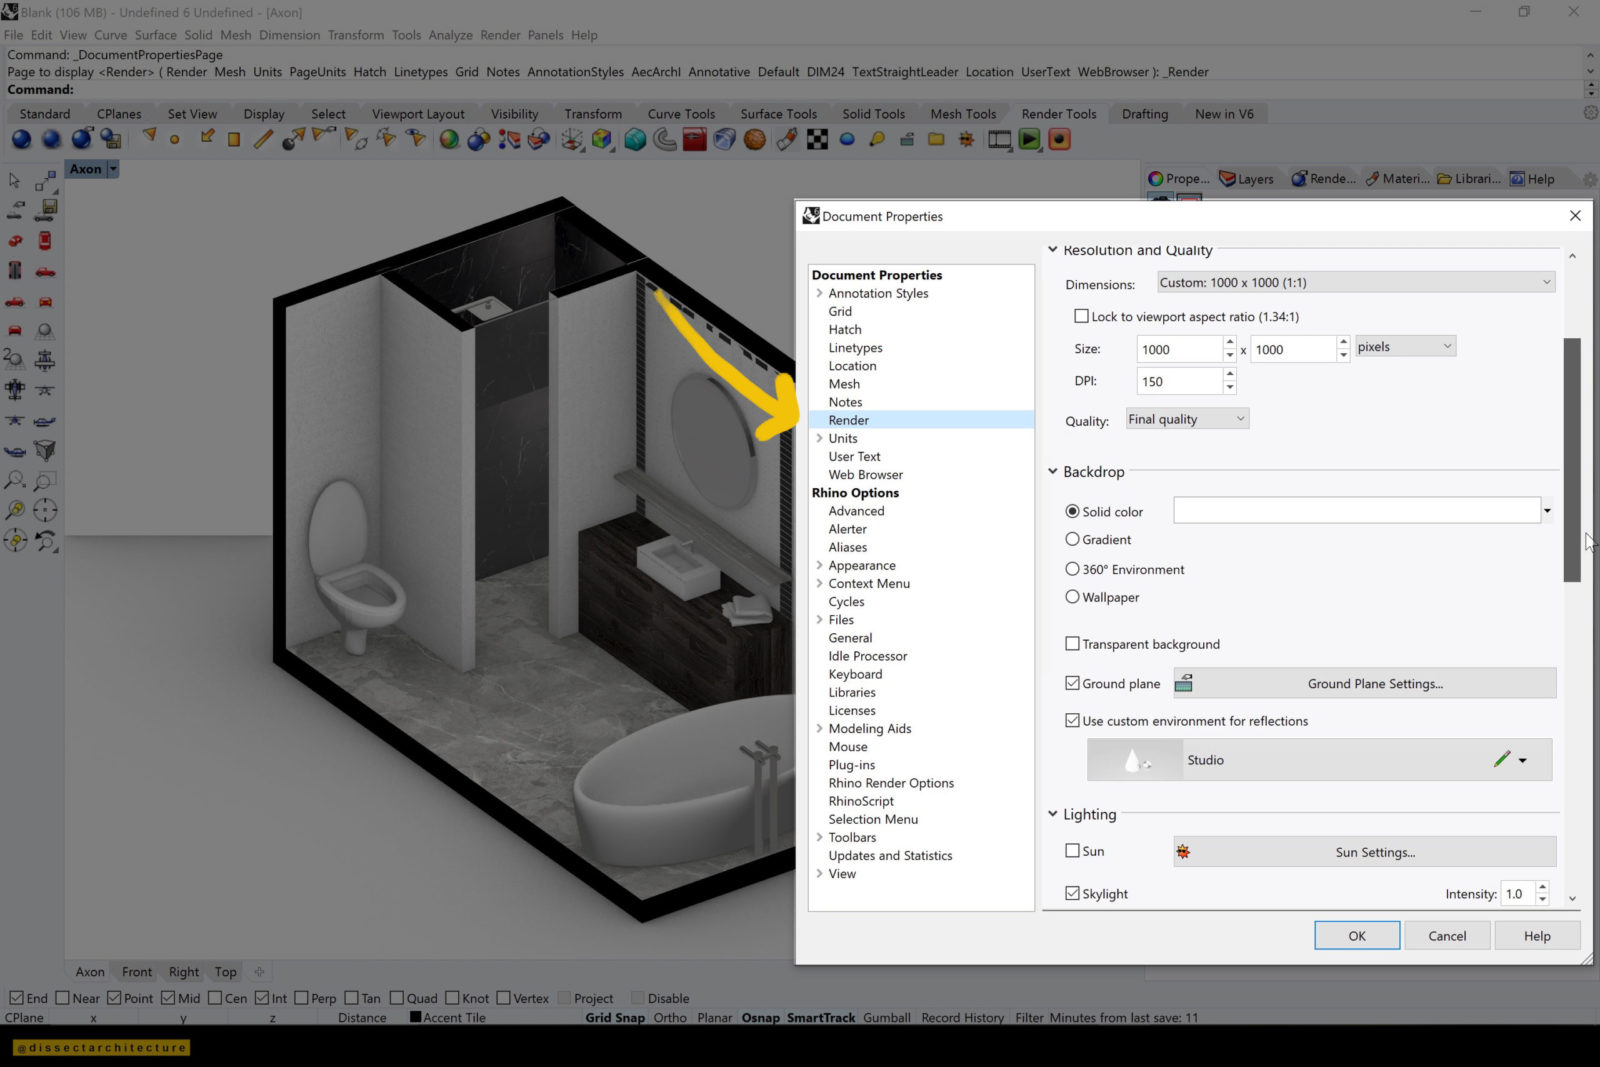
The Render Properties I used were 150 DPI with Final Quality selected, the dimensions is used were 1000px x 1000px, the backdrop to selected to a solid white color, and with the Ground Plane option checked. Under the lighting options I selected Skylight.
After you are done making your selections hit OK.
Step 22
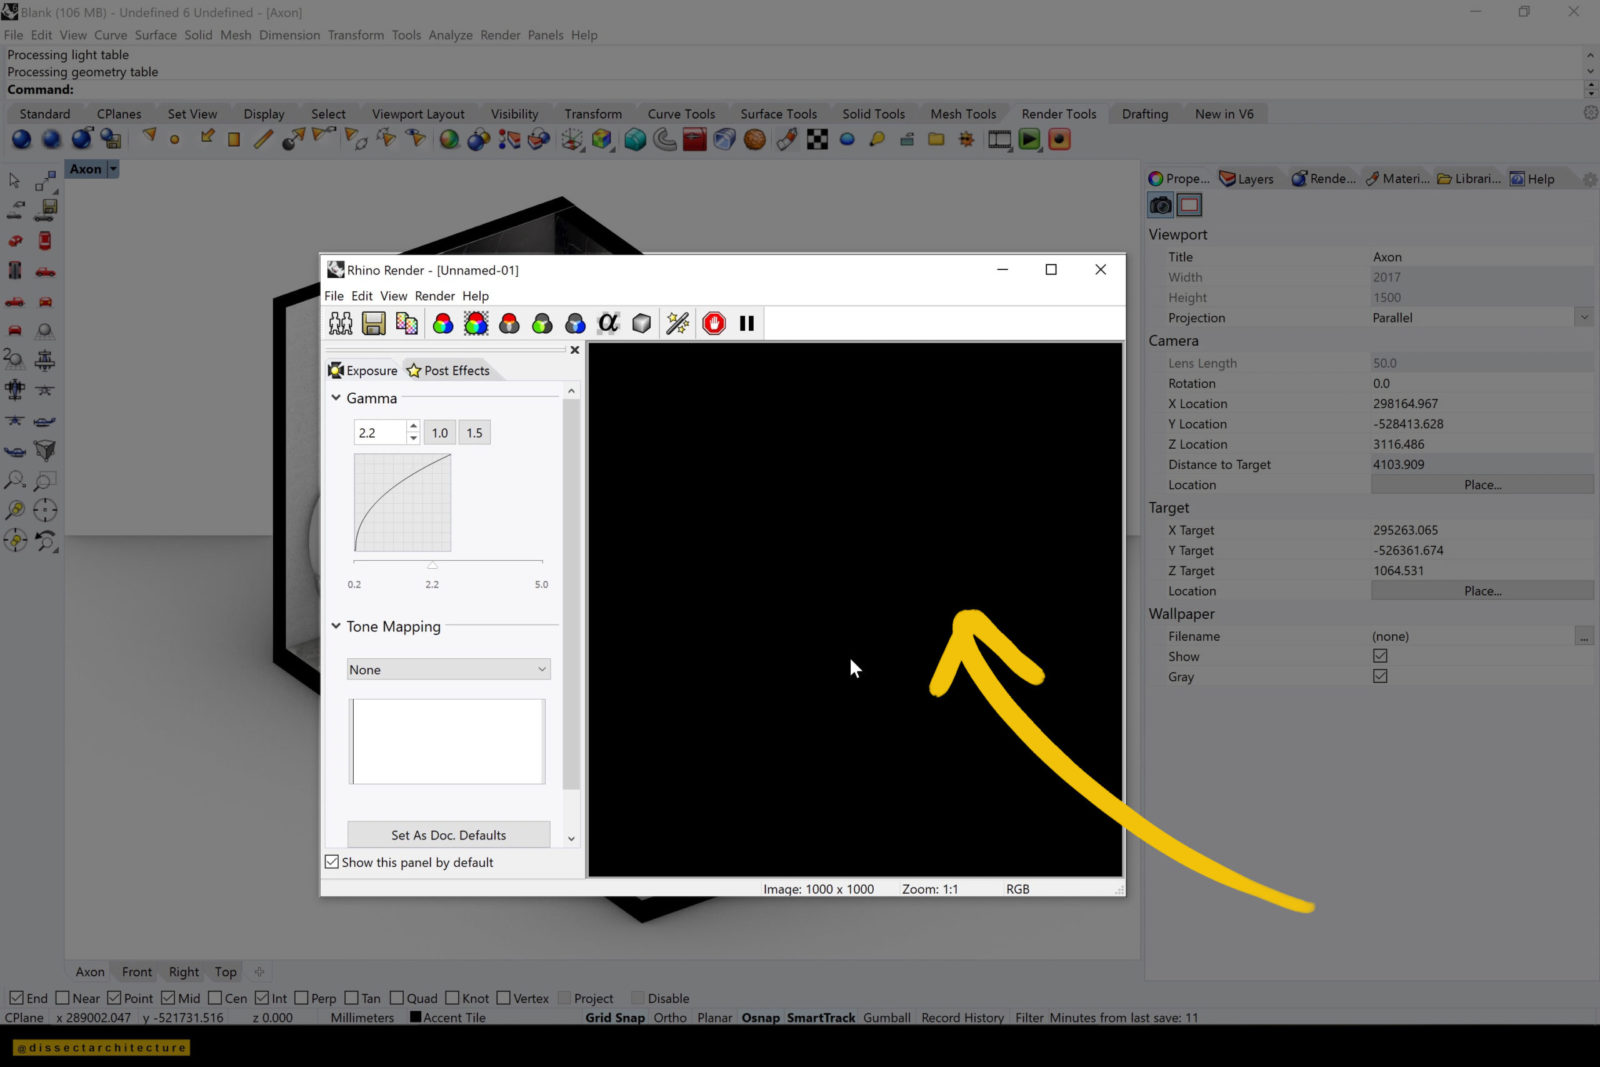
Now click on Render under the Render Menu. Your model will now be rendered.
After the rendering process is finished, click the Save icon to save your rendered image.
You now know how to add textures in Rhino and this process can be applied to other models and files as well.