Create a Complete Render in Photoshop
Objective:
Create a complete render in Photoshop with a perspective drawing with linework and add textures, colors, and shadows.
We’ll explore how to create a complete render in Photoshop from scratch. Different techniques are used throughout the process. They include: how to add textures, how to create a pattern, and how to add entourage in Photoshop.
Software Used:
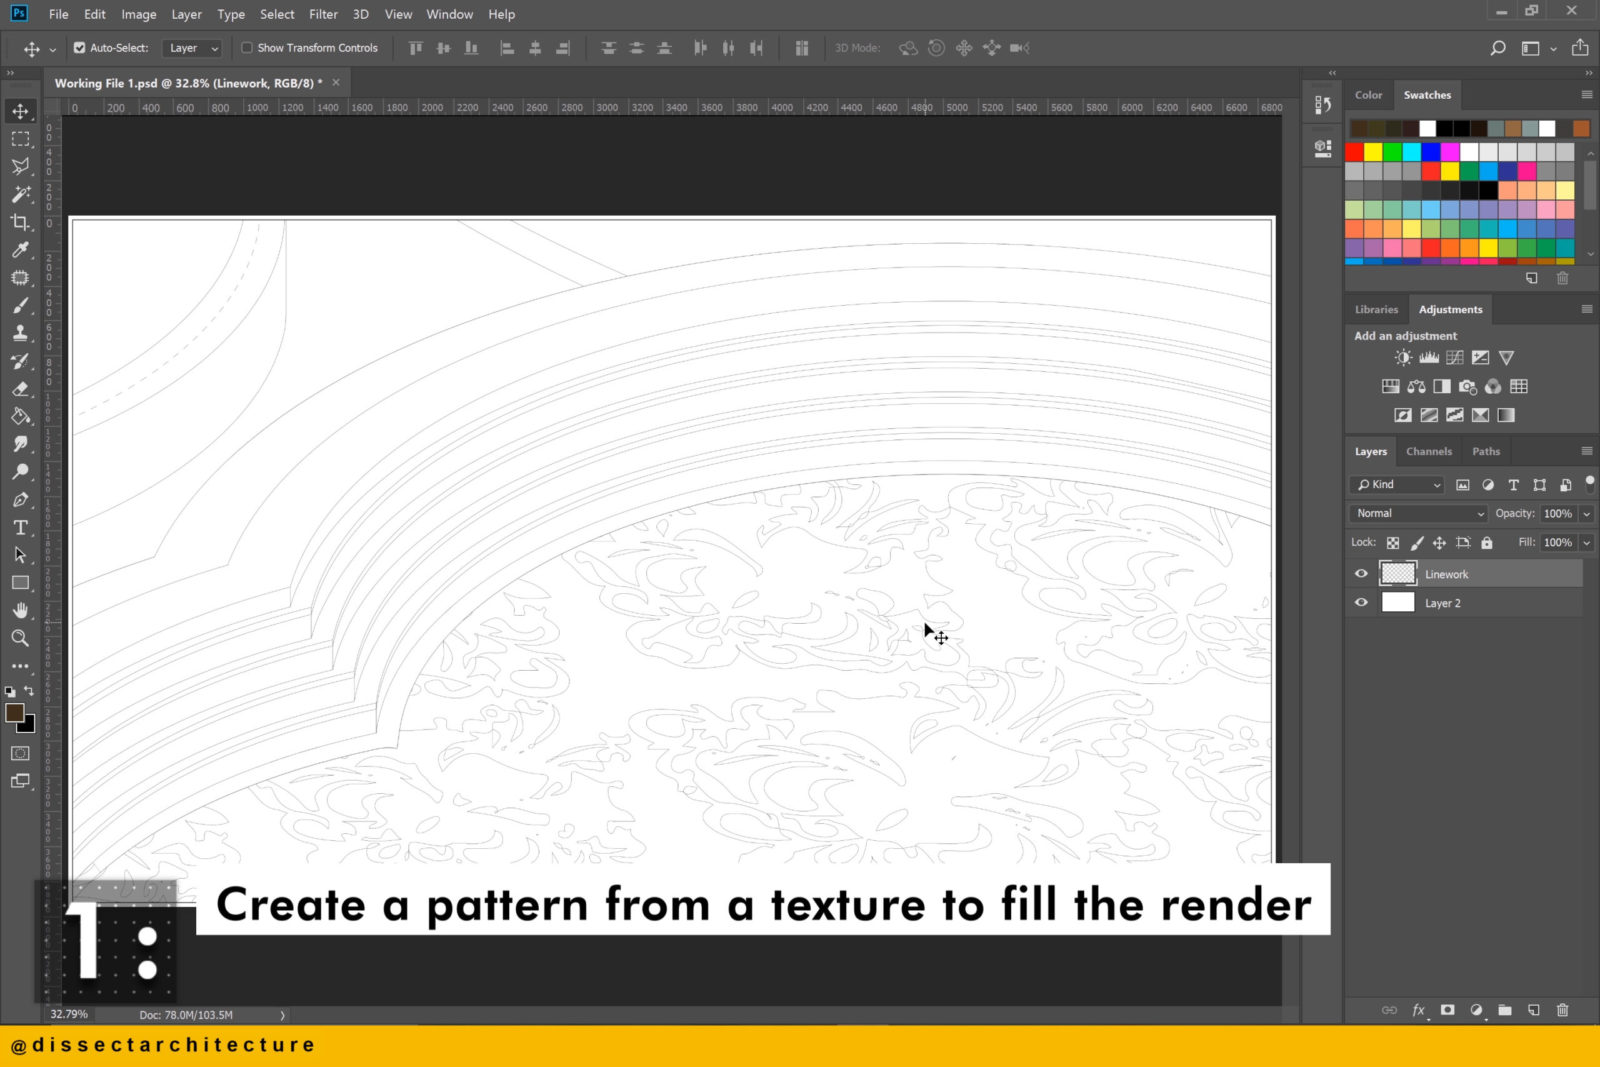
Step 01
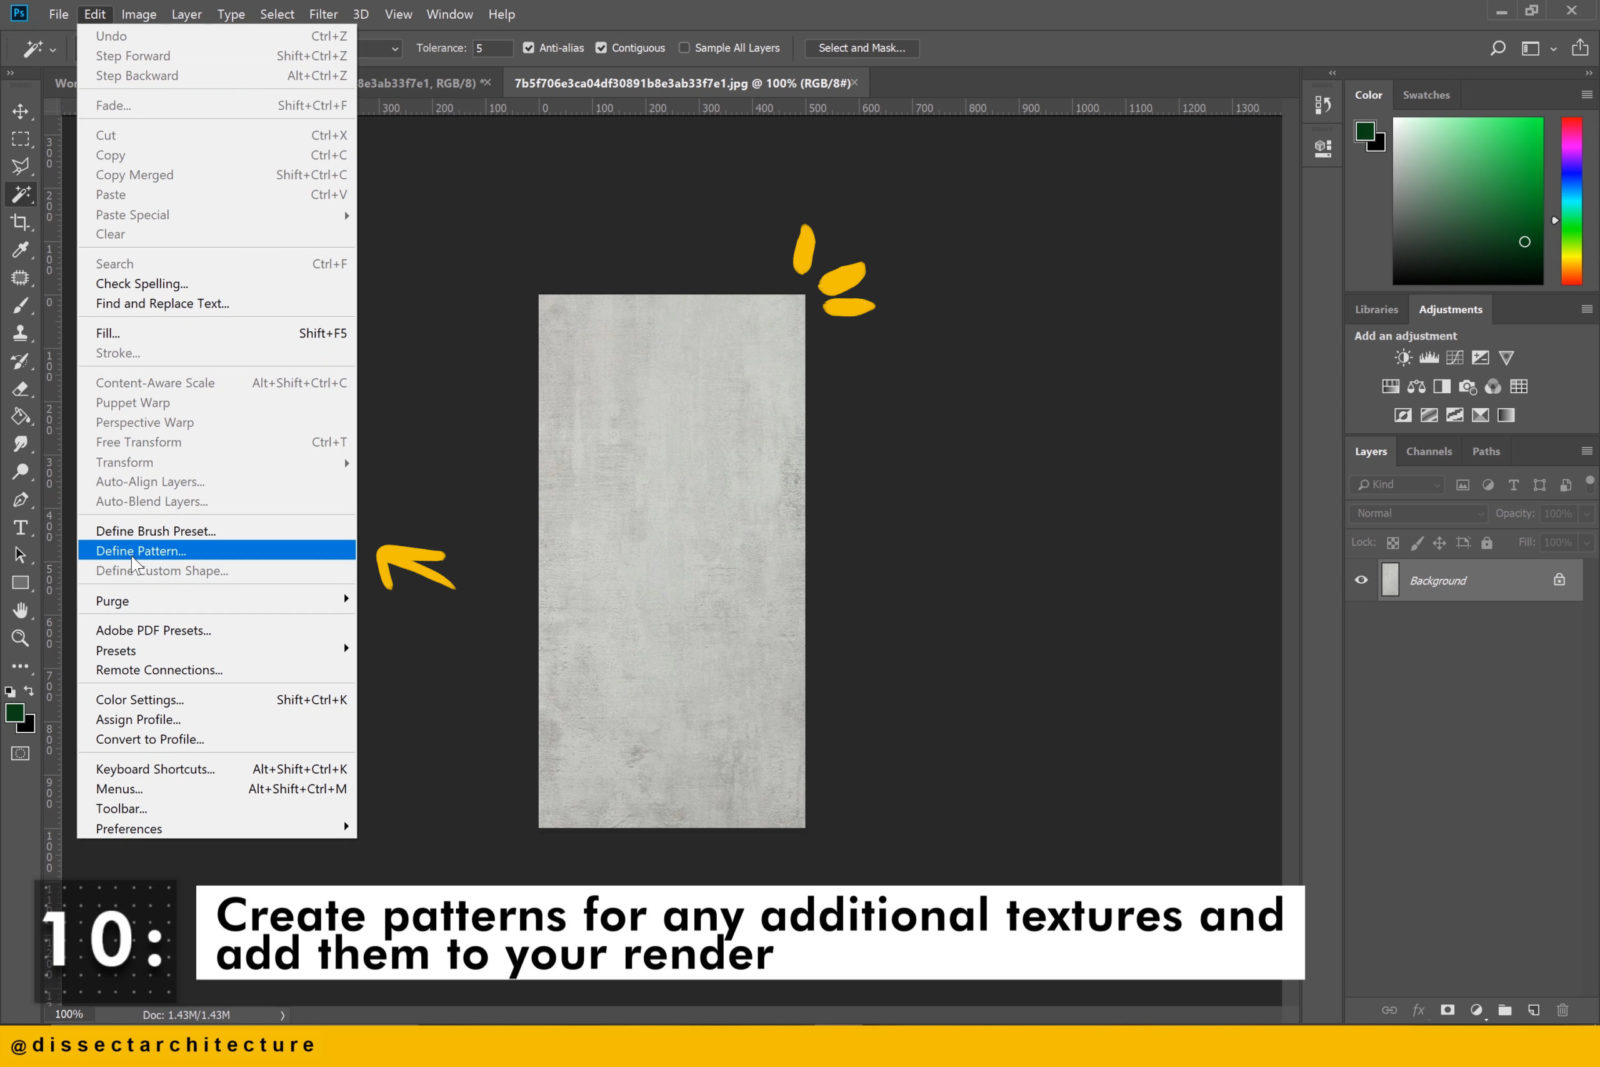
Start by creating a pattern from a texture to fill the render.
How to Create a Pattern:
1. Open the image you’d like to turn into a pattern
2. Go to Edit > Define Pattern
3. Give the Pattern a name click OK

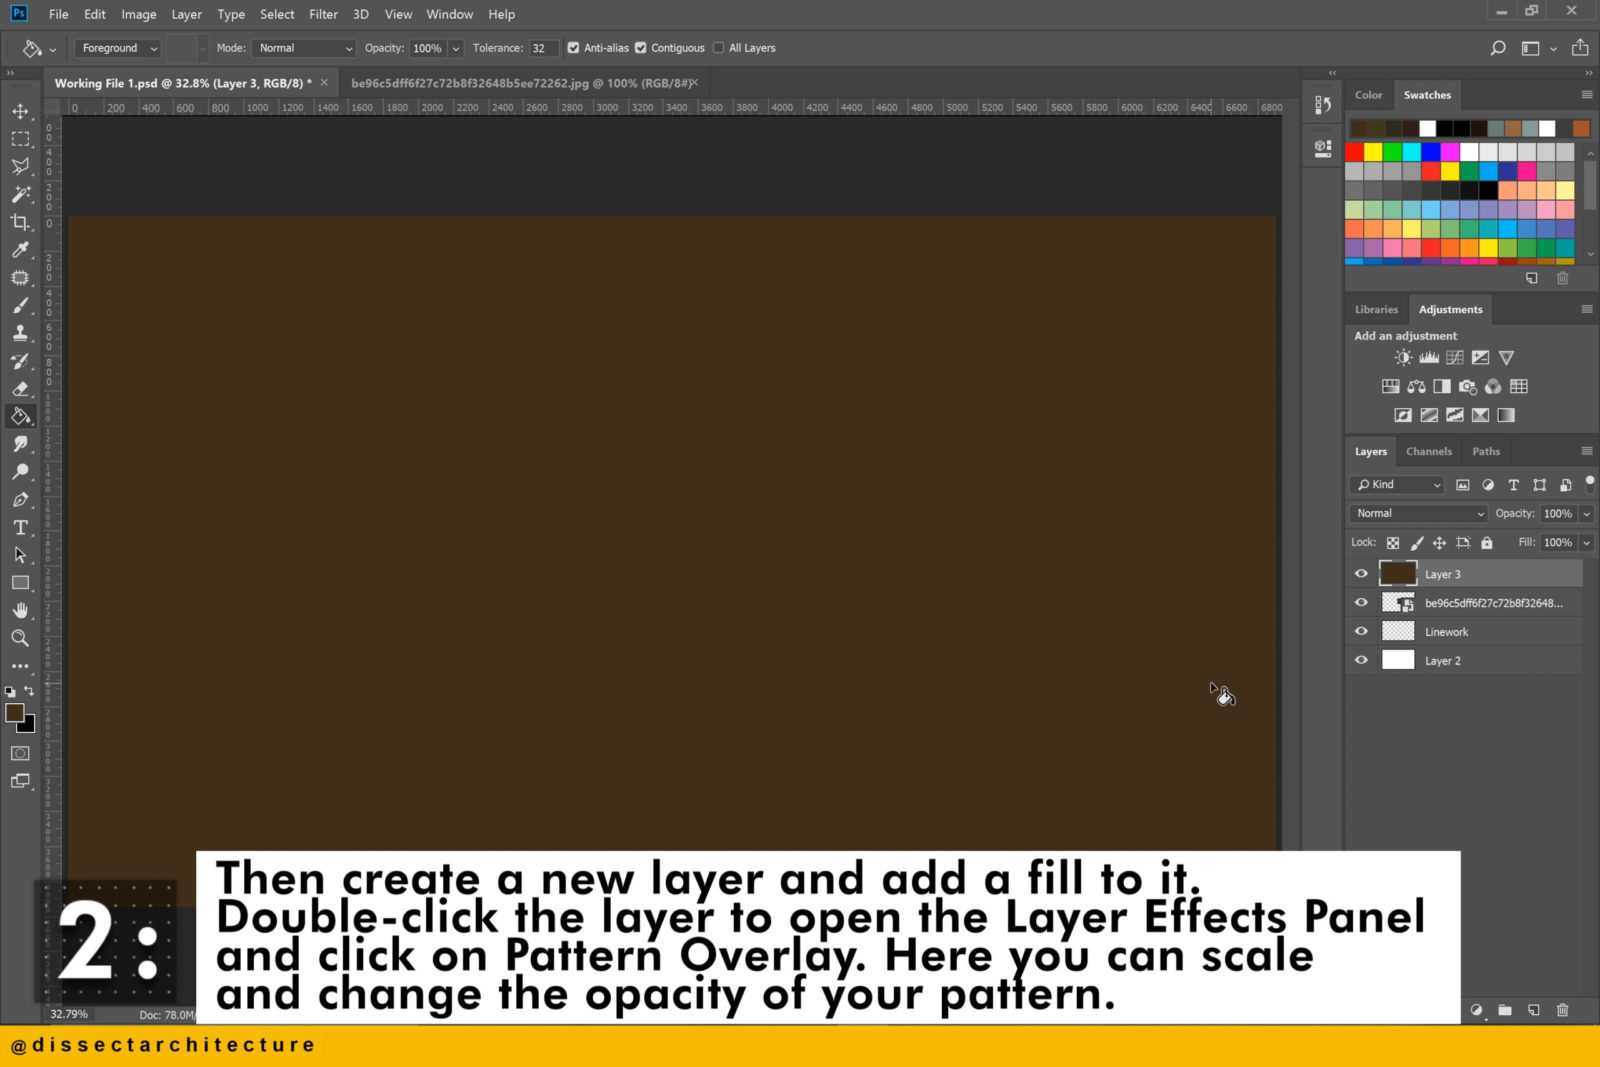
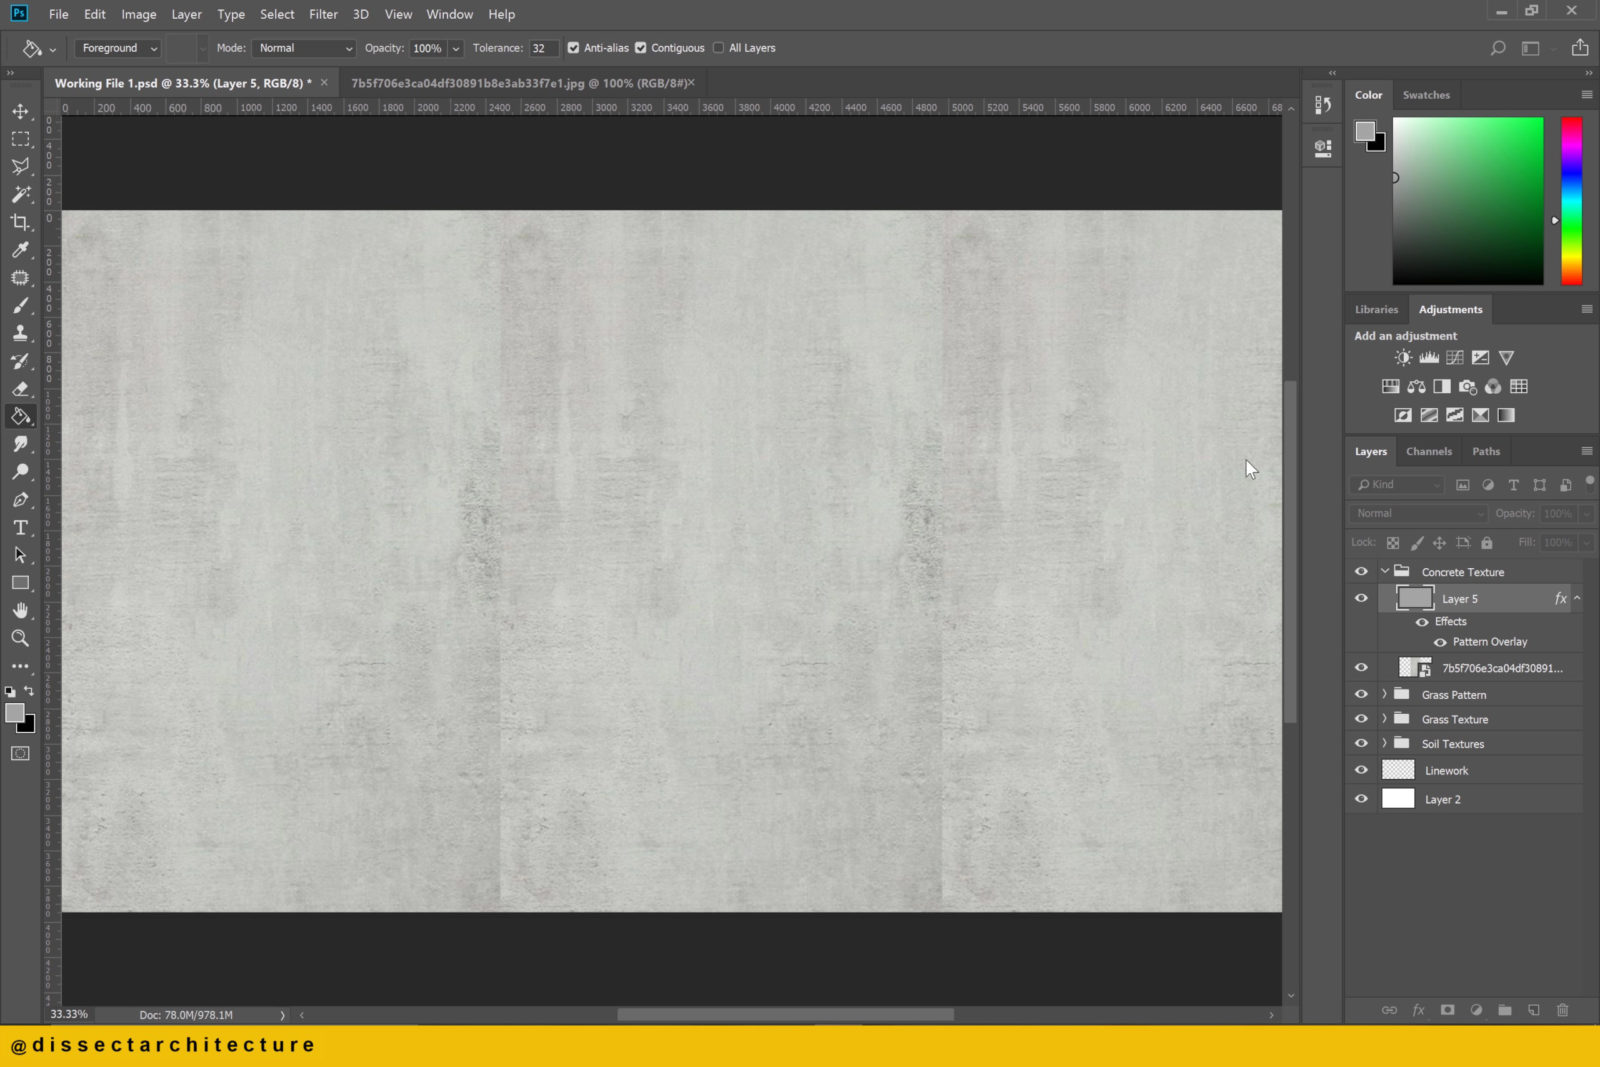
Step 02
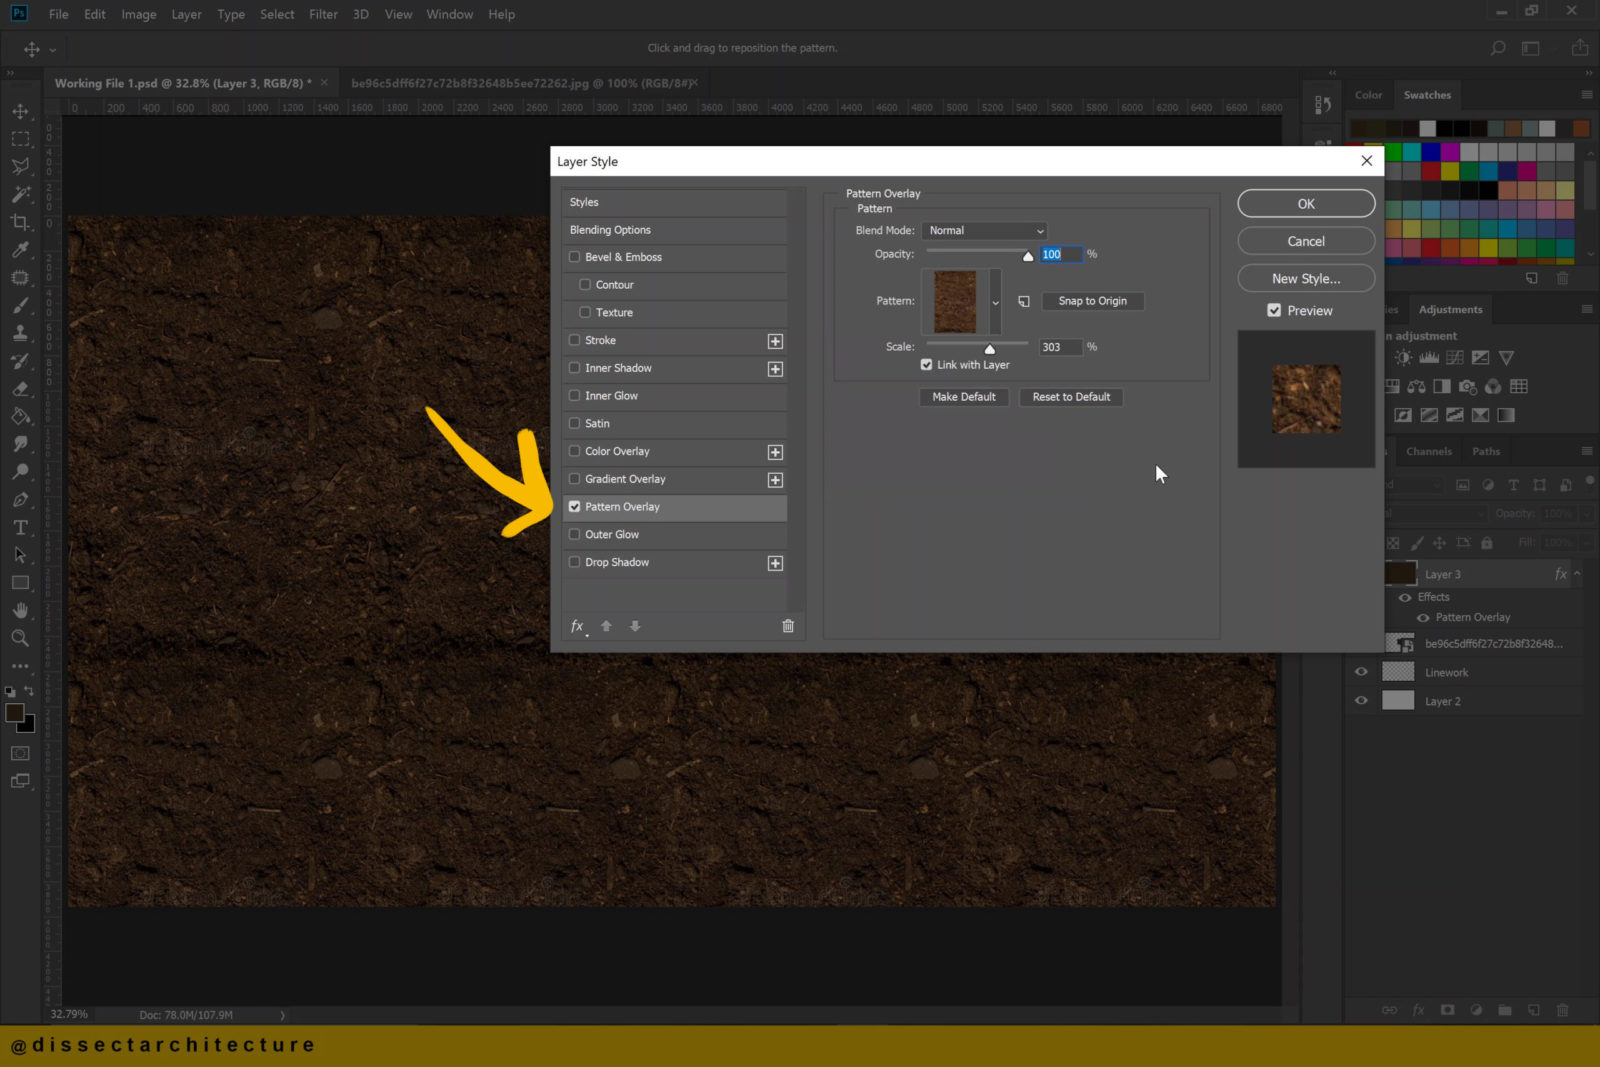
Then create a new layer and add a fill to it. Double-click the layer to open the Layer Effects Panel and click on Pattern Overlay.
Here you can add your pattern image.
Step 03
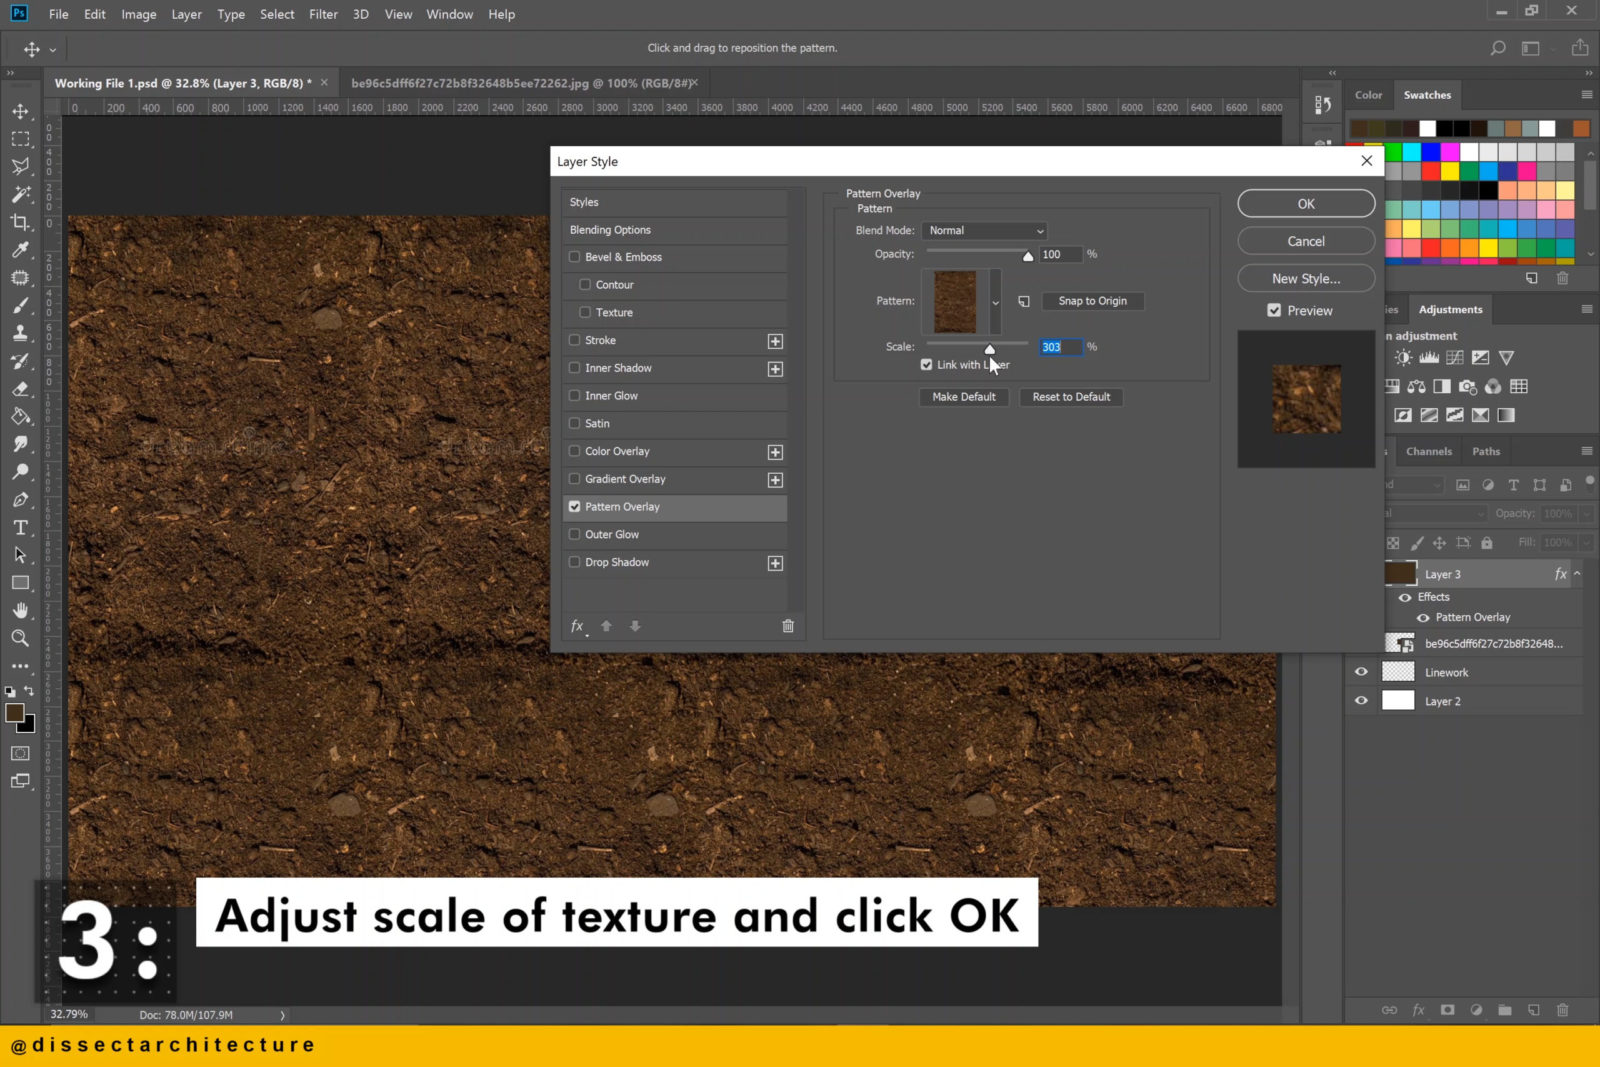
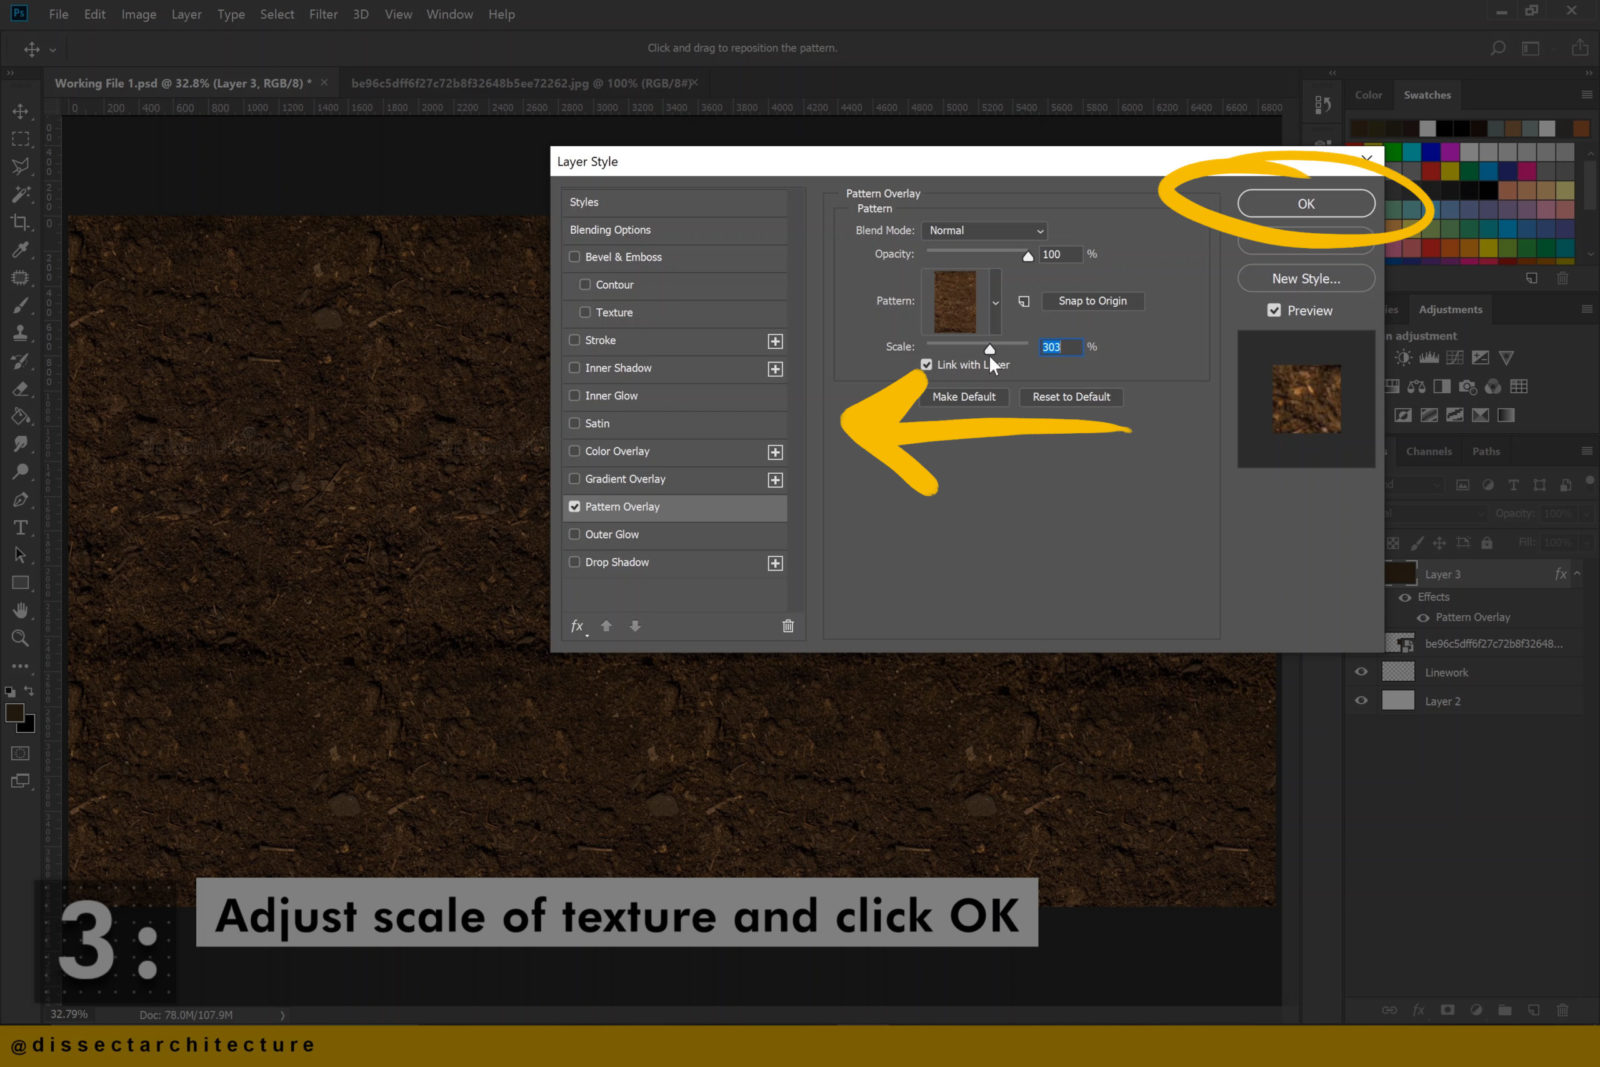
Adjust the scale of the texture and click OK.
Step 04
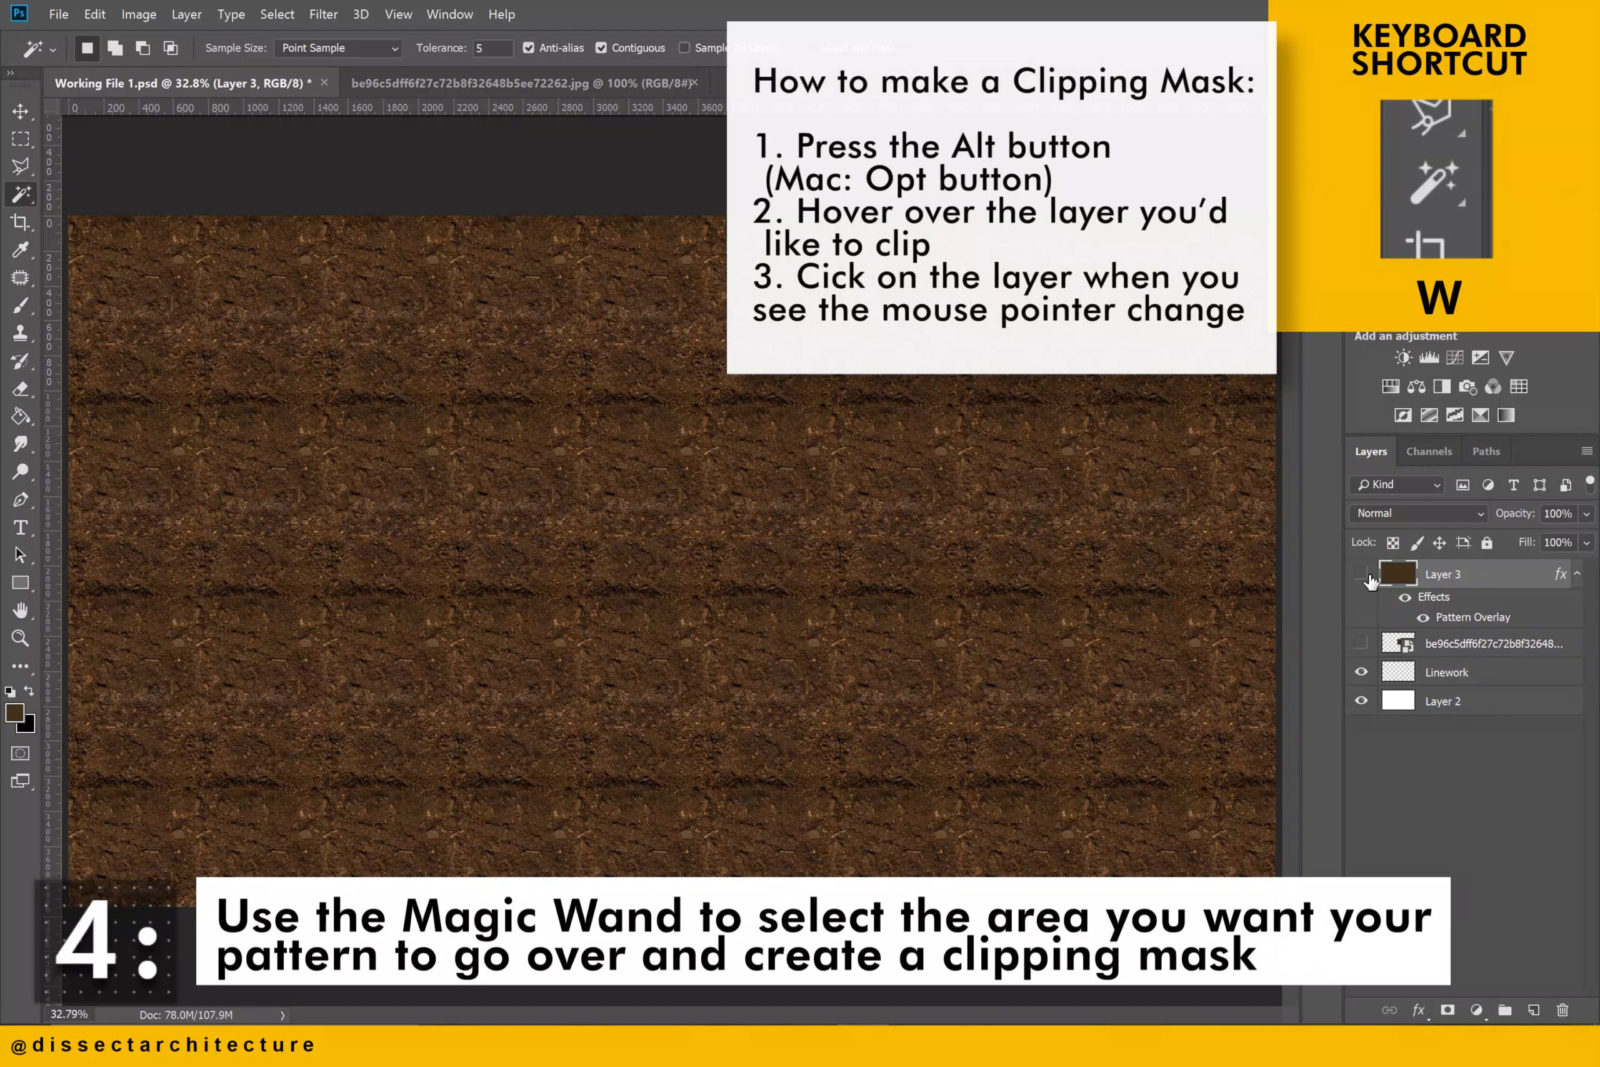
Use the Magic Wand Tool to select the area you want your pattern to go over and create a Clipping Mask.
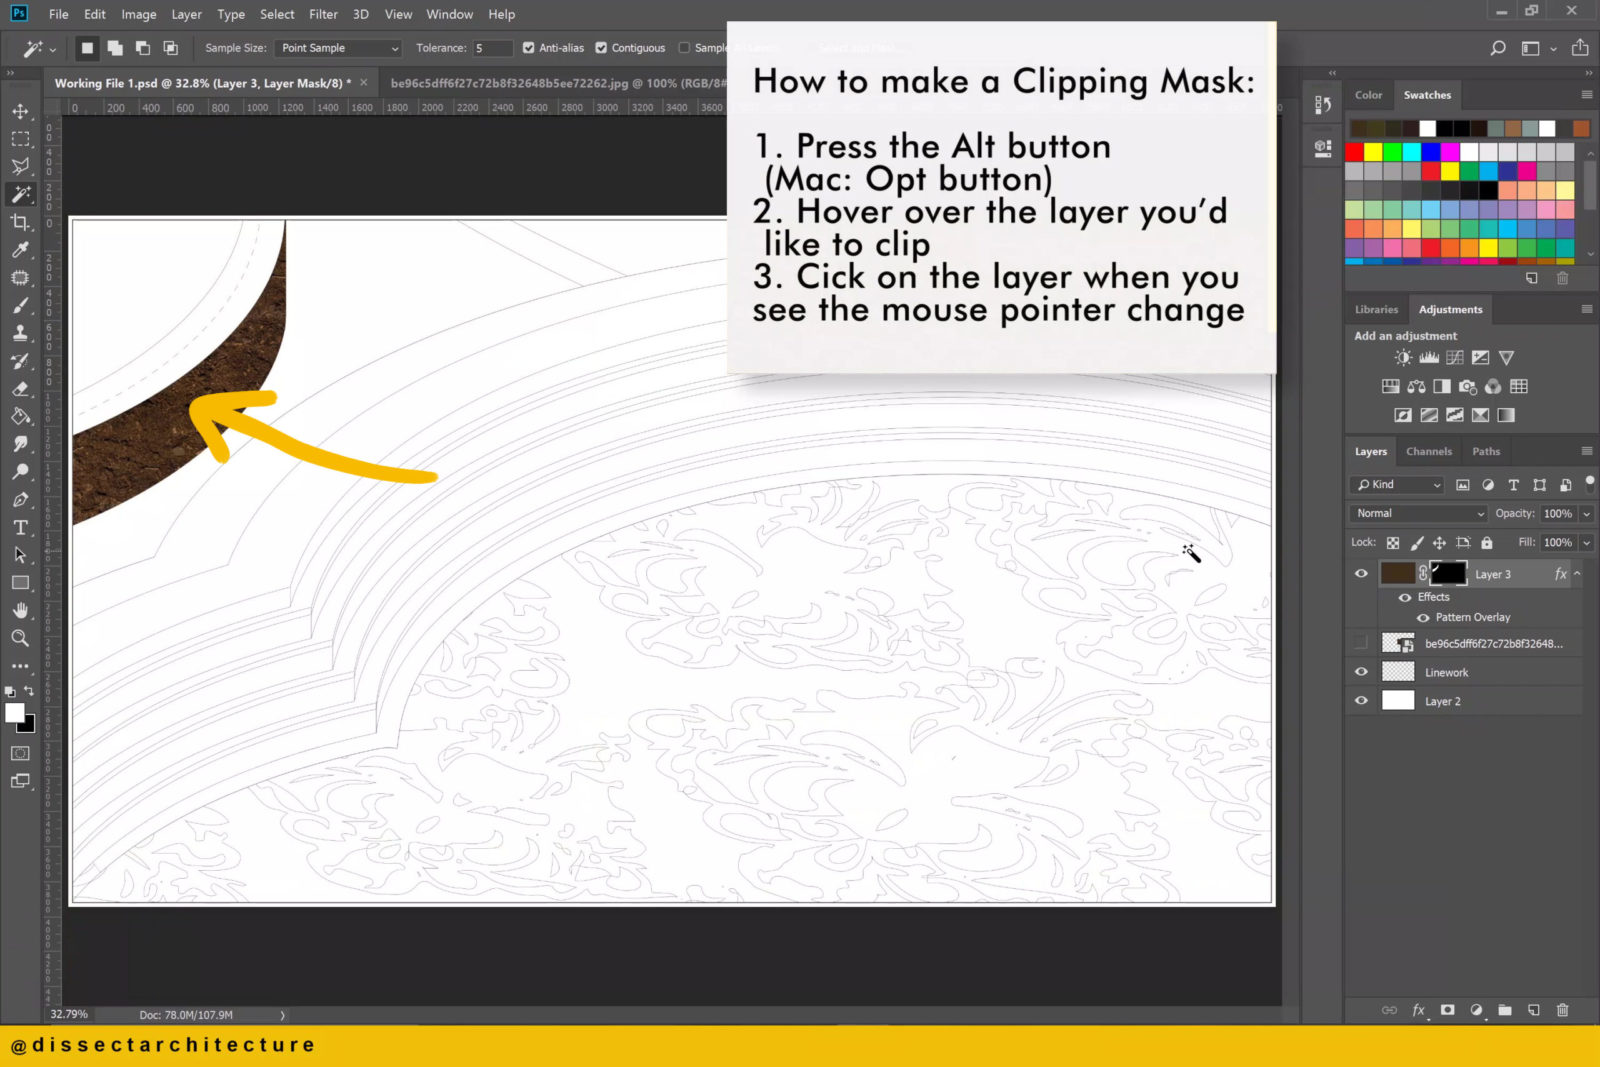
How to Create a Clipping Mask:
1. Press the ALT button
2. Hover over the top layer you’d like to clip
3. Click on the layer when you see the mouse pointer change
Step 05
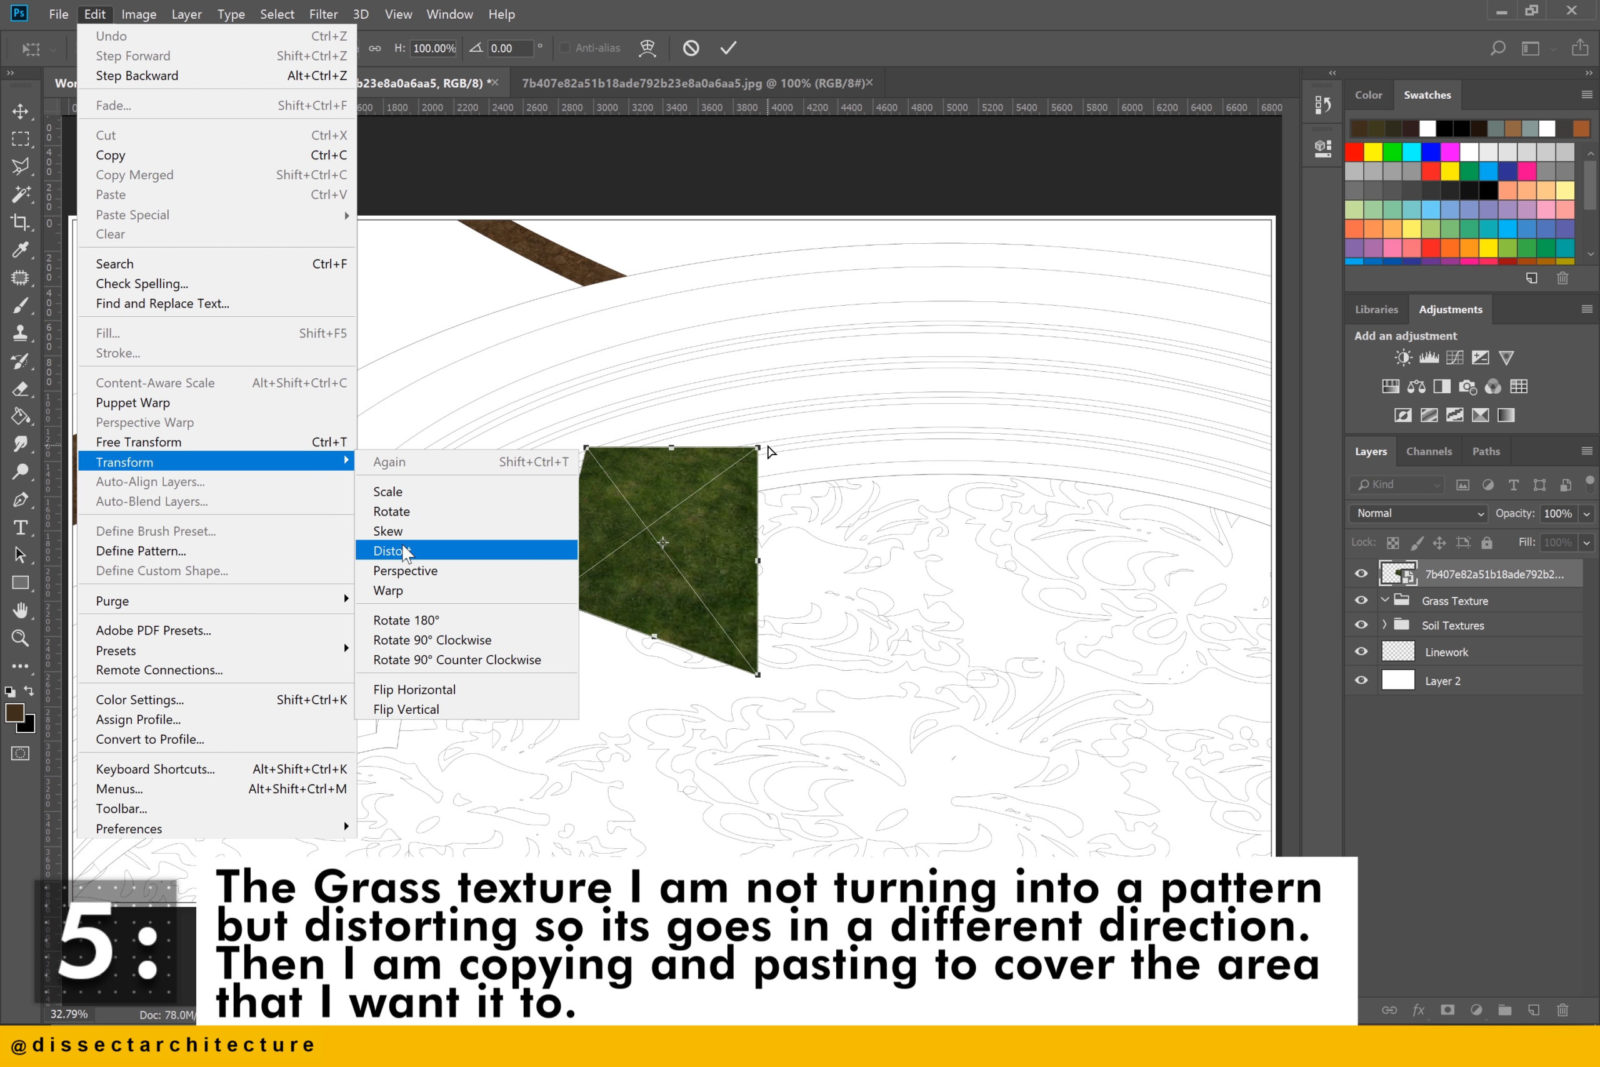
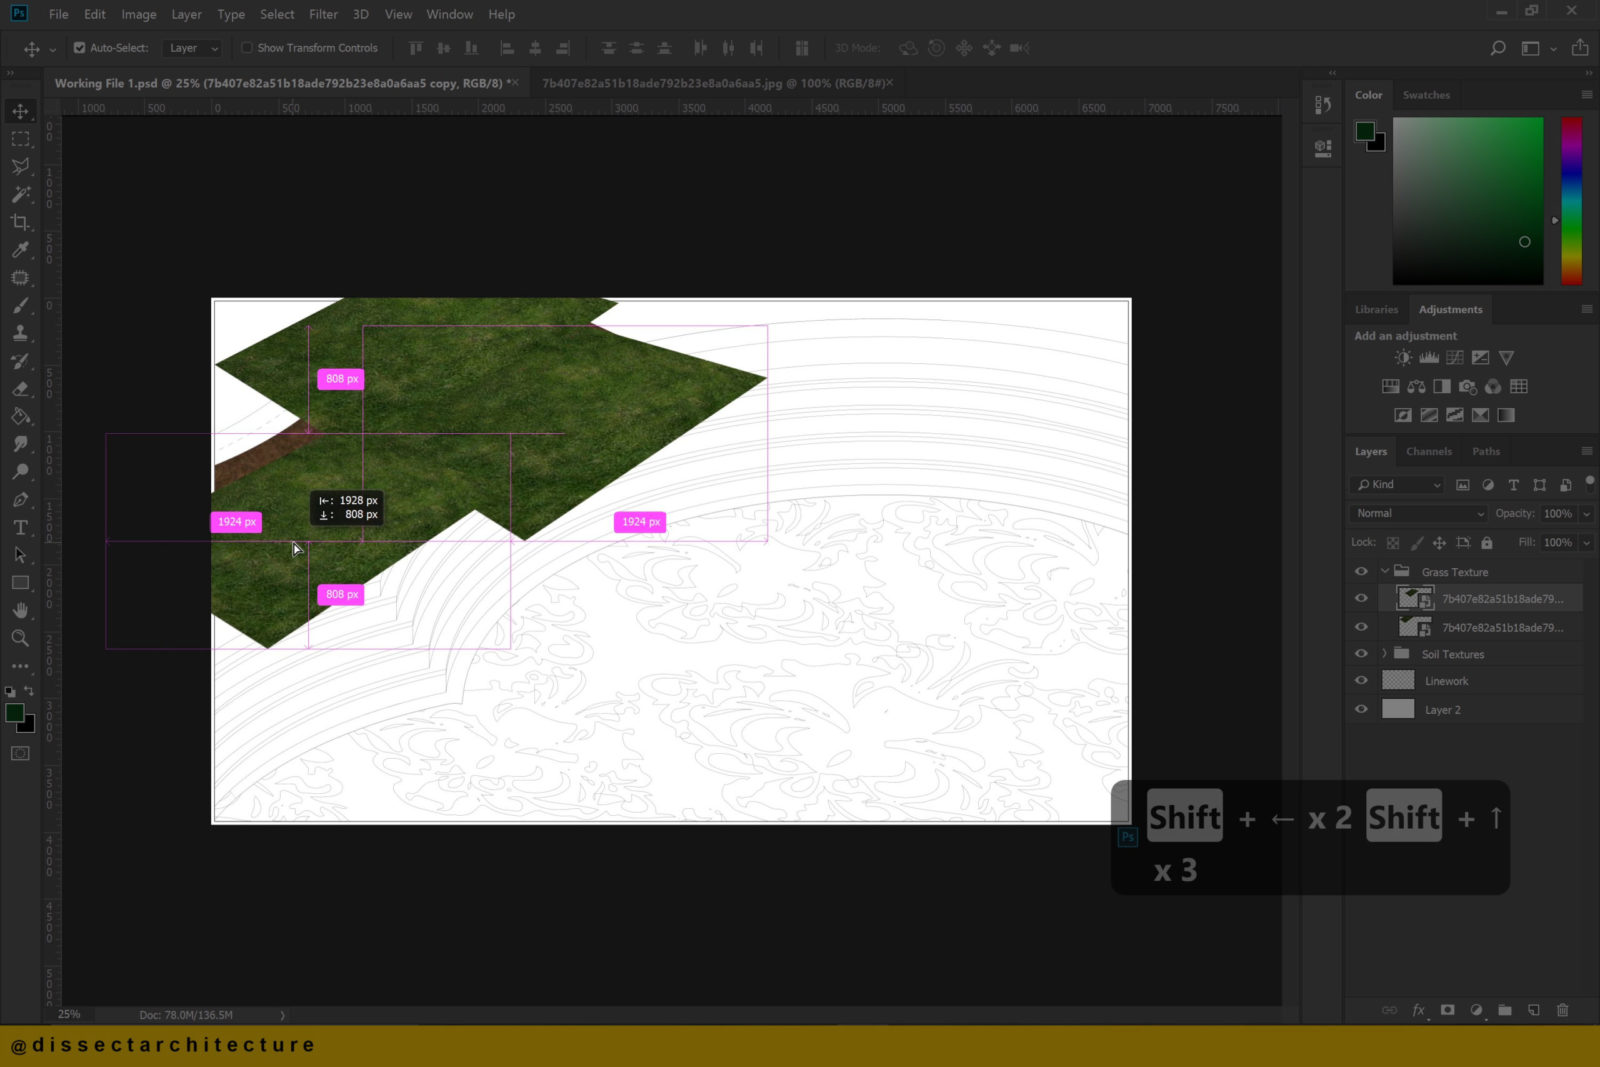
I am adding a grass texture next.
The grass texture I am not turning into a pattern, but distorting it so it goes in a different direction. Then I am copying and pasting it to cover the area that will become the grass.
Step 06
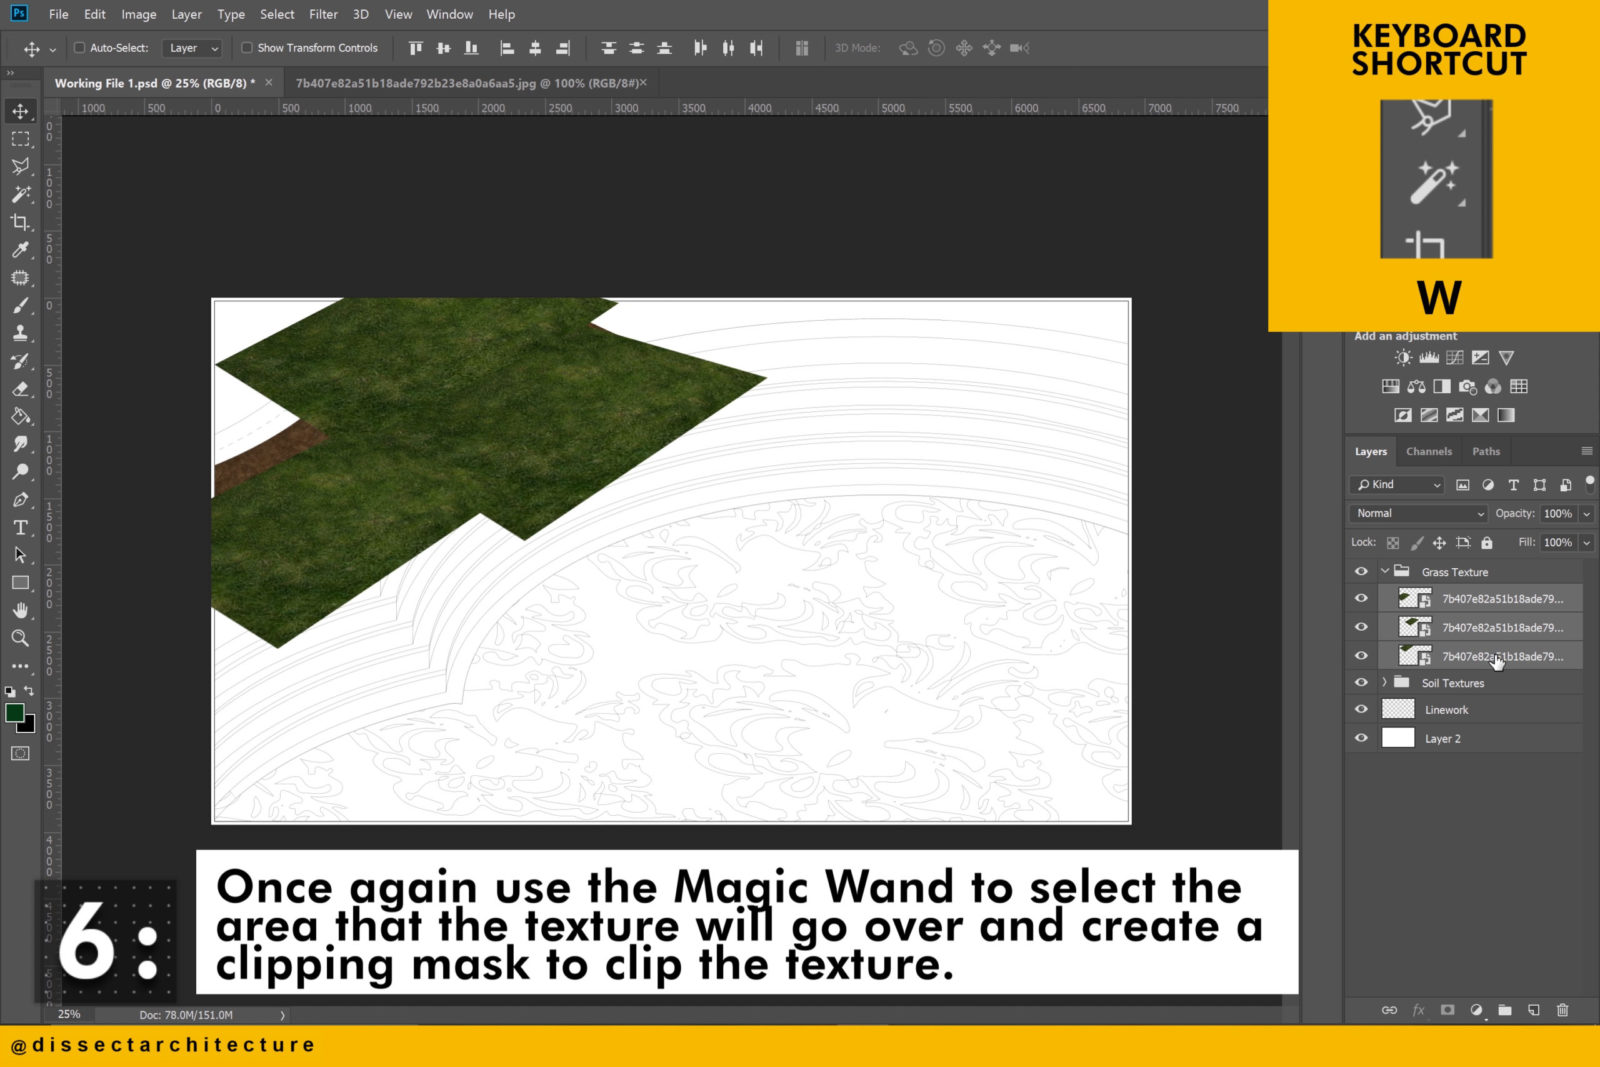
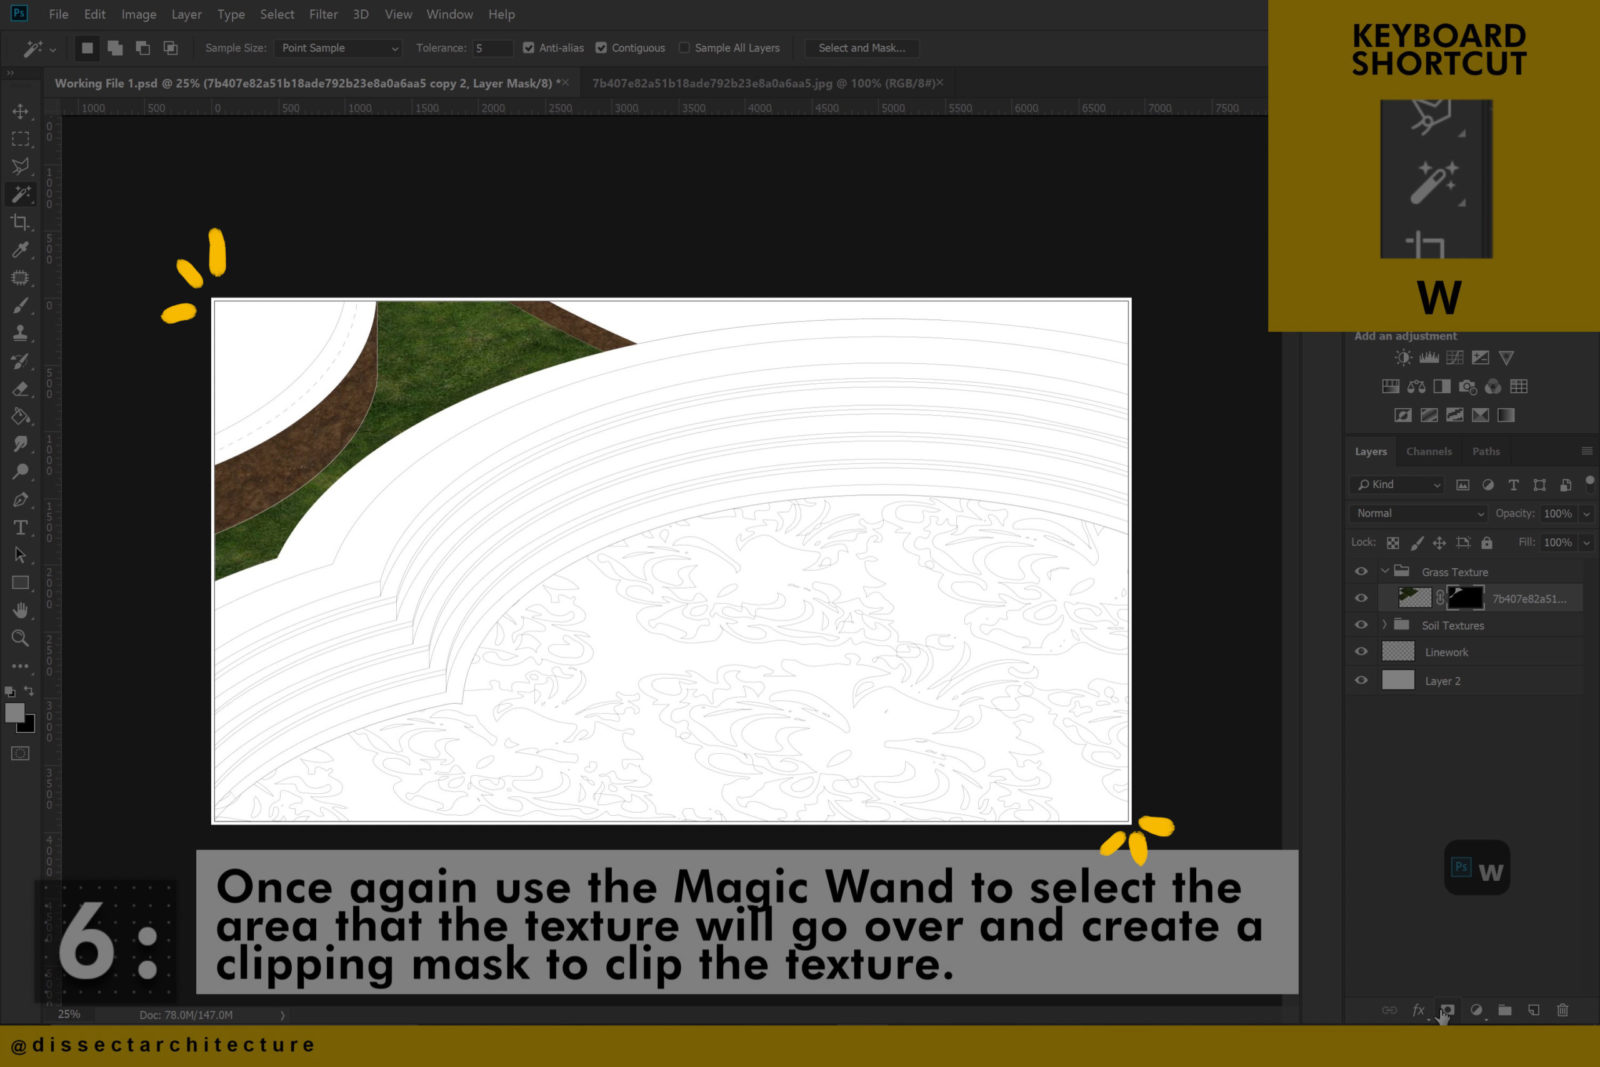
Once again use the Magic Wand Tool to select the area that the texture will go over and create a clipping mask to clip the texture. the Magic Wand Tool can be activated by pressing the “W” key.
Step 07
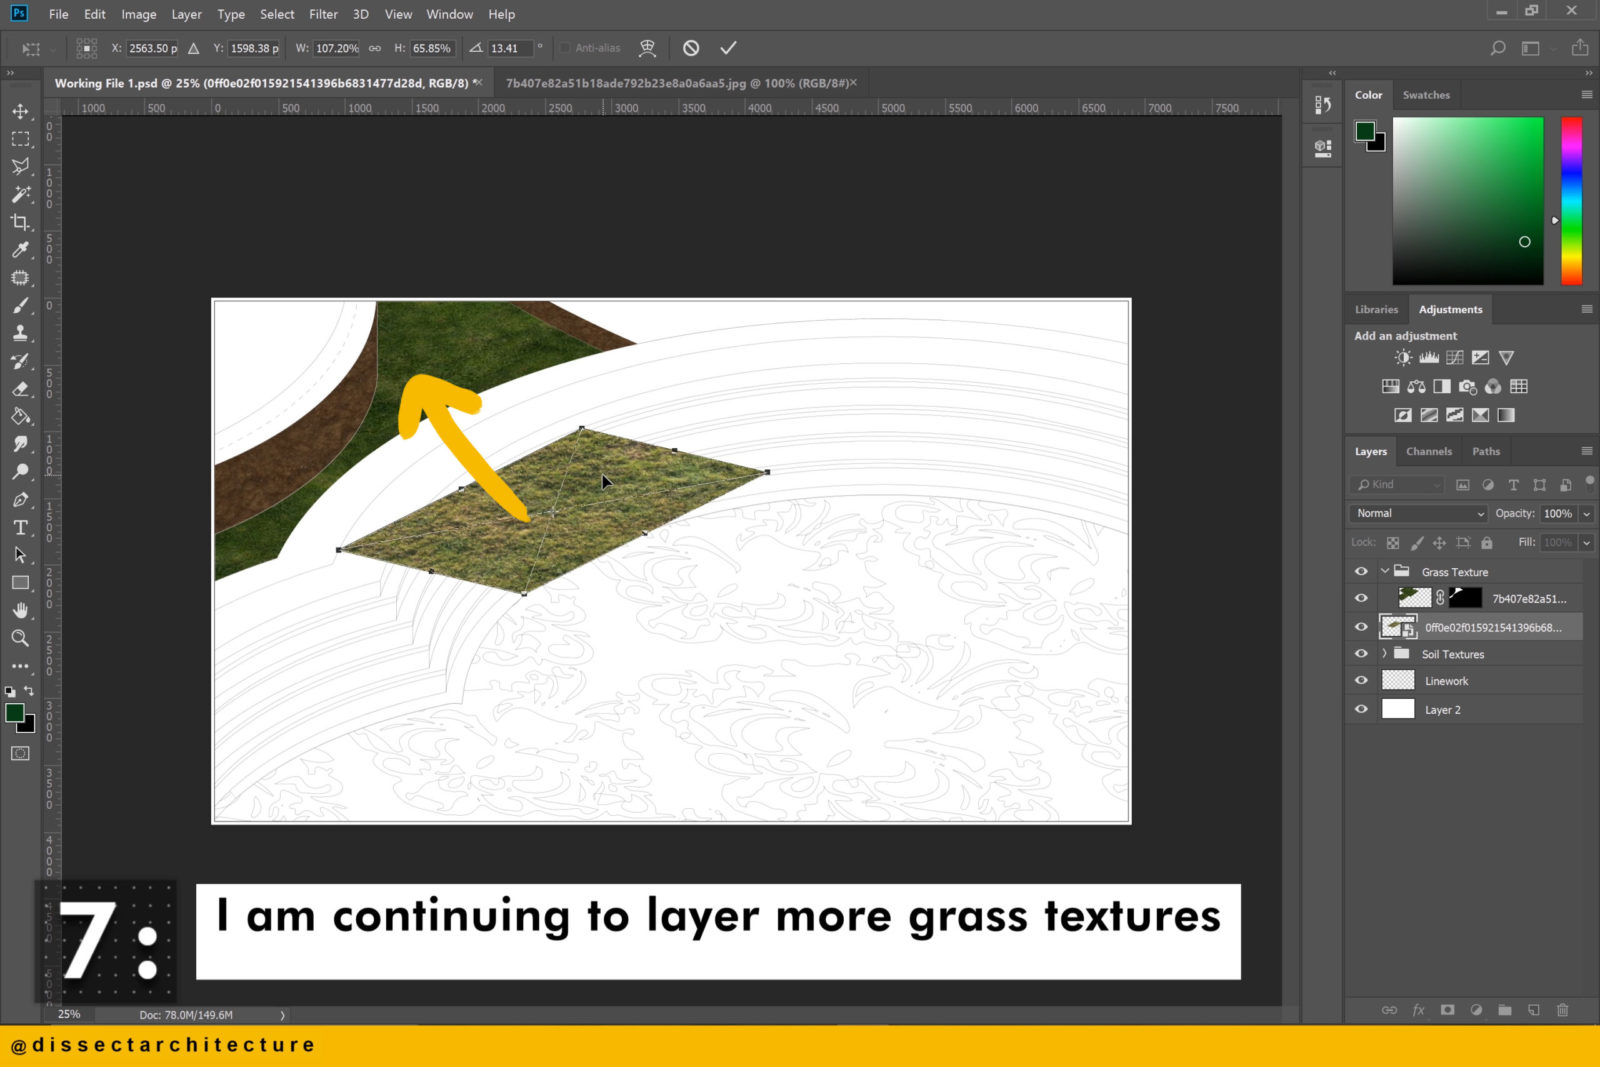
I am repeating the same process to layer more grass textures over each other.

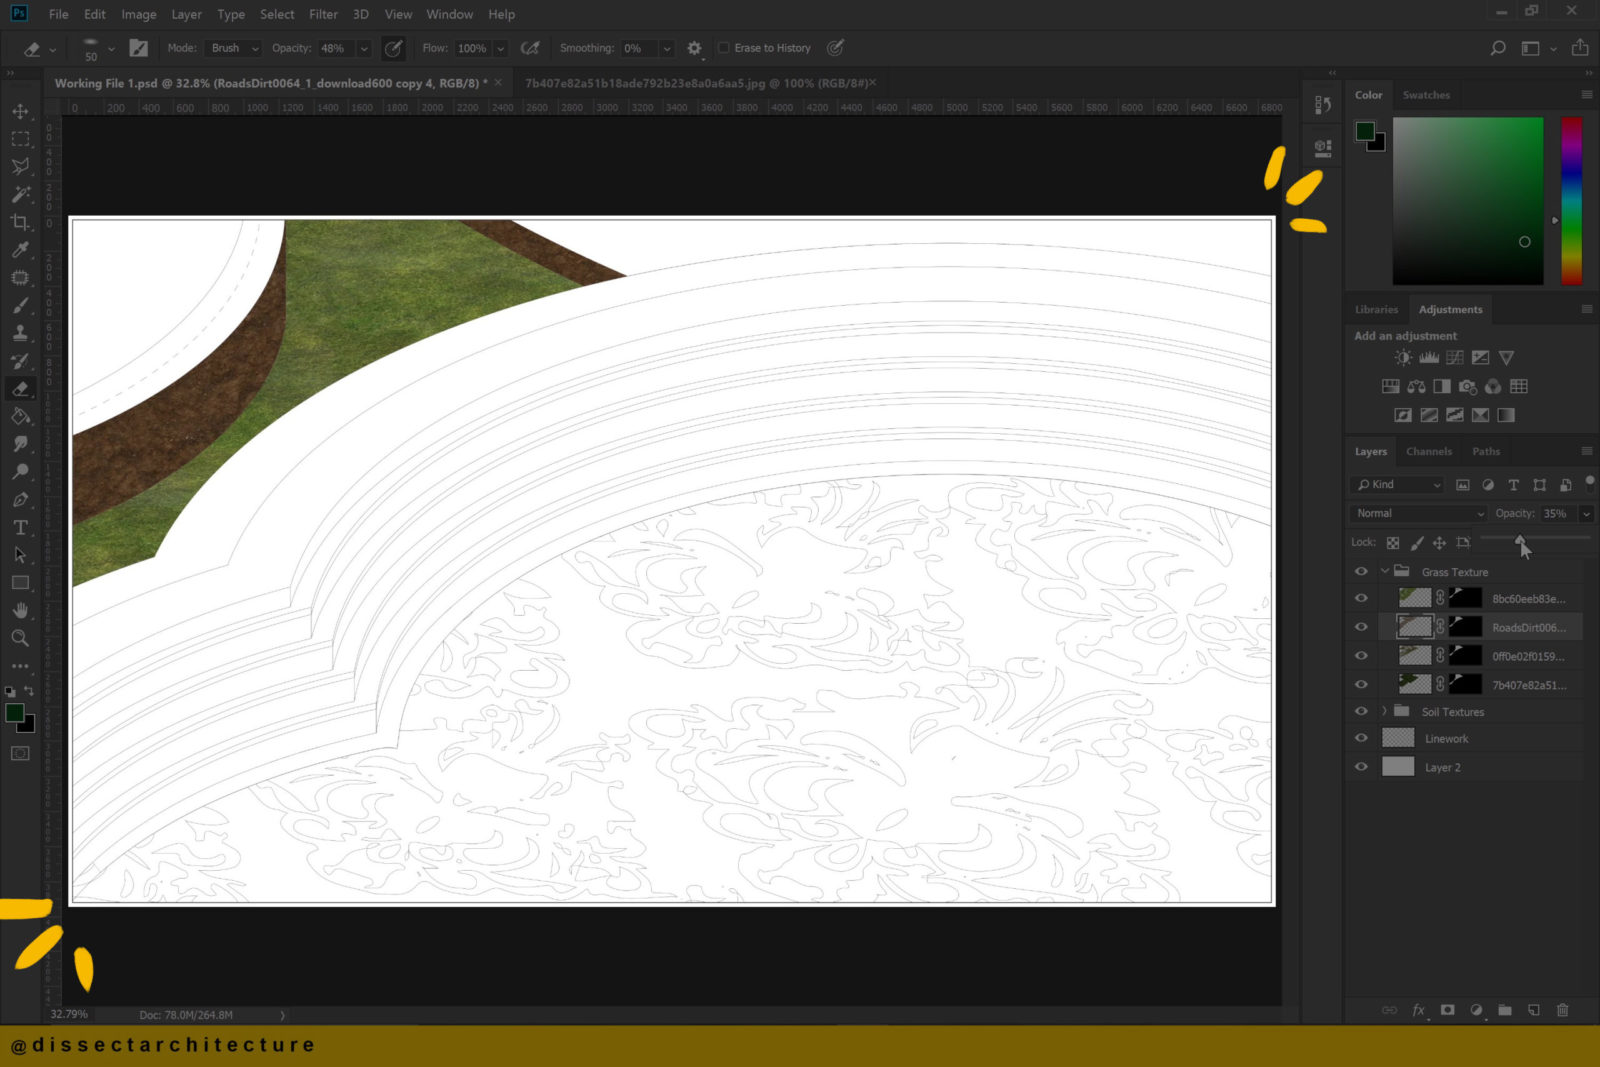
Step 08
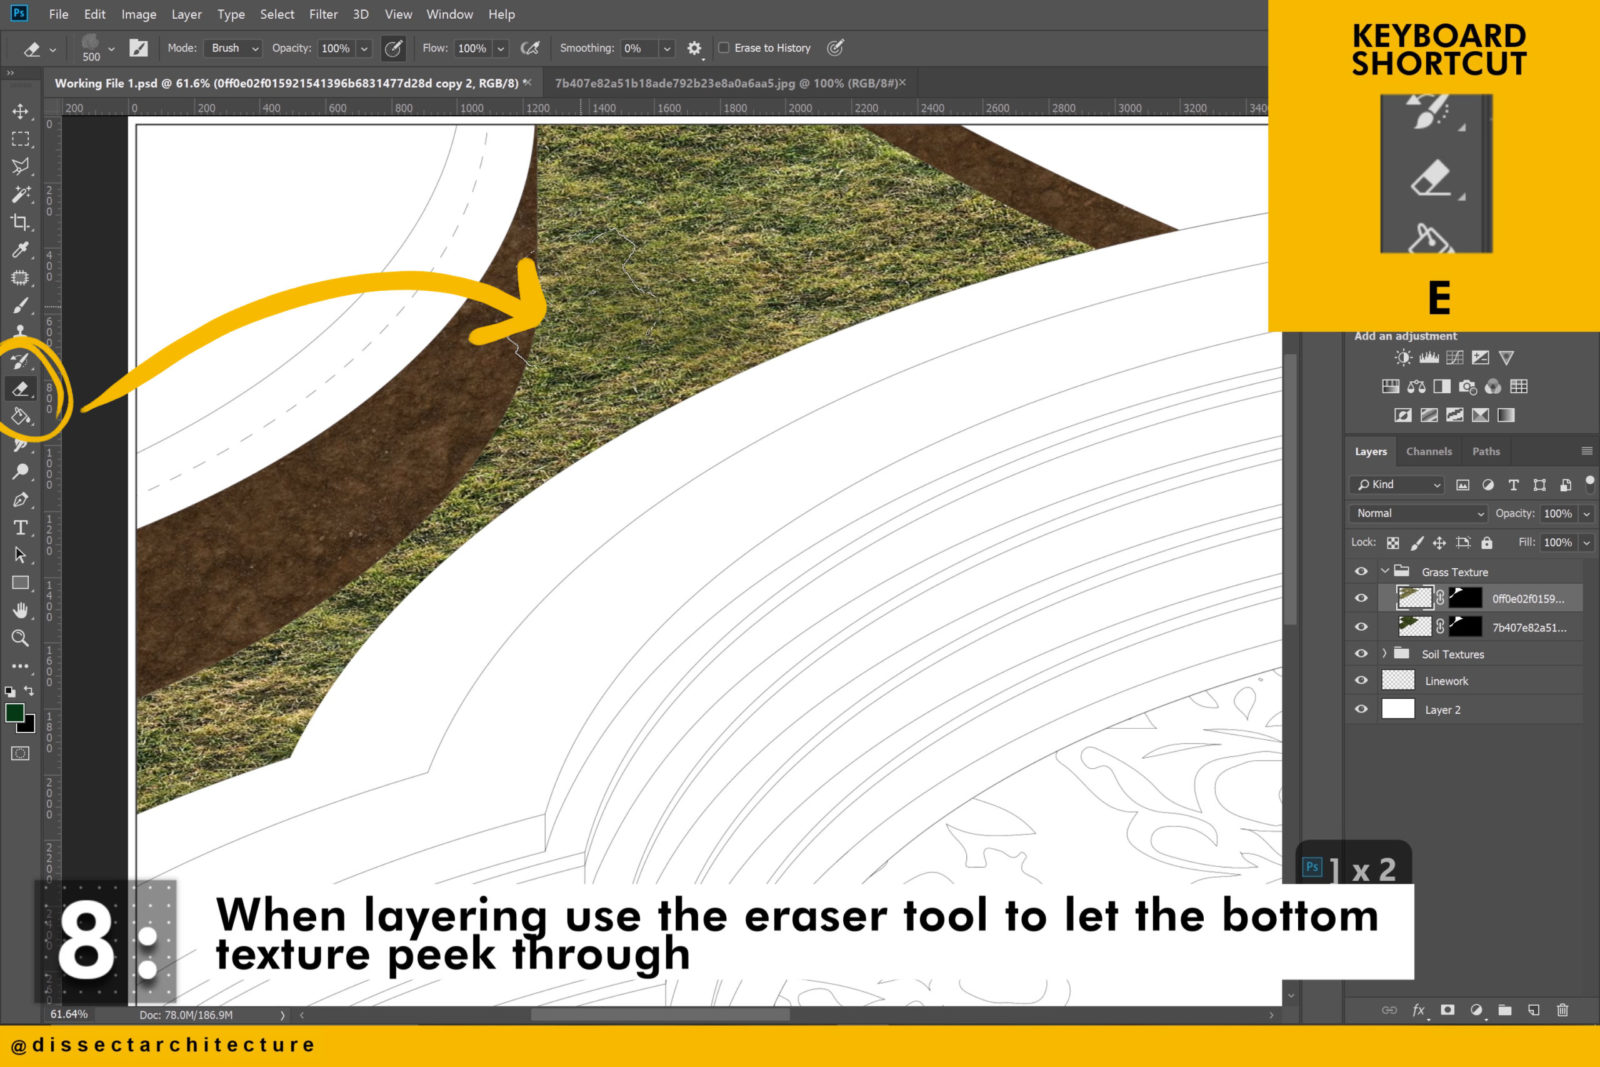
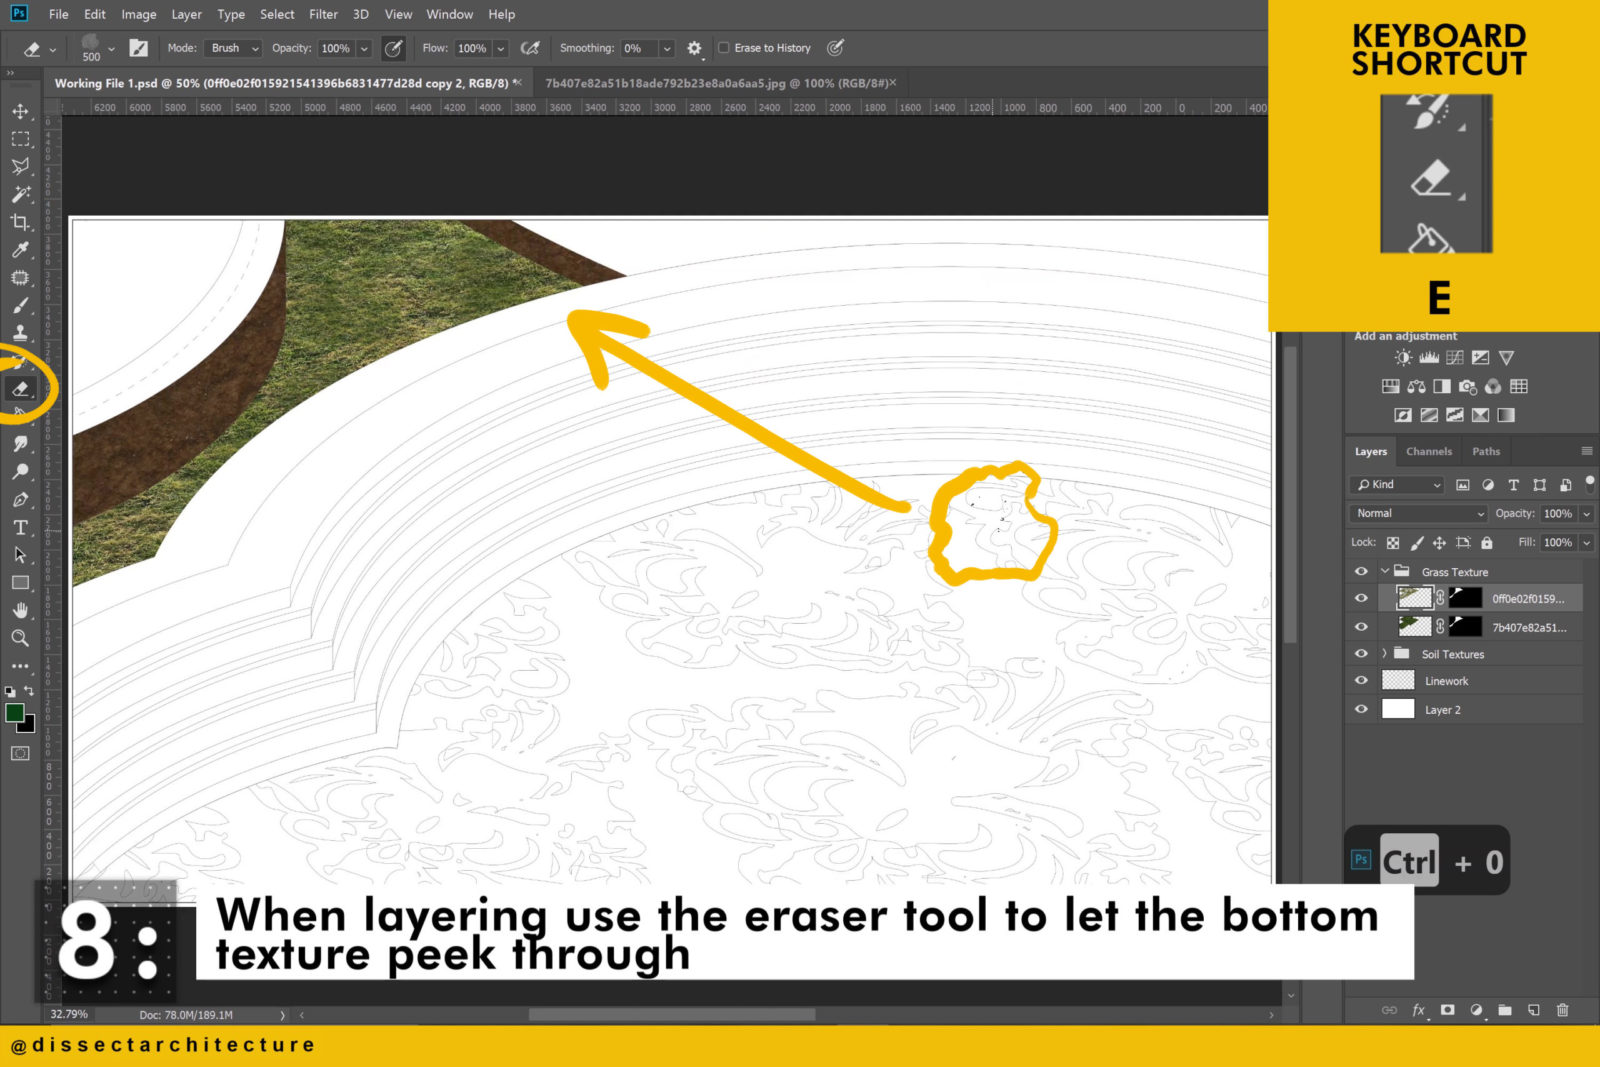
When layering use the Eraser Tool to let the bottom texture peek through by erasing small parts of the top layers.
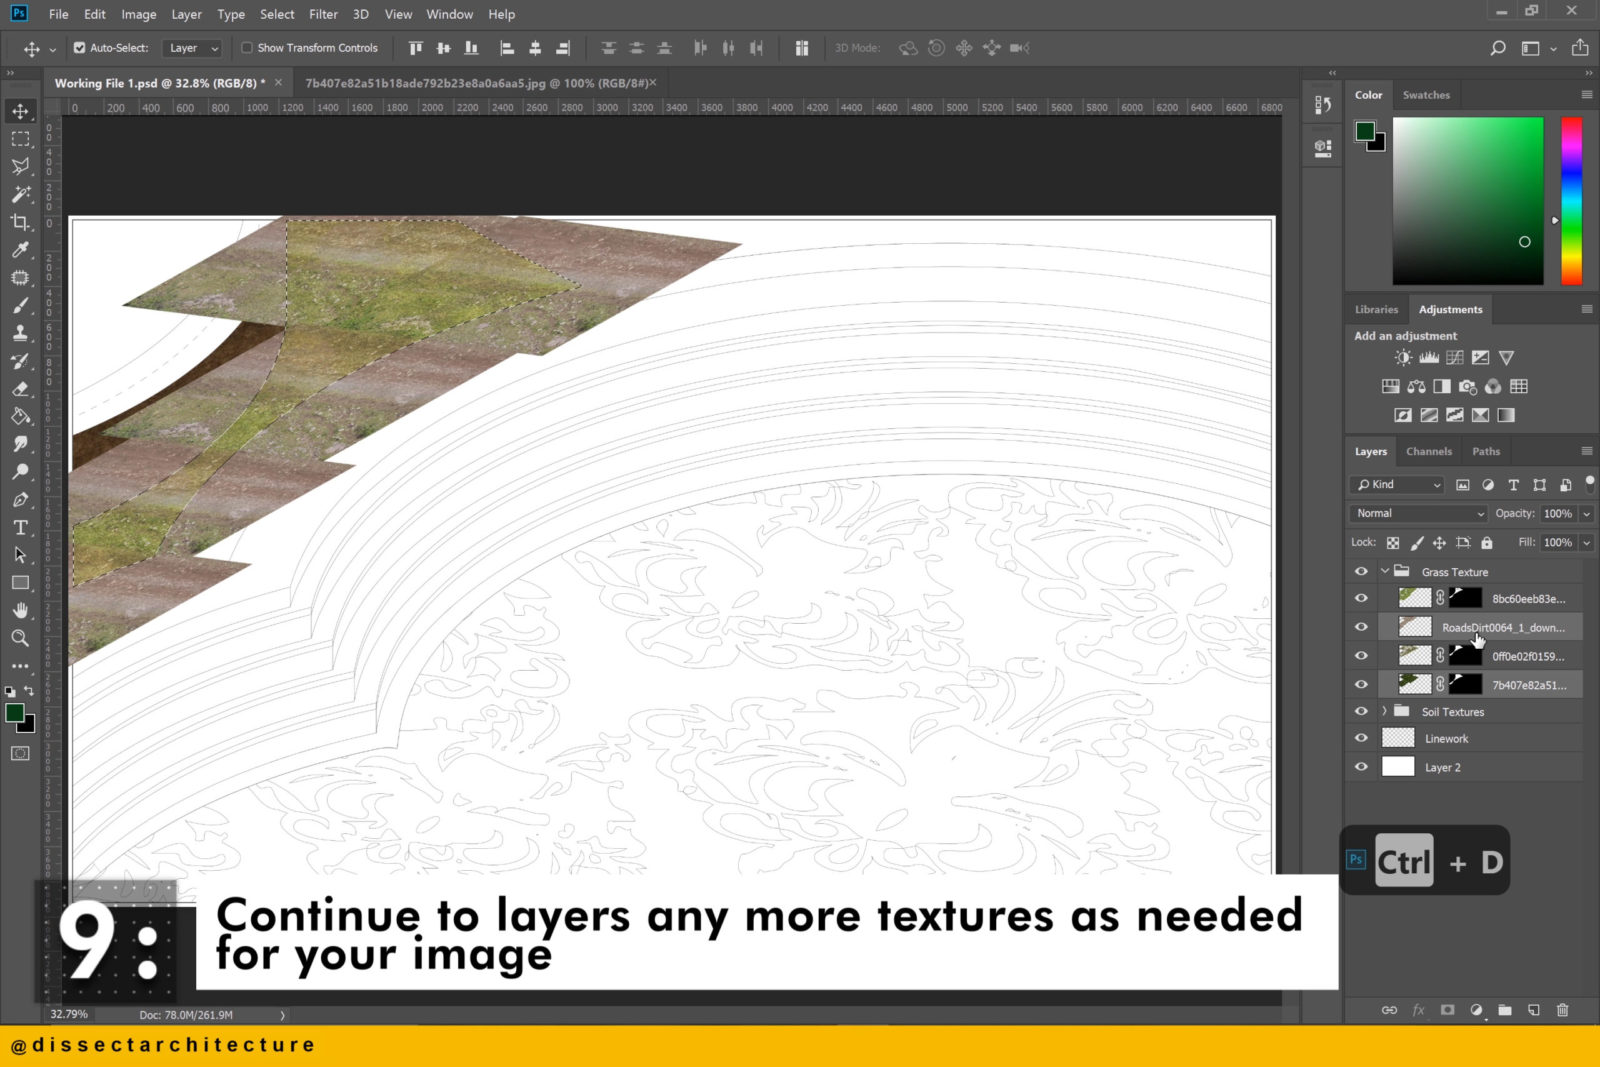
Step 09
Continue to layer more textures as needed to your image.
Step 10
Then create any additional patterns for anymore textures and add them to your render.
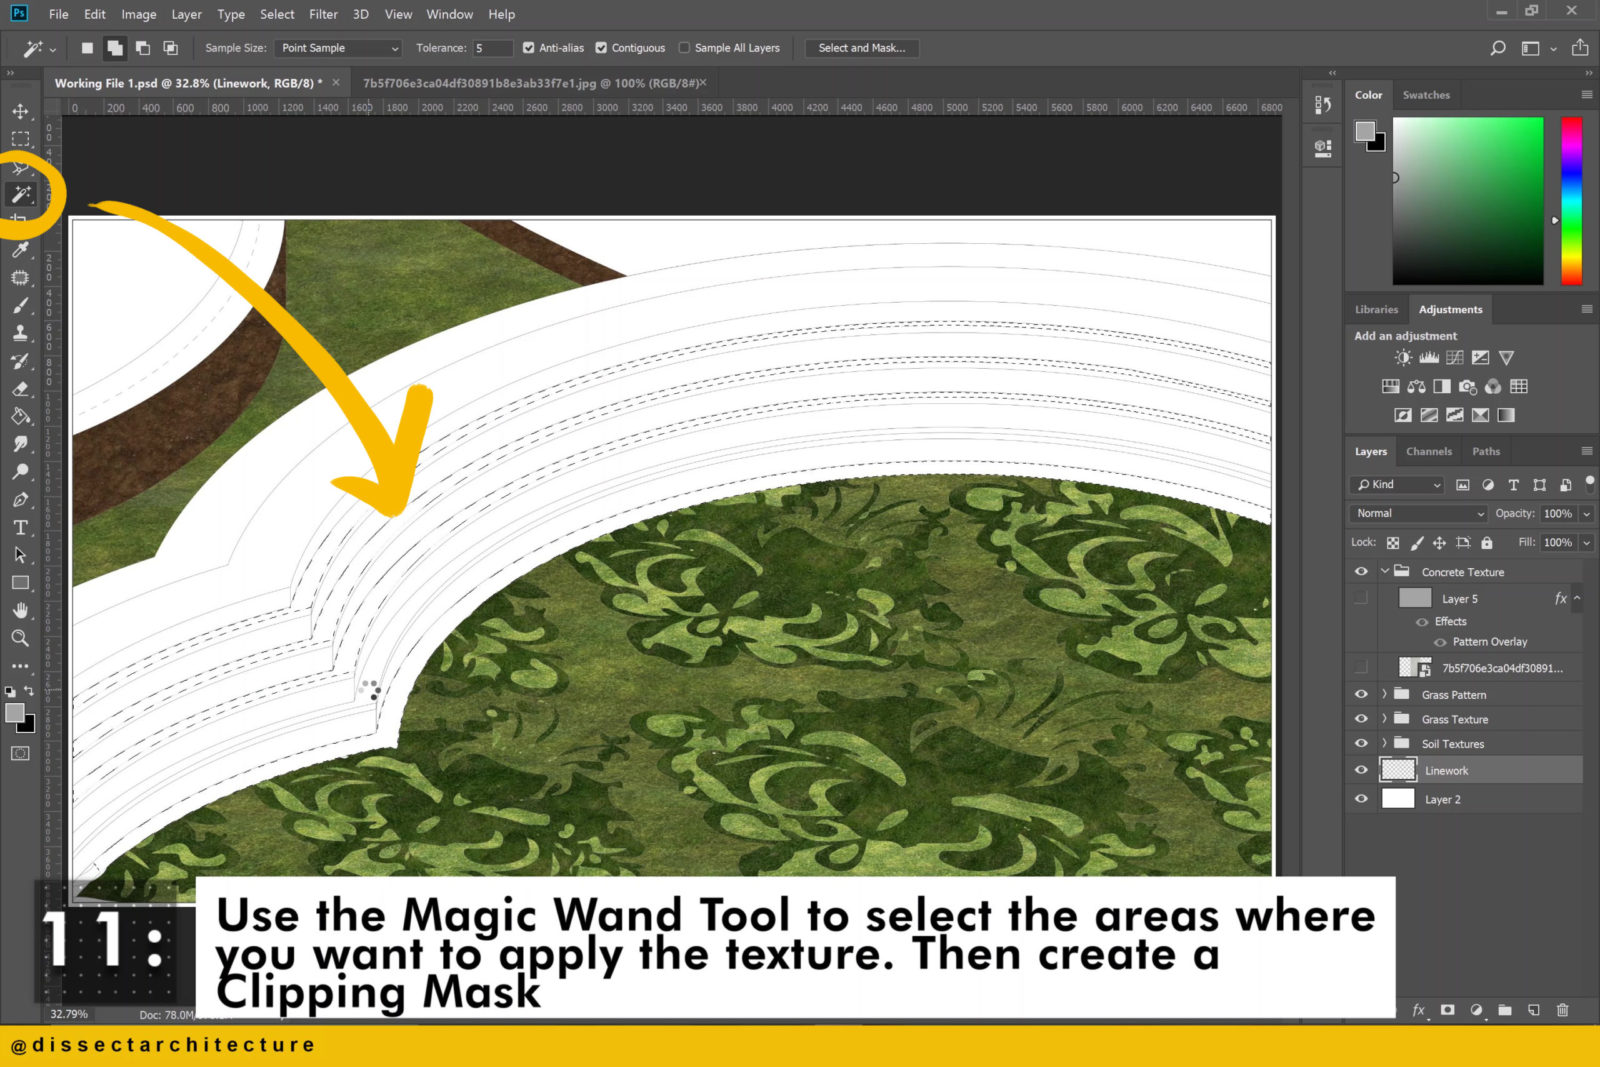
Step 11
Continue to use the Magic Wand Tool to select the areas where you want to apply more textures. Add the patterns/texture and then create a Clipping Mask to trim them.
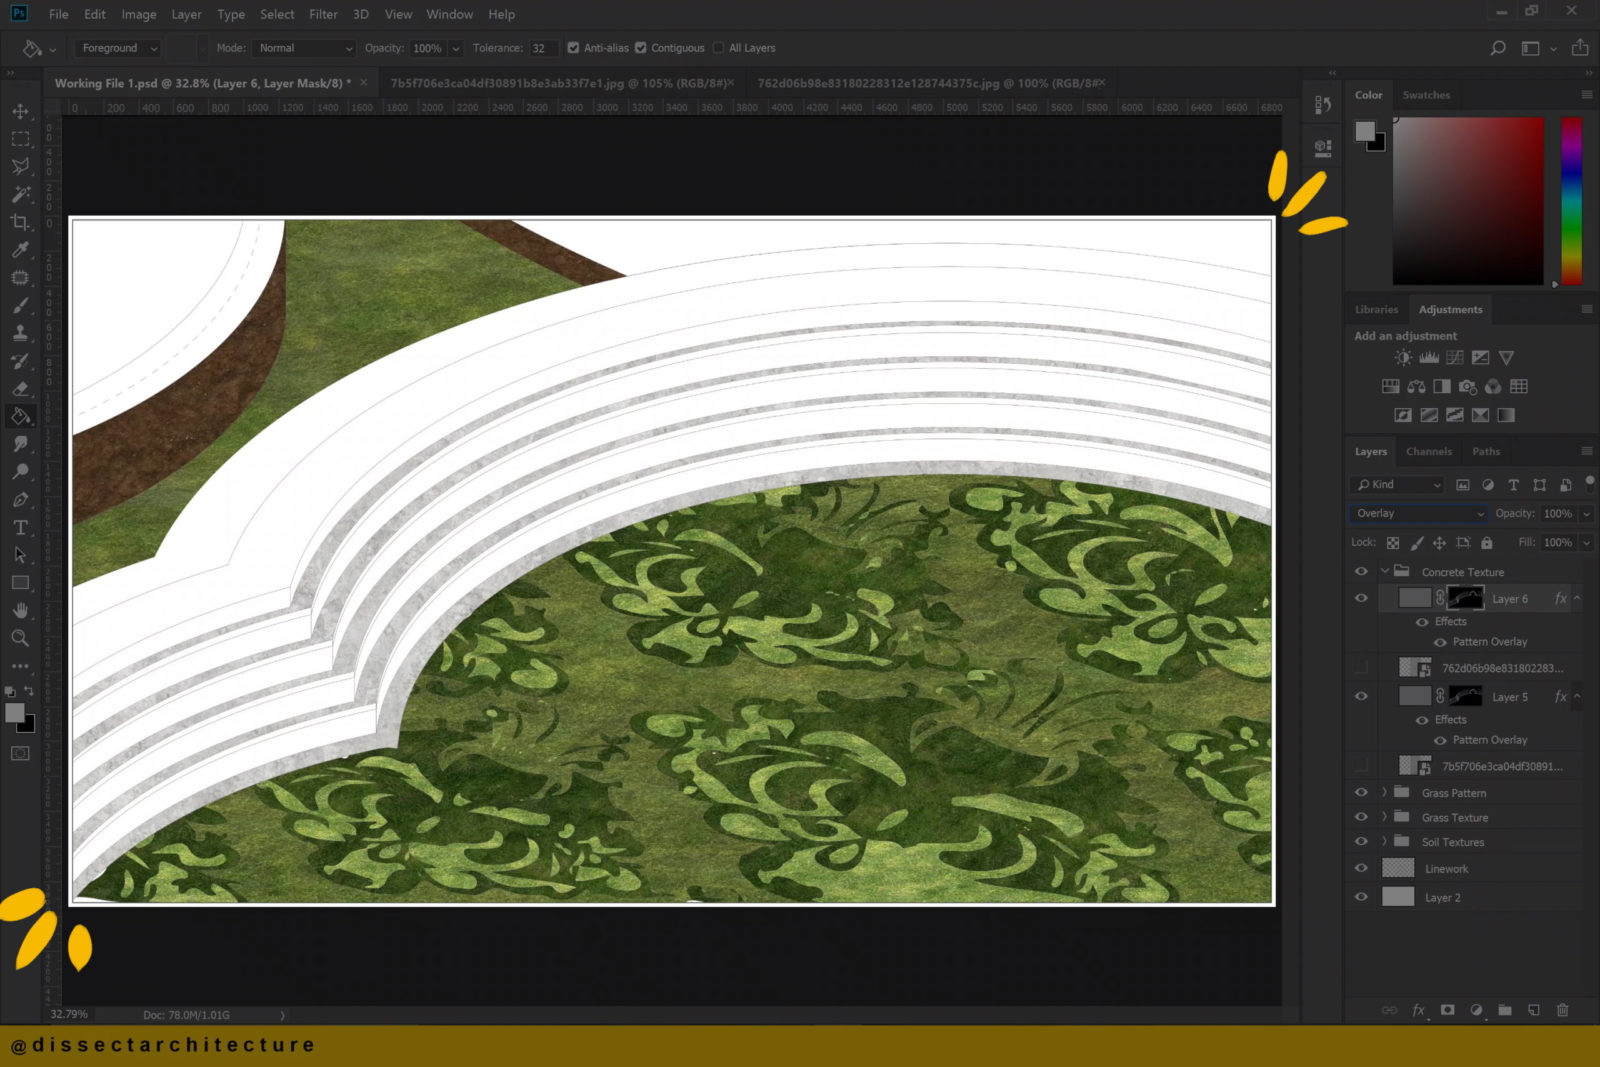
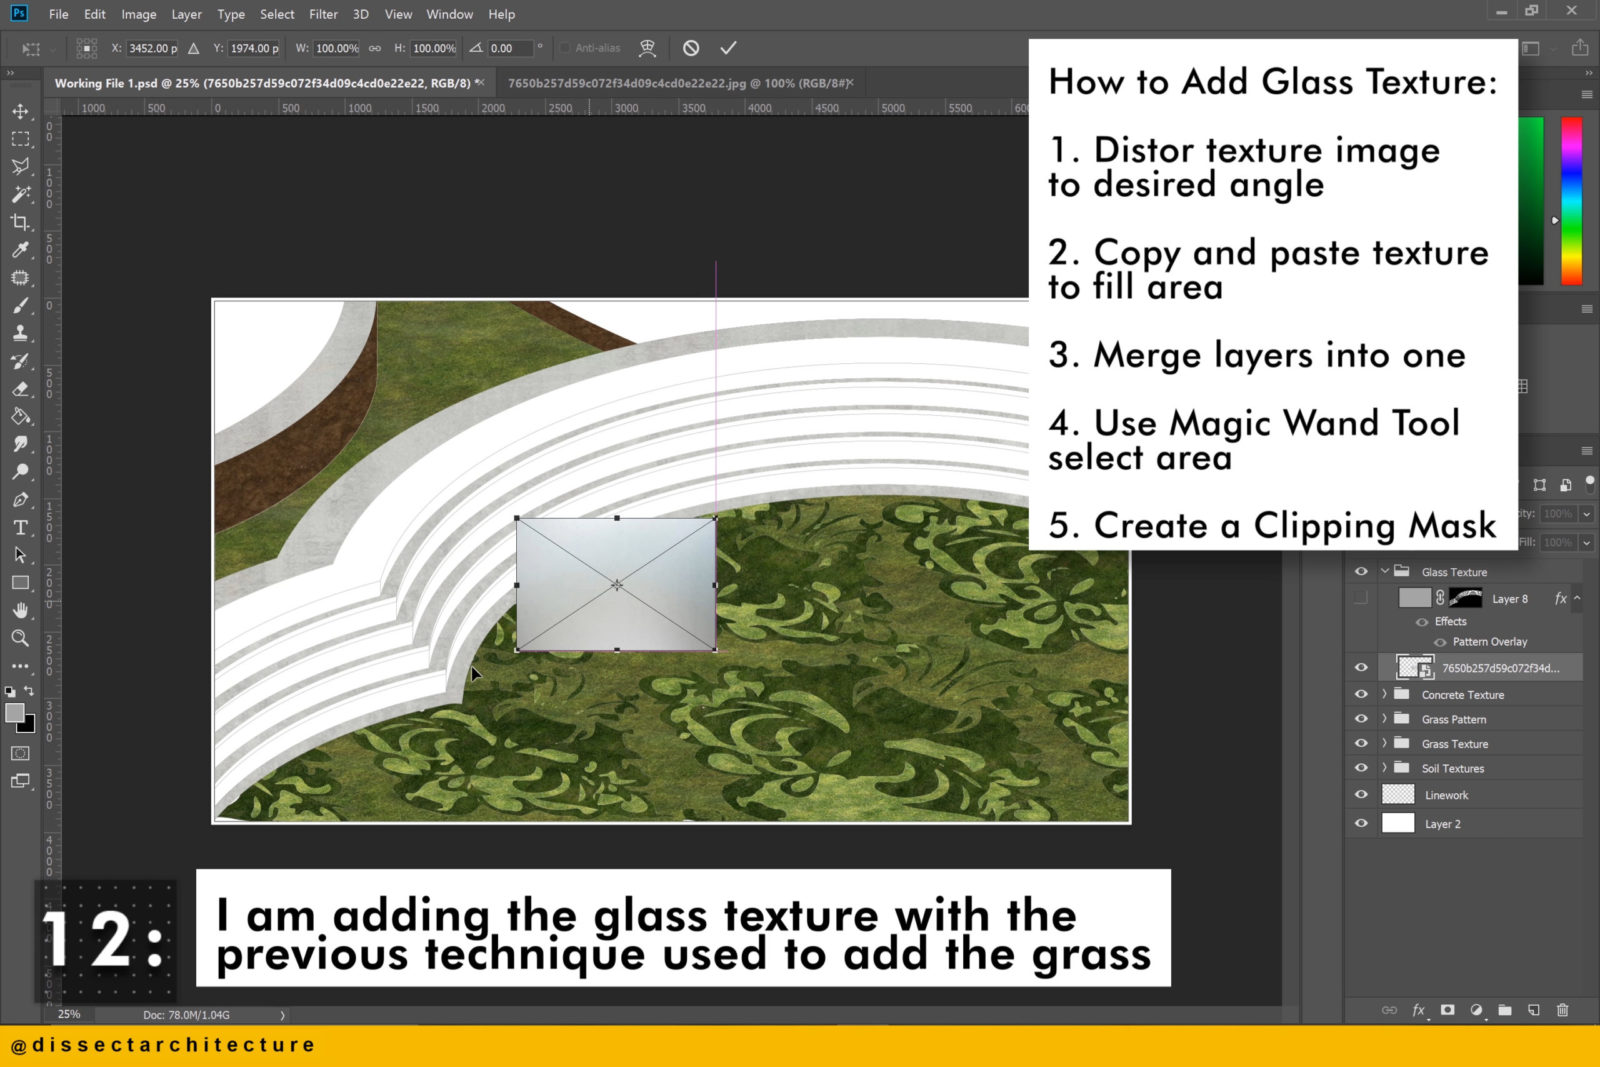
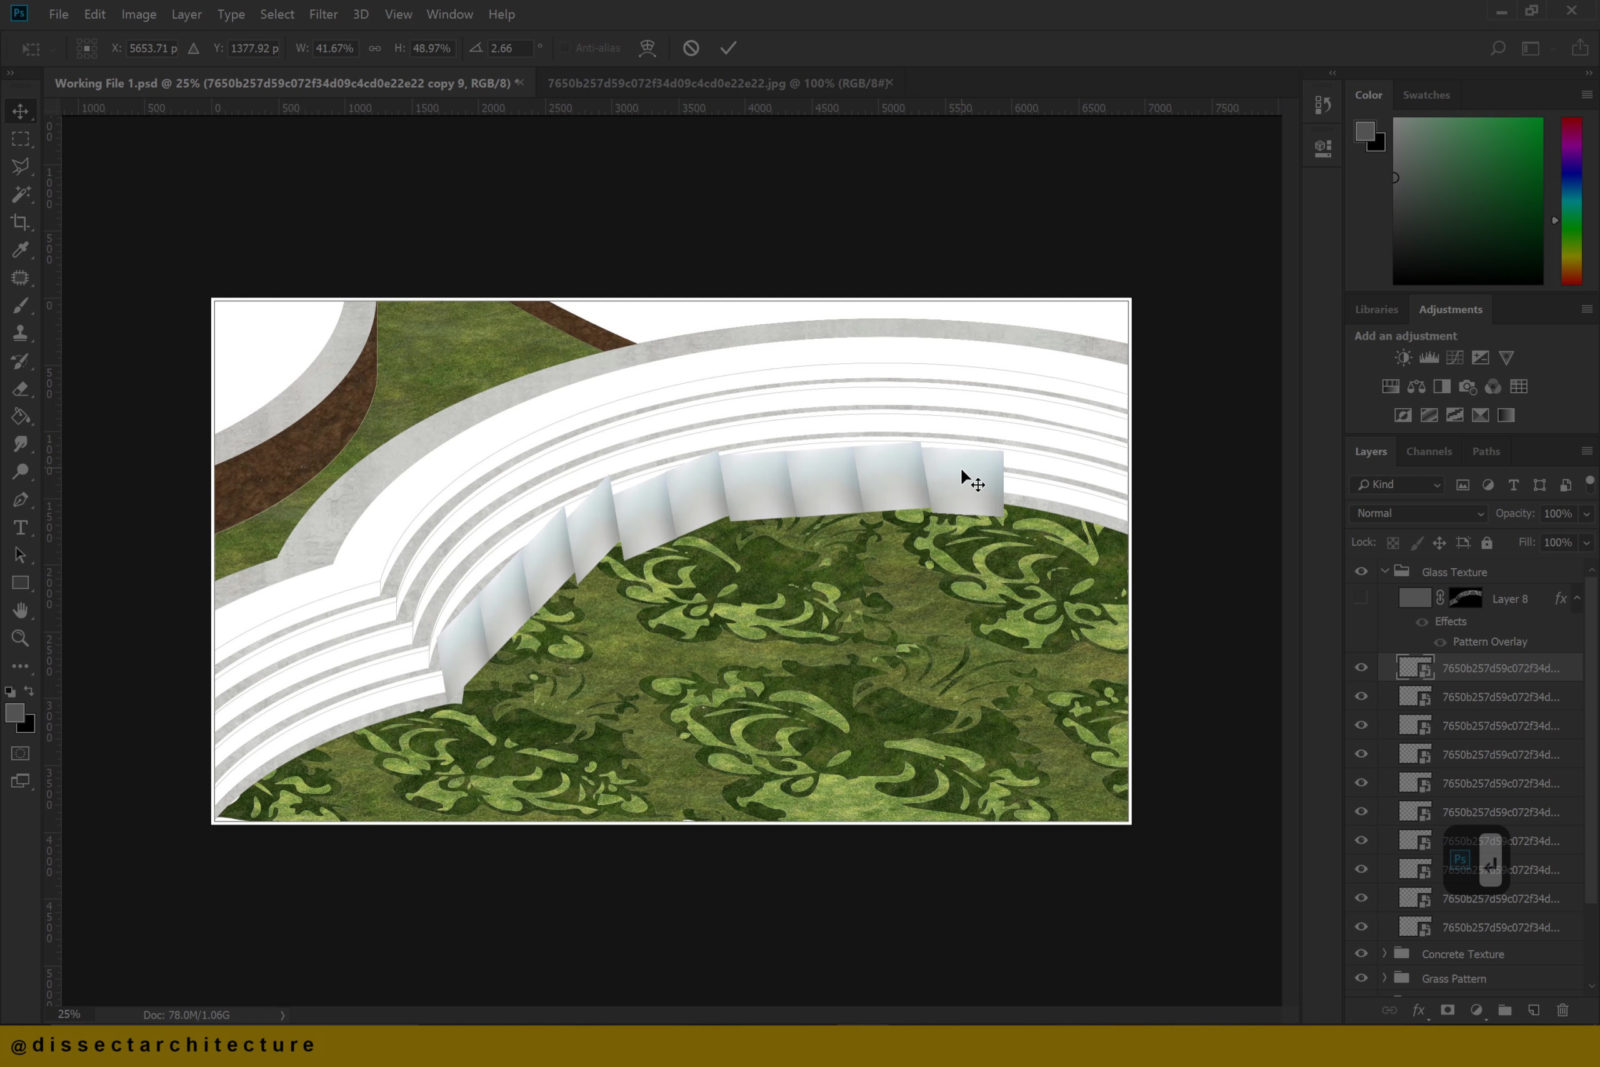
Step 12
I am adding a glass texture with the previous technique used to add the grass.
How To Add a Basic Glass Texture:
1. Distort texture image to the desired angle
2. Copy and paste texture to fill the area
3. Merge layers into one
4. Use the Magic Wand Tool to select the area
5. Create a Clipping Mask
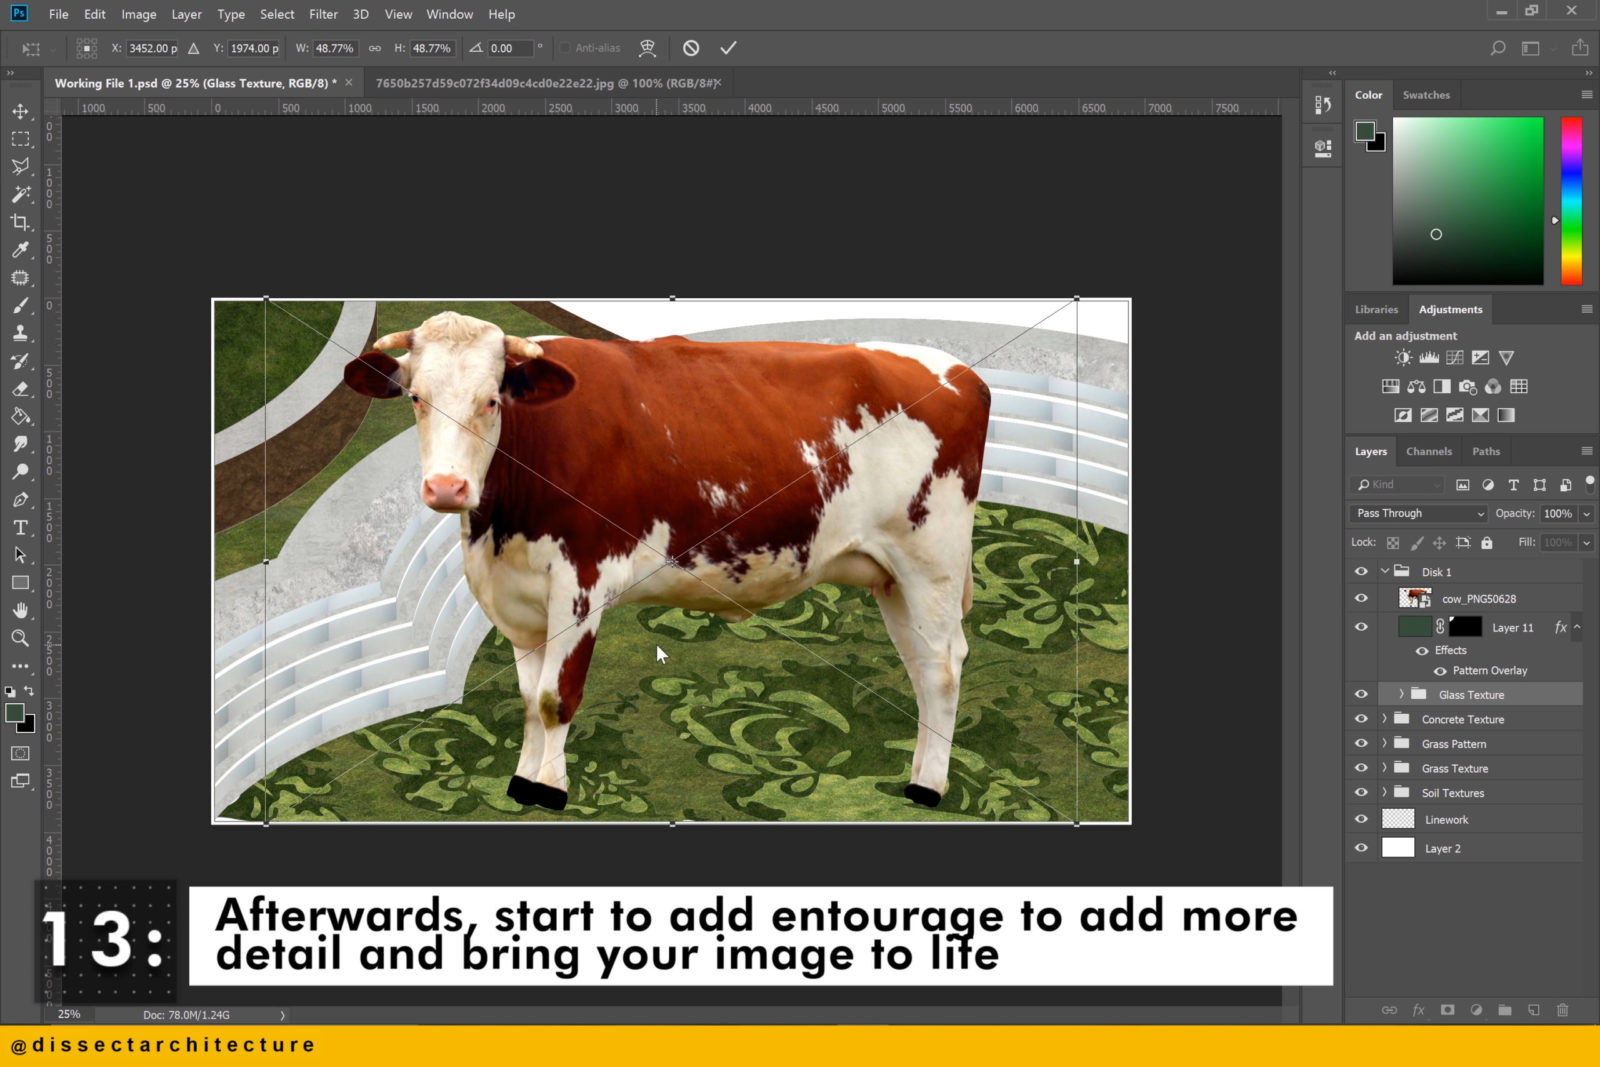
Step 13
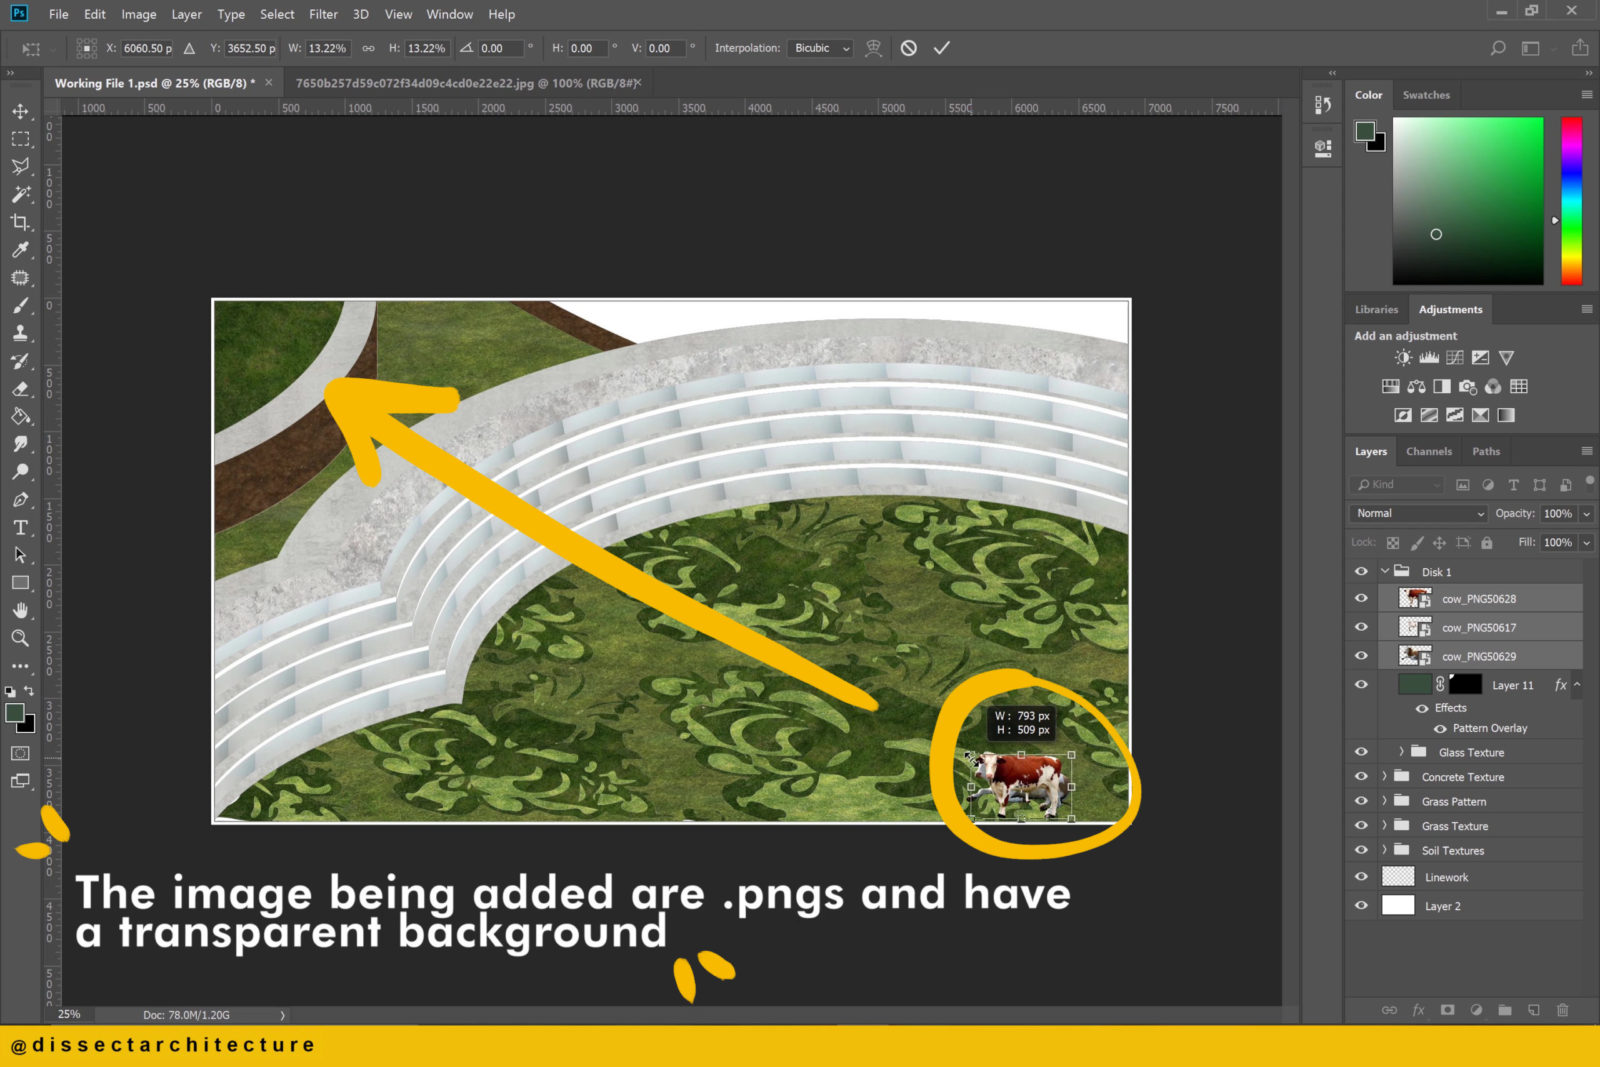
Afterwards, start to add entourage to add life and to working render in Photoshop.
The images being added are .pngs and have a transparent background.
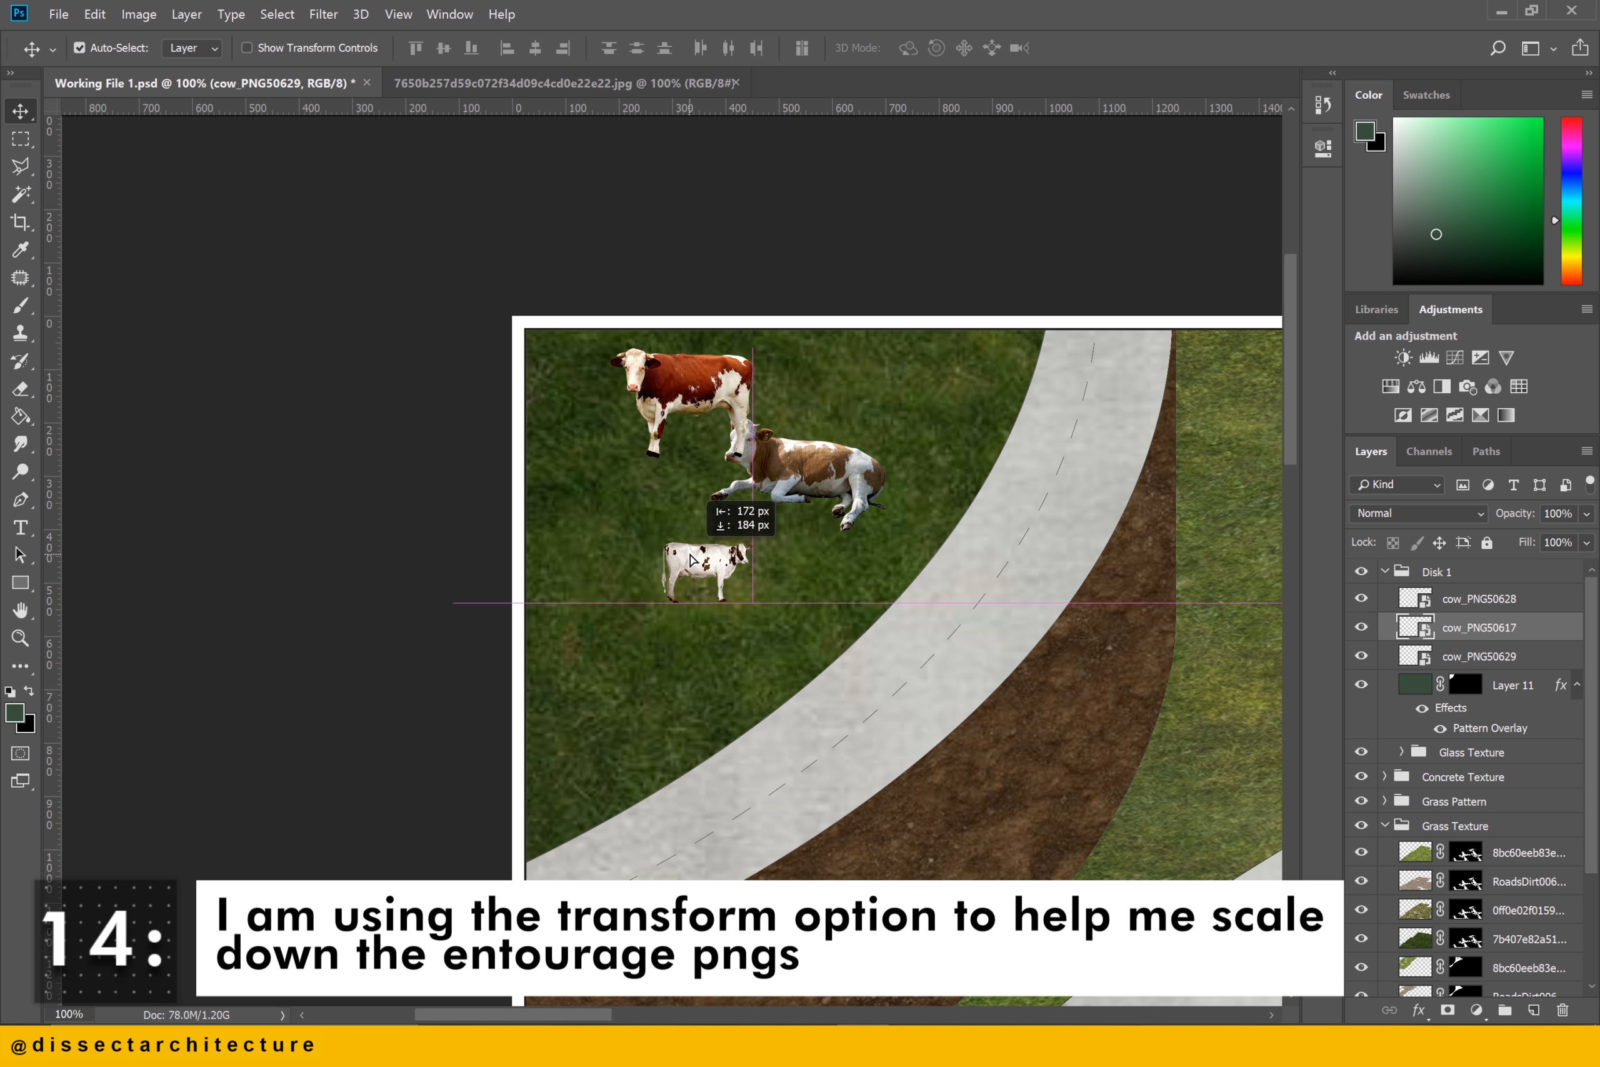
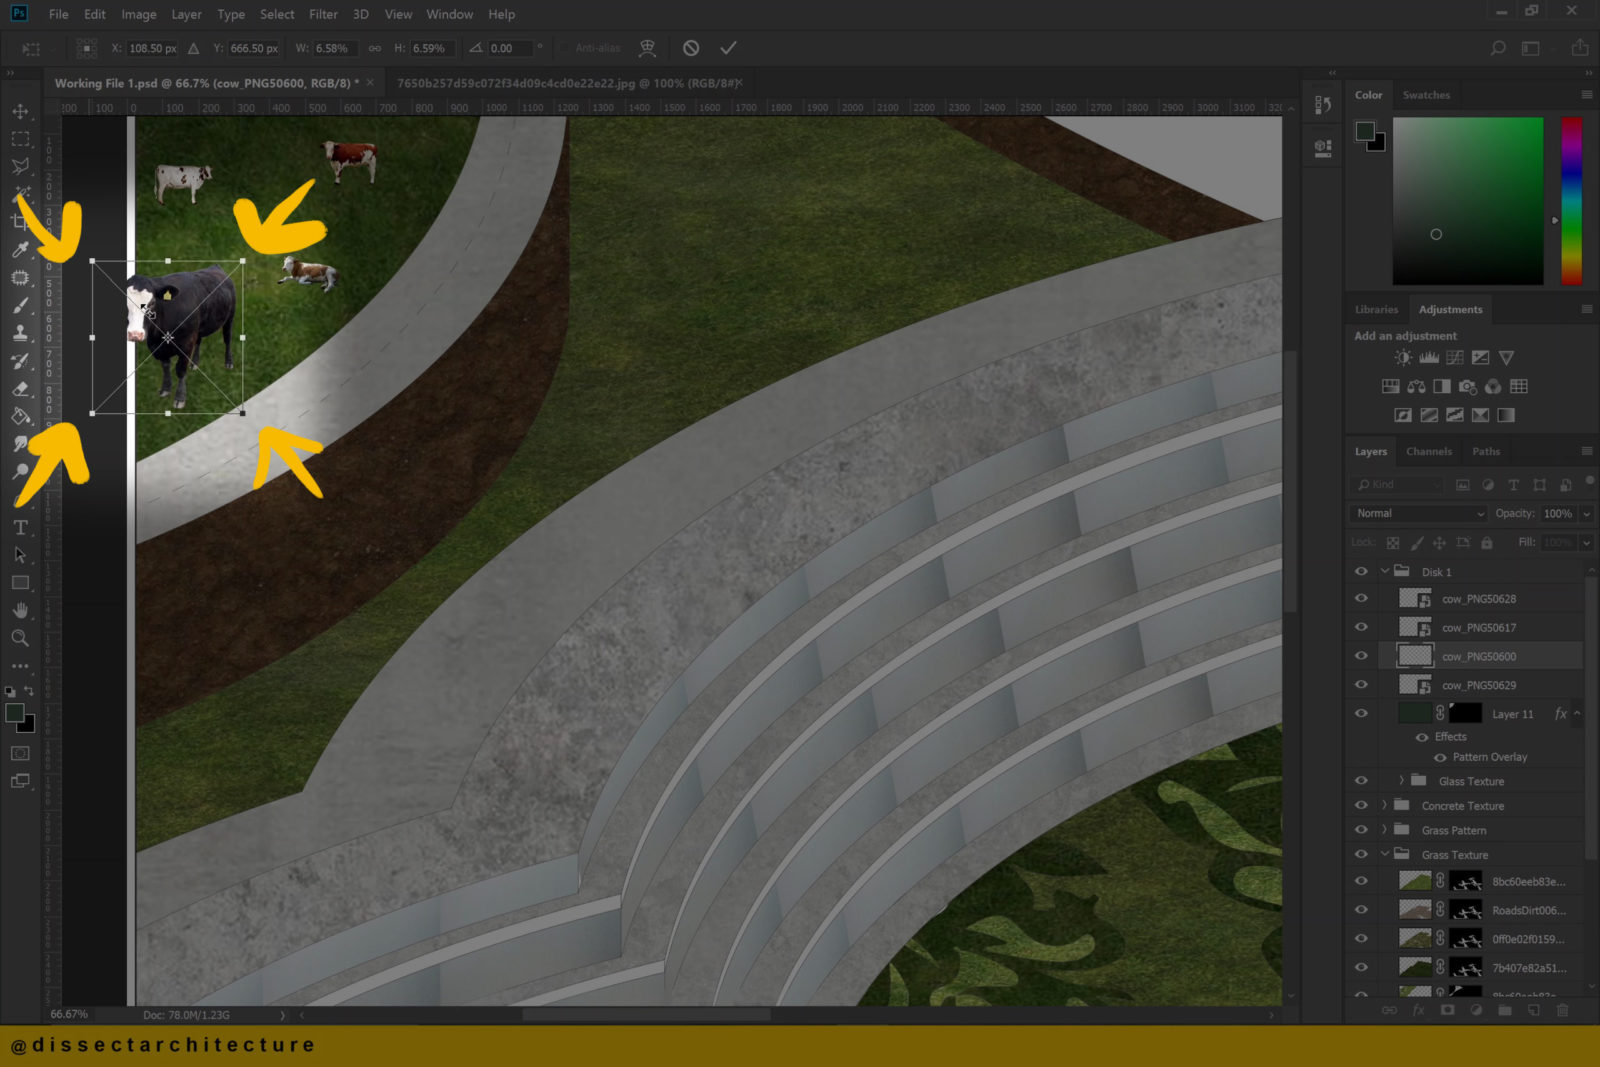
Step 14
Use the Transform Tool to help you scale down the entourage images in accordance with your image.
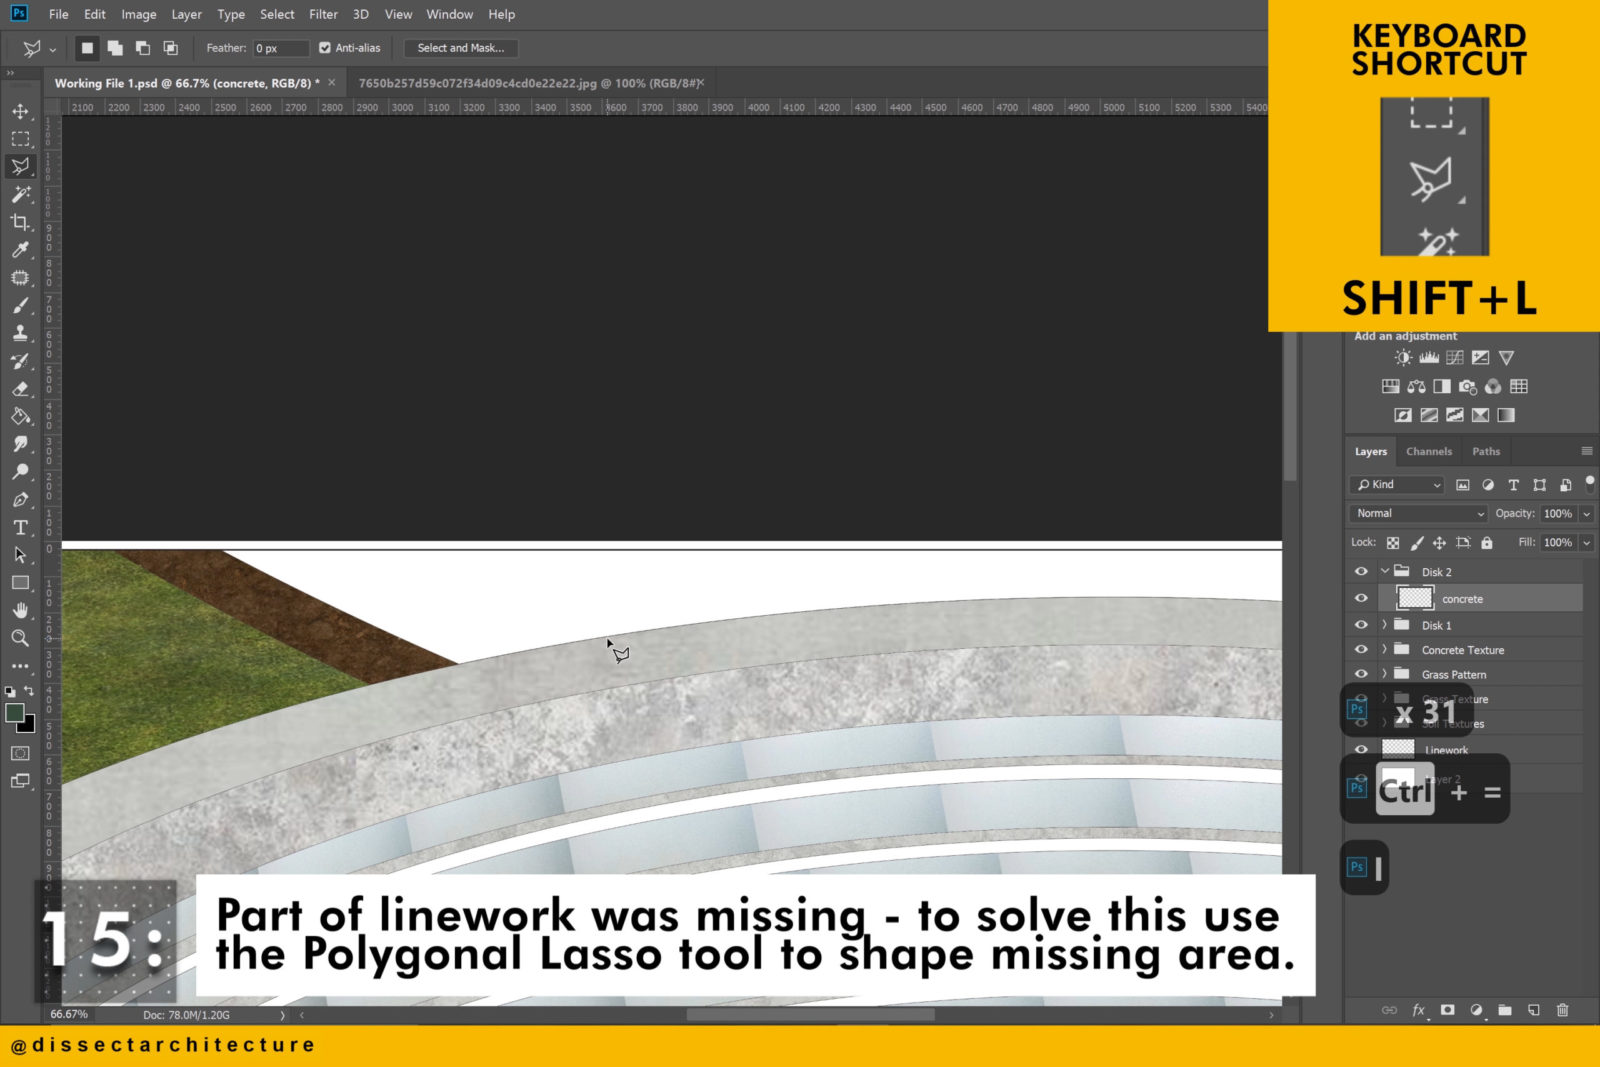
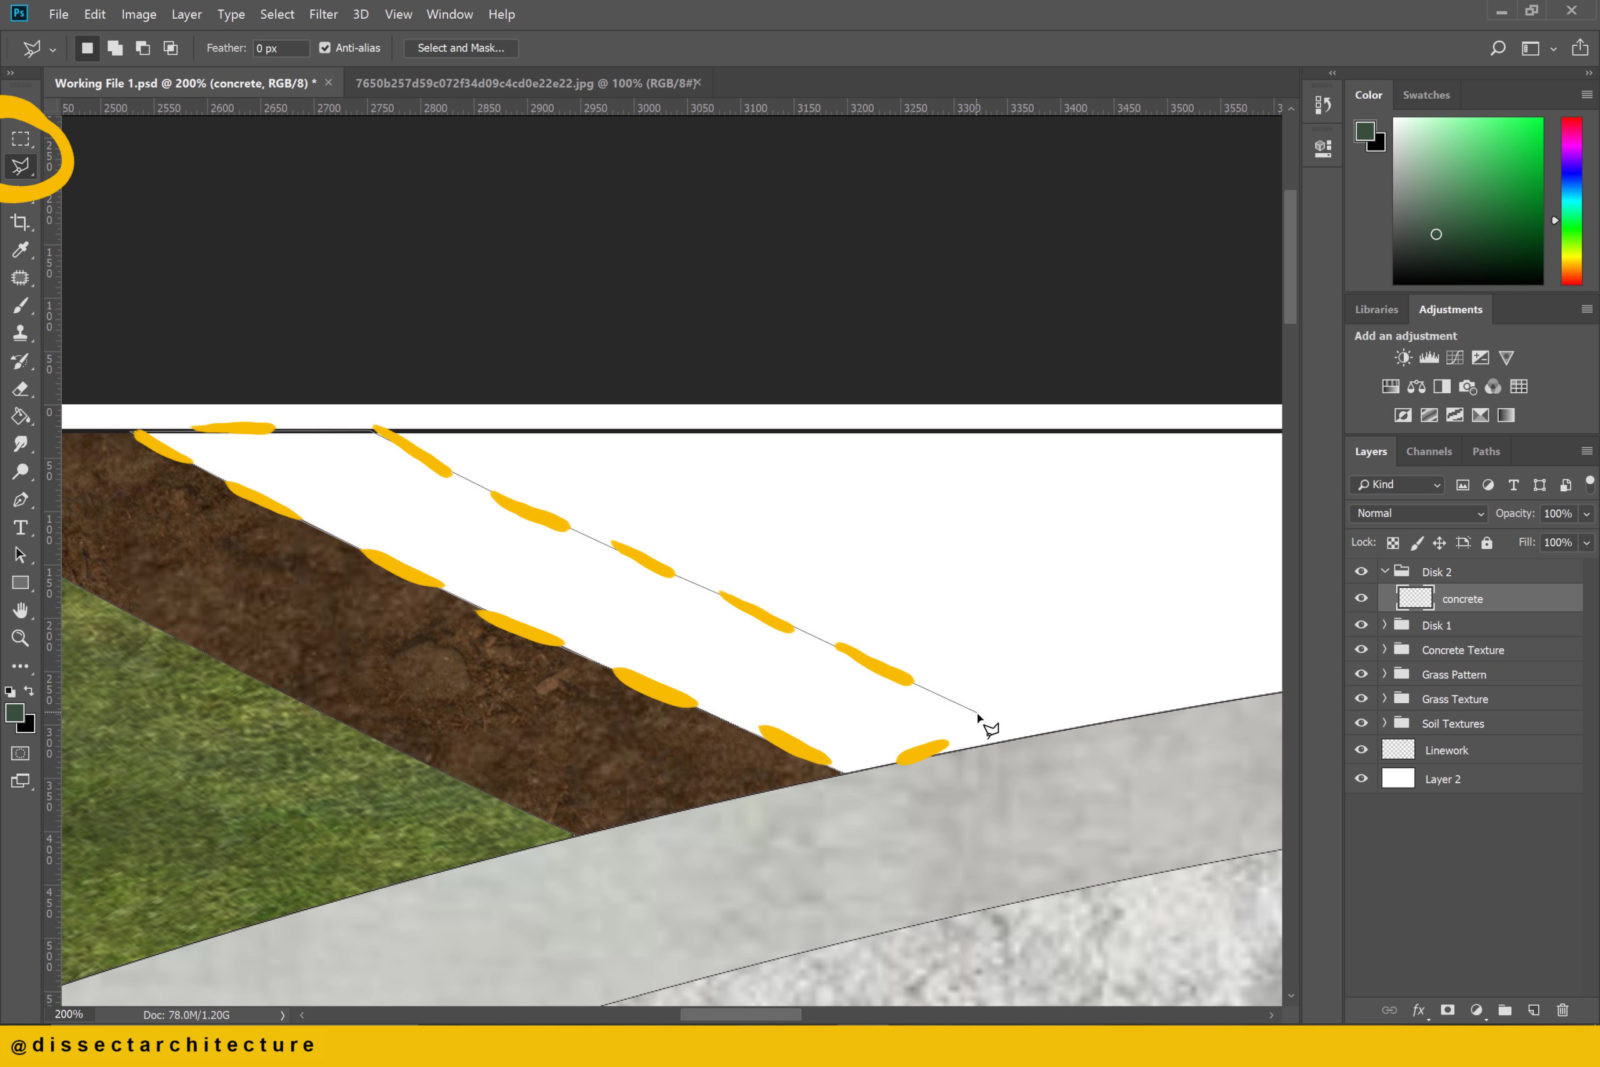
Step 15
Part of the linework in my drawing was missing – to solve this problem use the Polygonal Lasso Tool to shape the missing area. It would have been easier to double check the linework before importing it into Photoshop.
As you are working you might have to switch between different techniques or areas of your render. That is okay – everyone works differently!
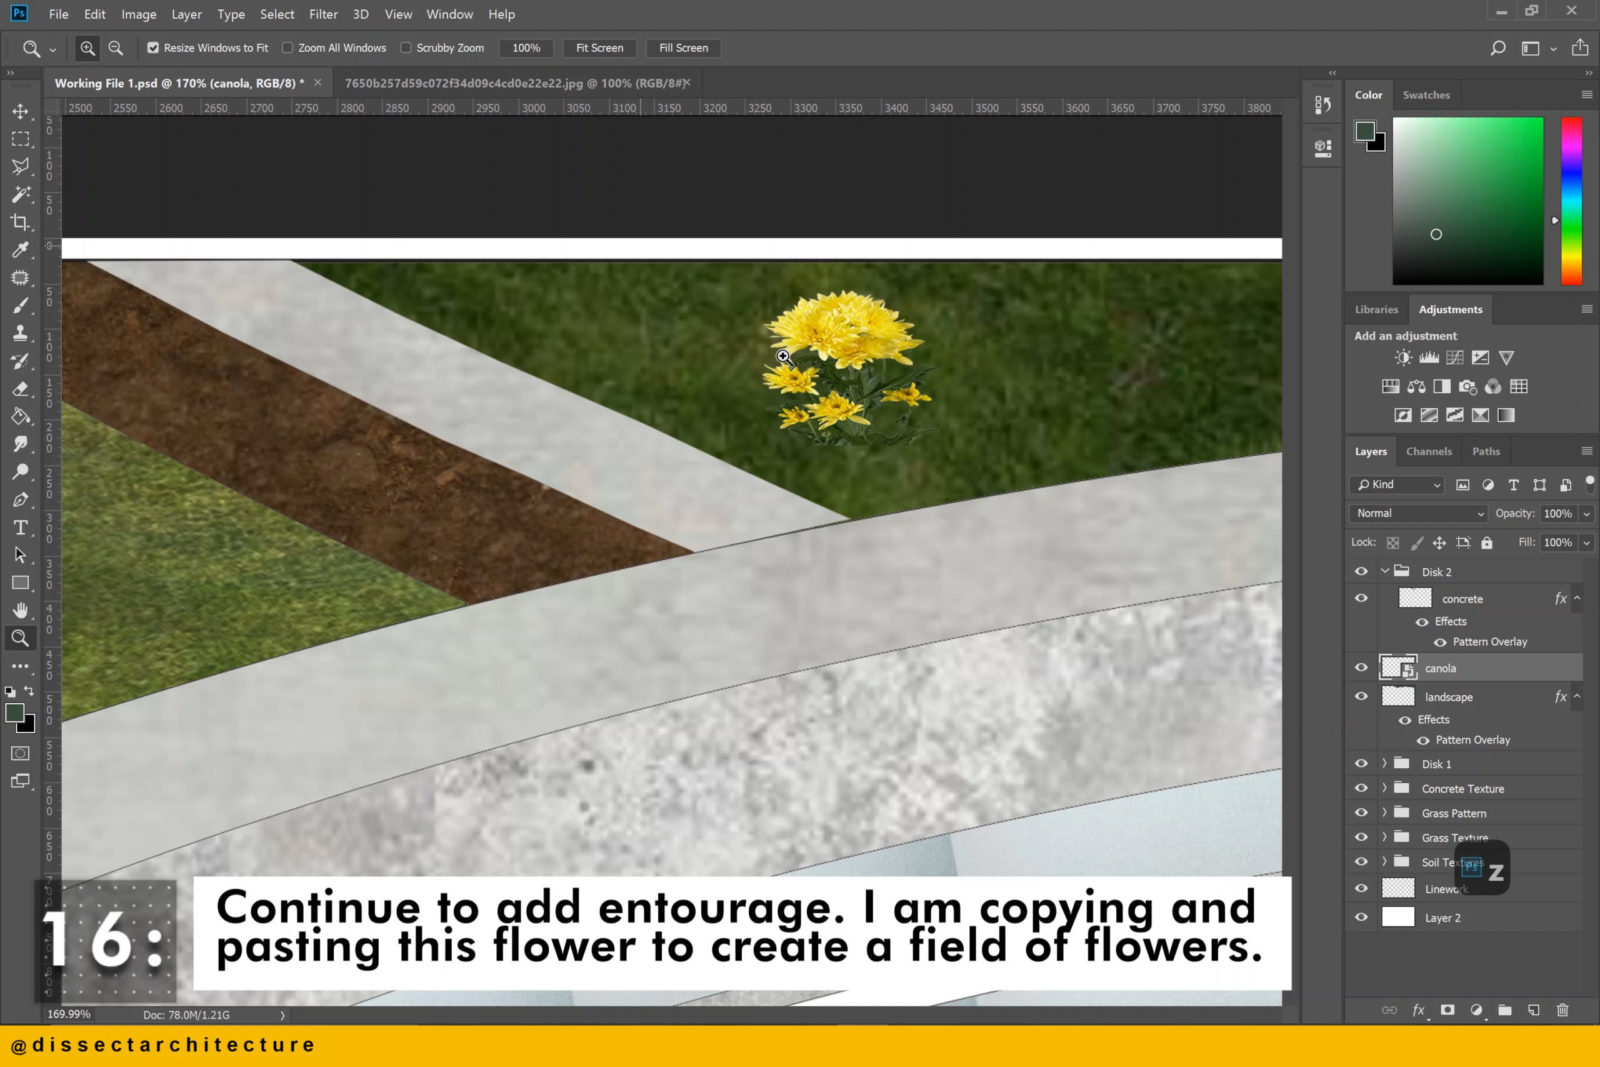
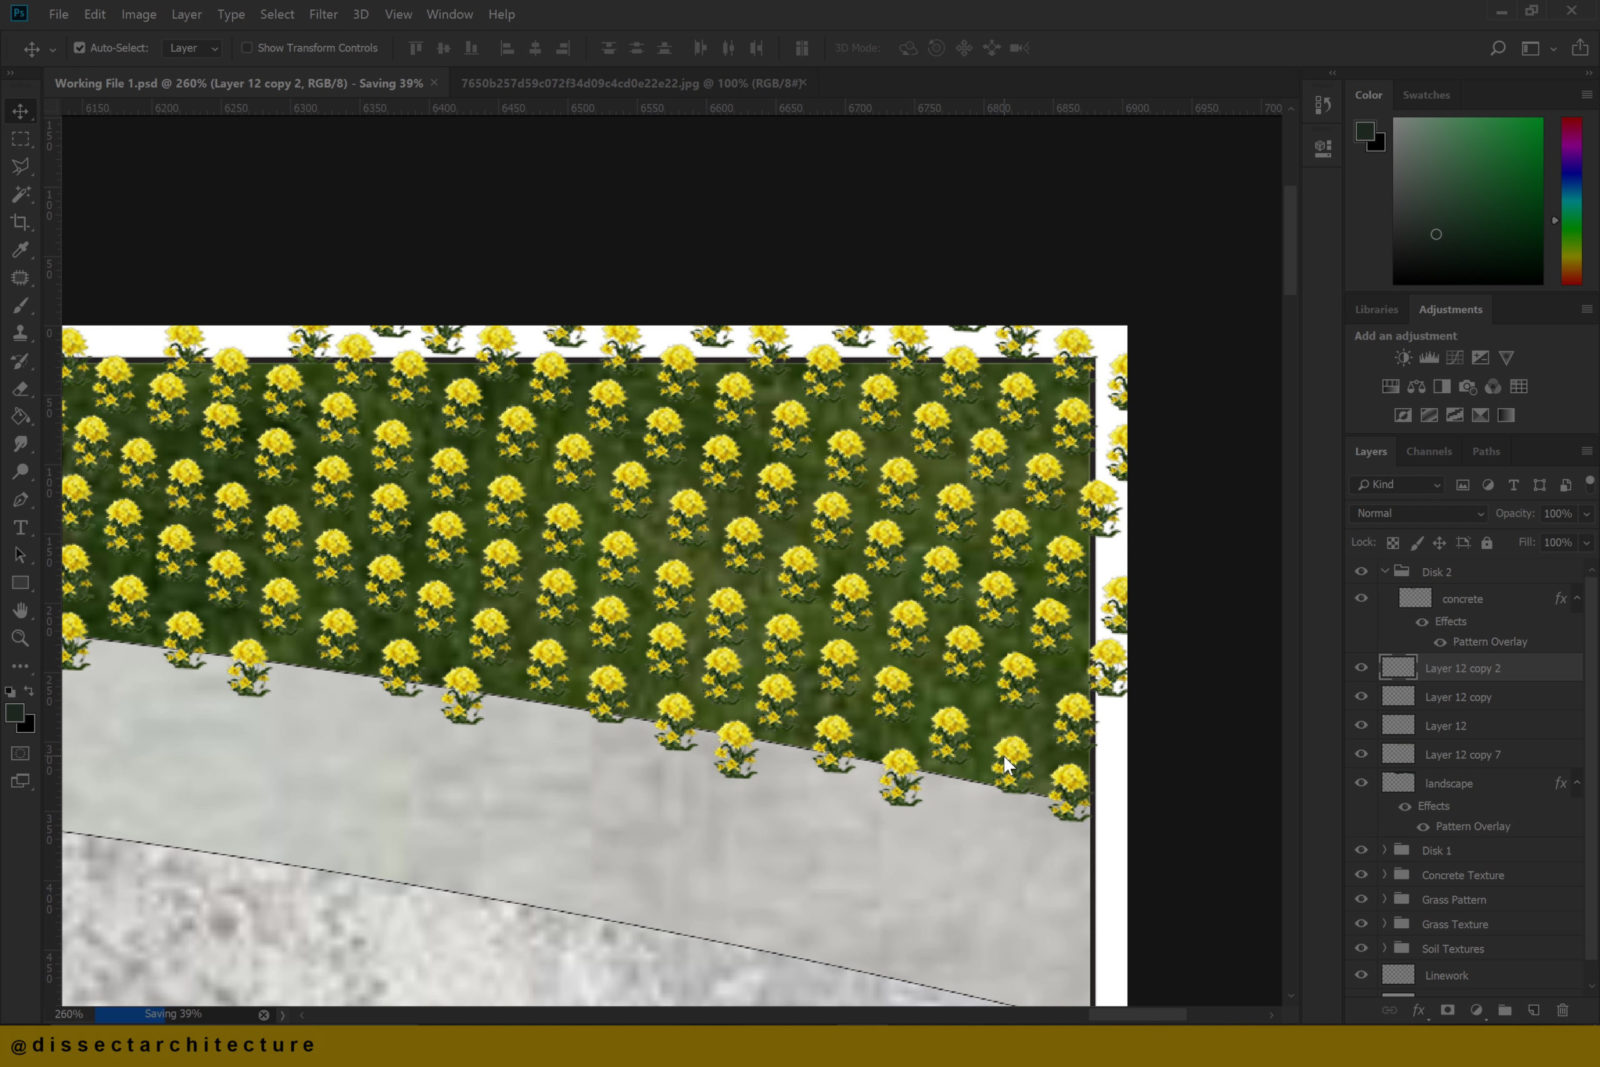
Step 16
Continue to add entourage. I am copying and pasting this flower to create a field of flowers.
Step 17
Add trees by pasting them onto the file first, scaling them down, and distributing them.
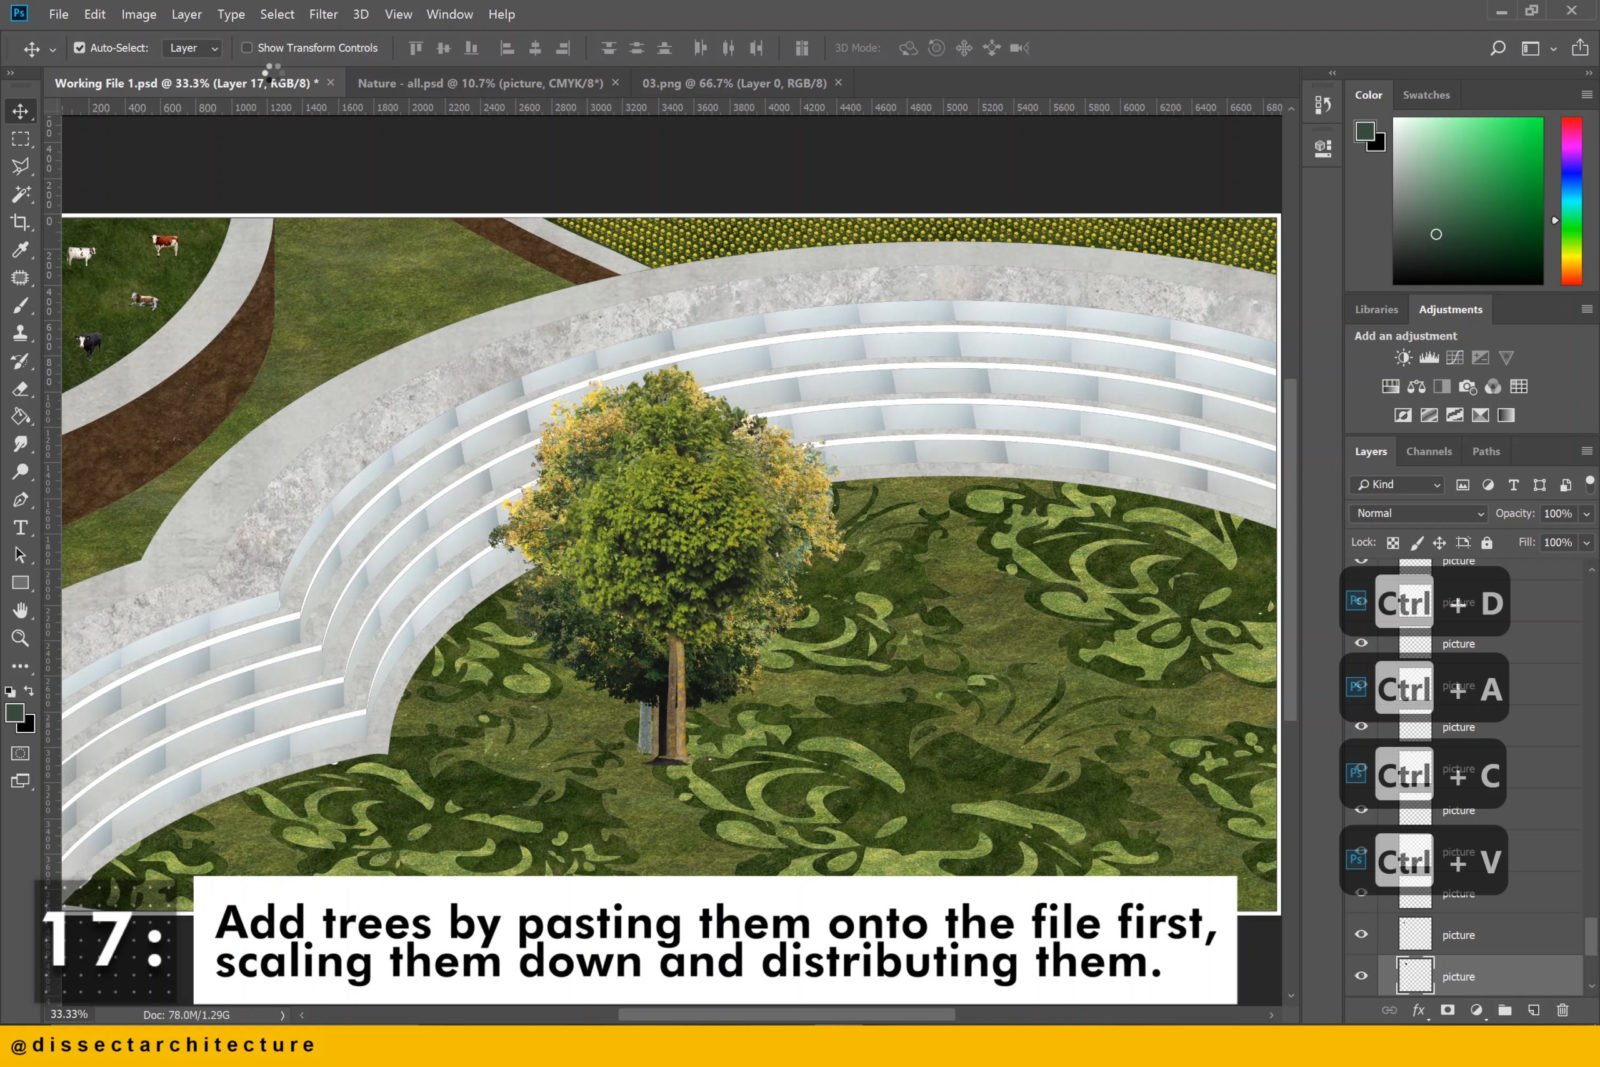
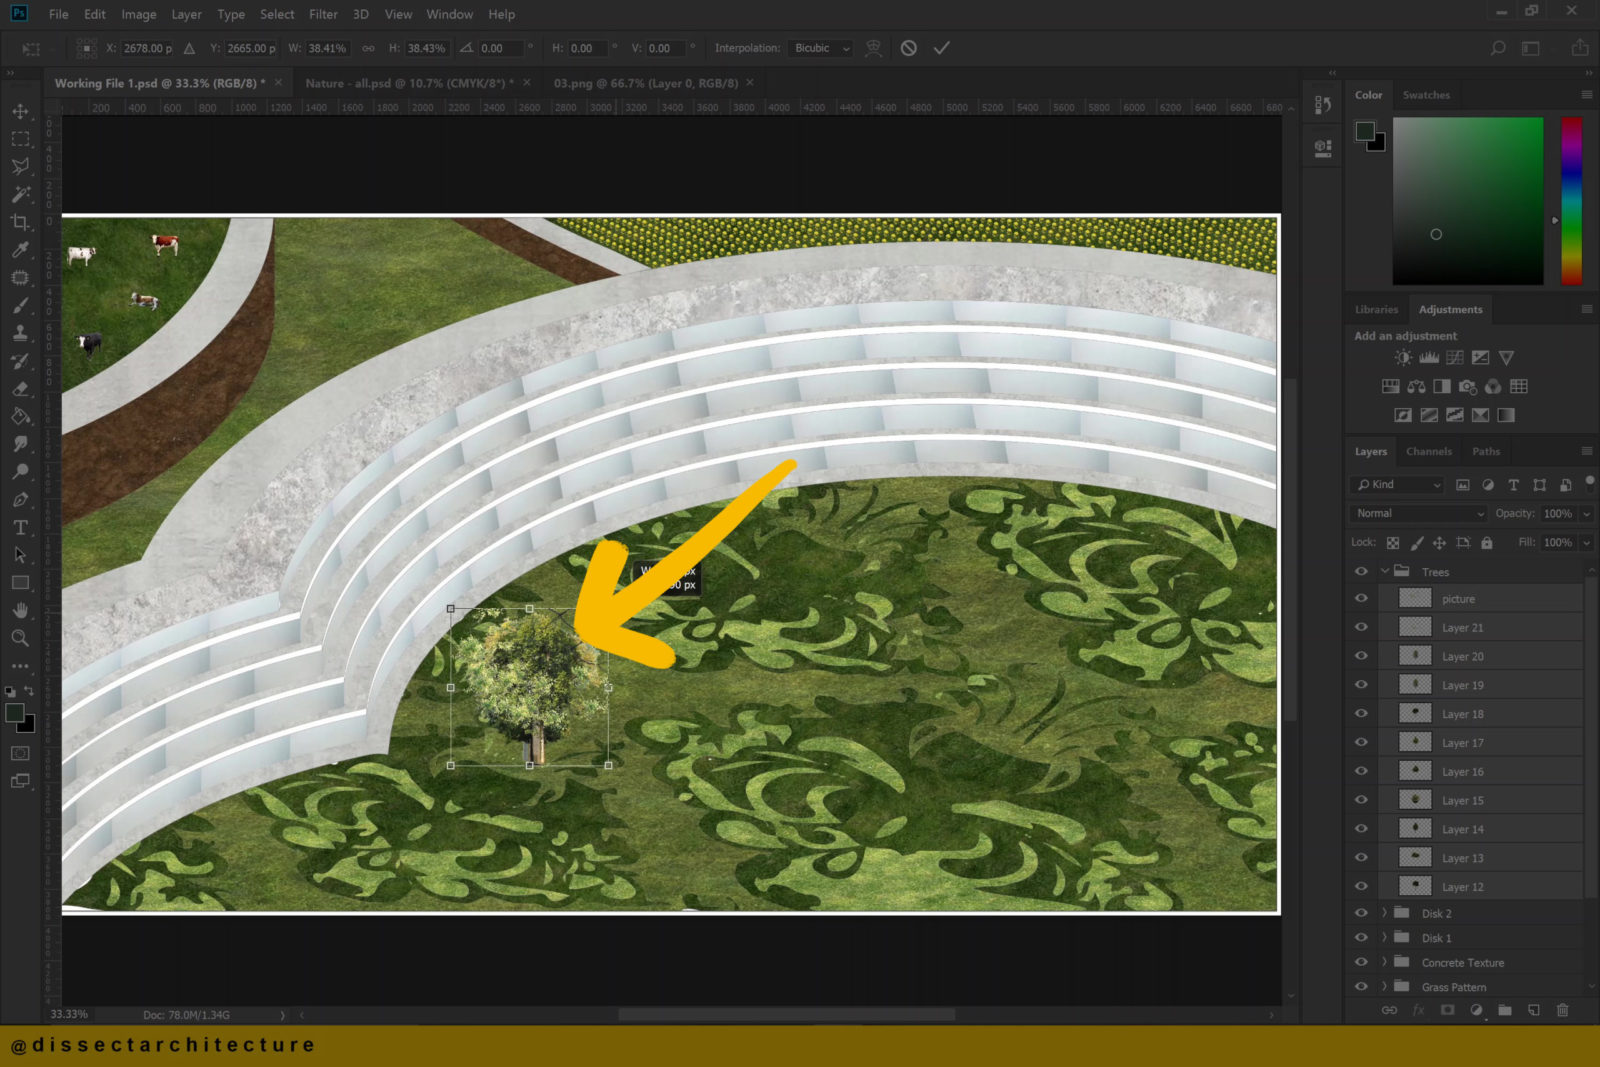
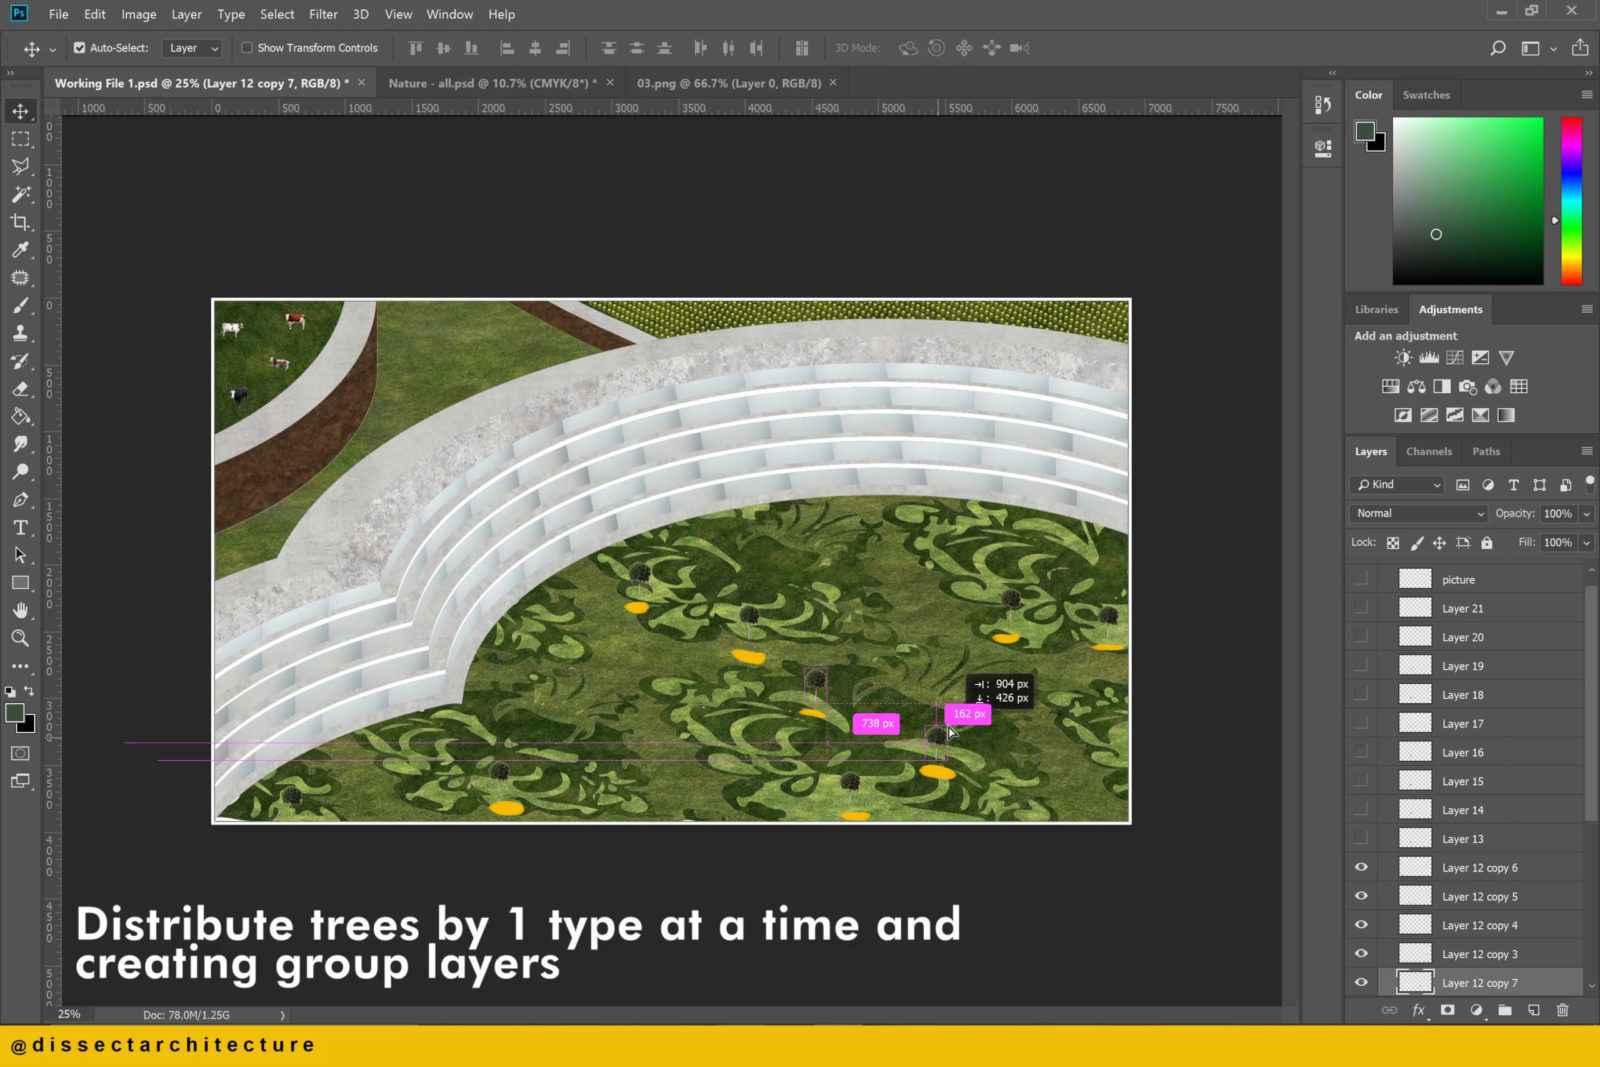
The method that I am using to distribute the trees is 1 type at a time and creating group layers of the same tree.

Step 18
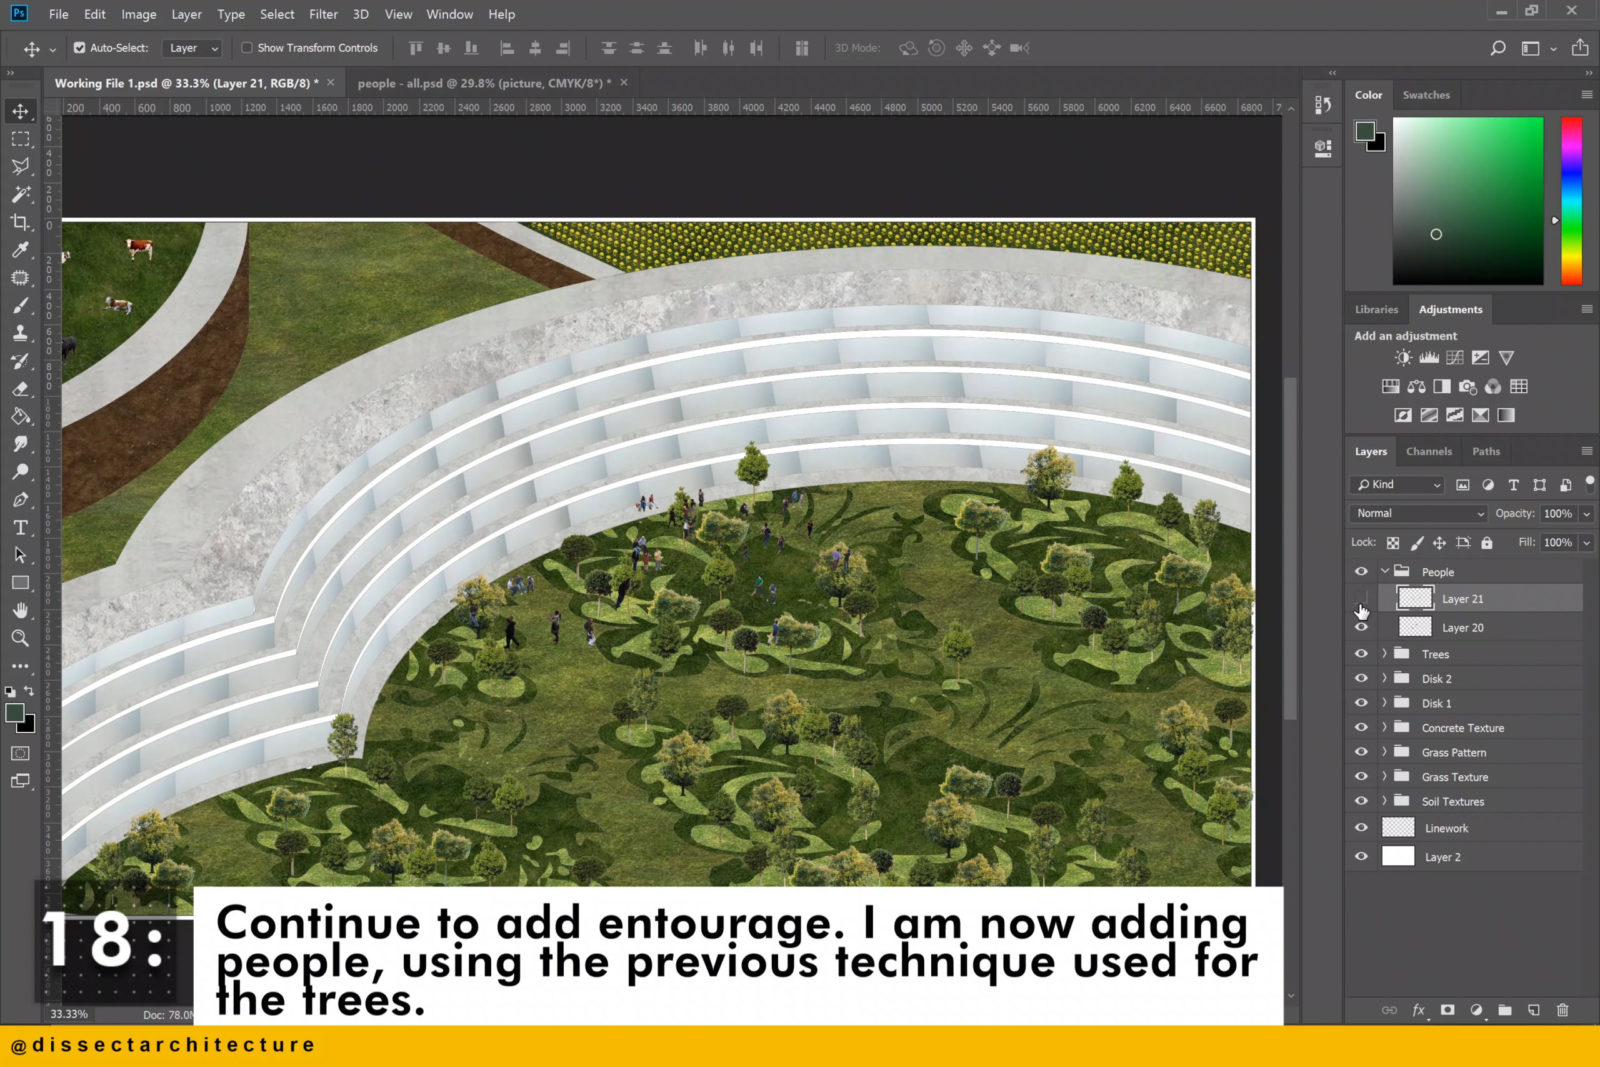
Continue to add entourage.
I am now adding people, using the previous technique used for the trees.
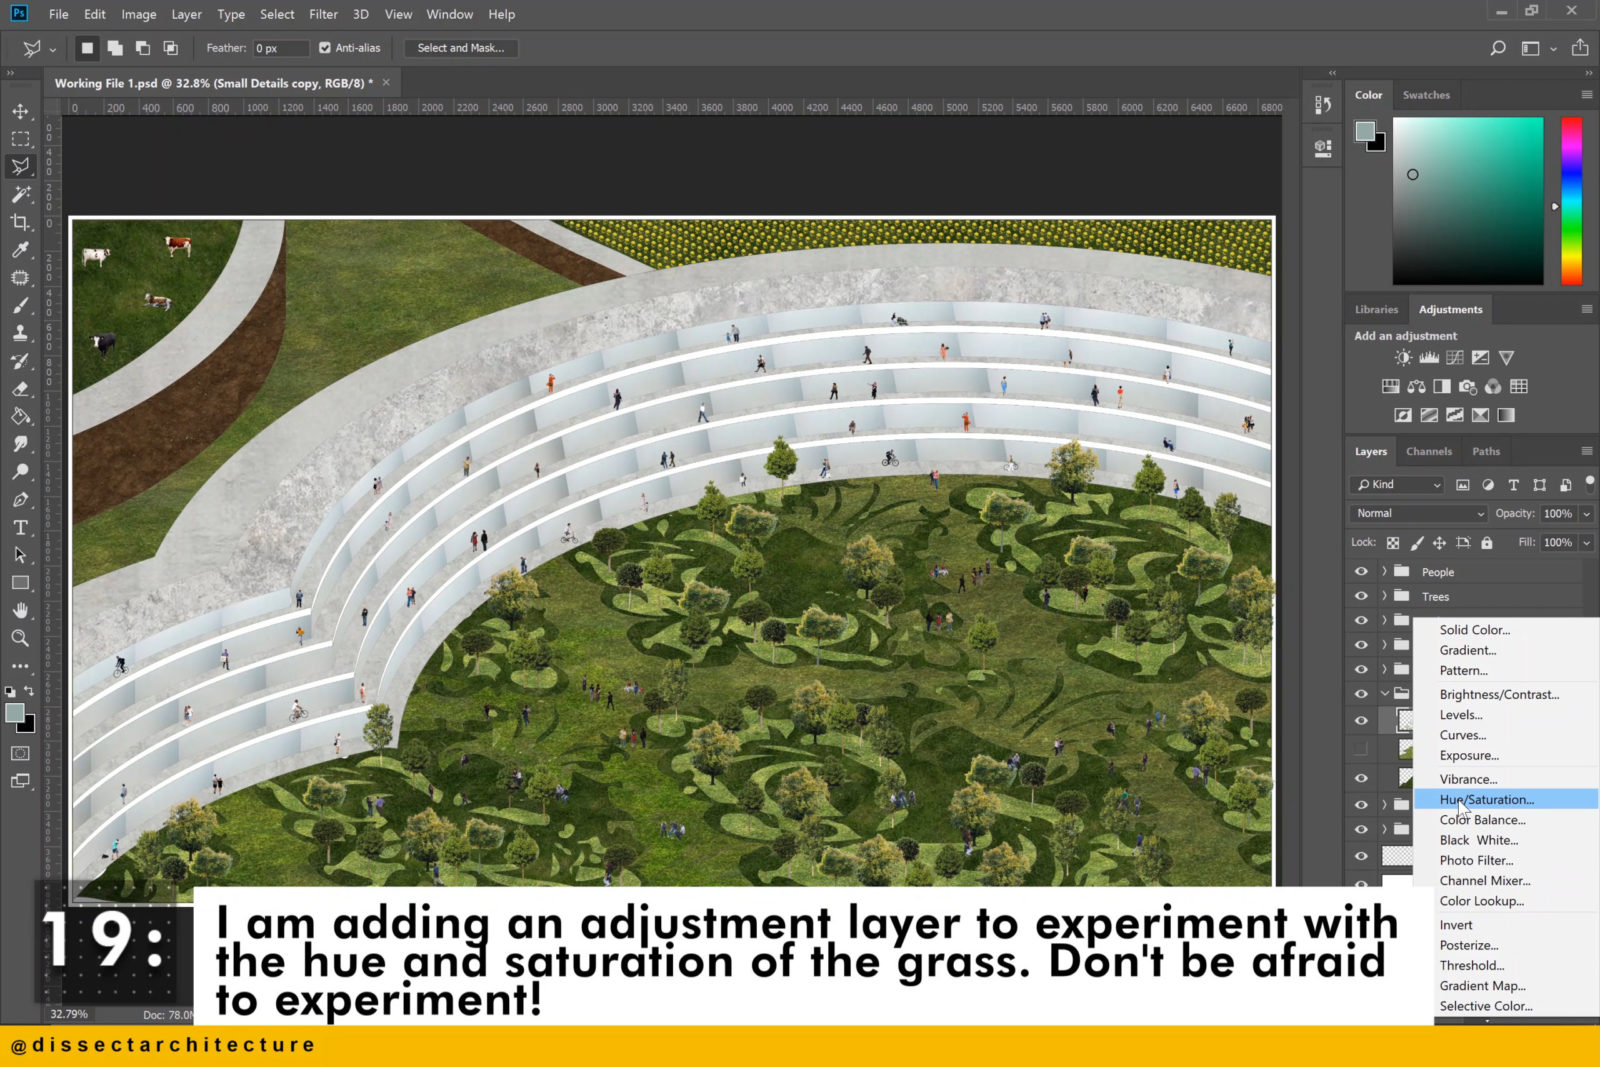
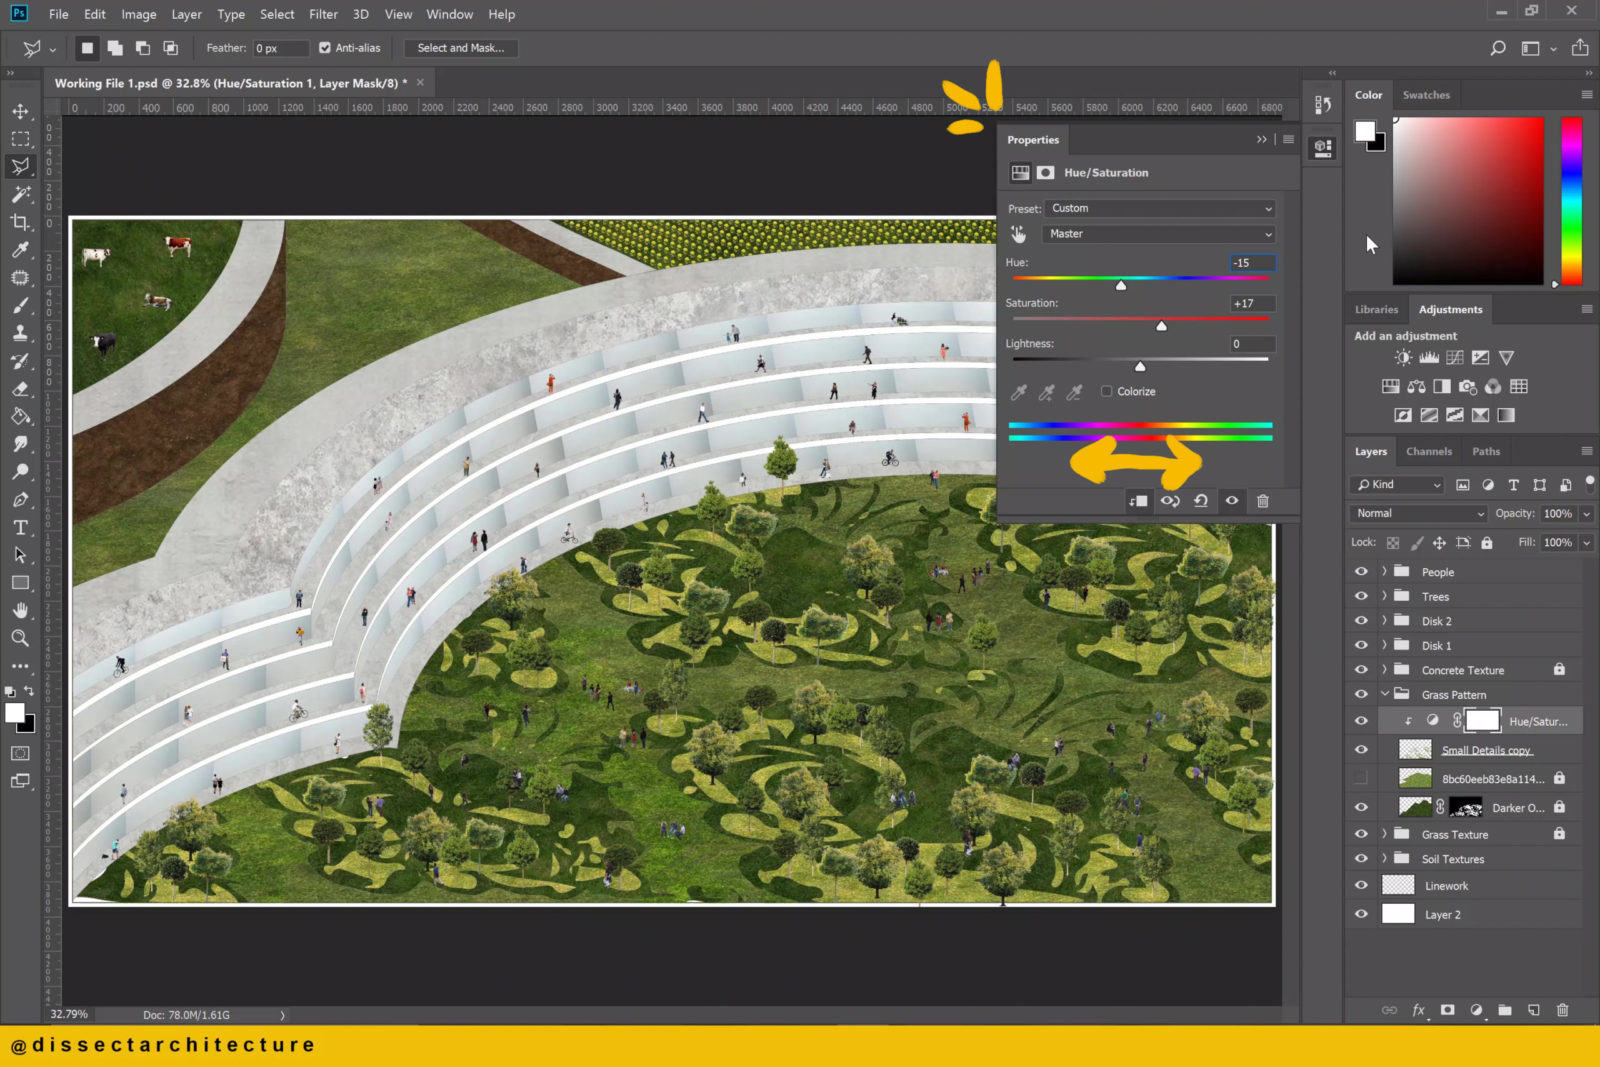
Step 19
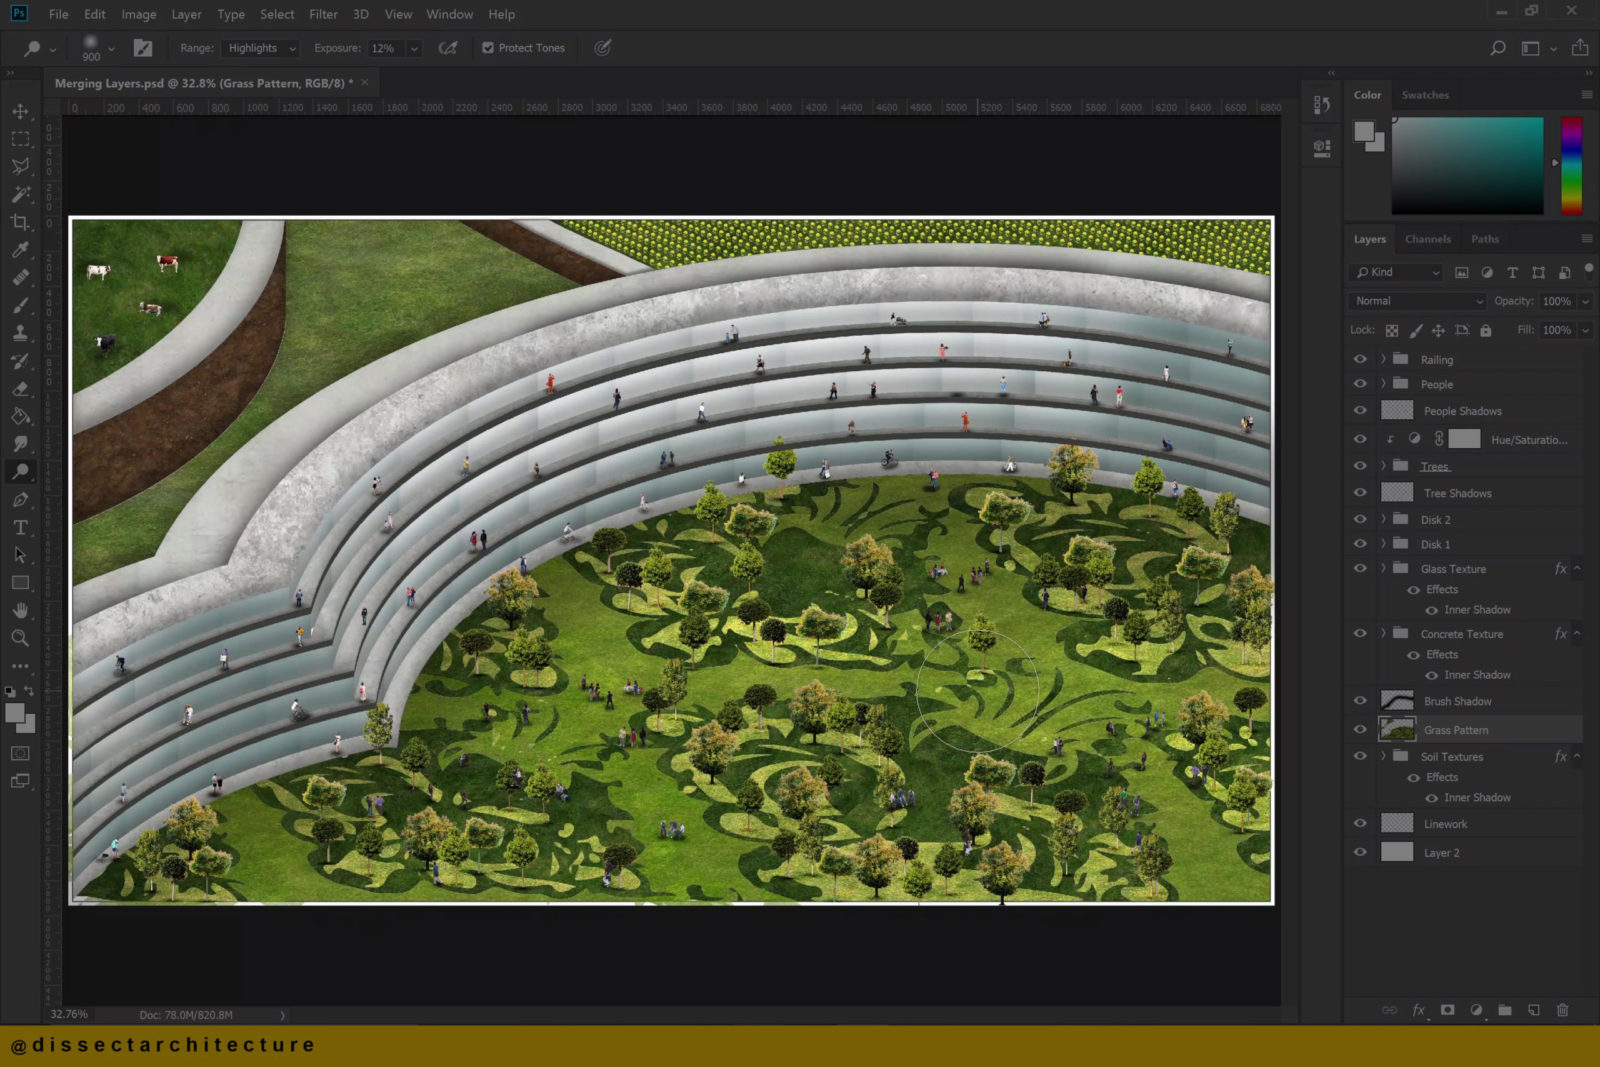
I am adding an adjustment layer to experiment with the hue and saturation of the grass. Don’t be afraid to experiment with colors or different techniques!
I am adding another adjustment layer to experiment with brightness and contrast.
Step 20
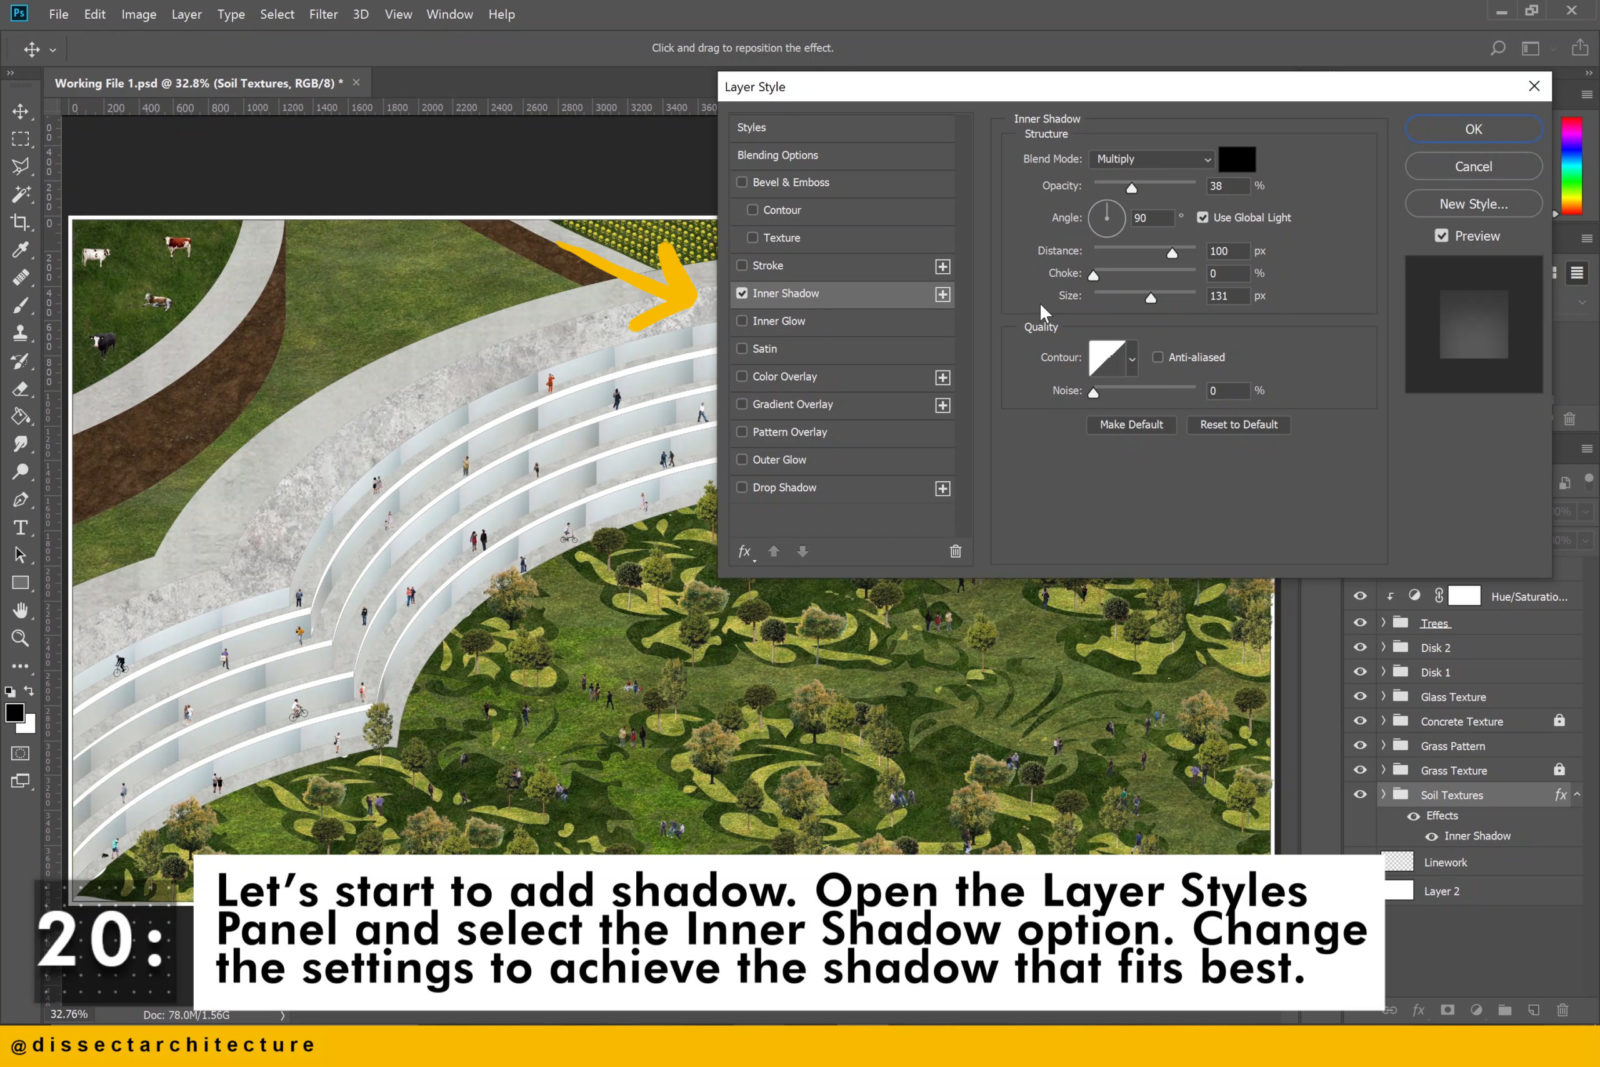
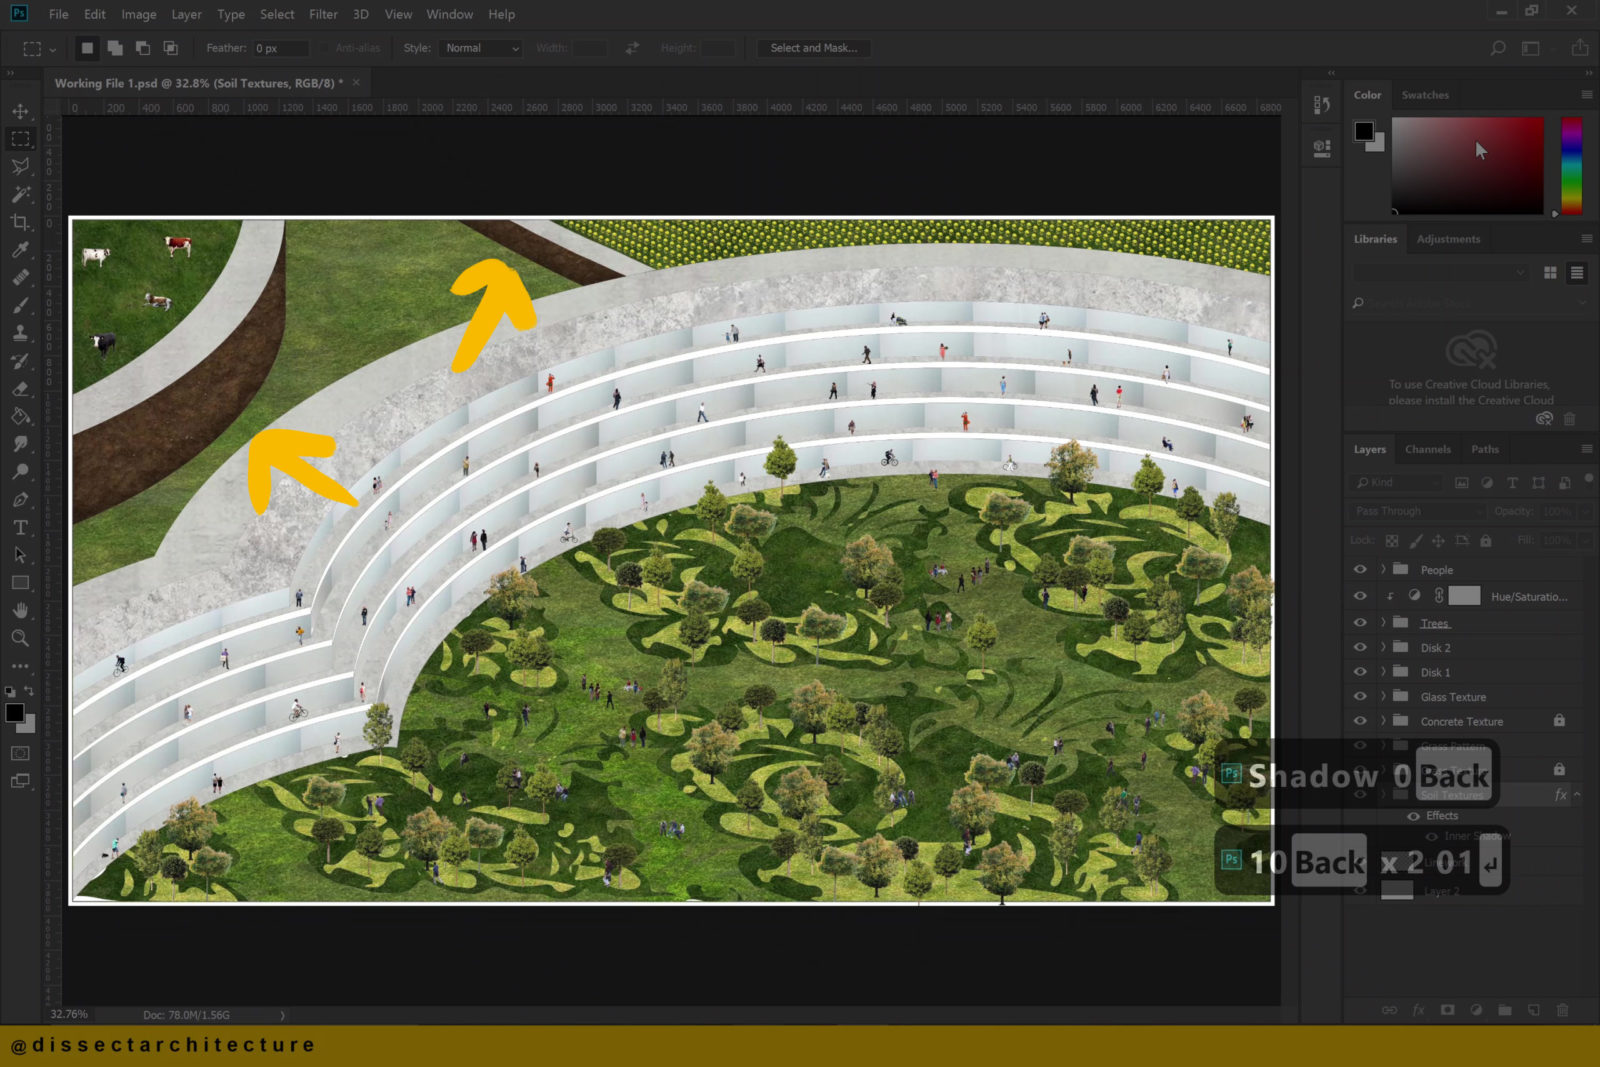
Let’s start to add shadow to your render in Photoshop.
Open the Layer Styles Panel and select the Inner Shadow option. Change the settings to achieve the shadow that fits the render best.
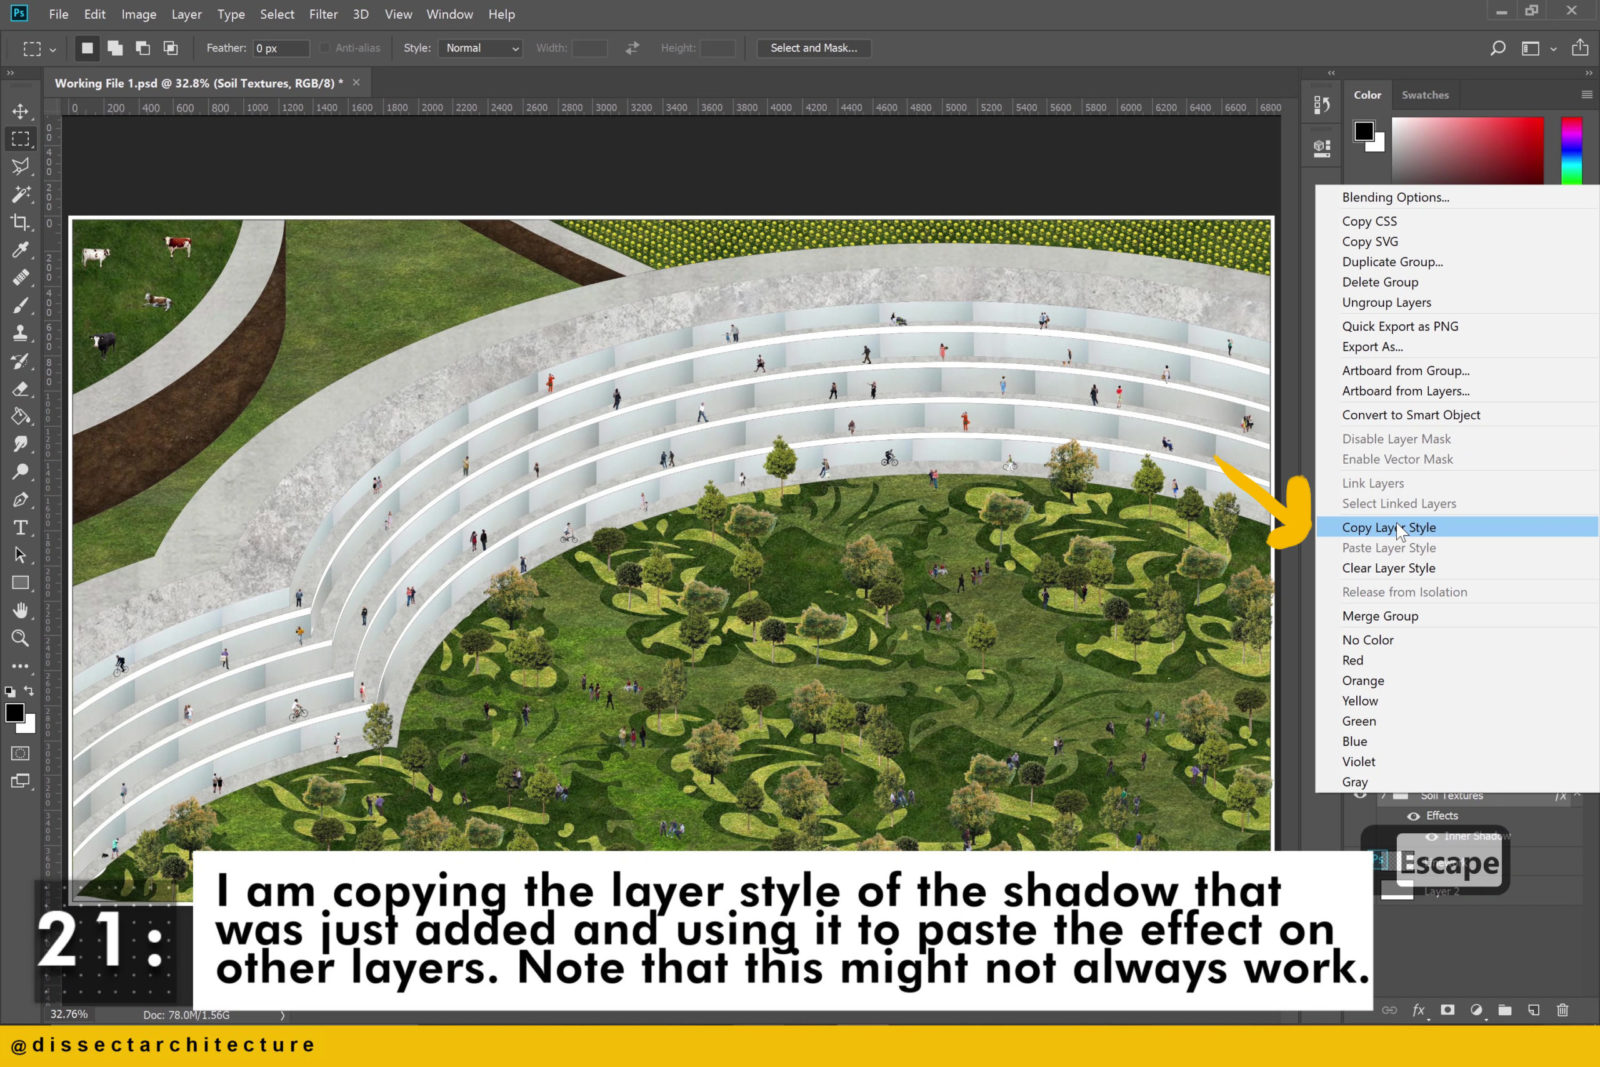
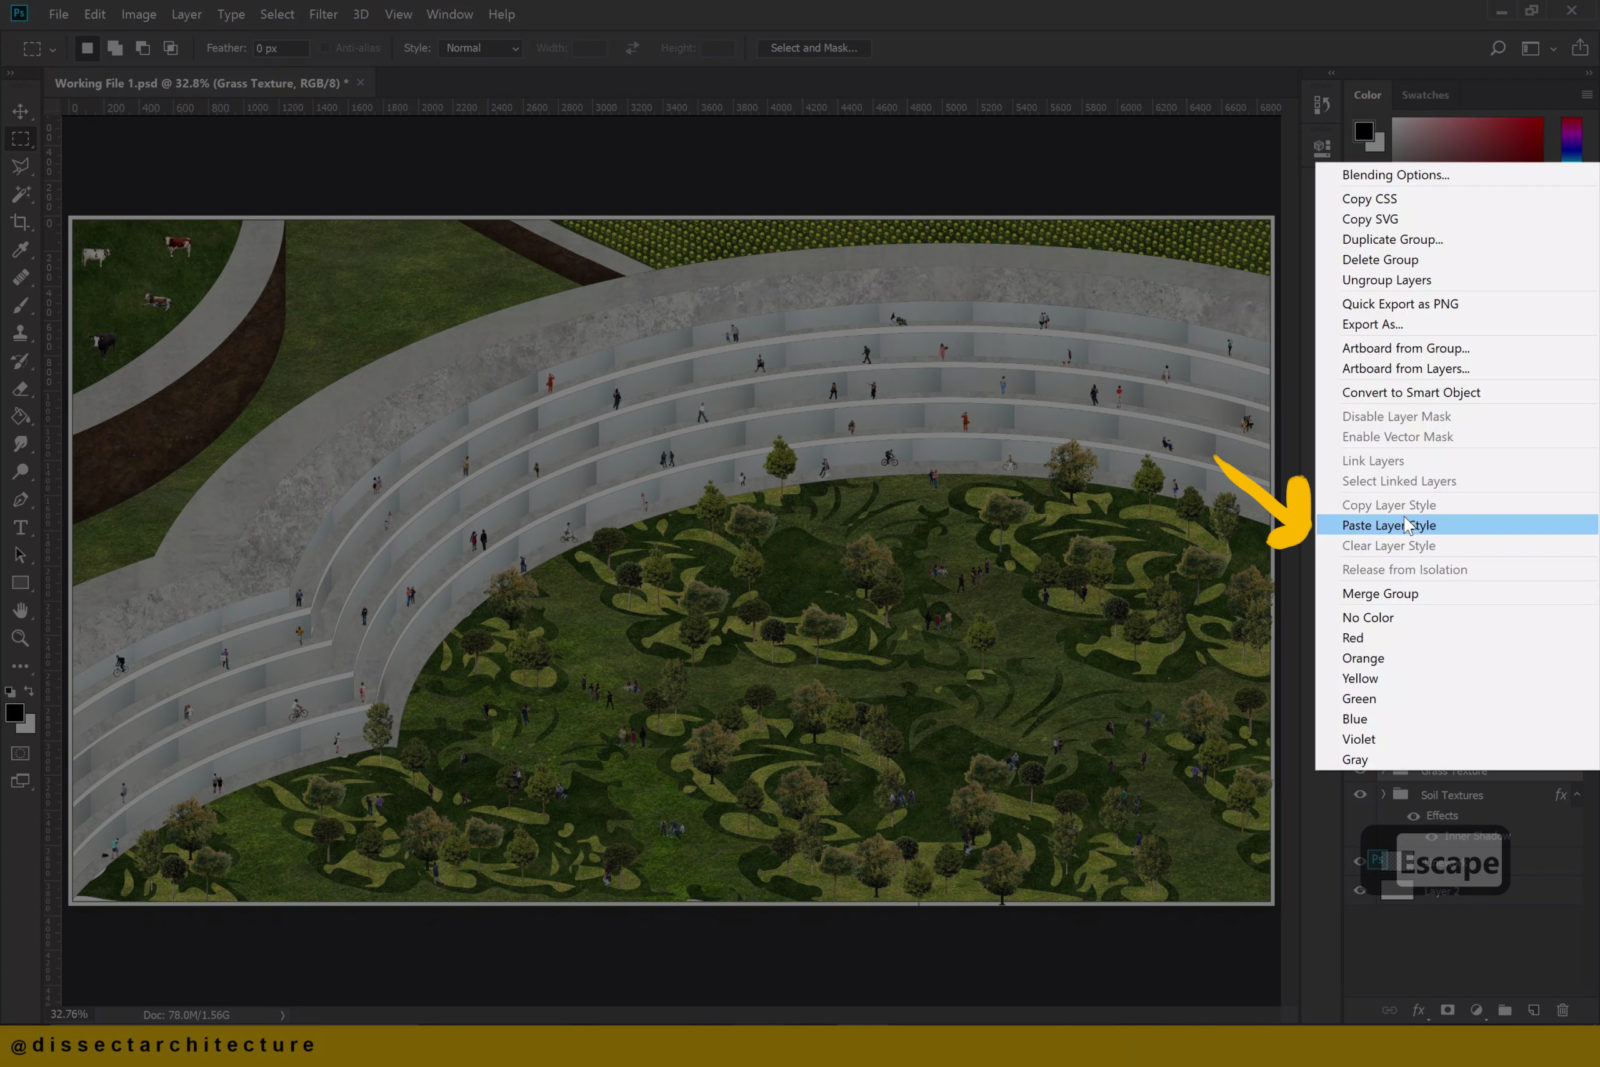
Step 21
I am copying the layer style of the shadow that was just added, by right clicking the layer and clicking Copy Layer Styles and pasting the effect on other layers.
Note that this might not always work or look perfect.
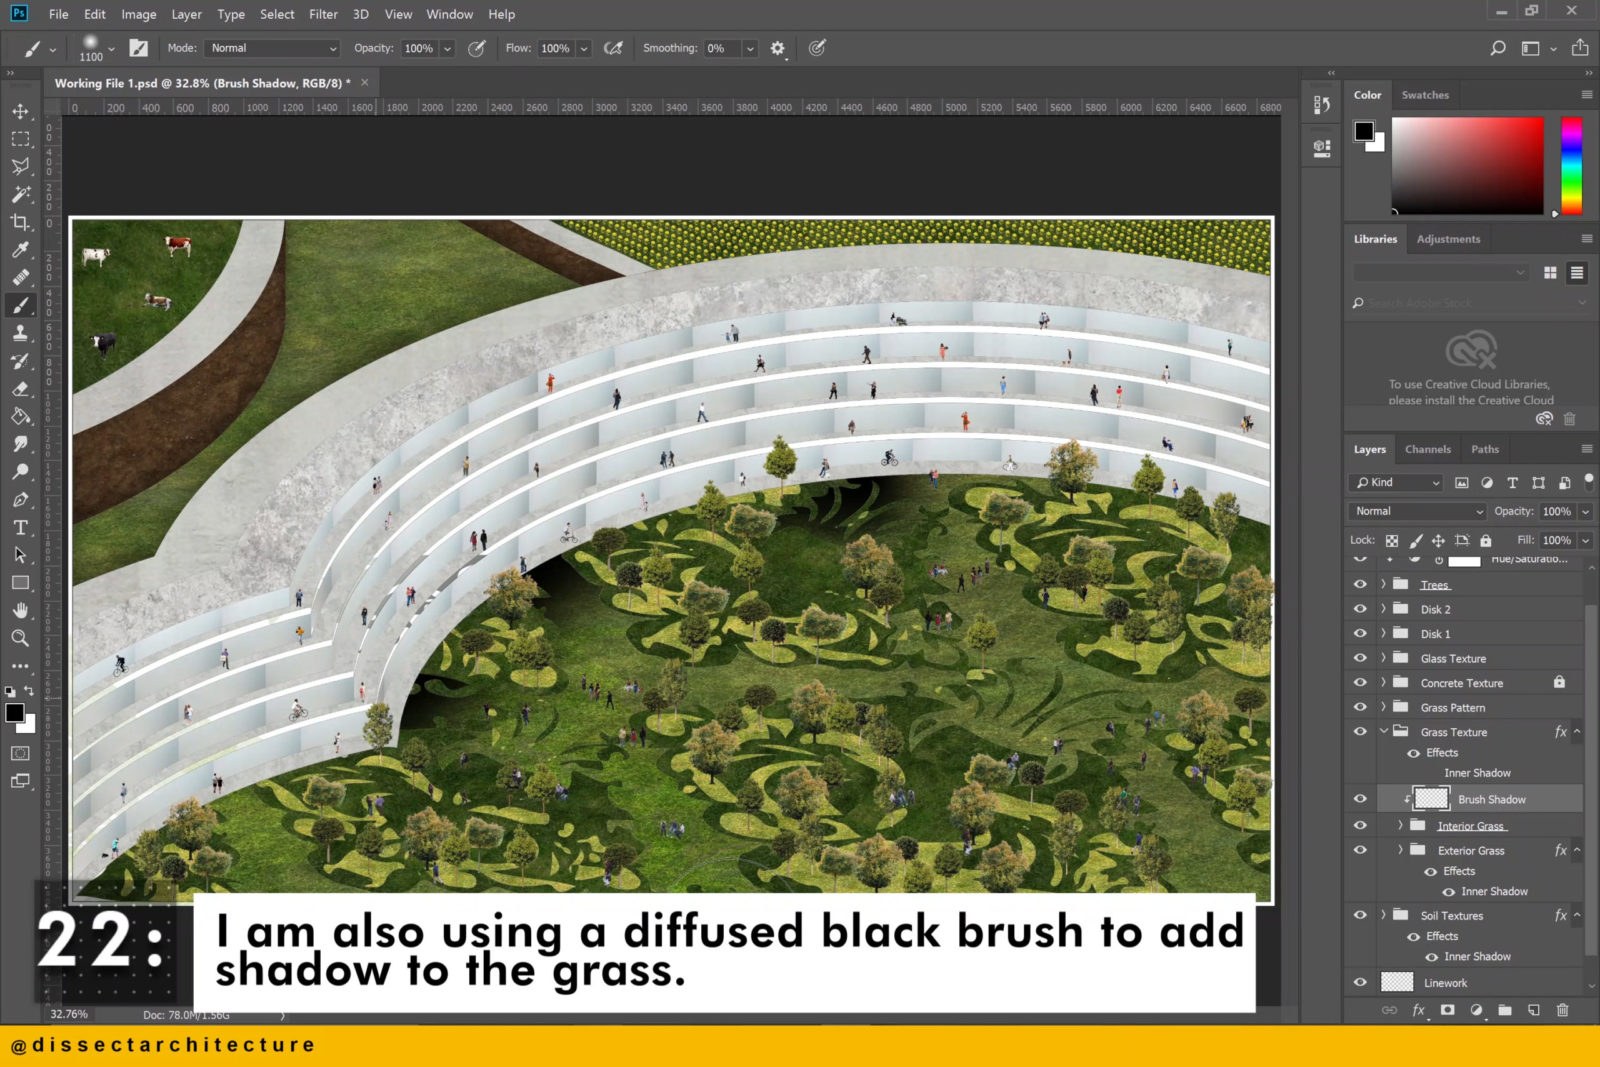
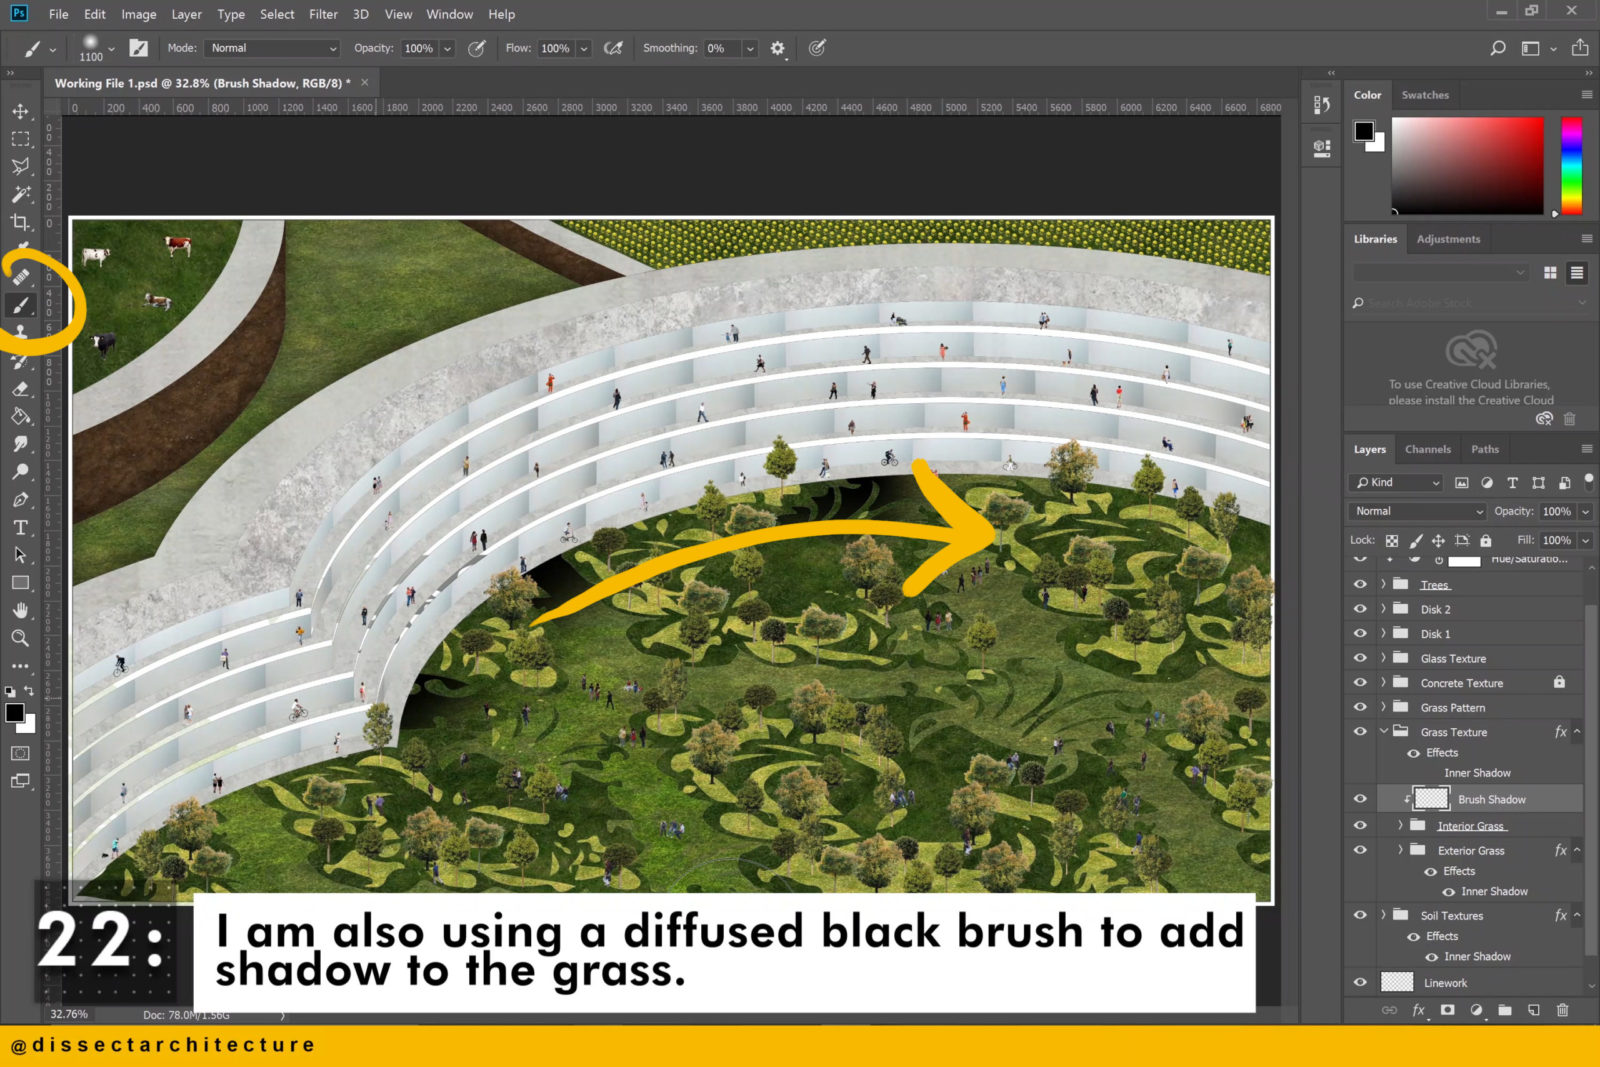
Step 22
I am also using a diffused black brush to add shadow to the grass. Make sure this is on a new layer that is made into a clipping mask over the layer with the grass texture.
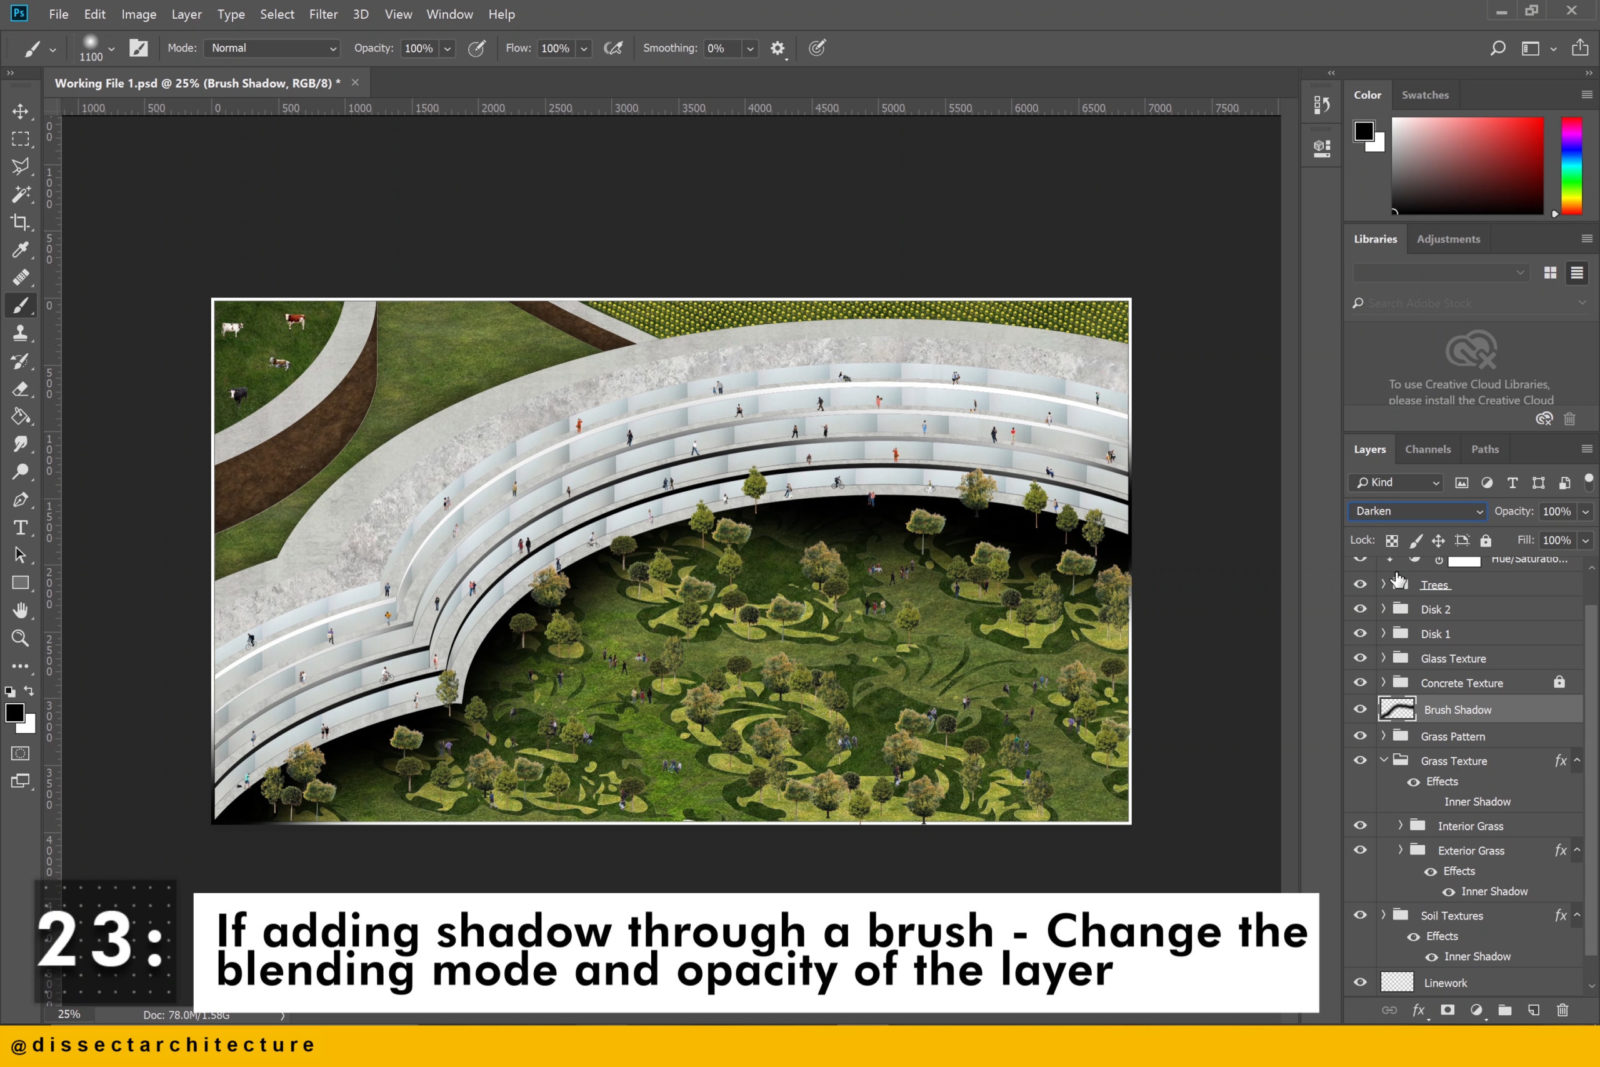
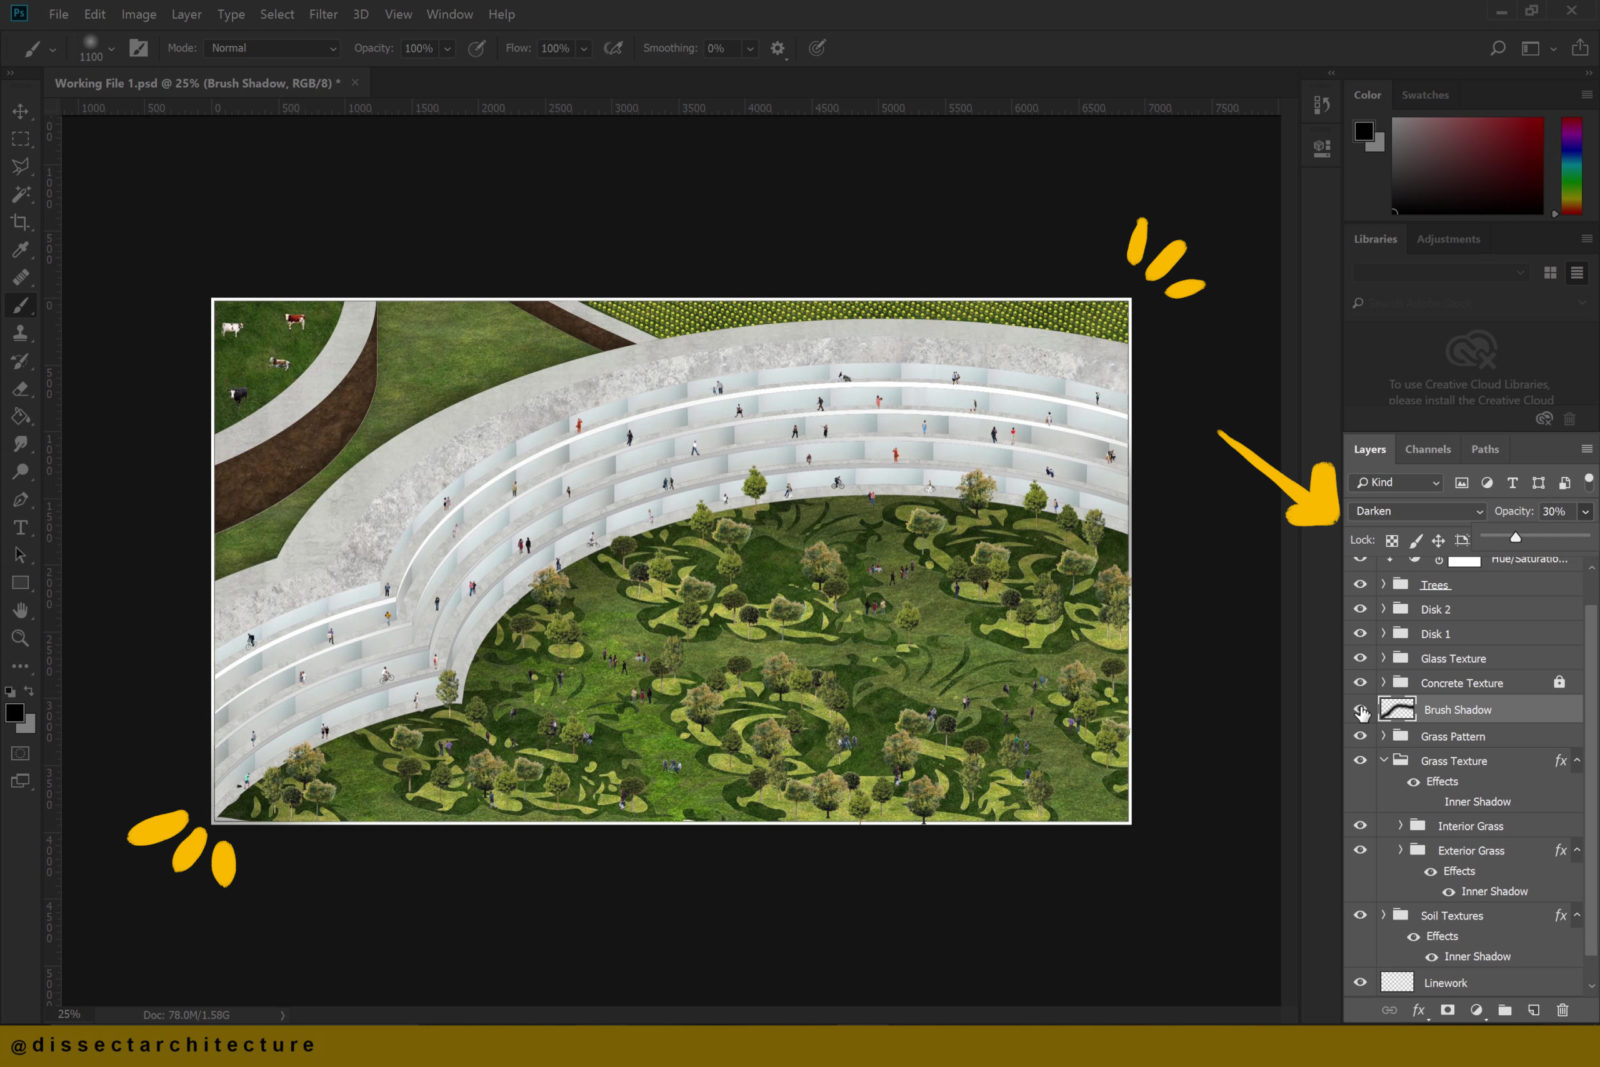
Step 23
If adding a shadow through a brush, change the blending mode and opacity of the layer to create a more subtle and blended shadow.
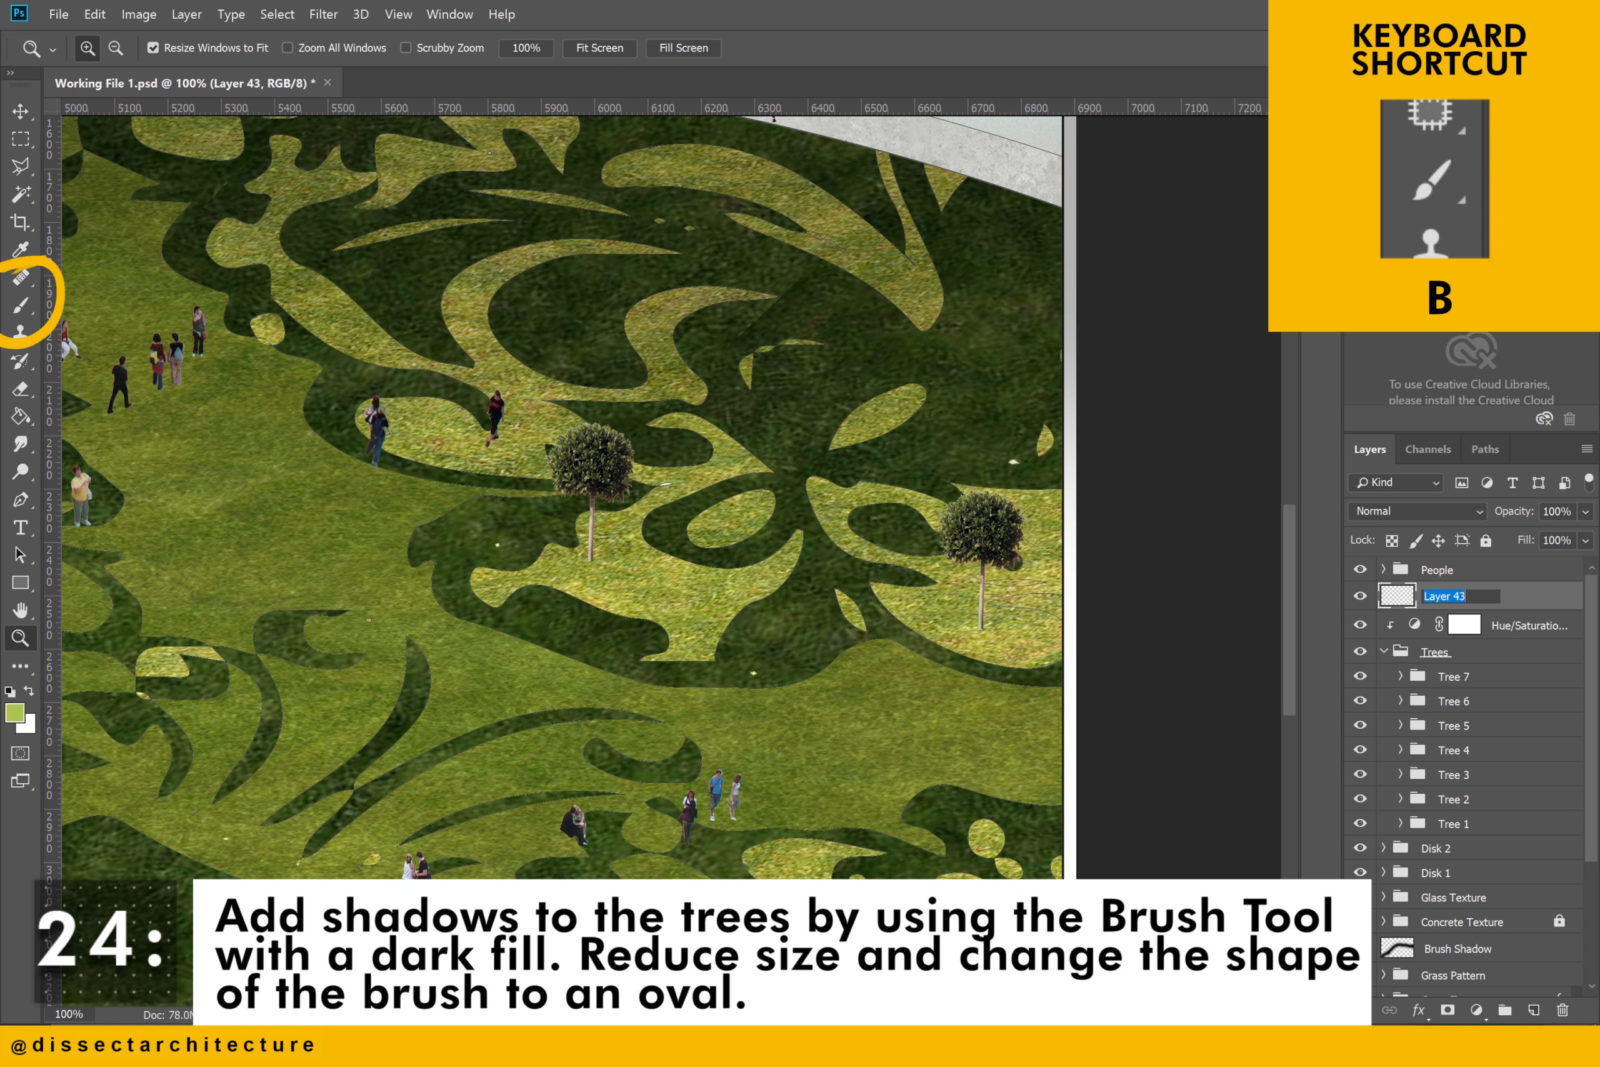
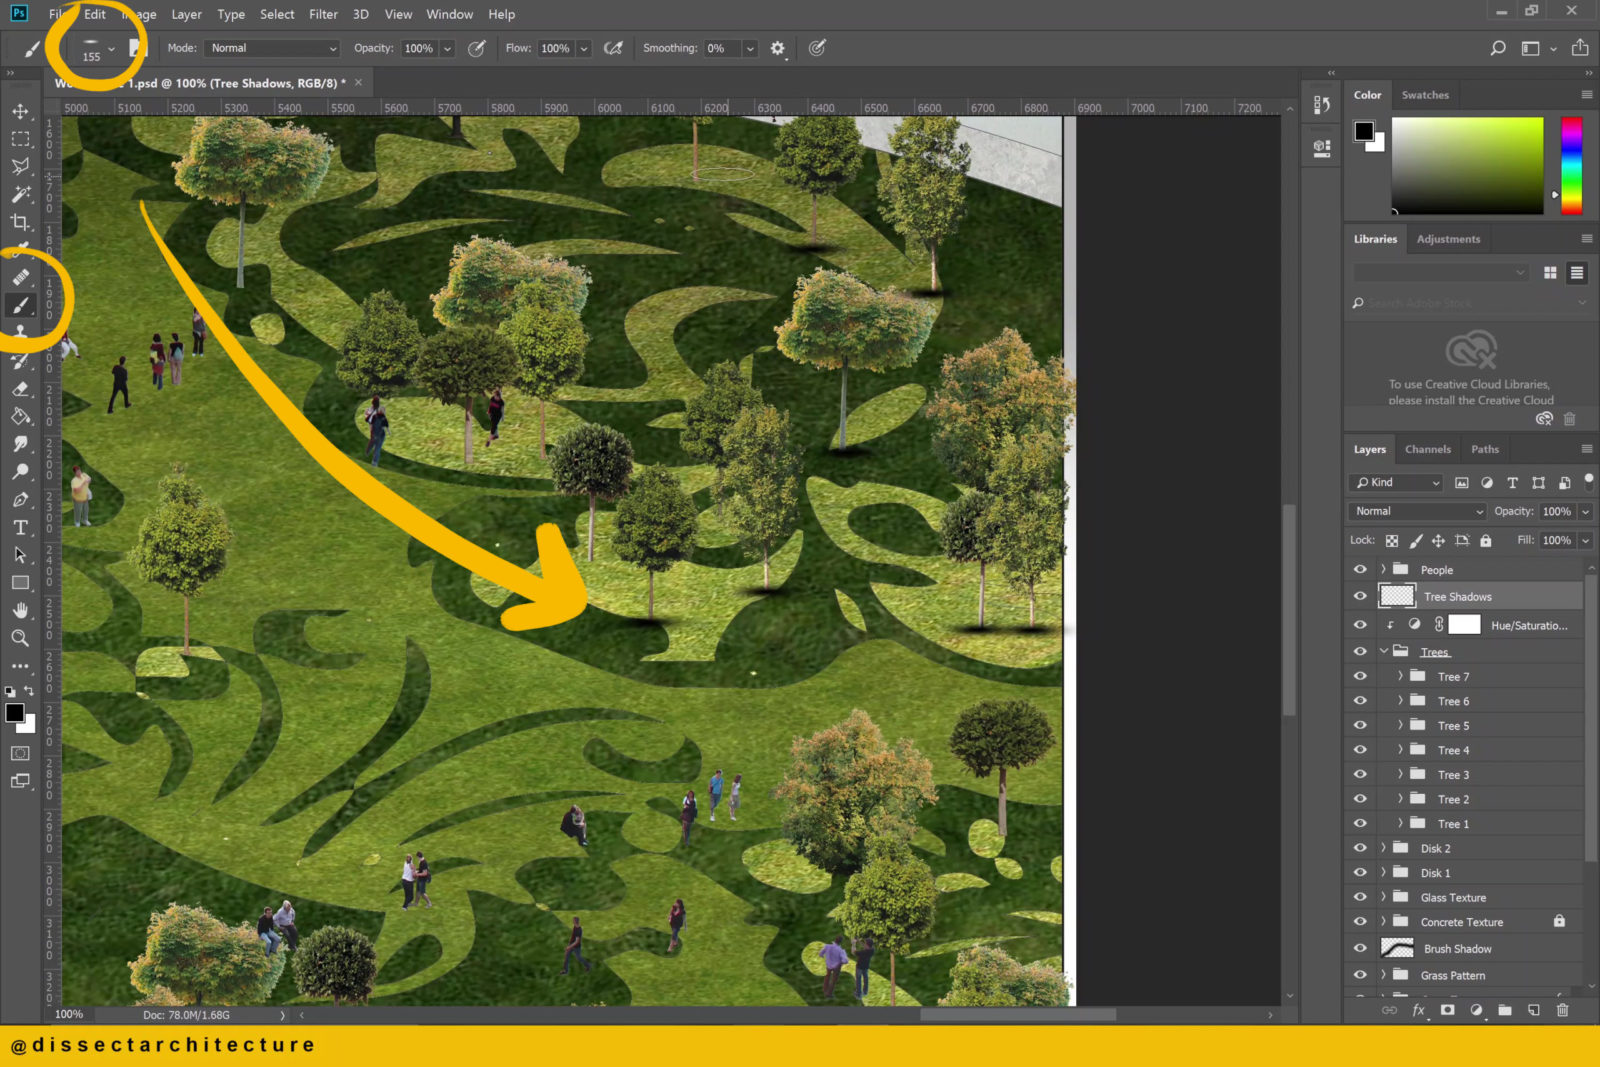
Step 24
Add shadow to the trees by using the Brush Tool with a dark fill. Reduce the size of the brush and change the shape of the brush to an oval.
Change the blending mode and opacity of the shadows to soften them as well.
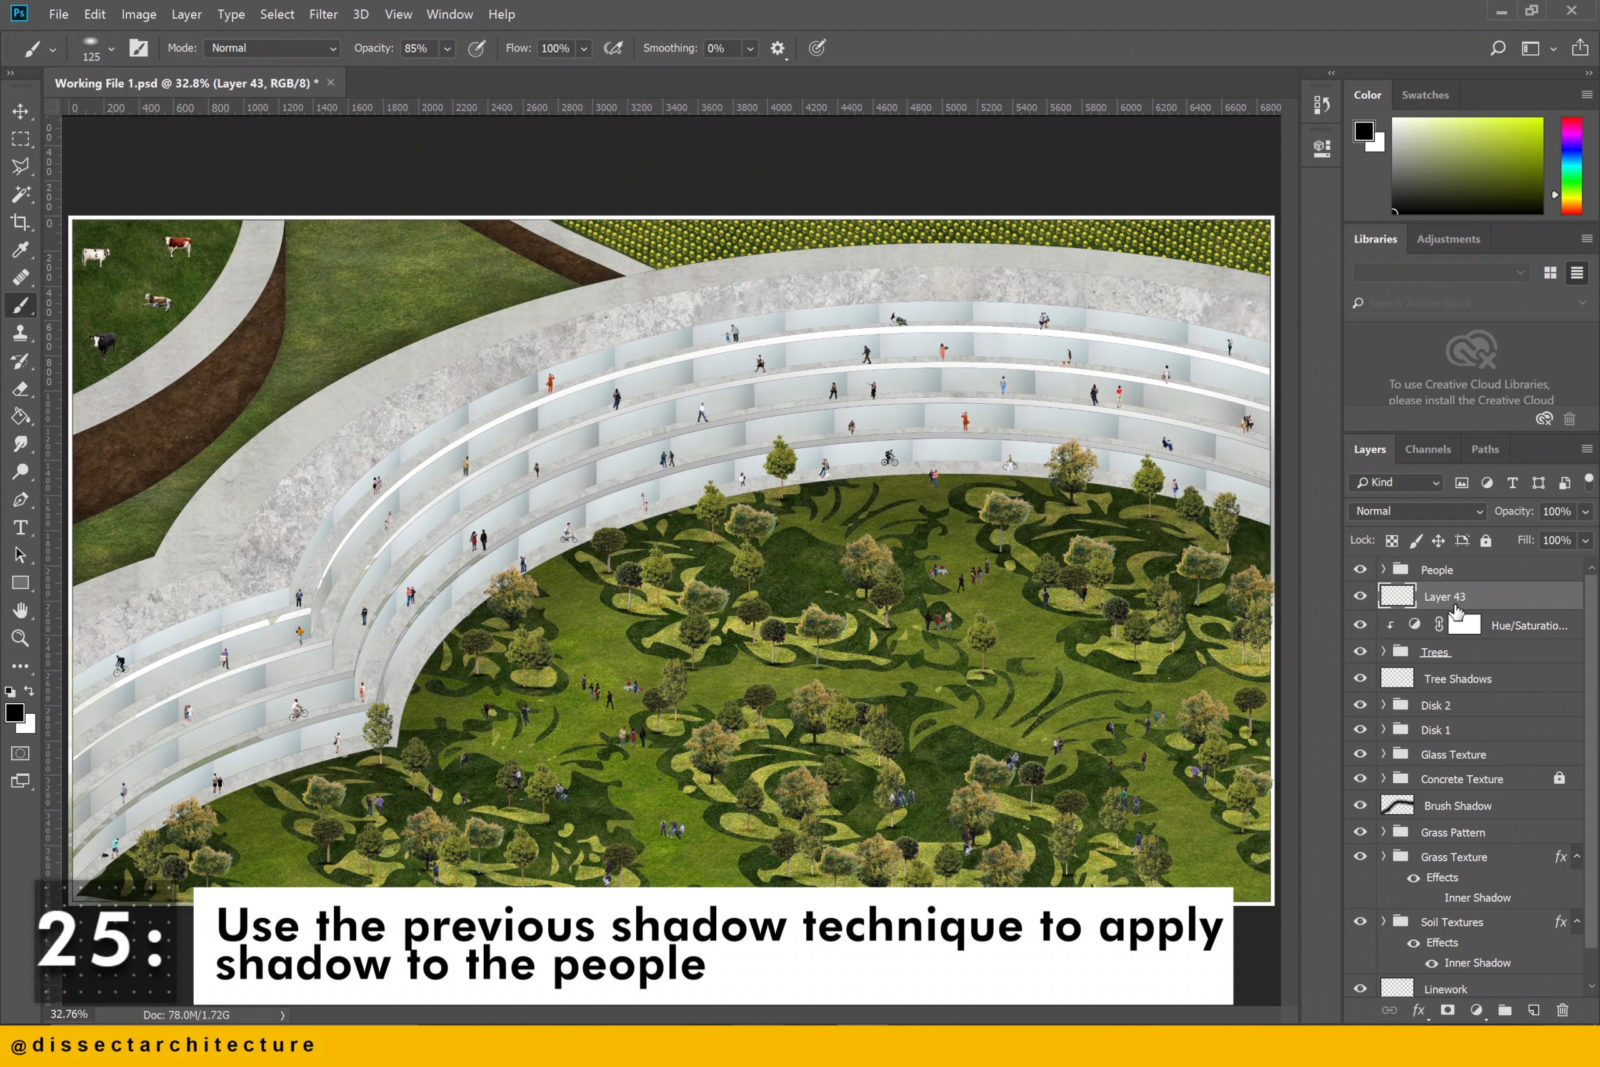
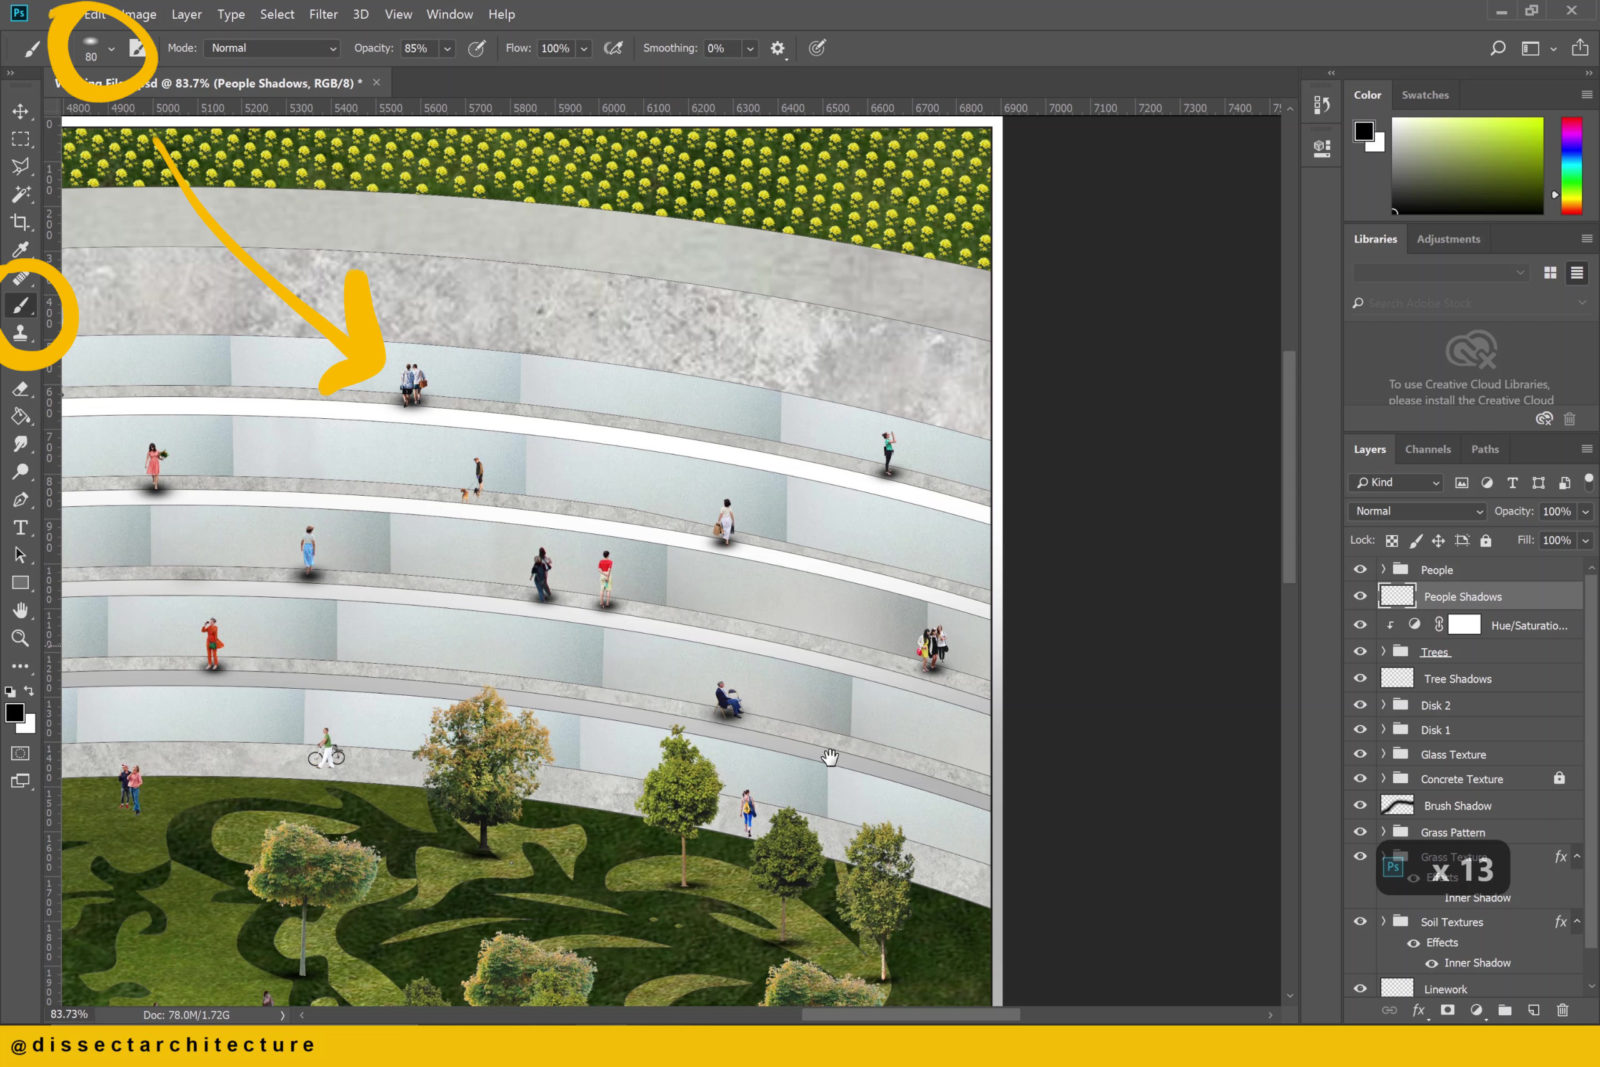
Step 25
Use the previous shadow technique to apply shadow to the people cutouts.
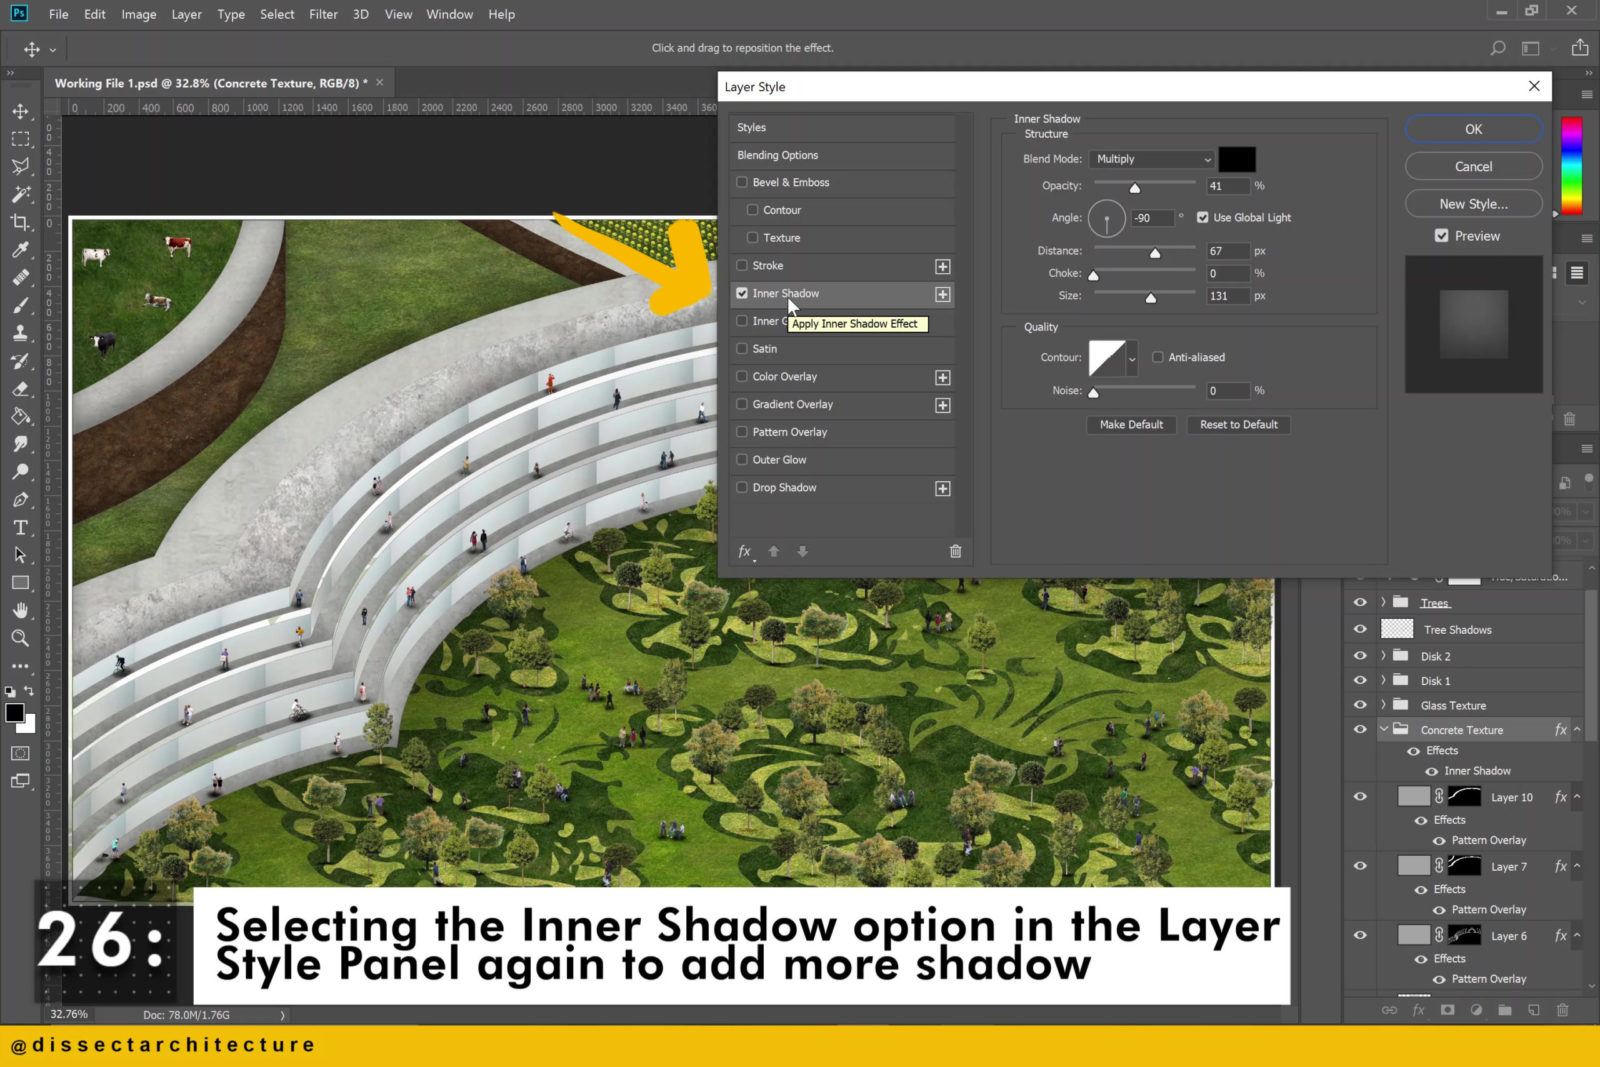
Step 26
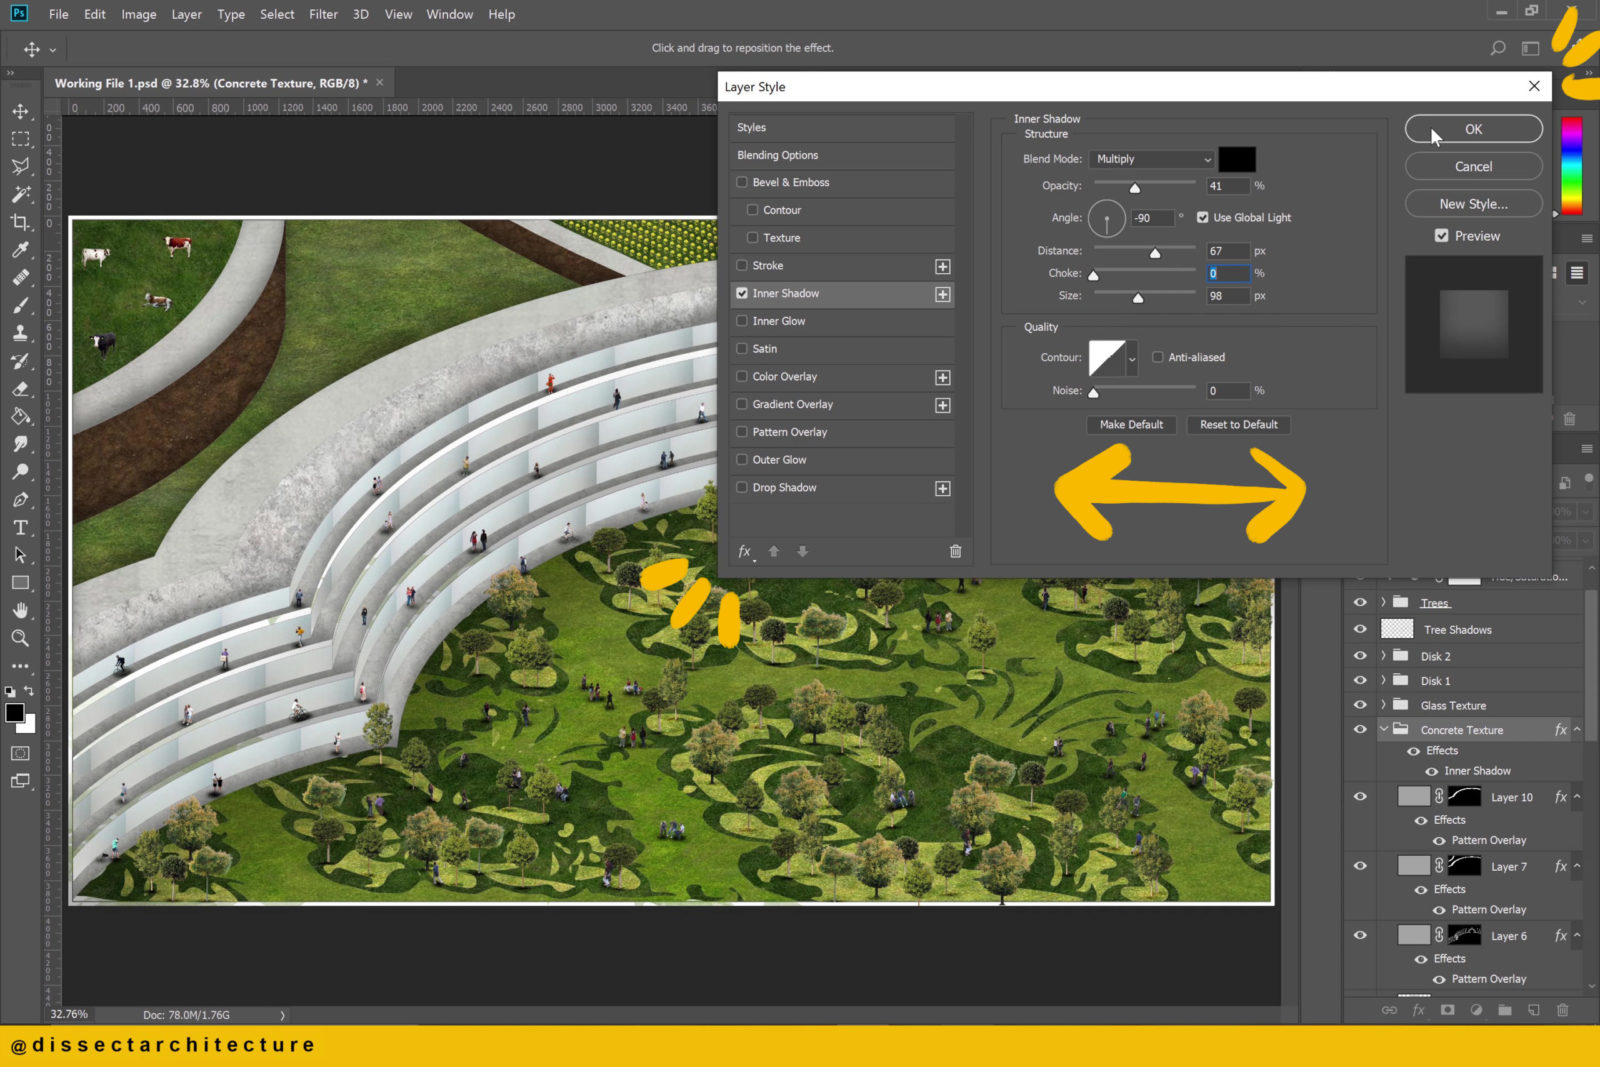
I am starting to add shadows to other parts of the image now, like the concrete textures.
I am doing so by going to the Layer Style Panel and selecting the Inner Shadow option to add more shadow.
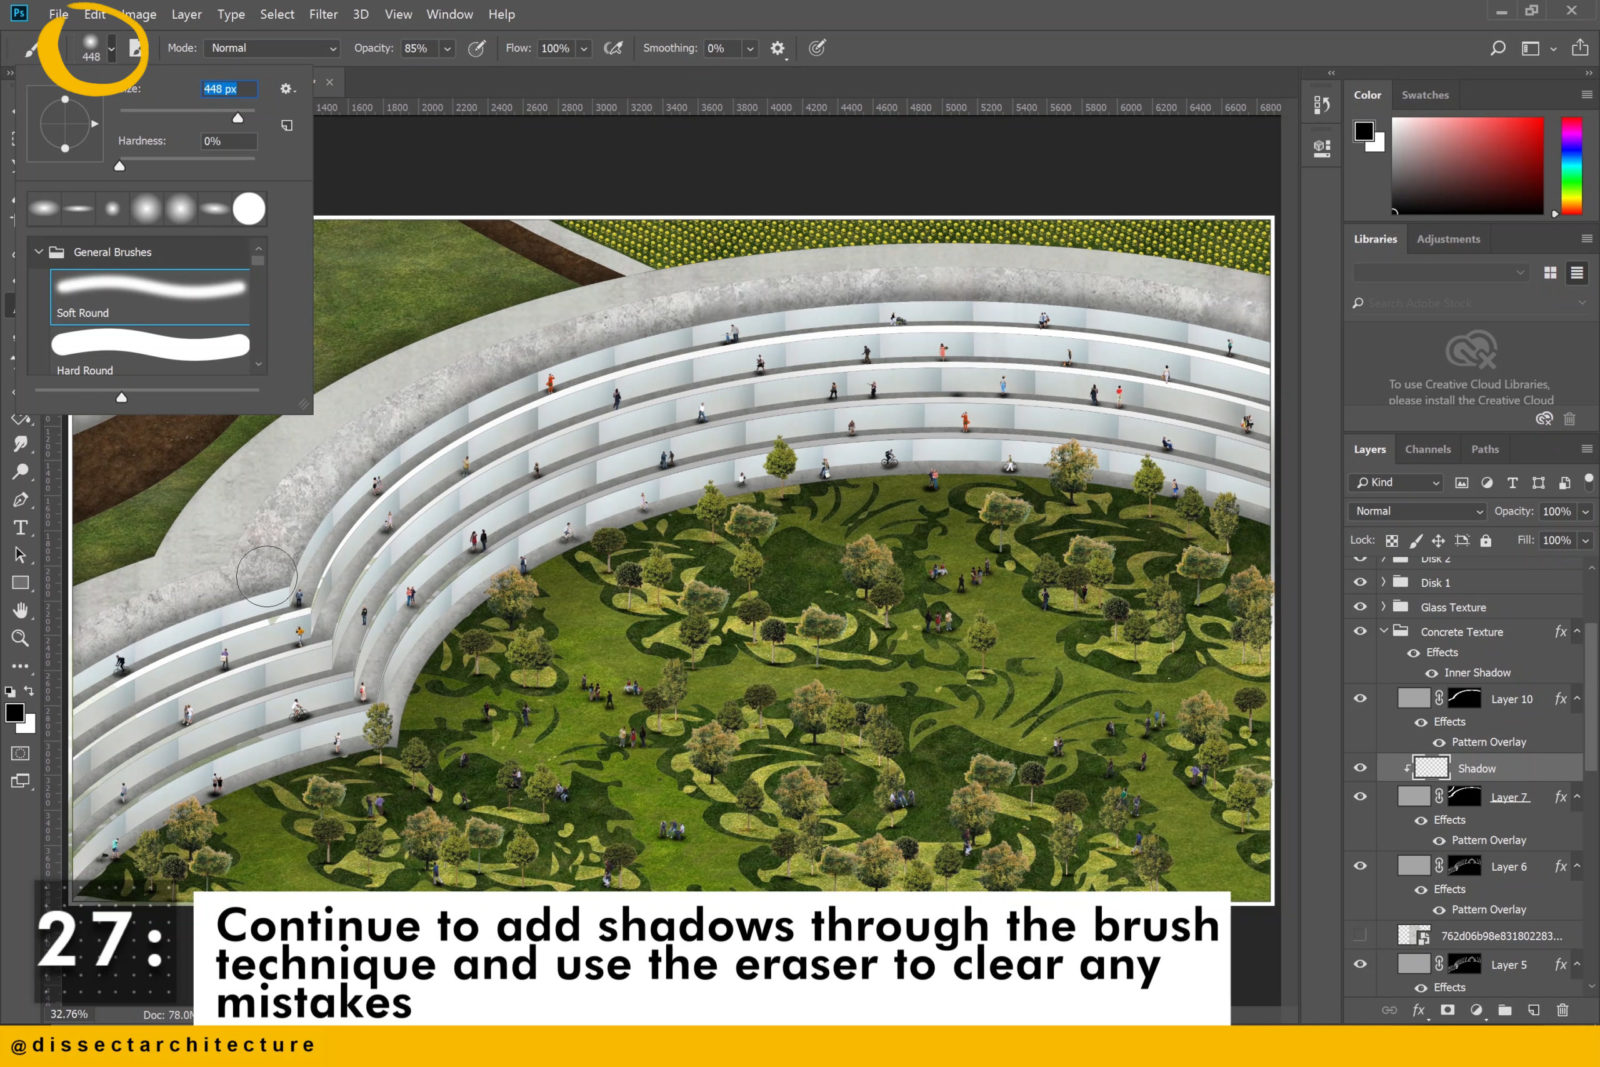
Step 27
Continue to work through your image to add more shadows through the brush technique and use the Eraser Tool to clear any mistakes.
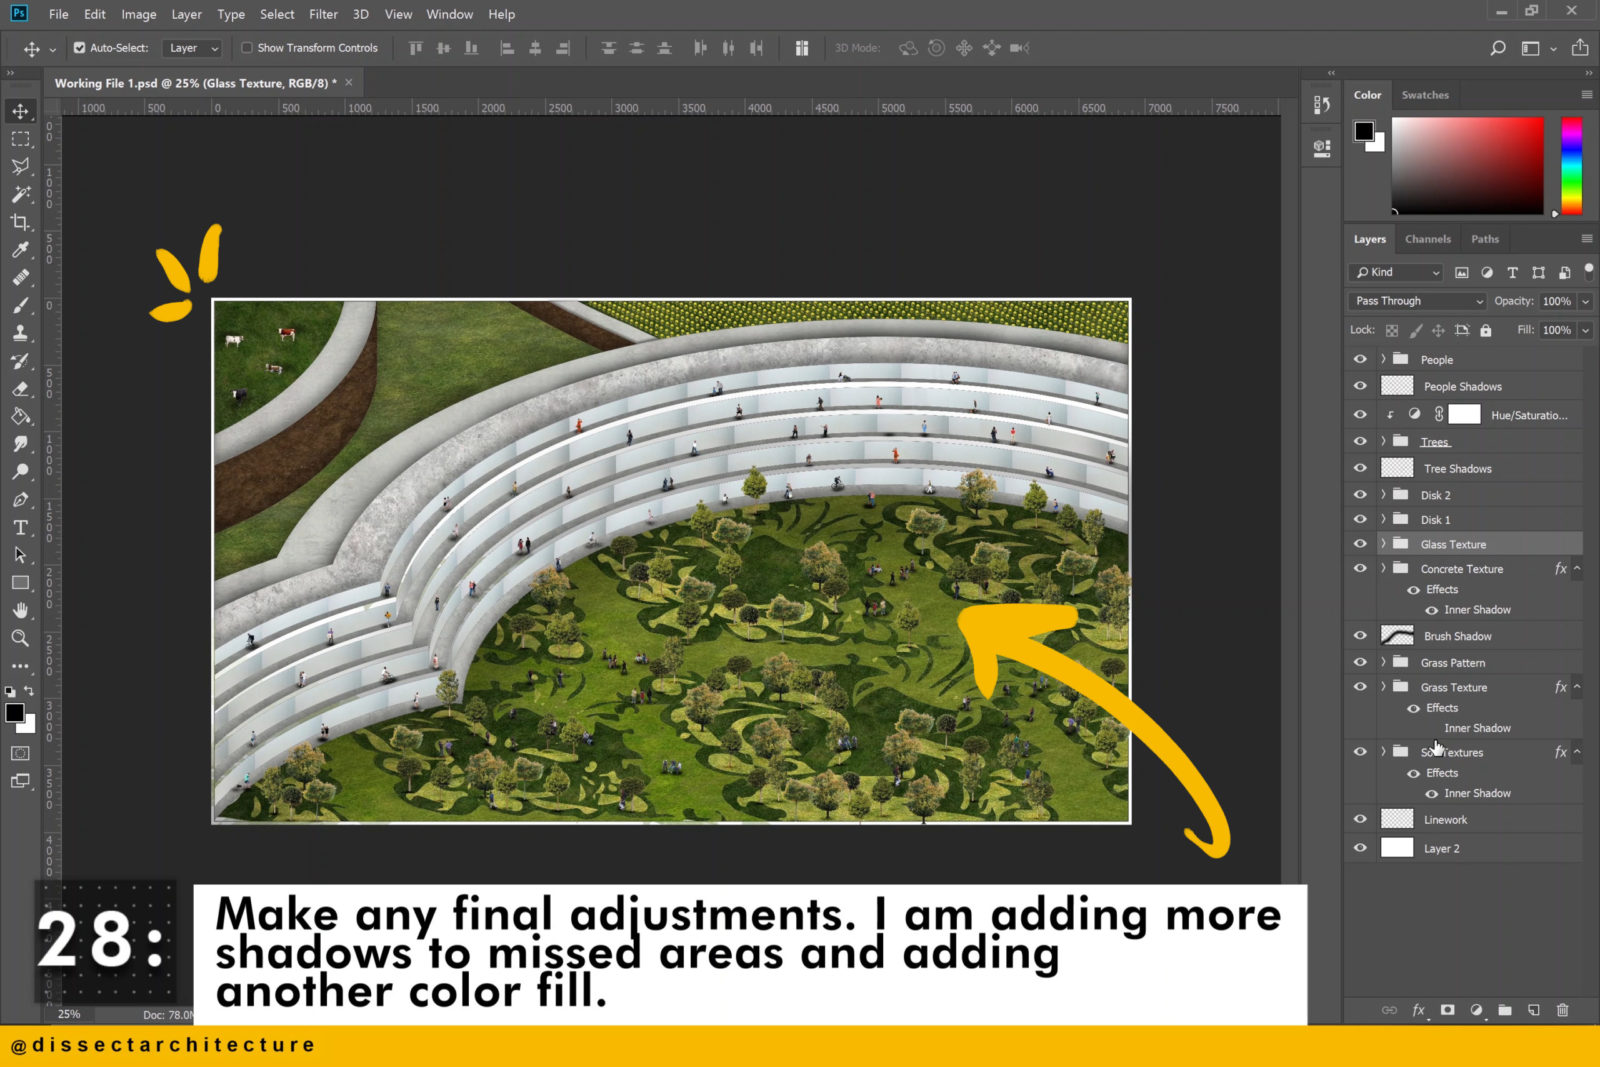
Step 28
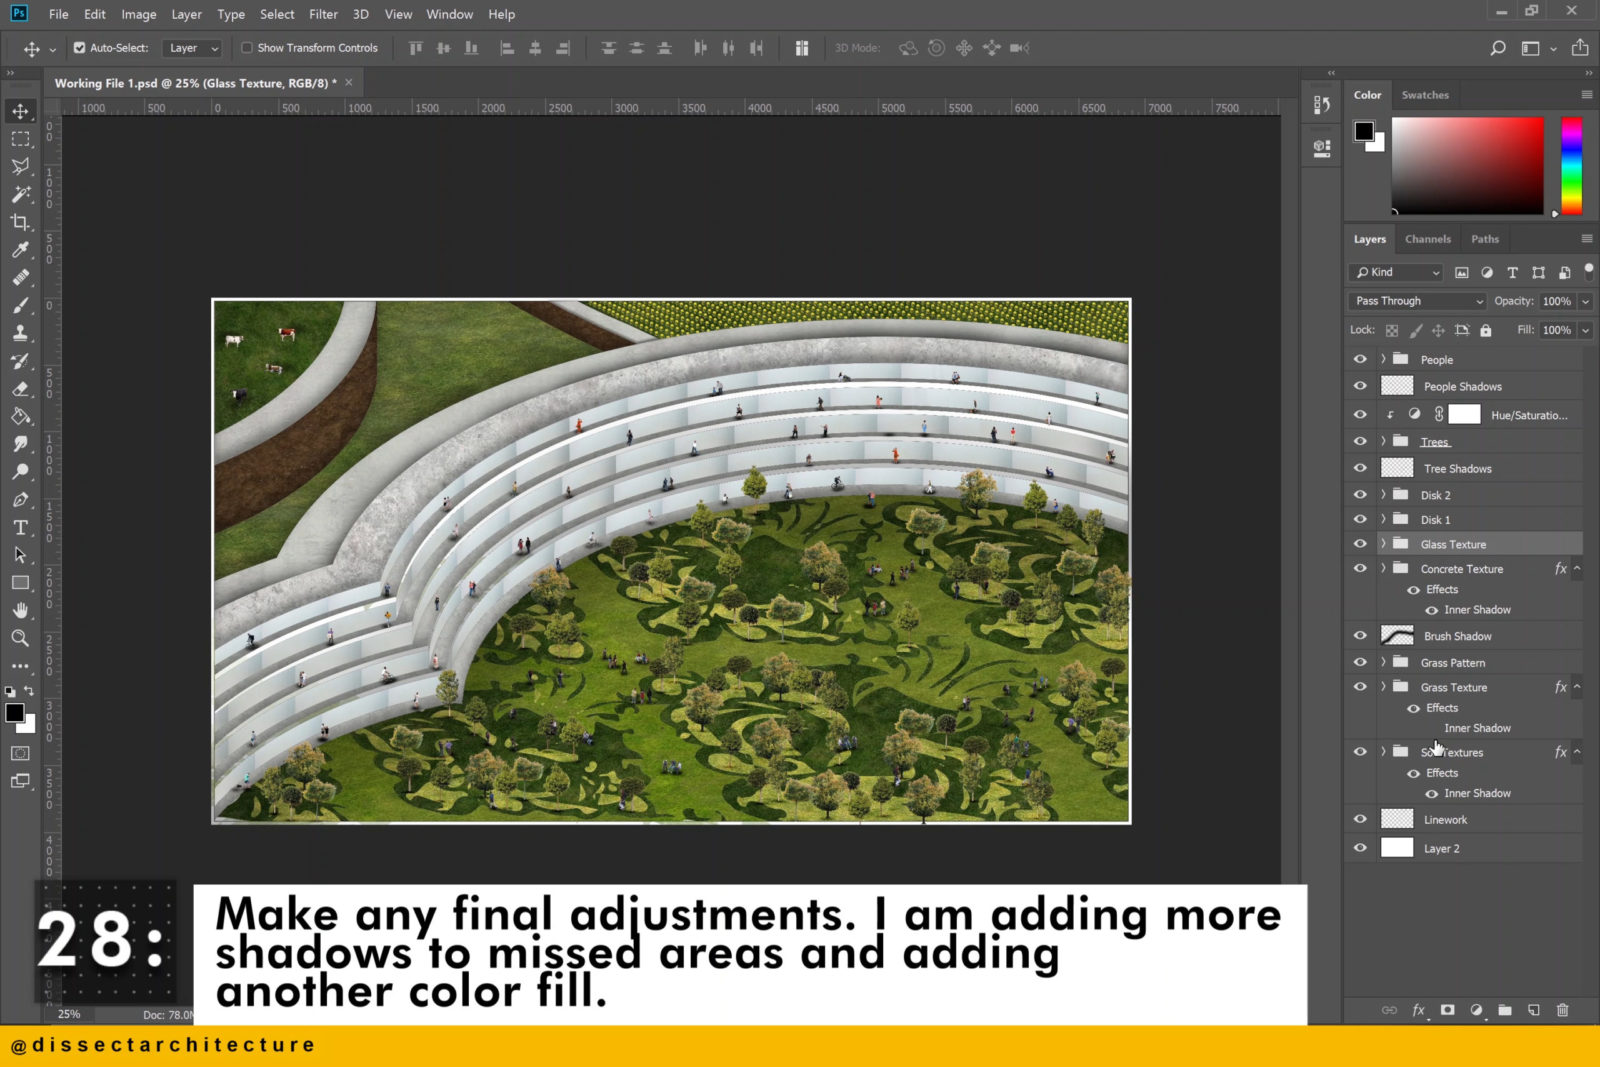
At this point you are almost done with your render-inPhotoshop, make any final adjustments.
I am adding more shadows to any missed areas and adding another color fill
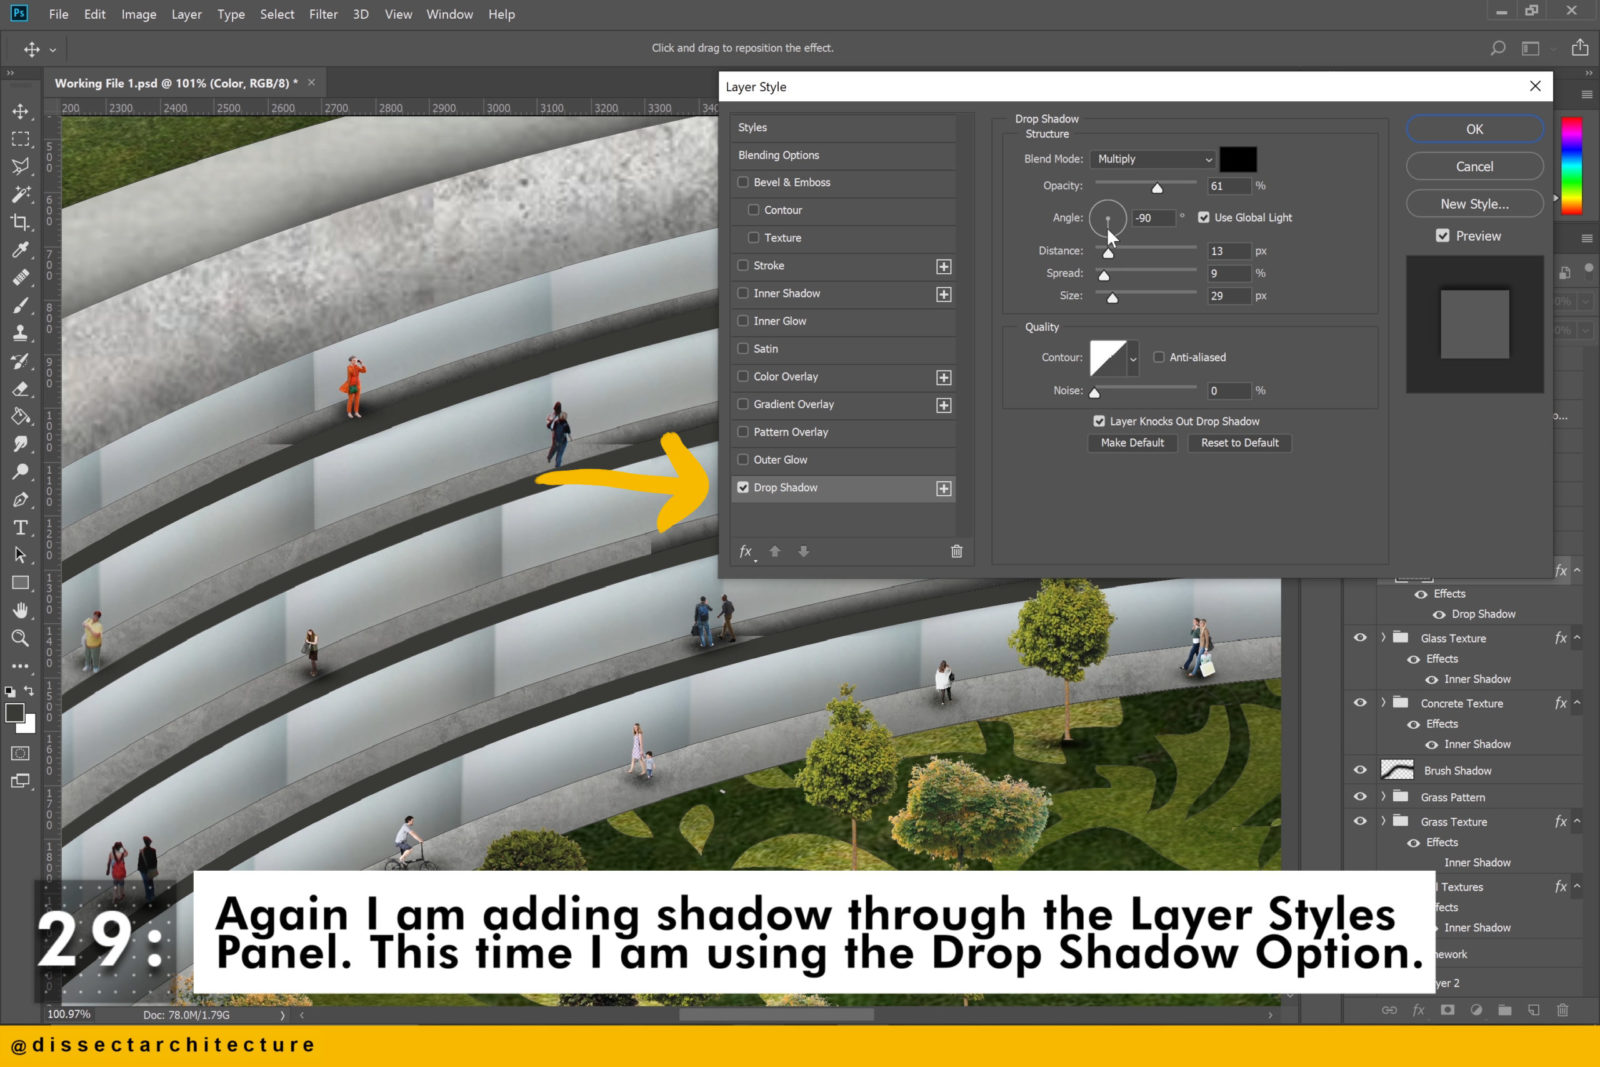
Step 29
Again I am adding shadow through the Layer Style Panel. This time I am using the Drop Shadow option.
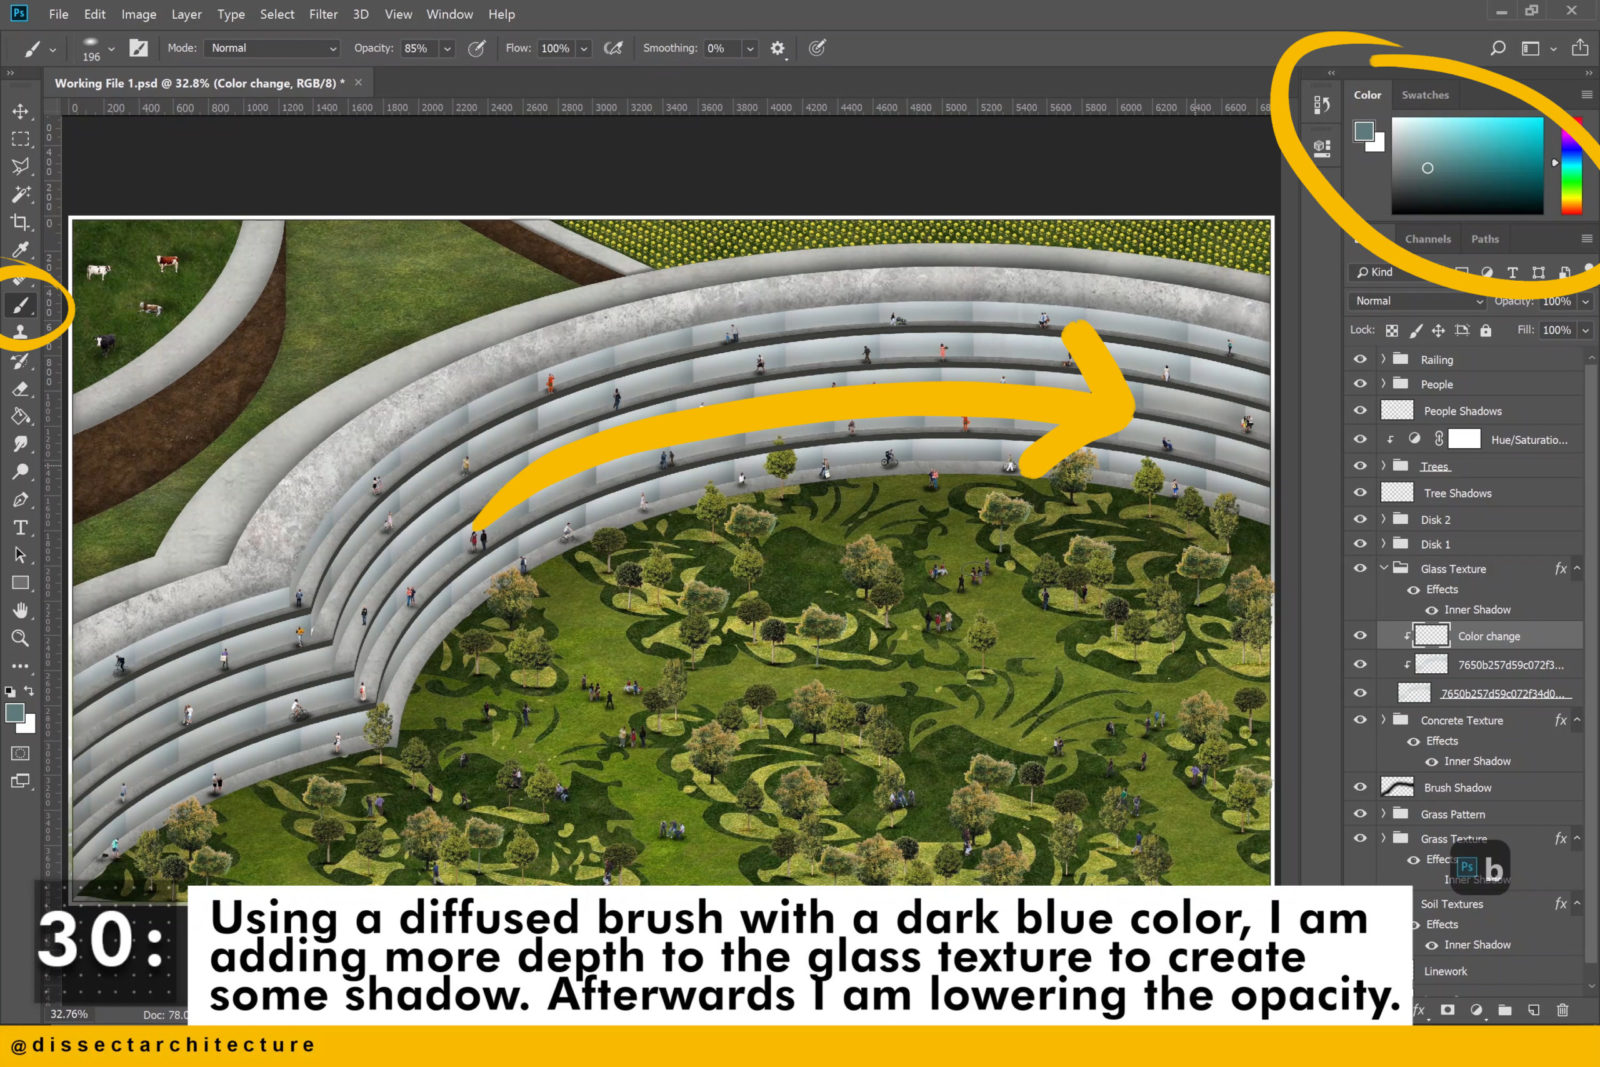
Step 30
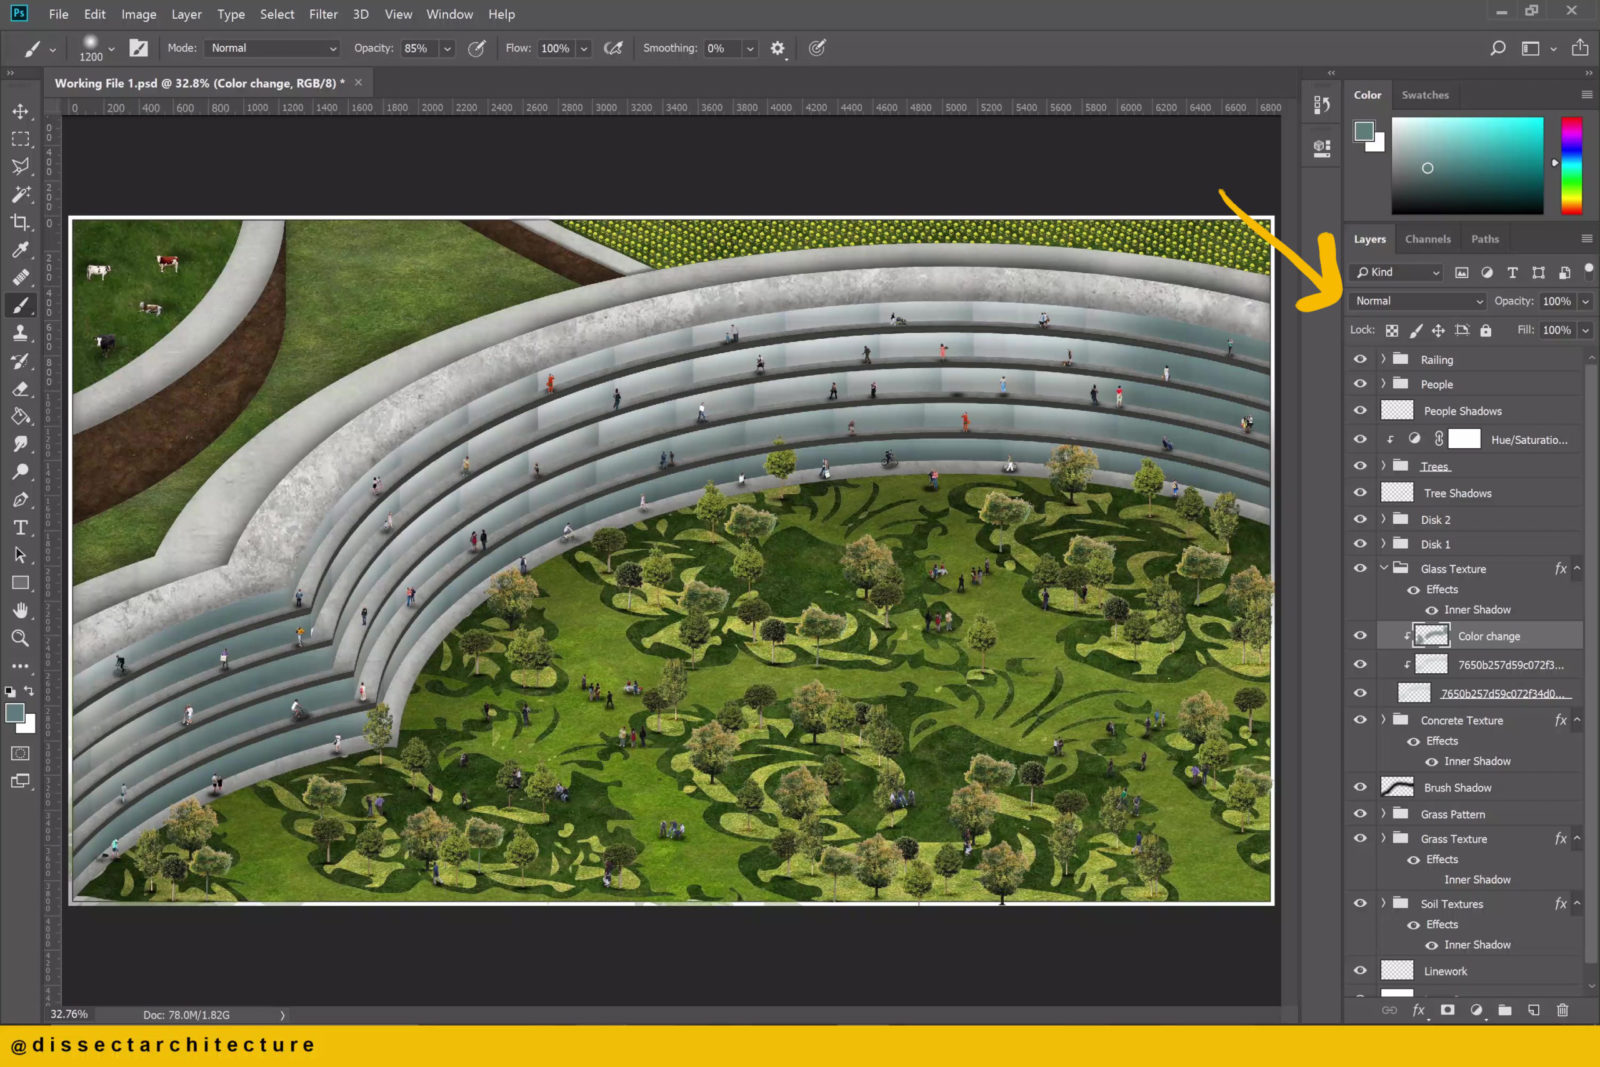
Using a diffused brush with a dark blue color, I am adding more depth to the glass texture to create some shadow. Afterwards I am lowering the opacity.
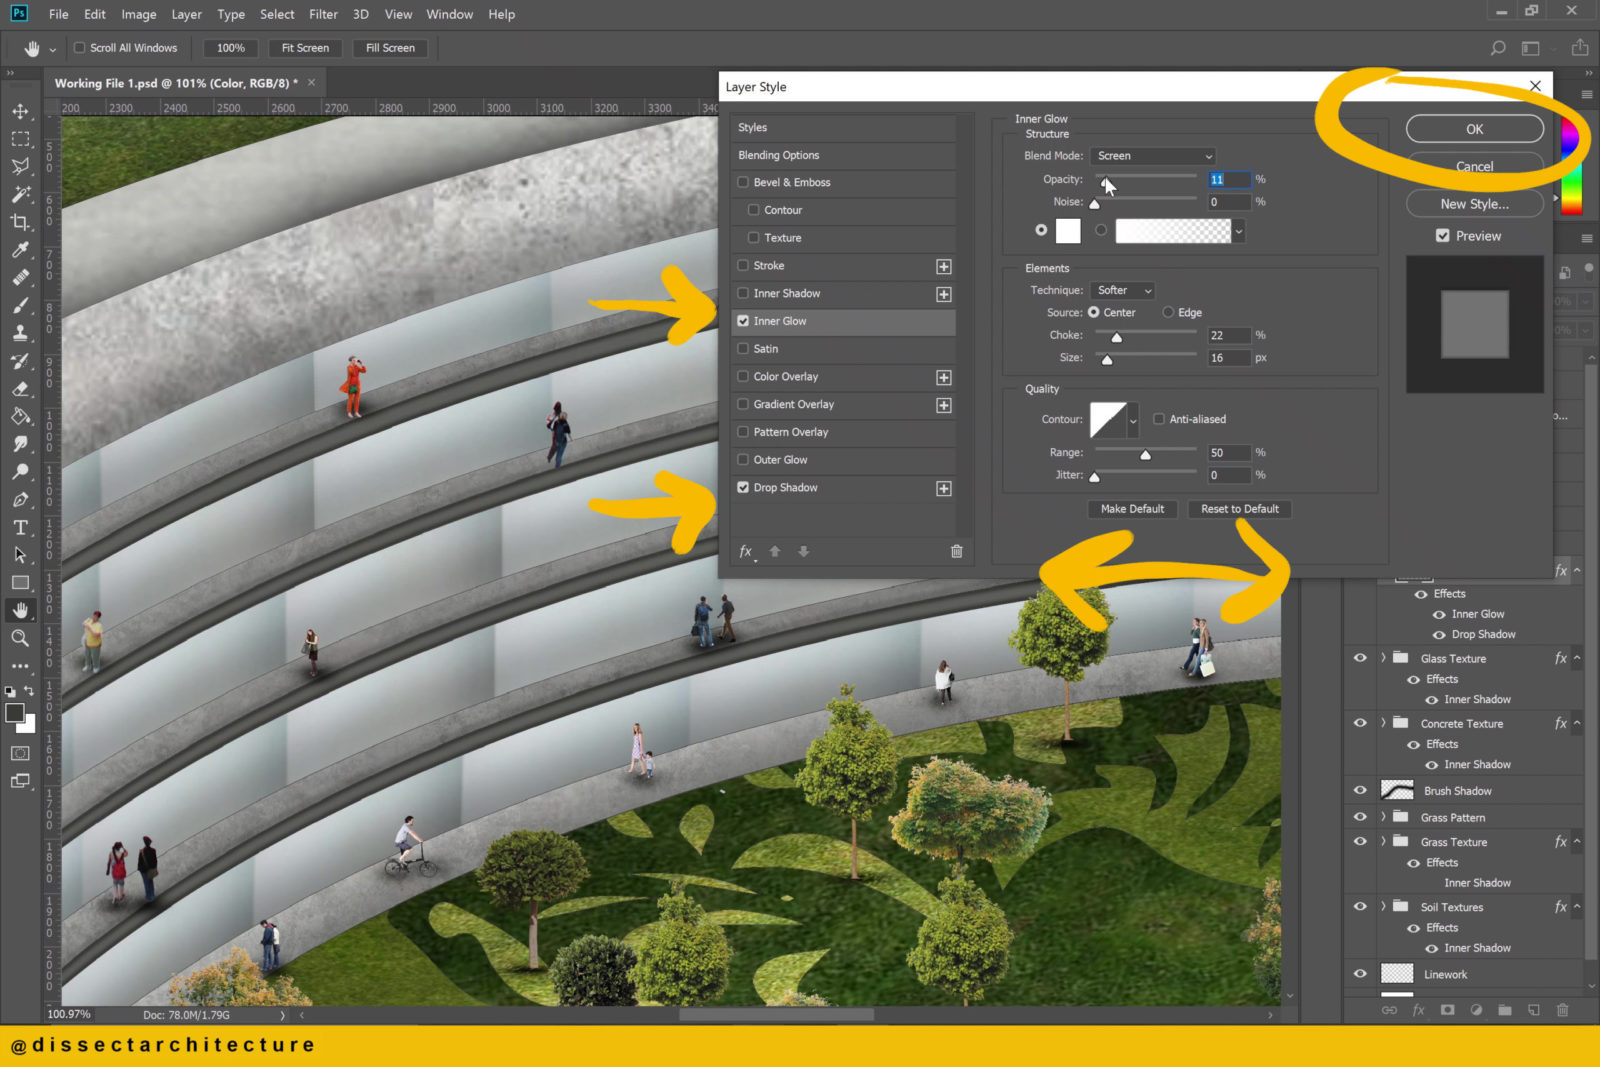
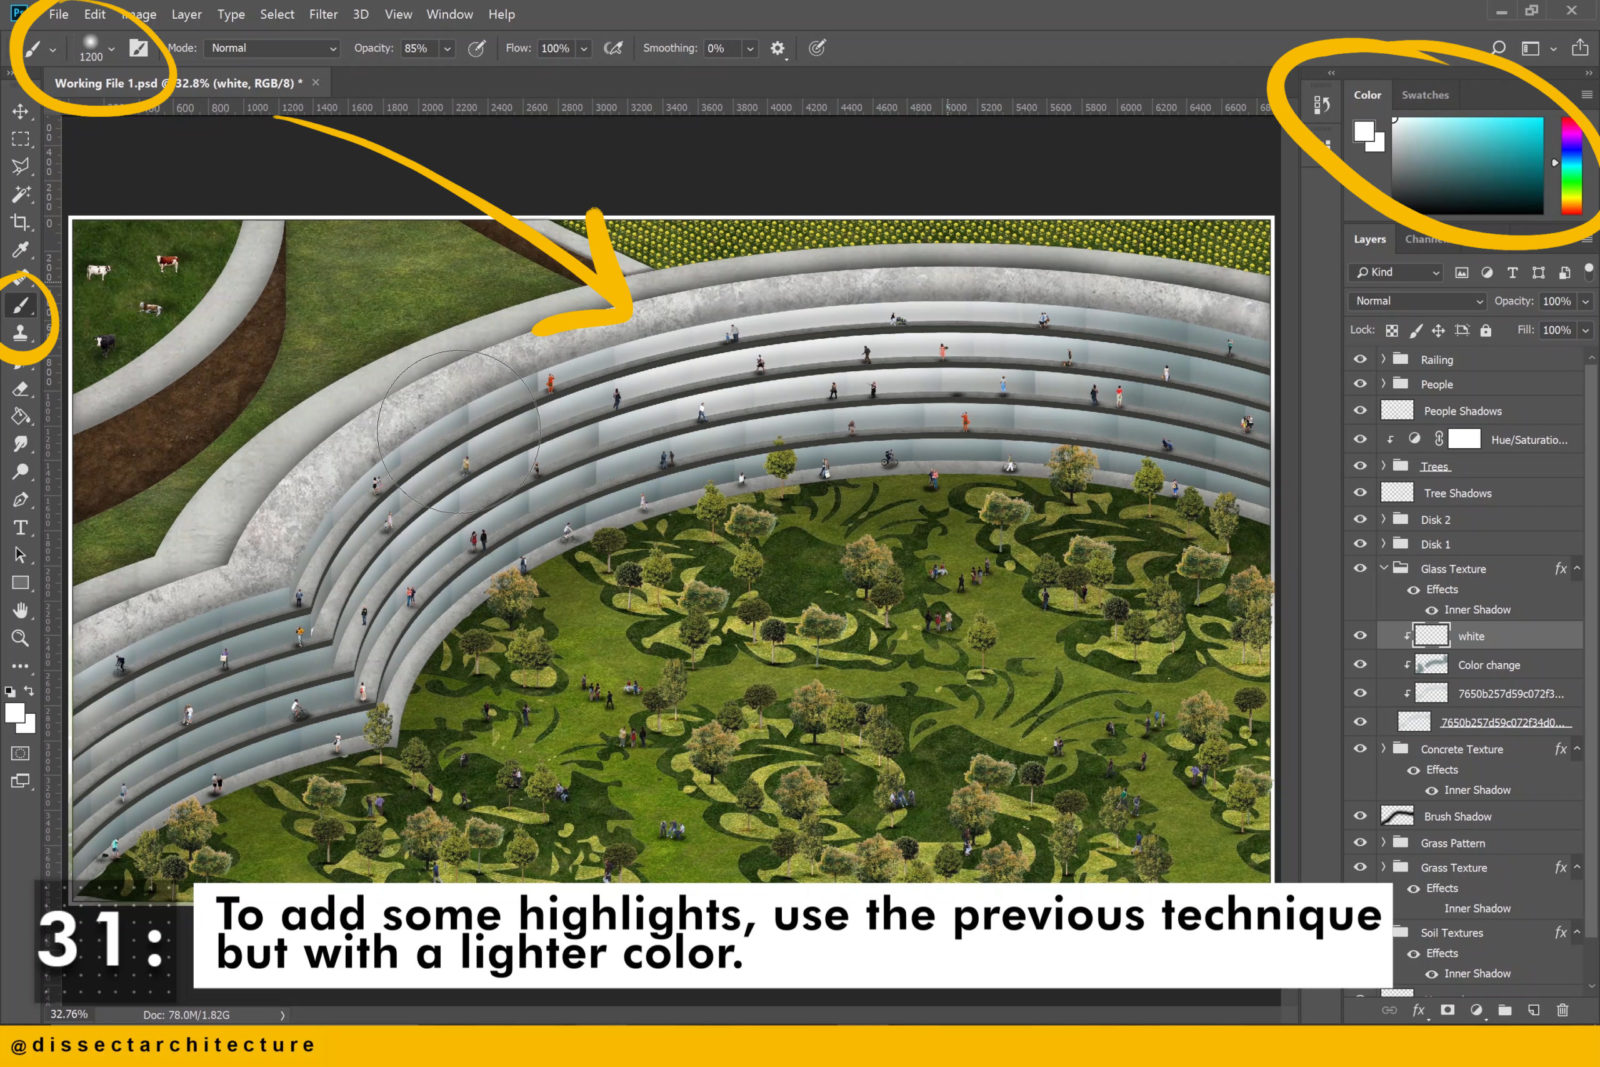
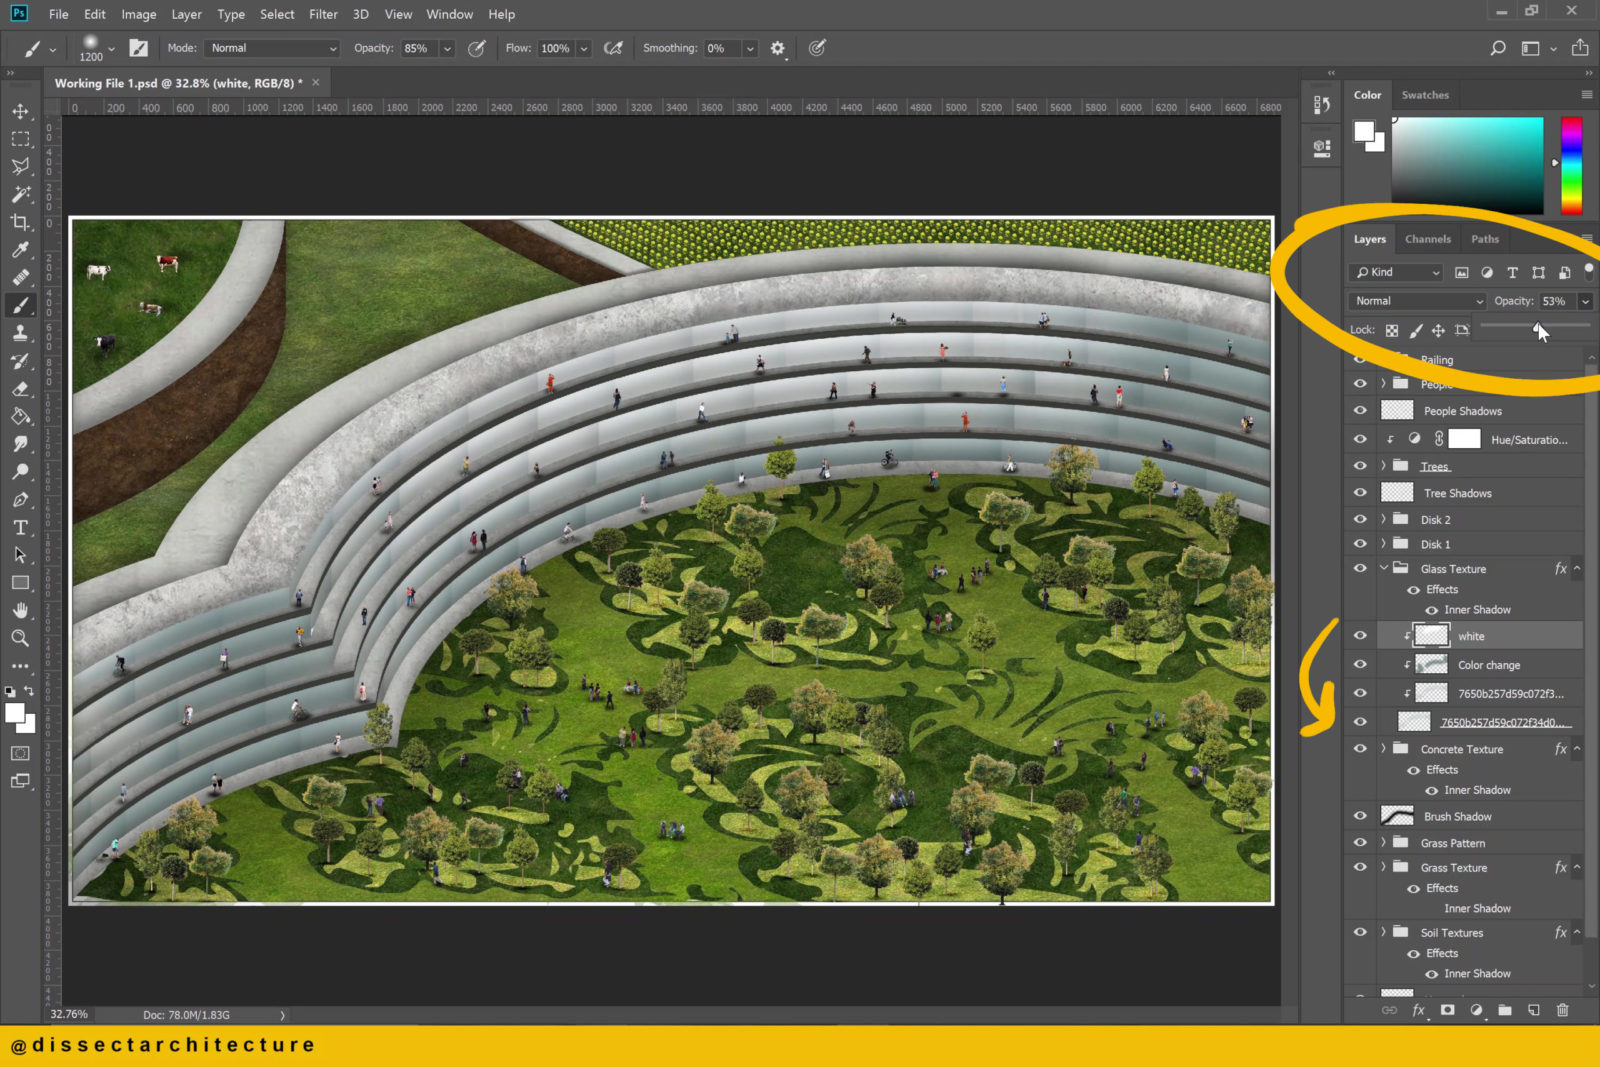
Step 31
To add some highlights, use the previous technique, but with a lighter color. Then change the blending mode of the layer for an added effect.
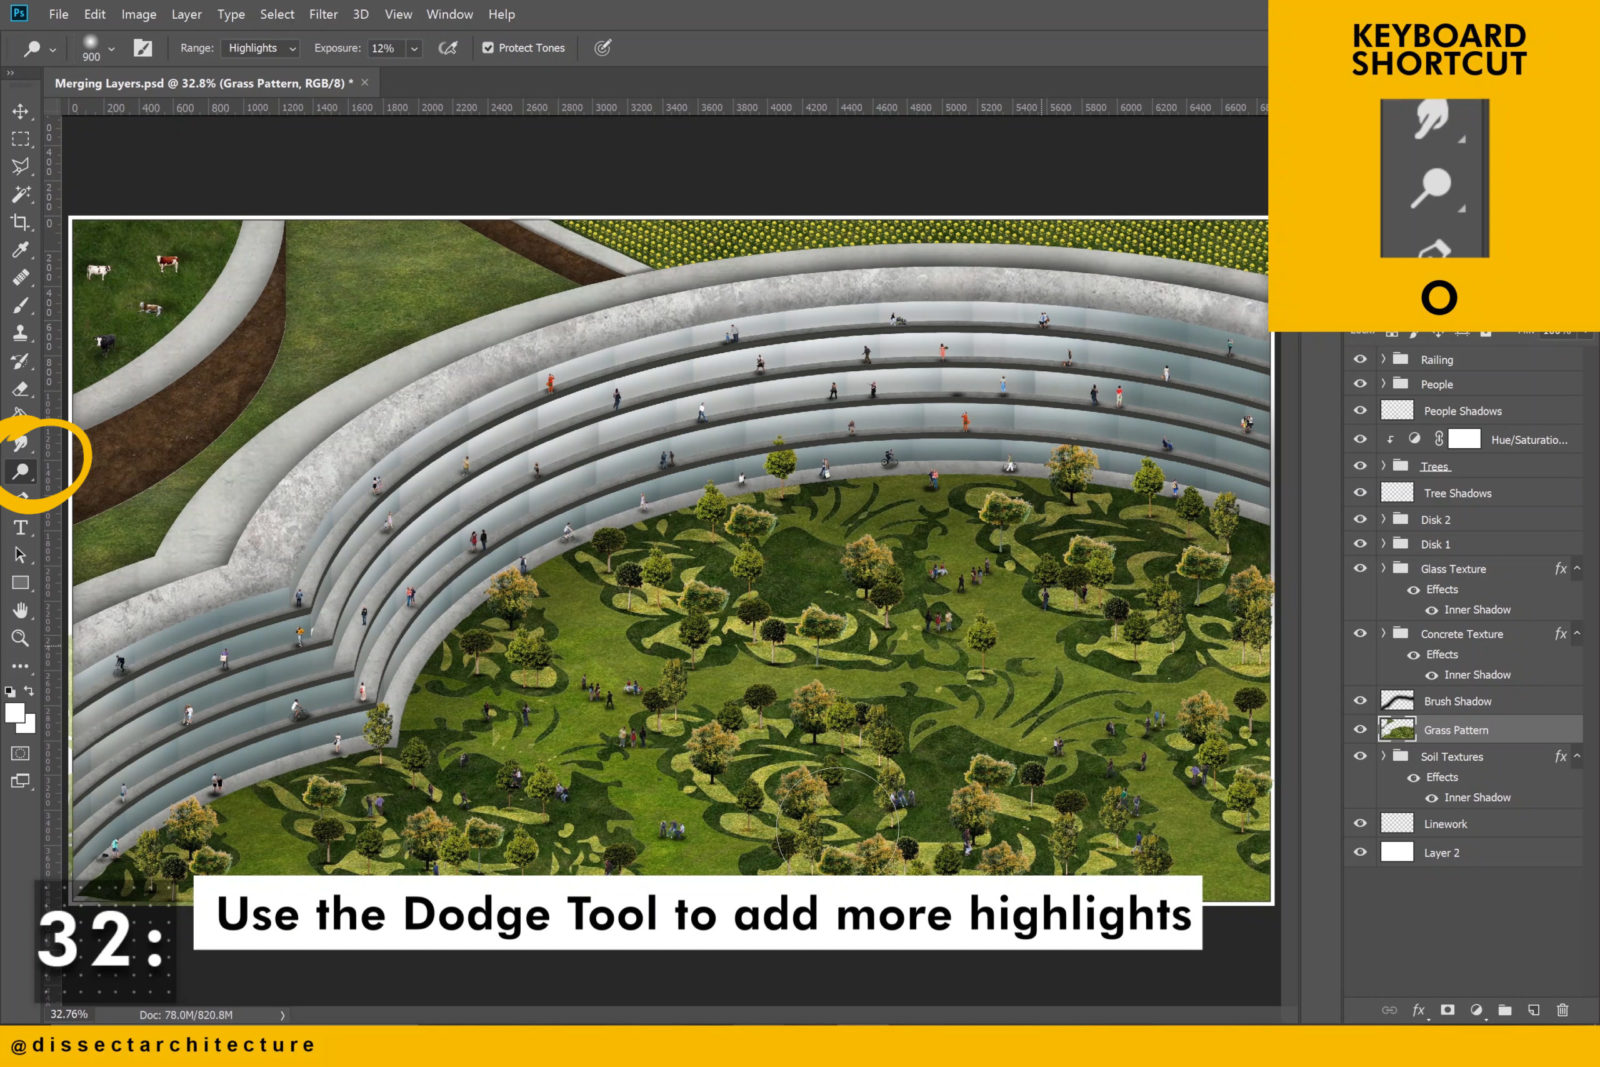
Step 32
Use the Dodge Tool to add more highlights. This can be activated by the O shortcut.
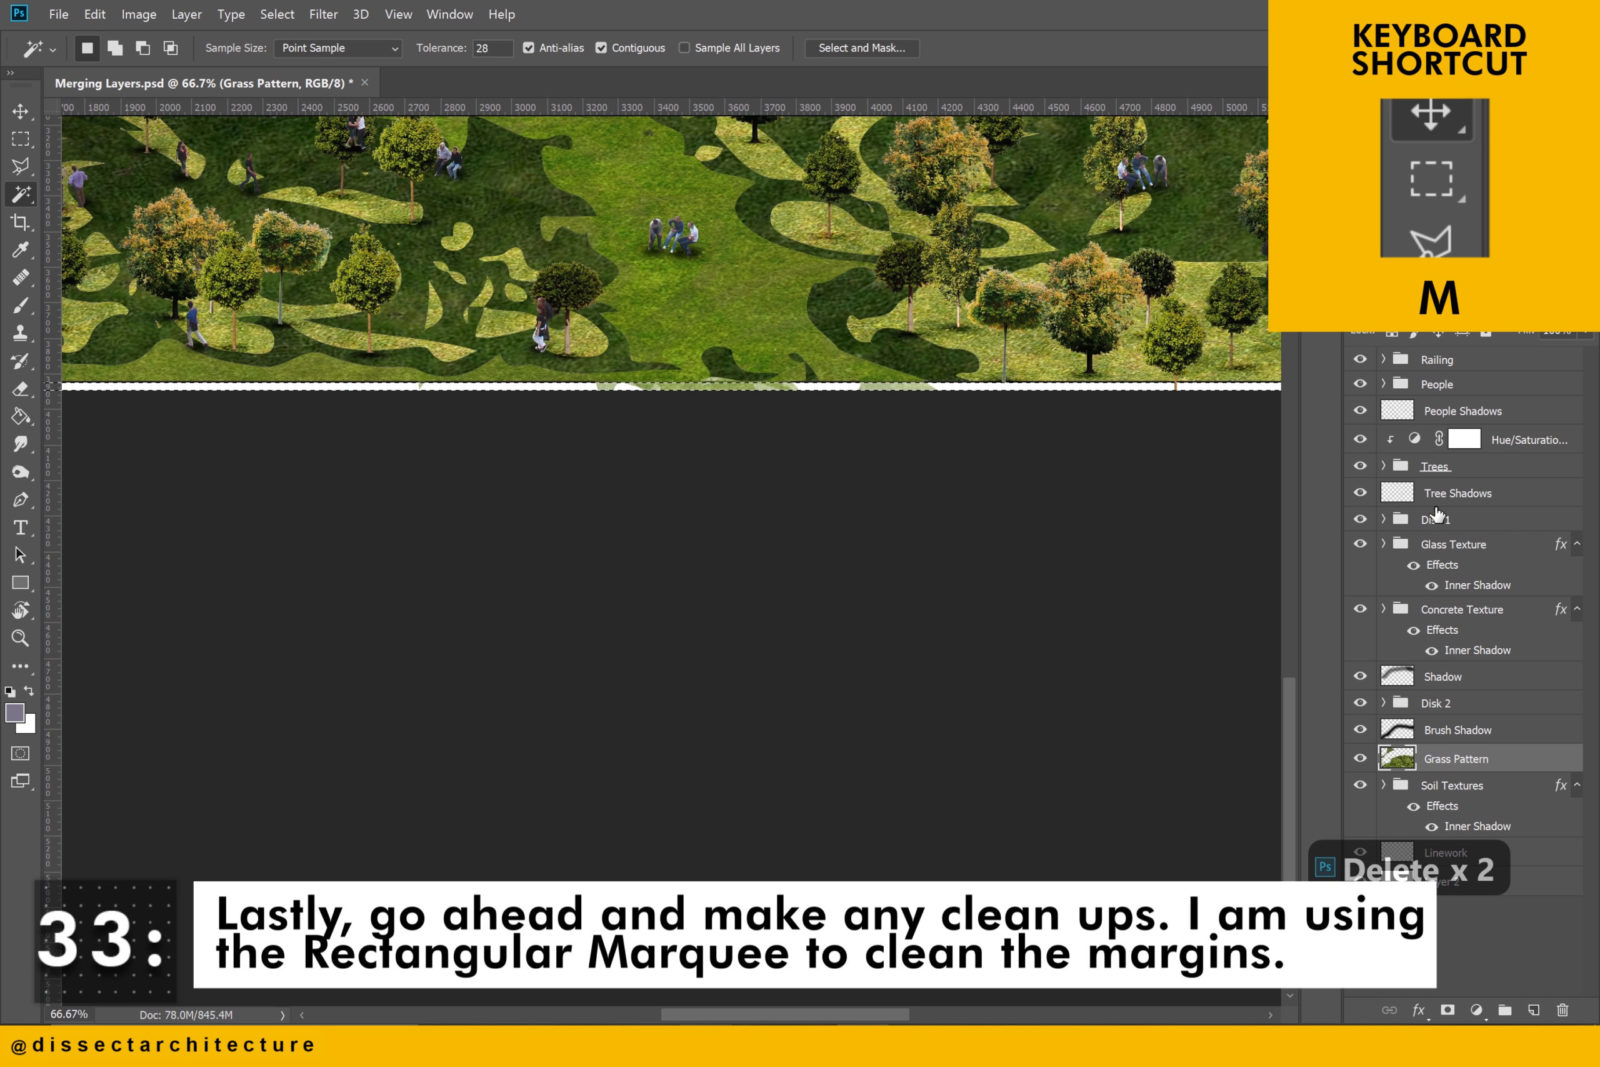
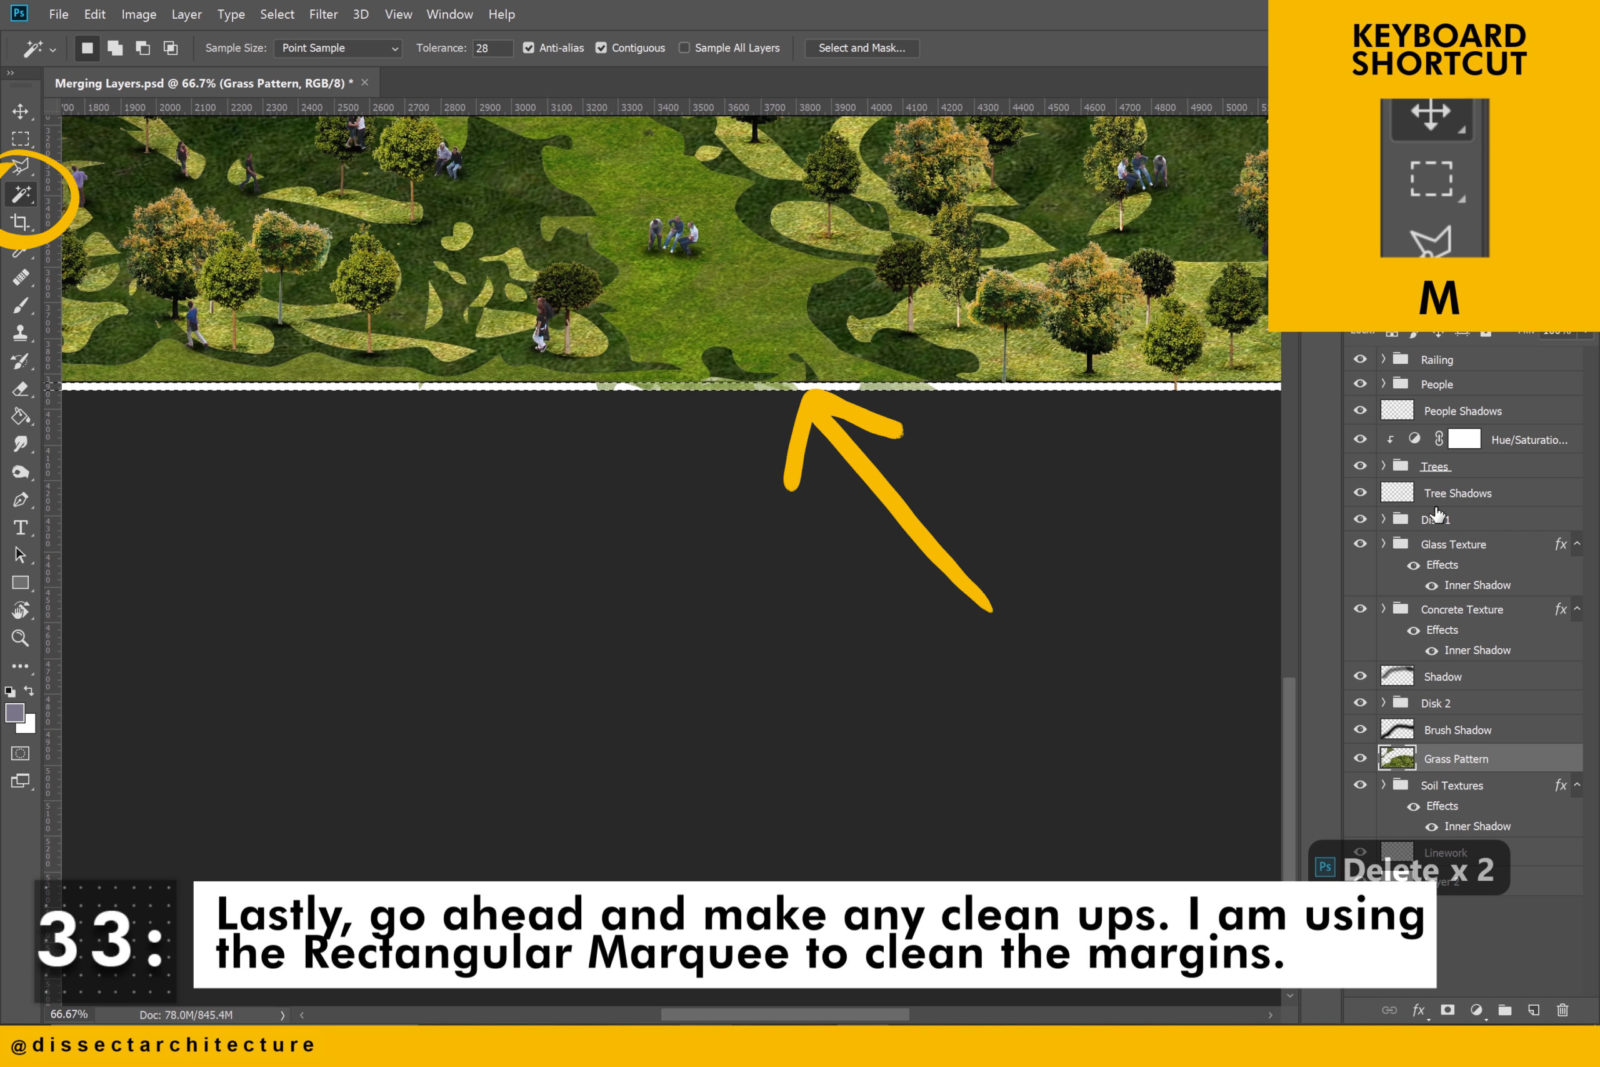
Step 33
Lastly, go ahead and make any clean ups.
I am using the Rectangular Marquee Tool to clean the margins.
This process of how to create a complete render in Photoshop can be applied to many different types of linework drawings to create different results.