

Collage Architecture Elevation in Photoshop
Objective:
Learn to create a Collage Architecture Elevation in Photoshop through post-production. This tutorial aims to show how to add color, textures, shadows, and entourage into a black and white elevation drawing utilizing Photoshop.
The collage render technique can be used in different kinds of settings like school or in the office!
Software Used:
Step 01
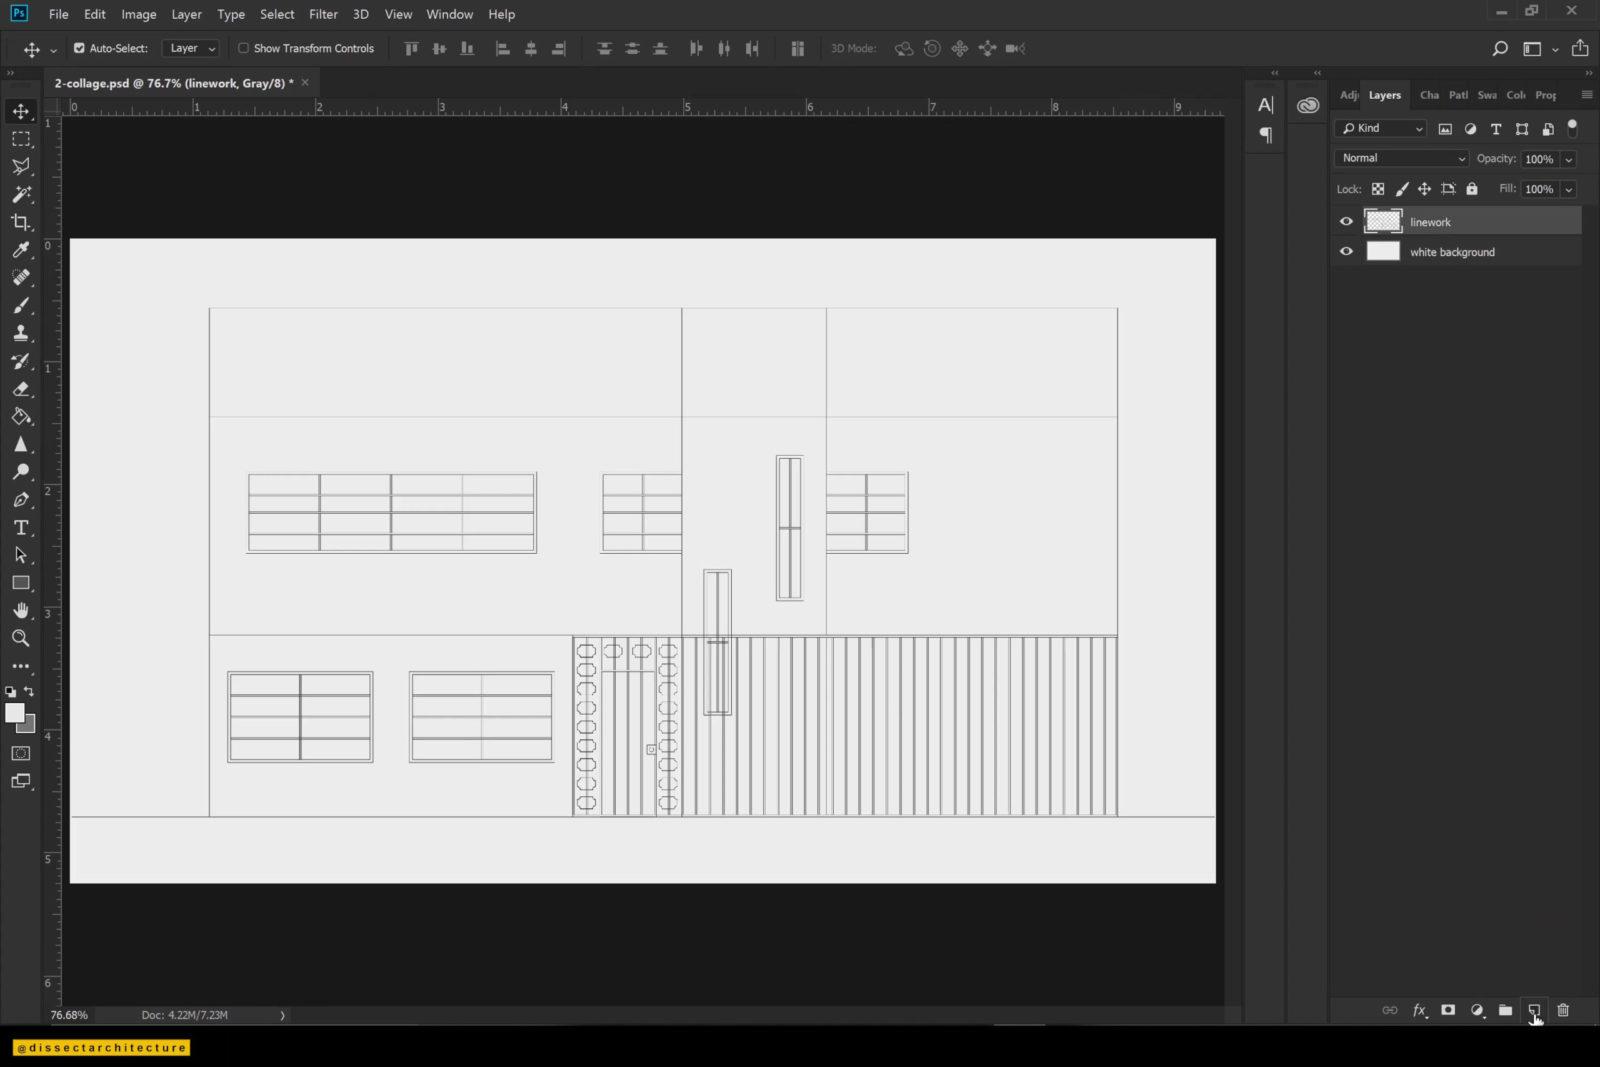
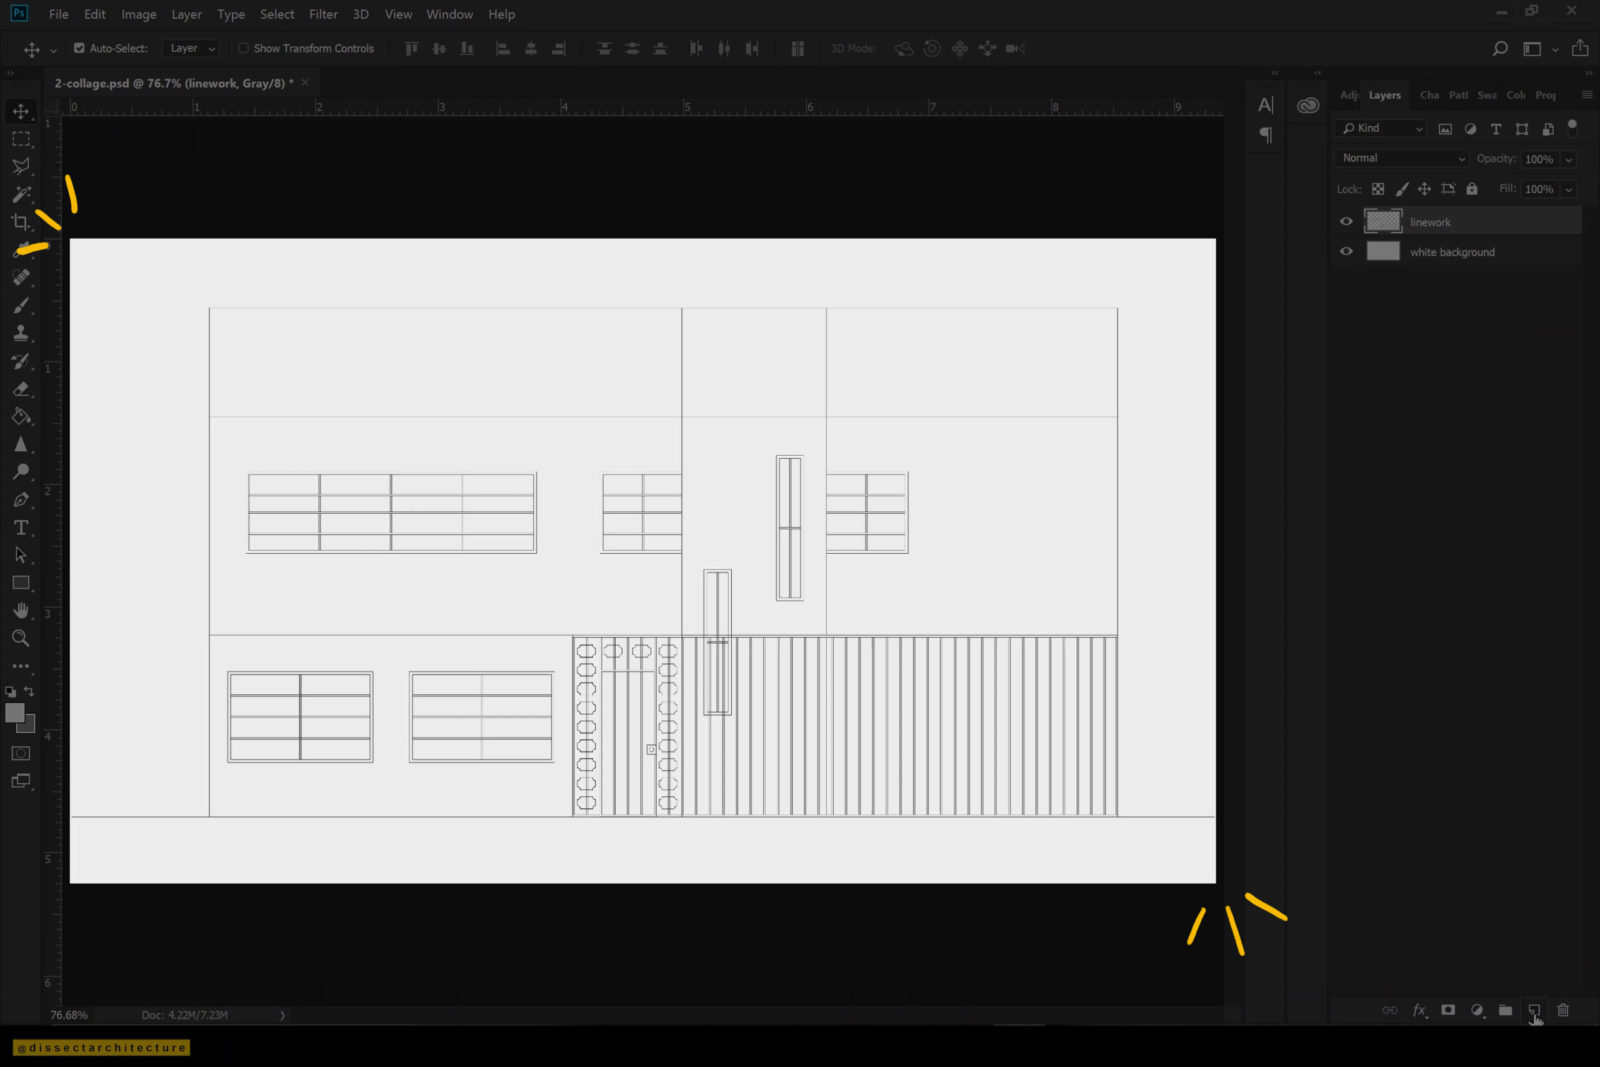
Open Photoshop and open the elevation drawing with all the necessary linework. Then, go ahead and save the file into a new Photoshop file. This will become the working file to create the Collage Architecture Elevation in Photoshop.
Step 02
Let’s start by adding color first.
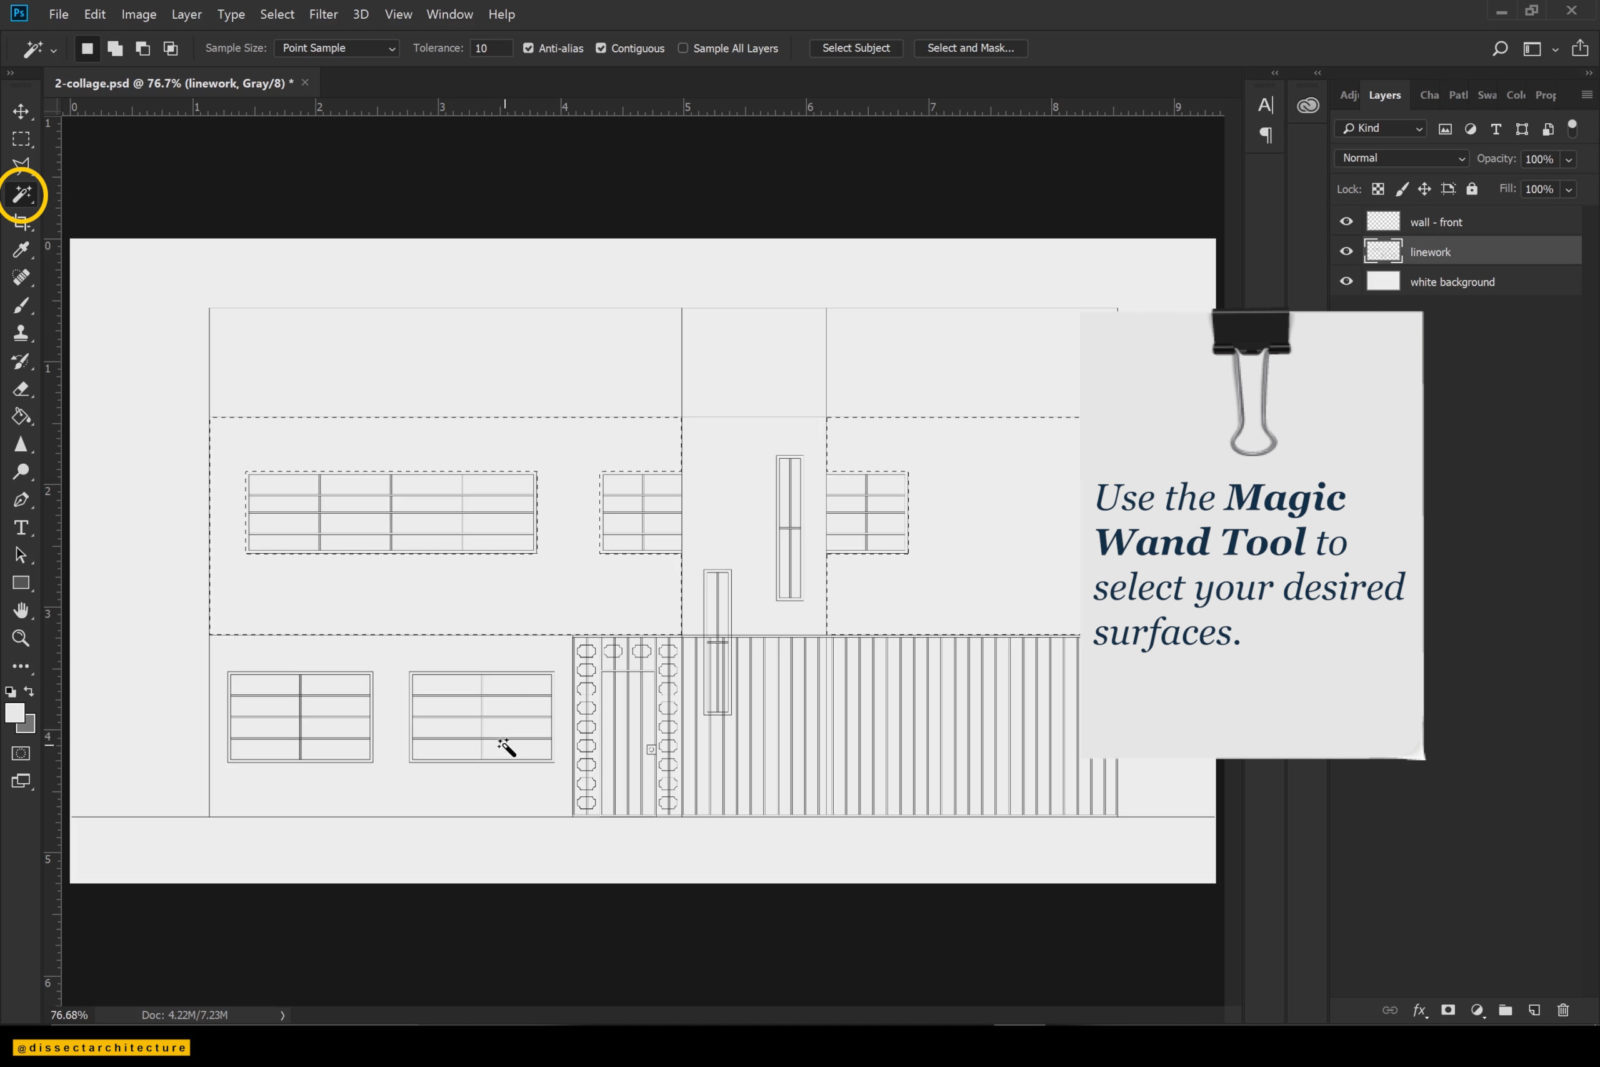
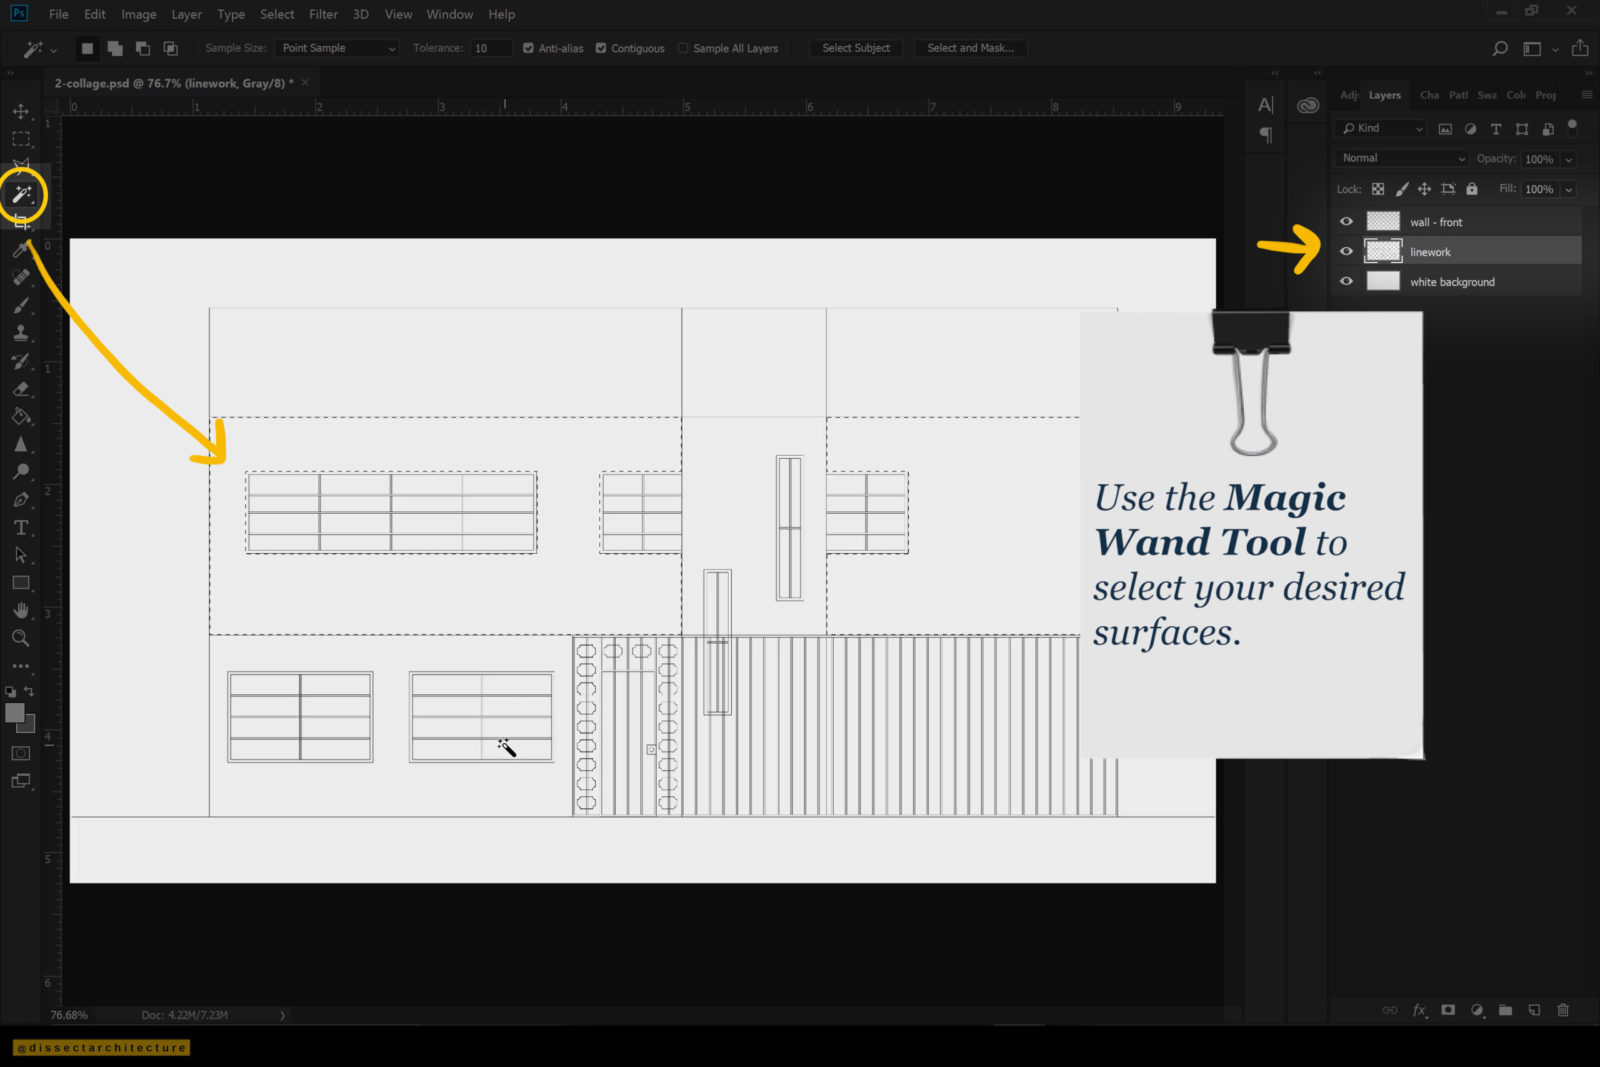
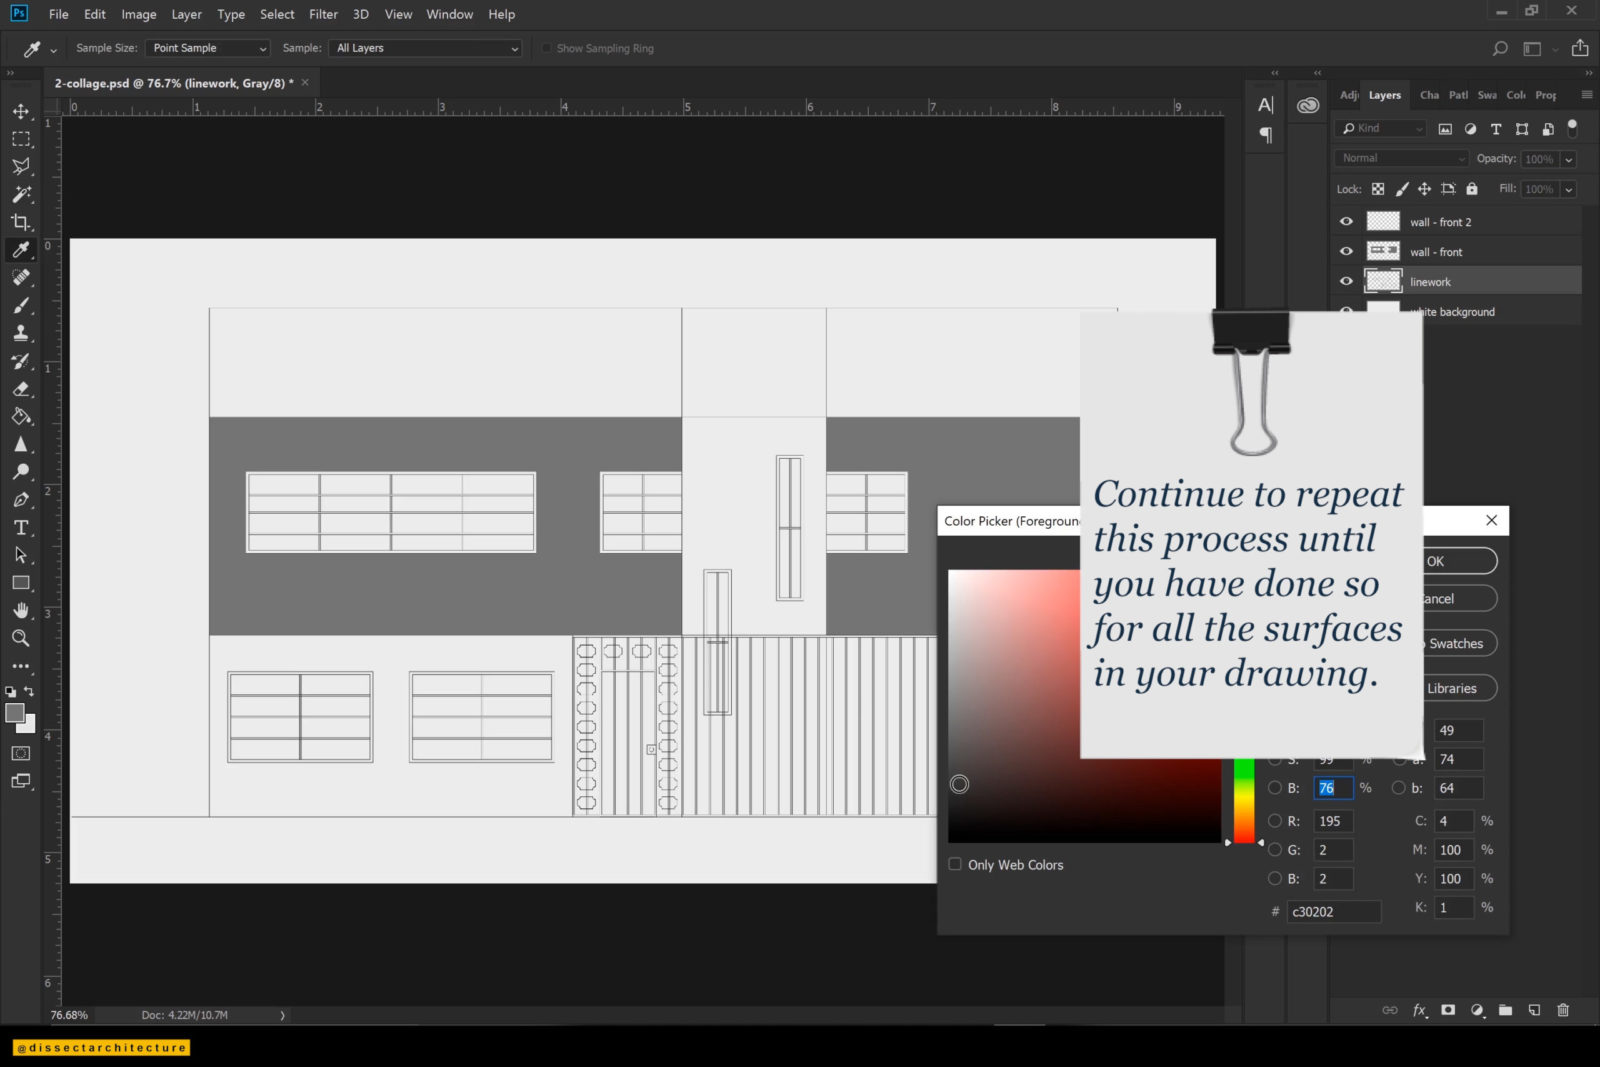
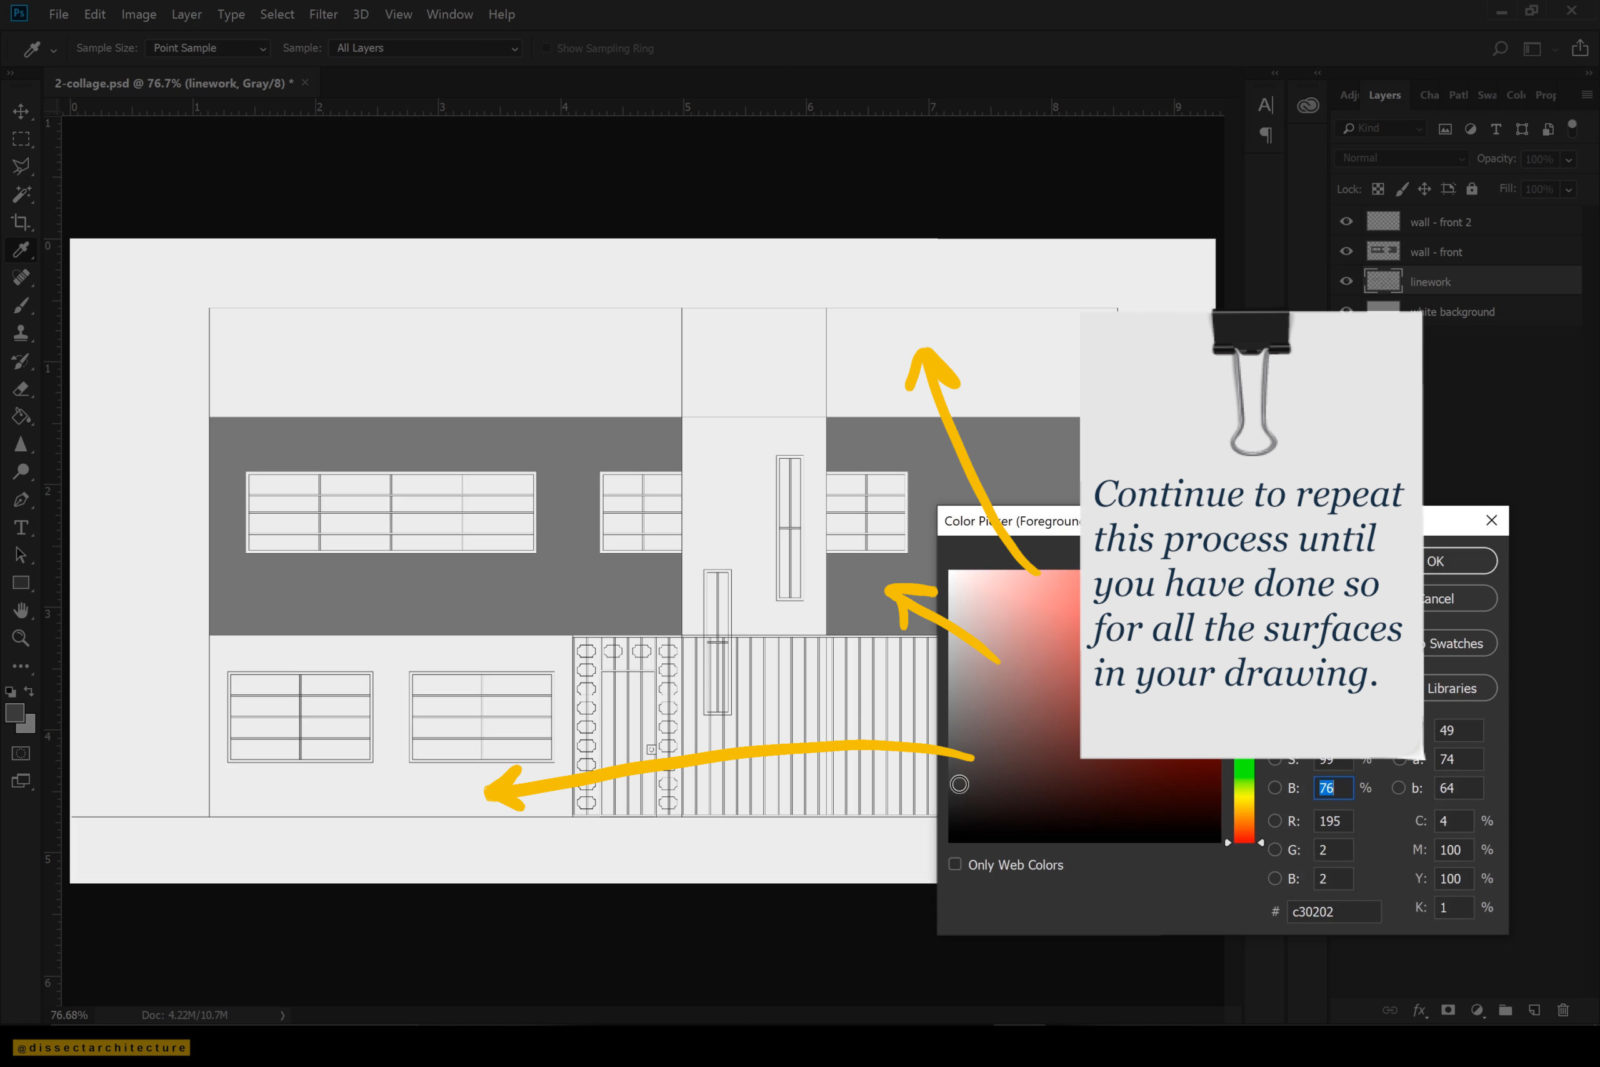
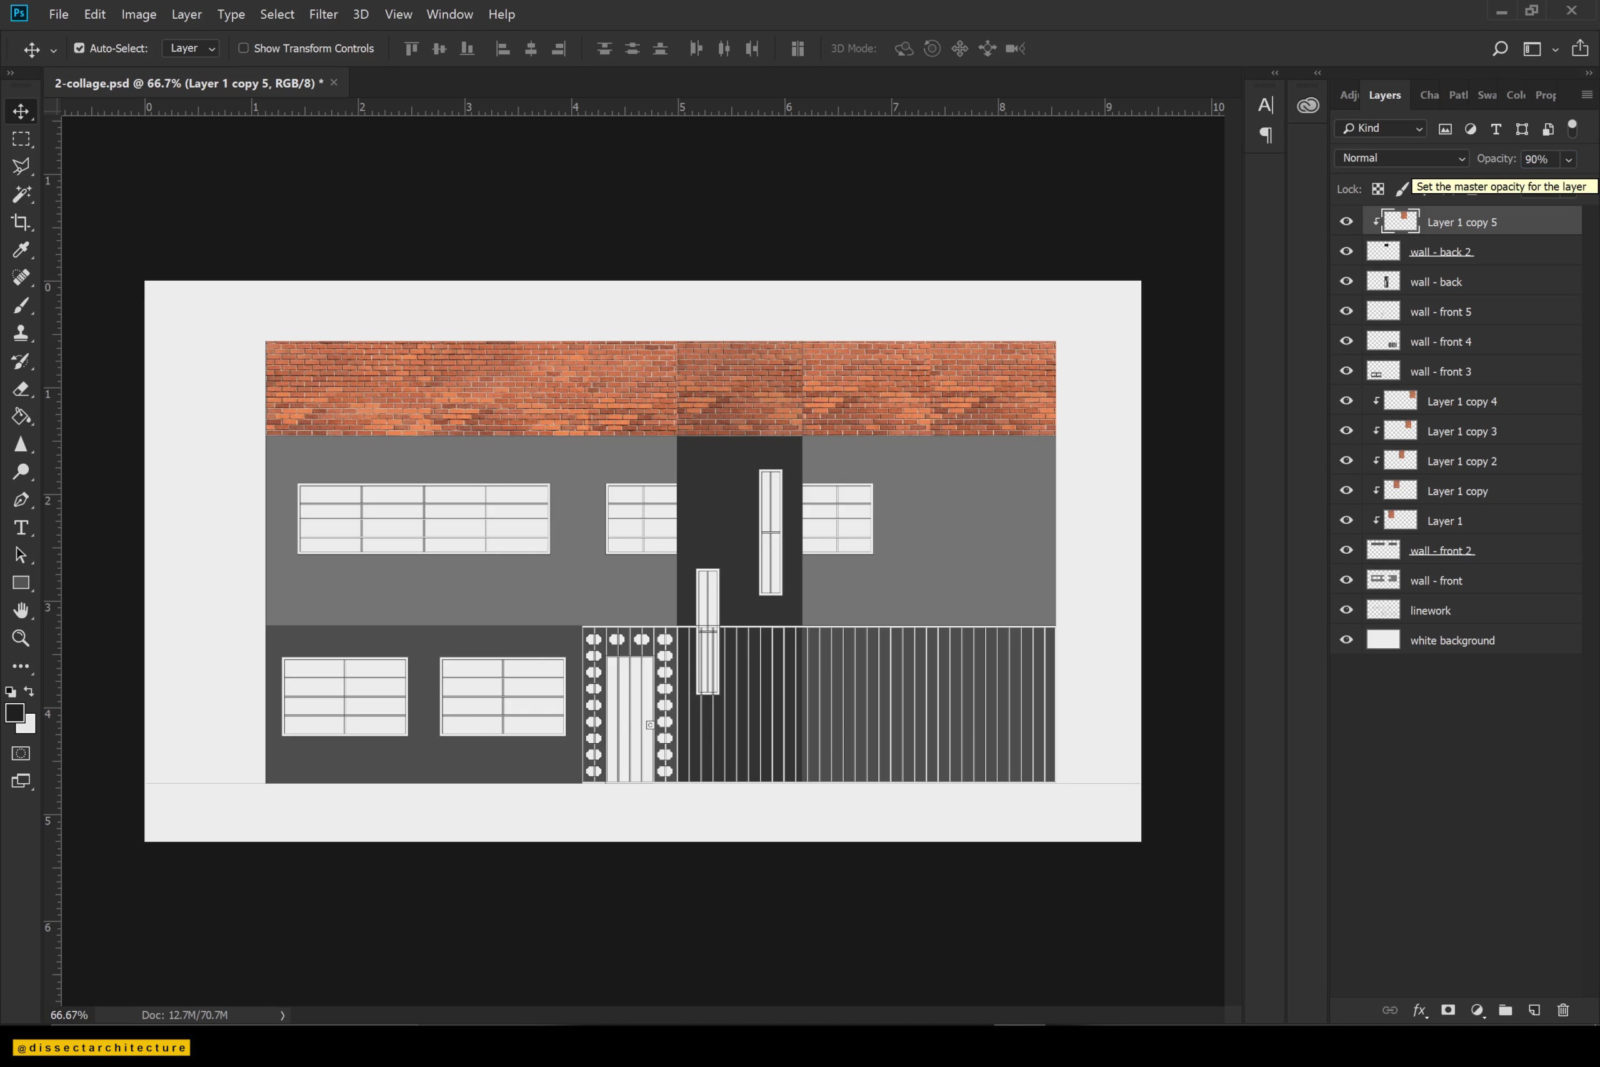
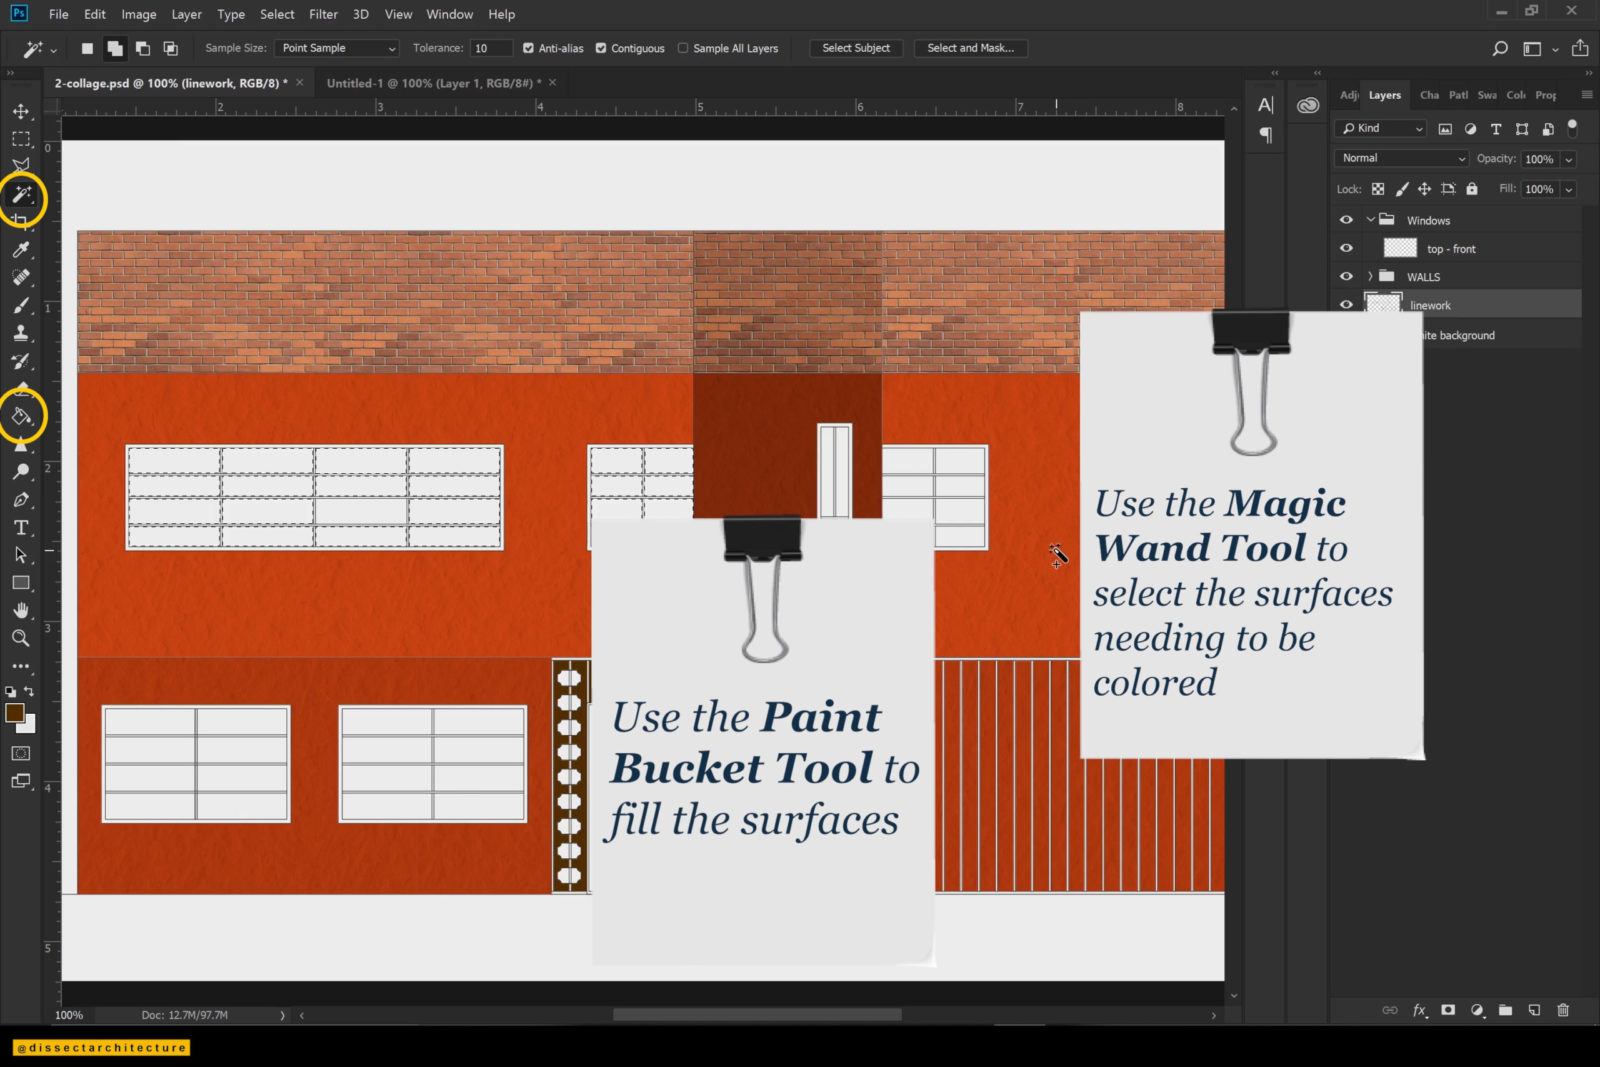
I am creating a new layer and using the Magic Wand Tool to select the larger surfaces within the linework (like the walls). Then with the Paint Bucket Tool, I am adding a color fill to the selection. Throughout this process I am making sure to separate the different color fills into their own layers.
Step 03
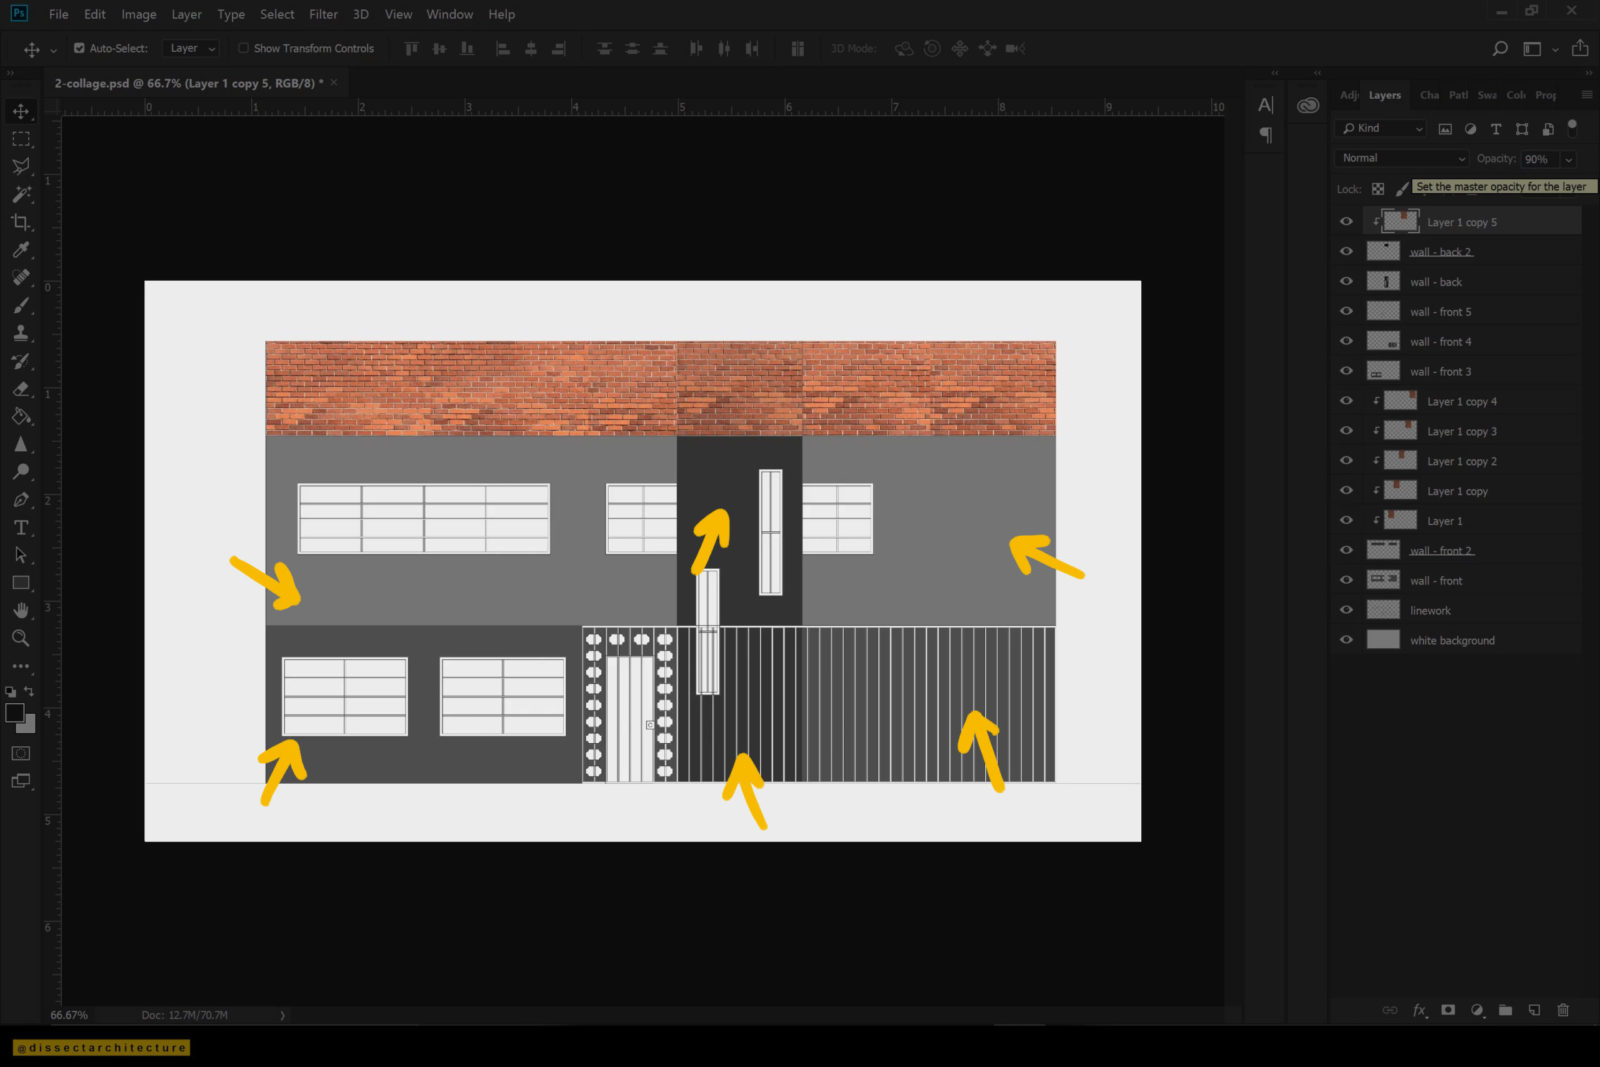
Continue this process until you have finished going through all the main elements within your elevation drawing.
Make sure to also name your layers and remain organized as you are working.
Step 04
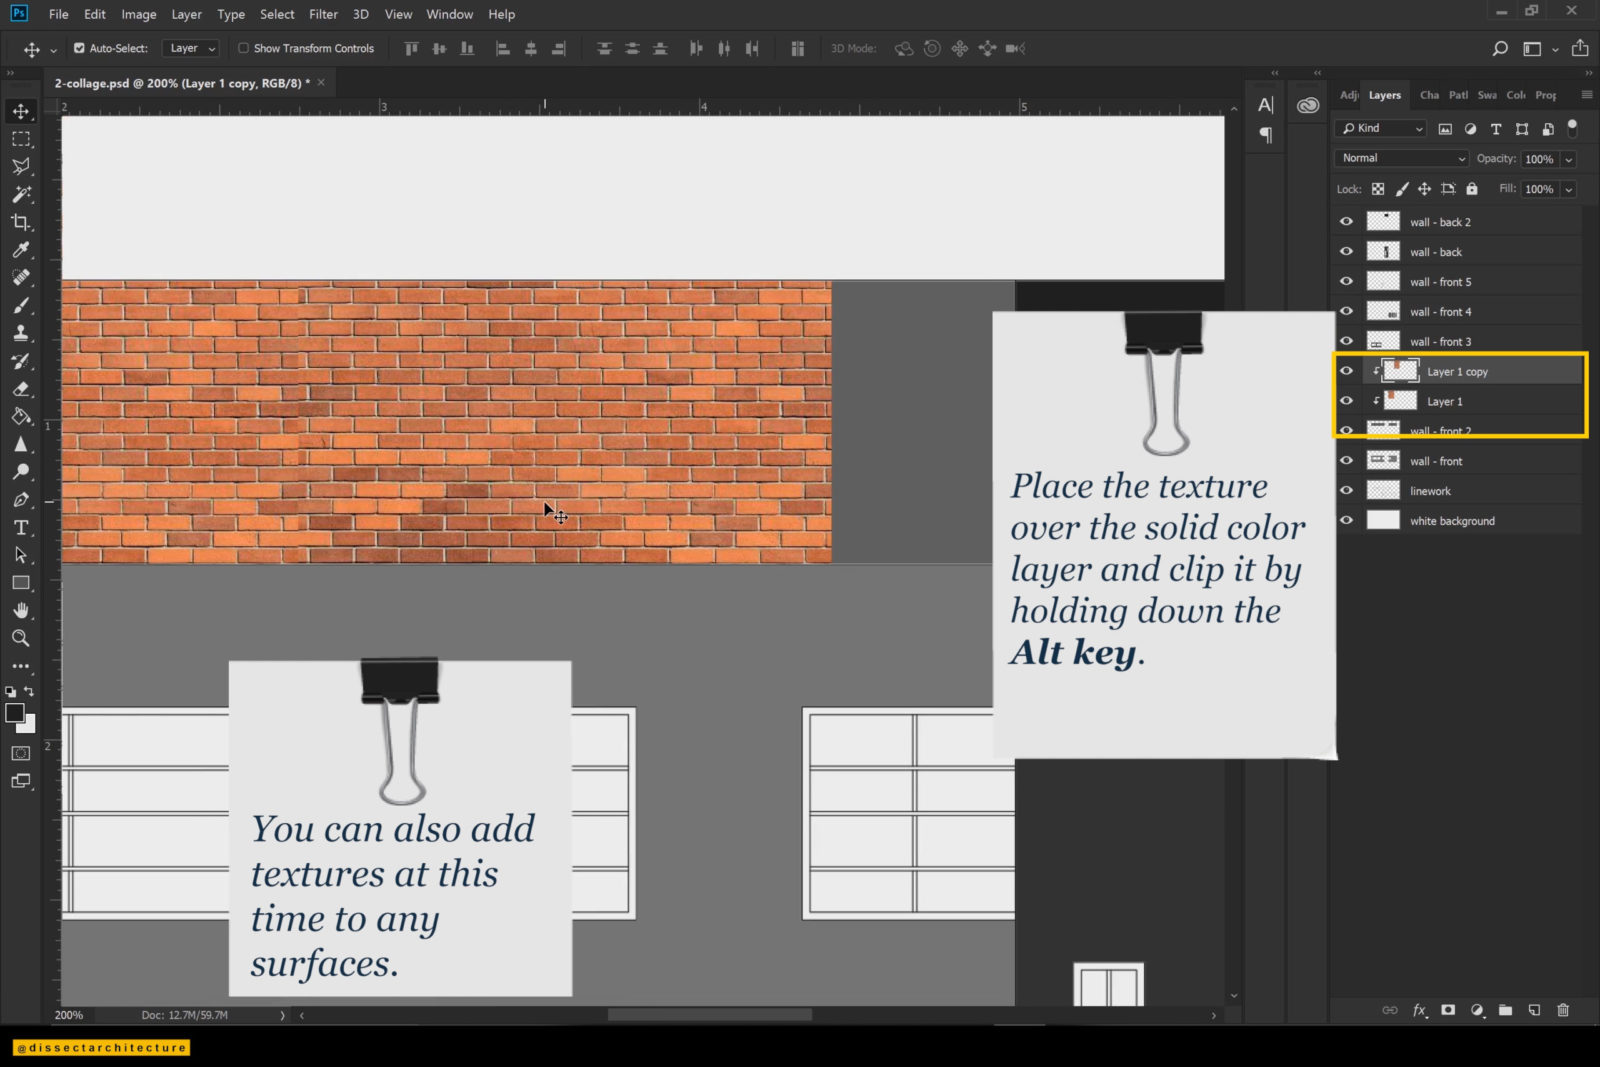
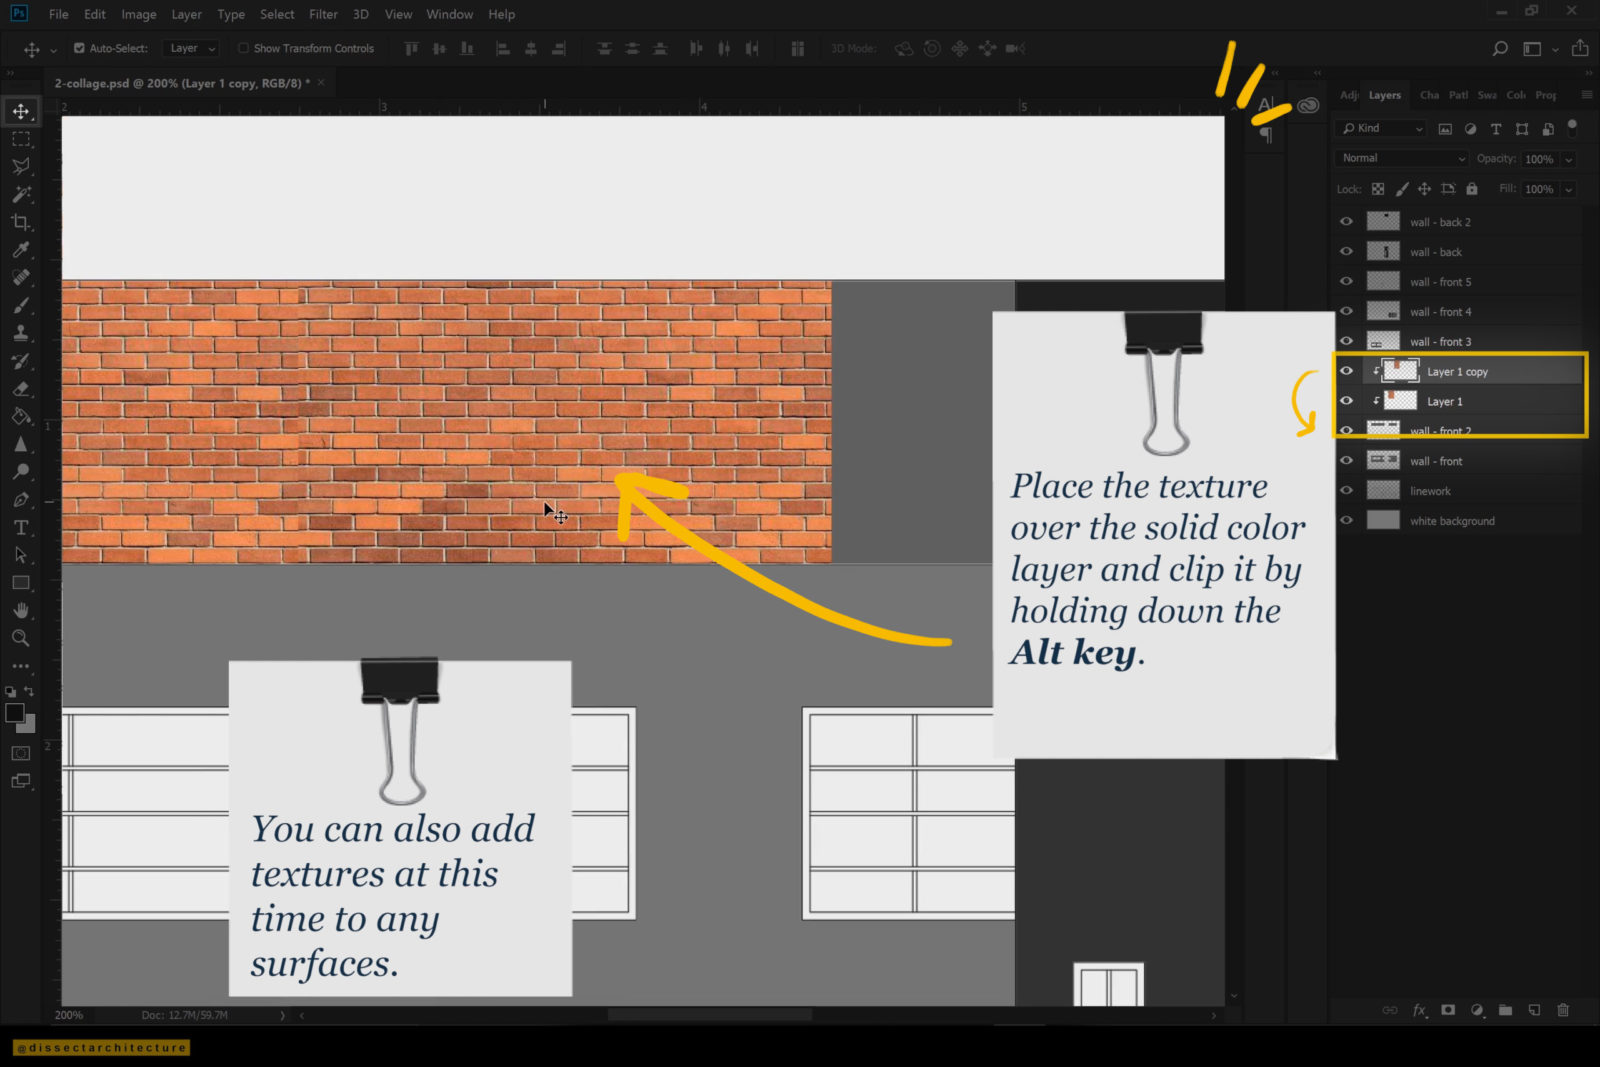
Now I am starting to add textures.
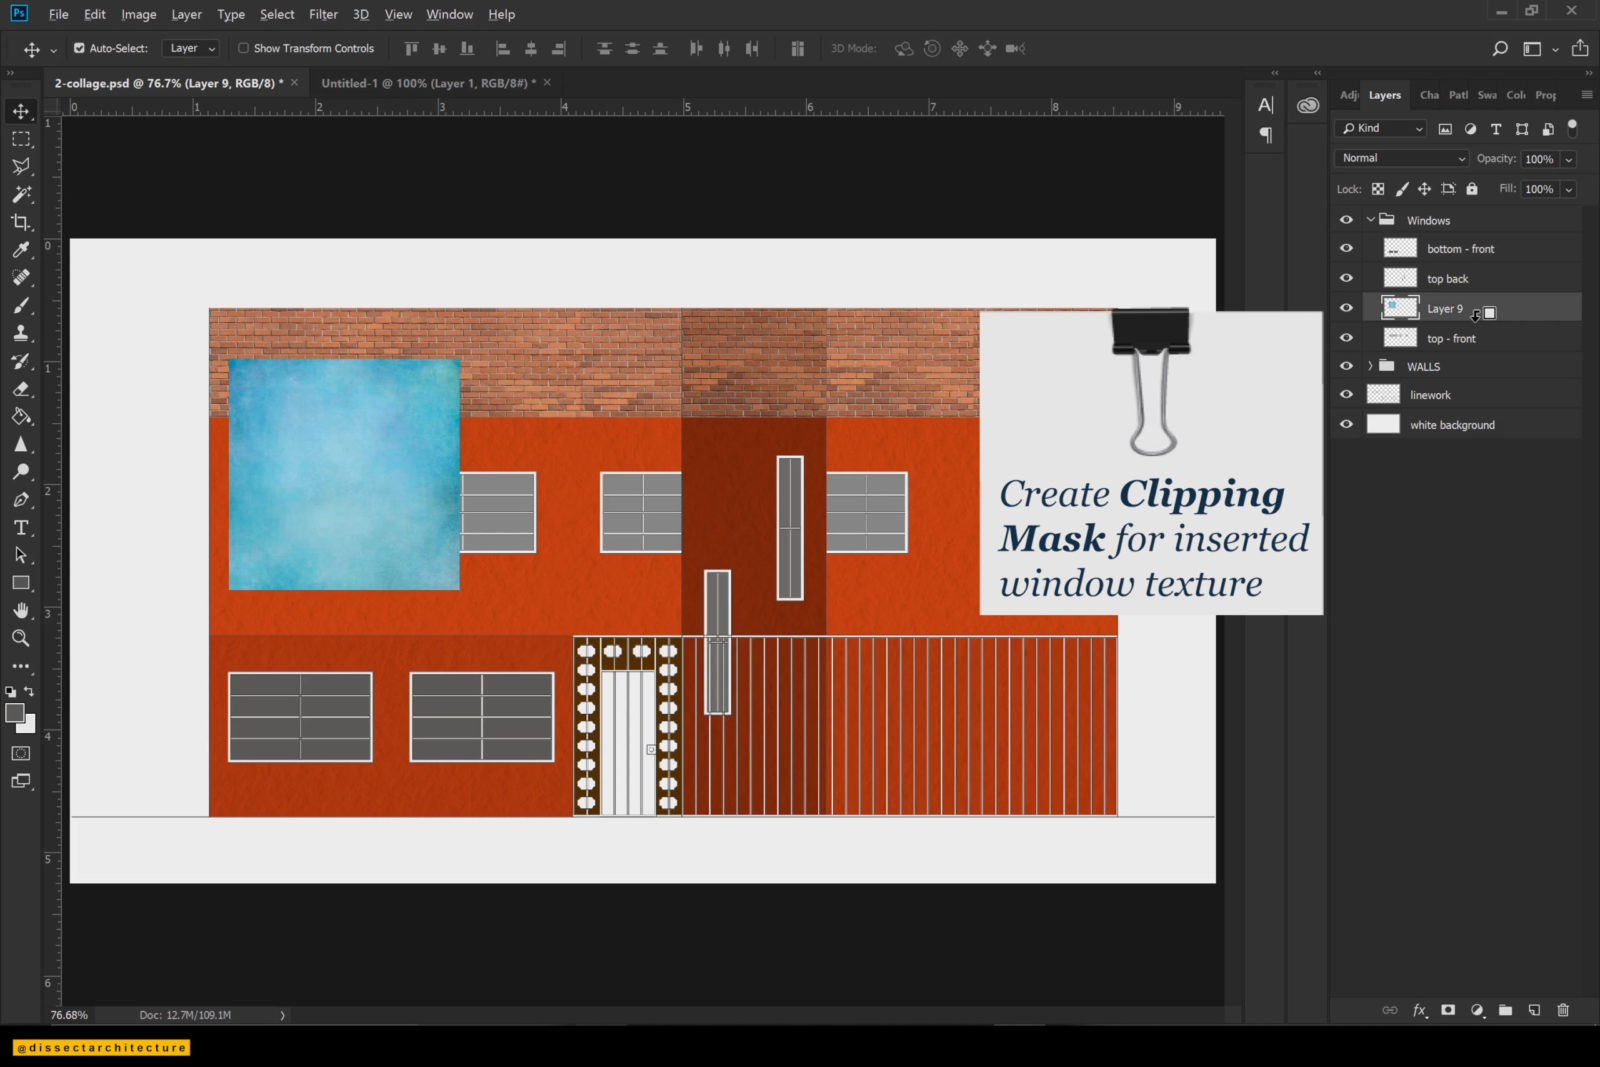
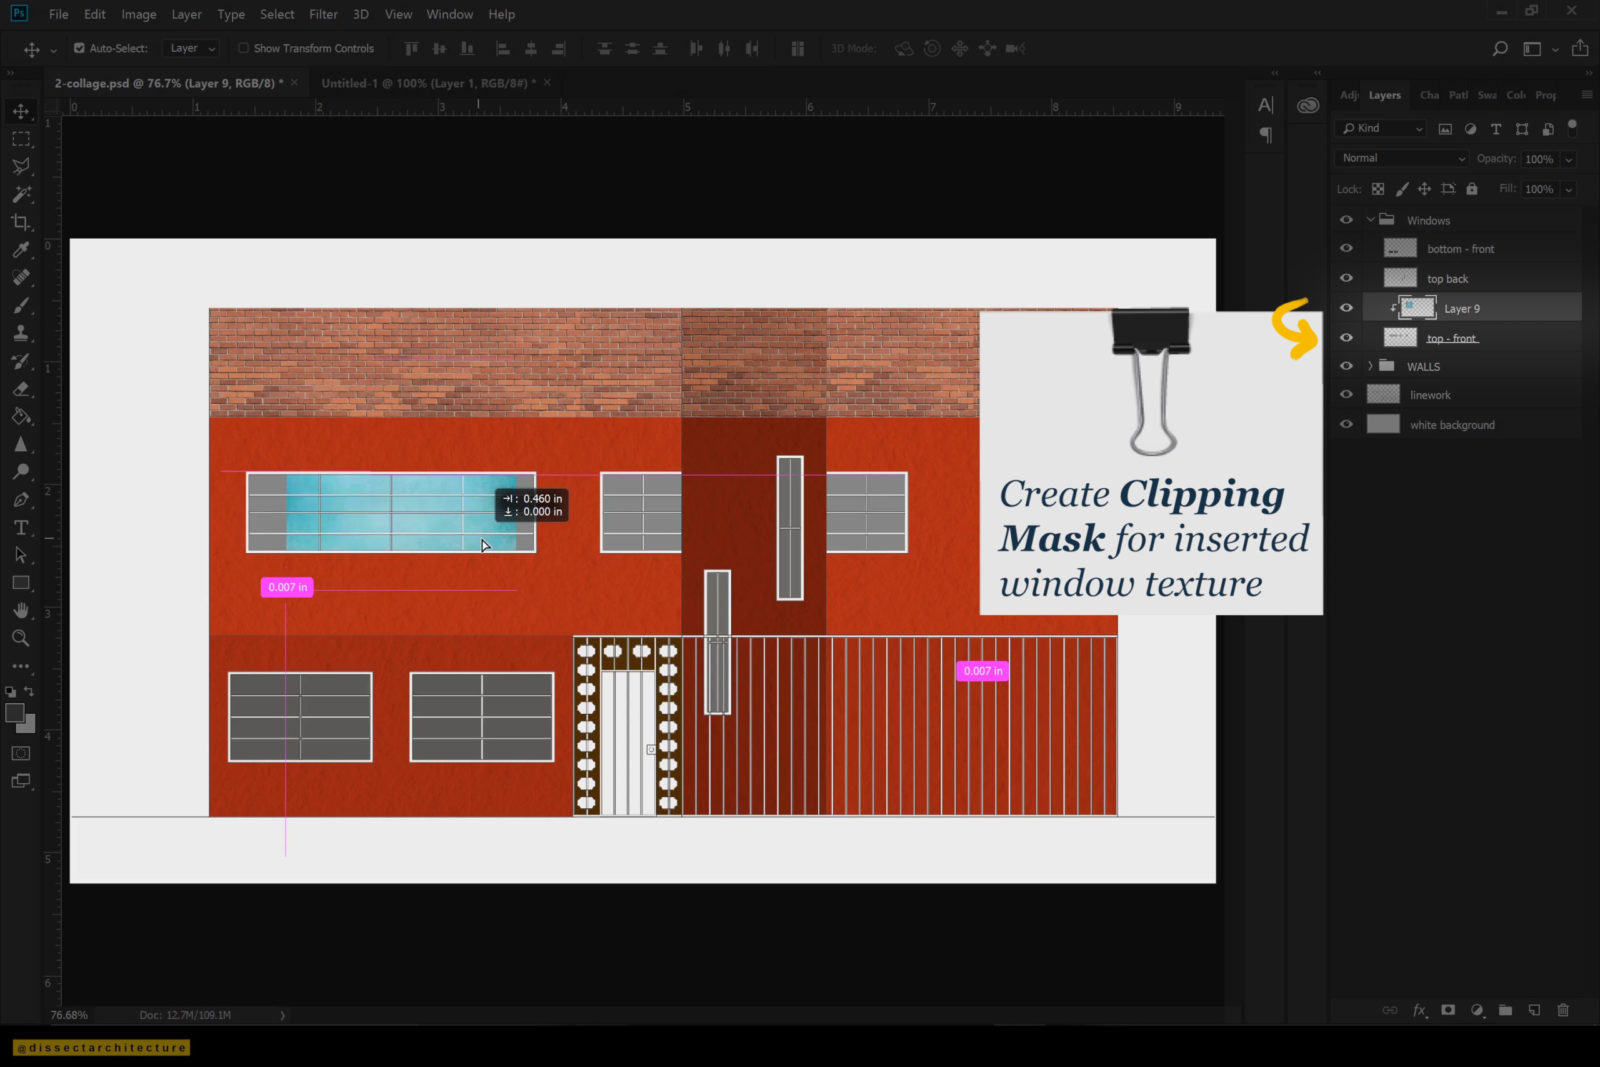
Start by adding textures to the separated elements by adding the textures on top of the layer with the color fill and then creating a Clipping Plane by hovering over the layer with the texture and holding the Alt key and clicking on the layer with the texture to create the clipping mask. Continue to copy and paste the texture until you fill the entire surface.
Step 05
Continue this process to the rest of the layers that need textures within your Collage Architecture Elevation.
Step 06
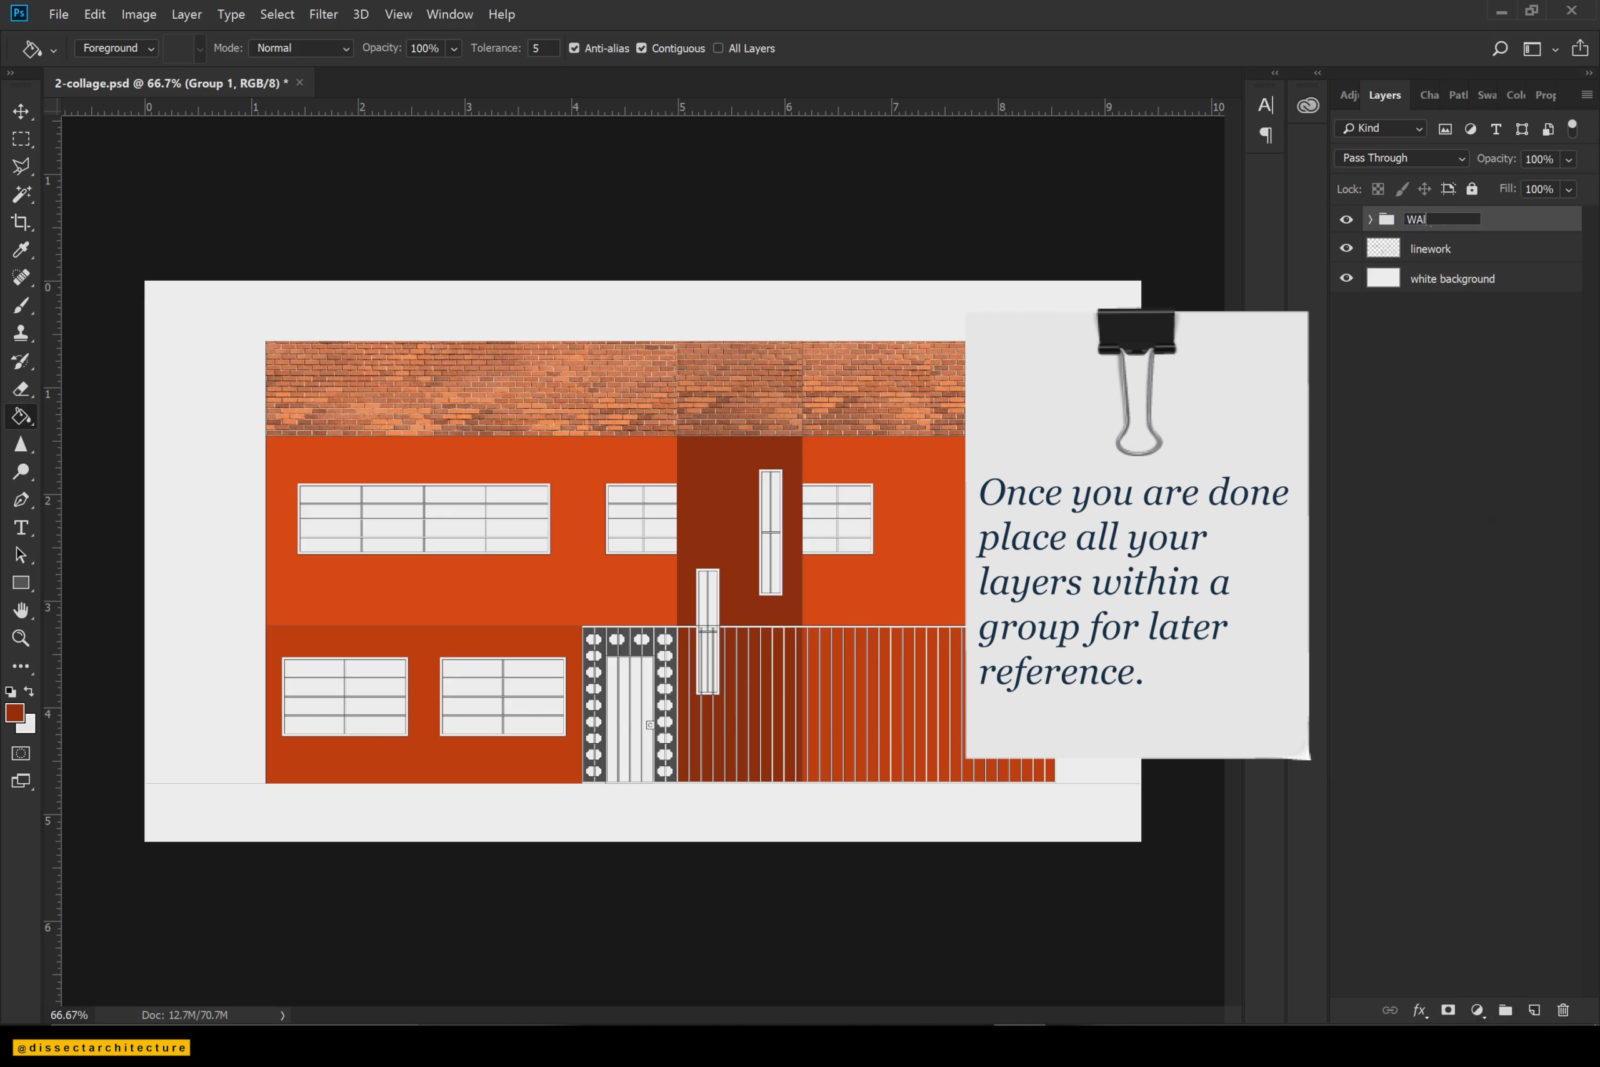
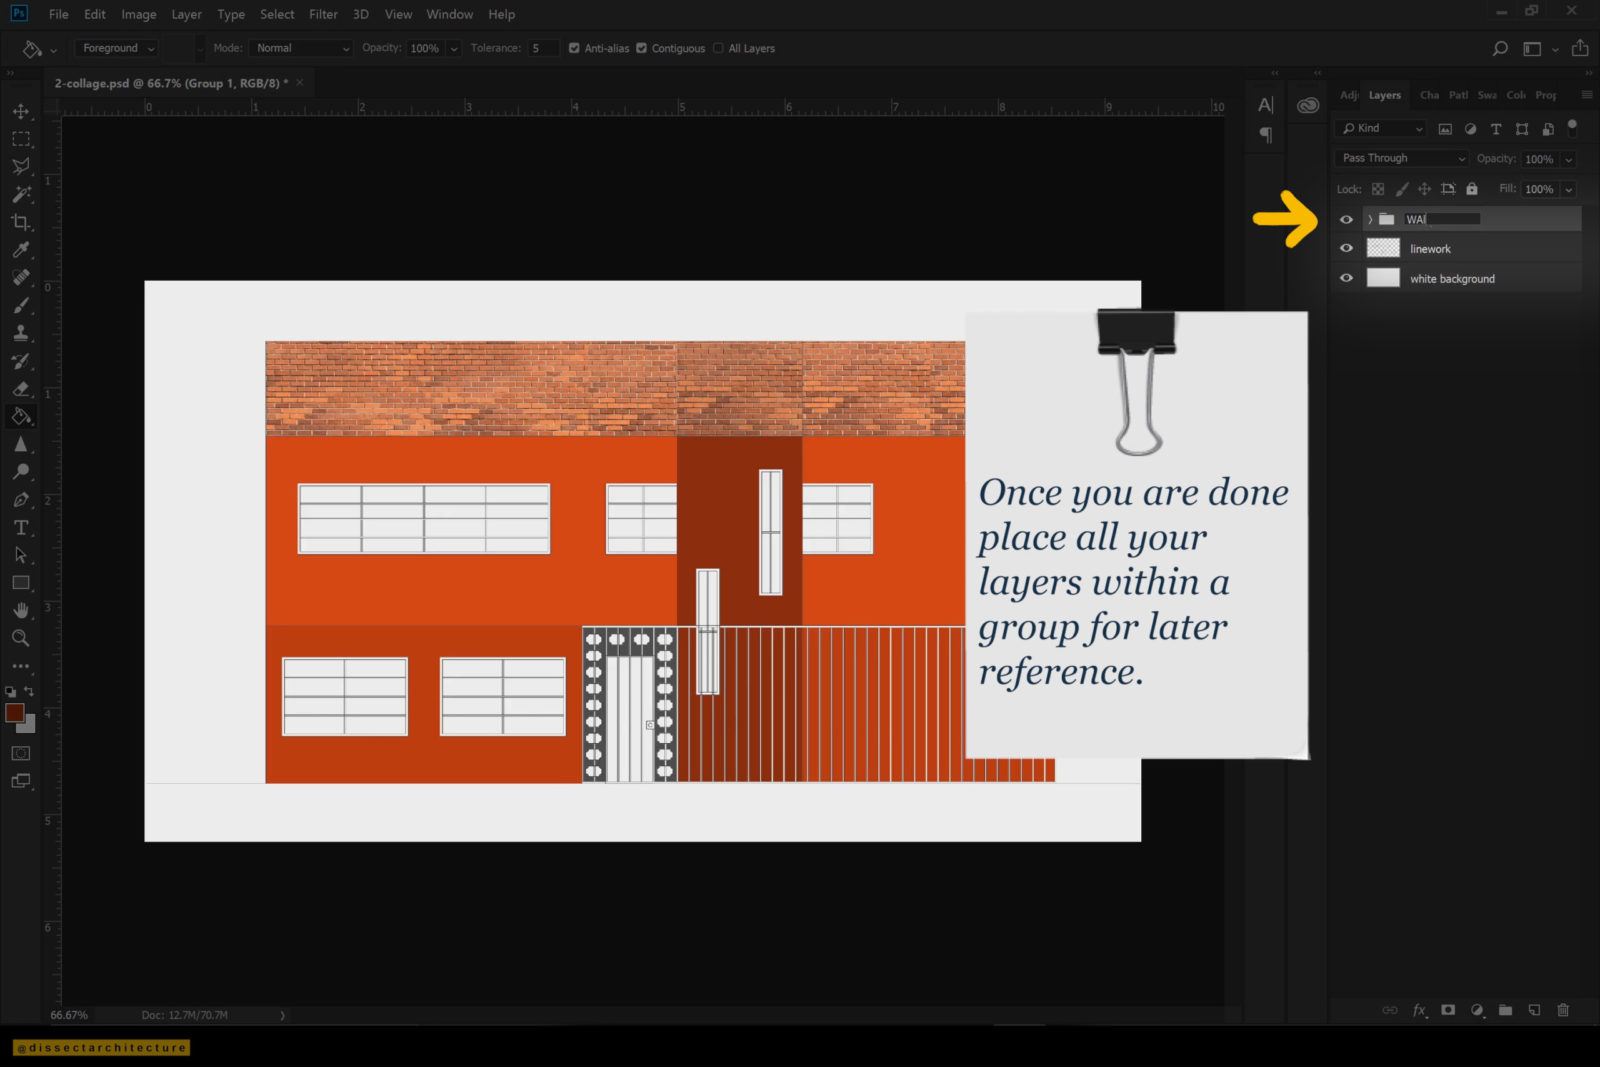
Group layers together to hep you organize your working file.
Step 07
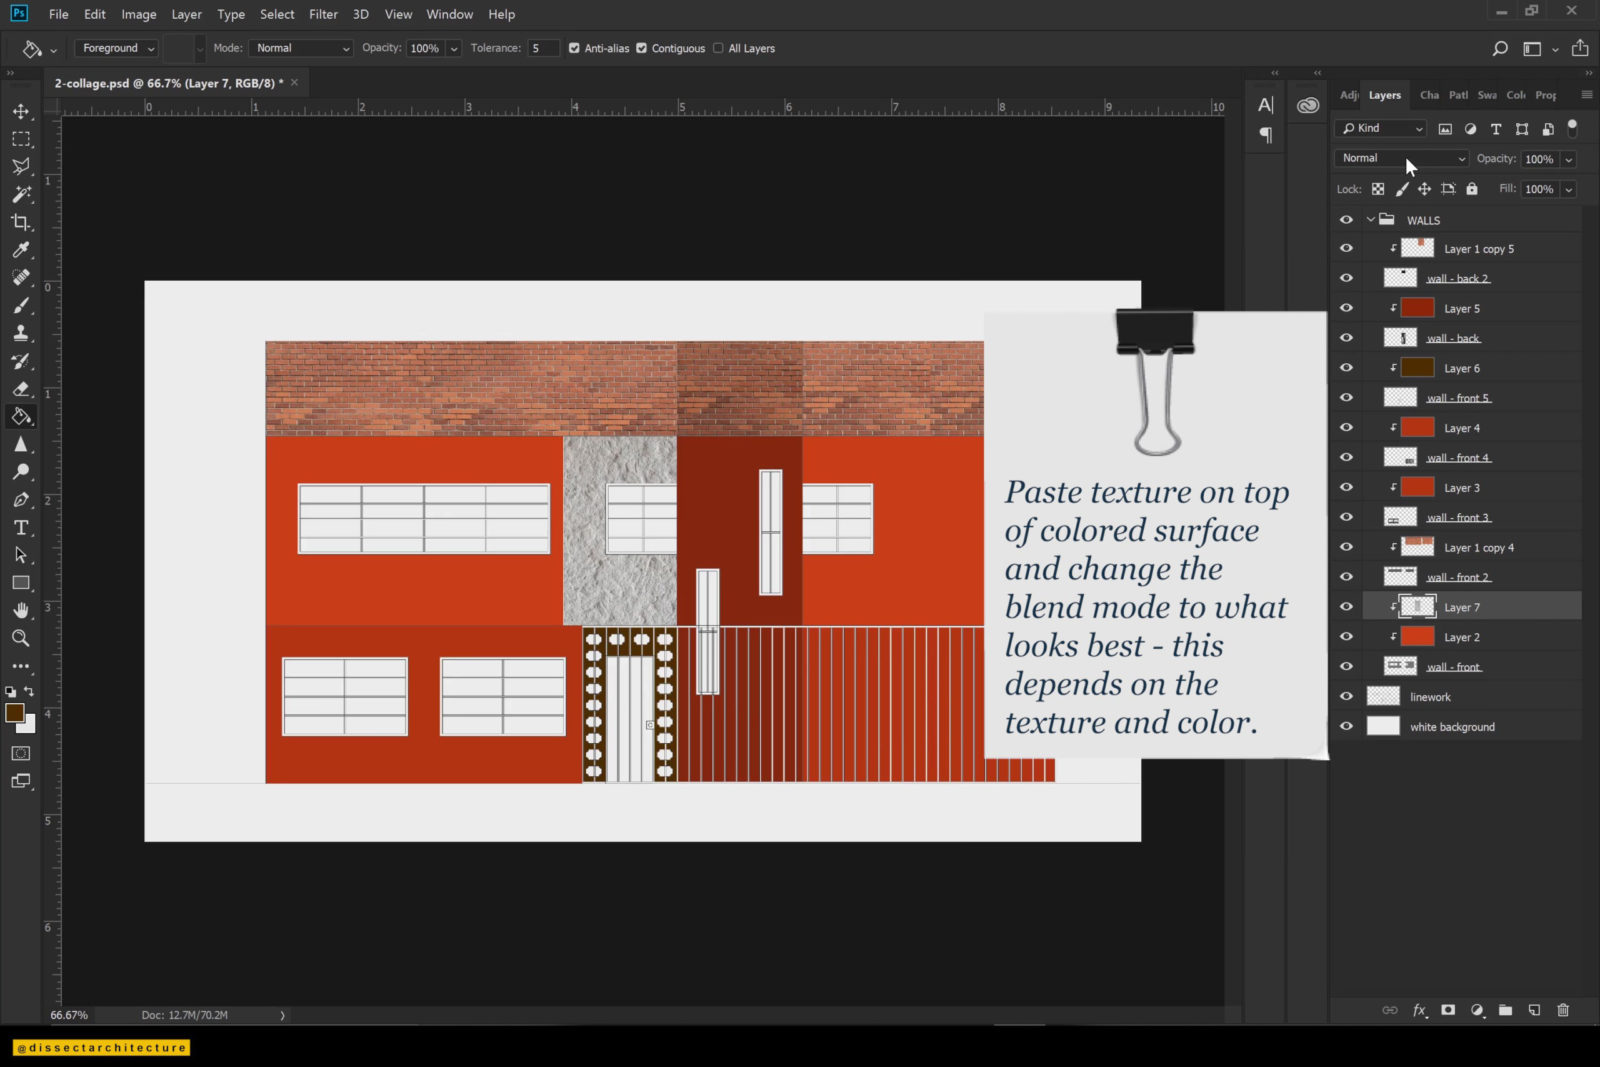
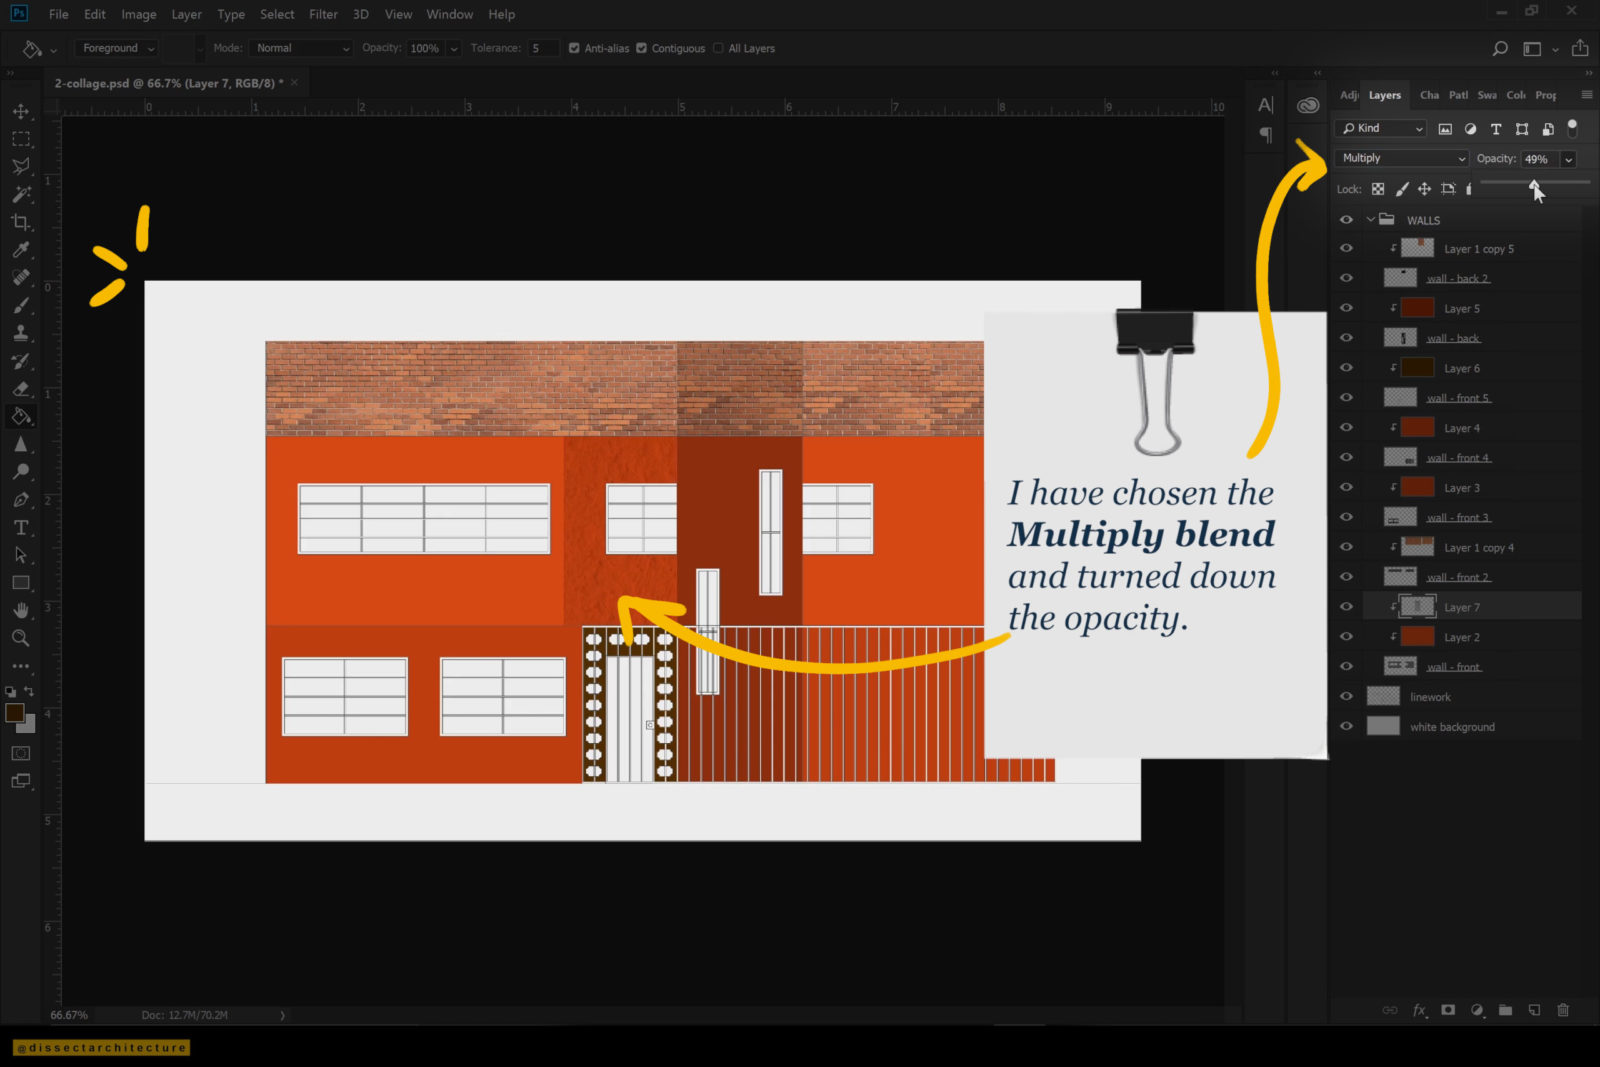
Now I am starting to add a subtle texture to the walls by pasting a texture on top of the colored surface and changing the blend mode to what blends the best – this depends on the color and texture. The blend mode I selected was the Multiply and I brought down the opacity of the layer to 49%.
Step 08
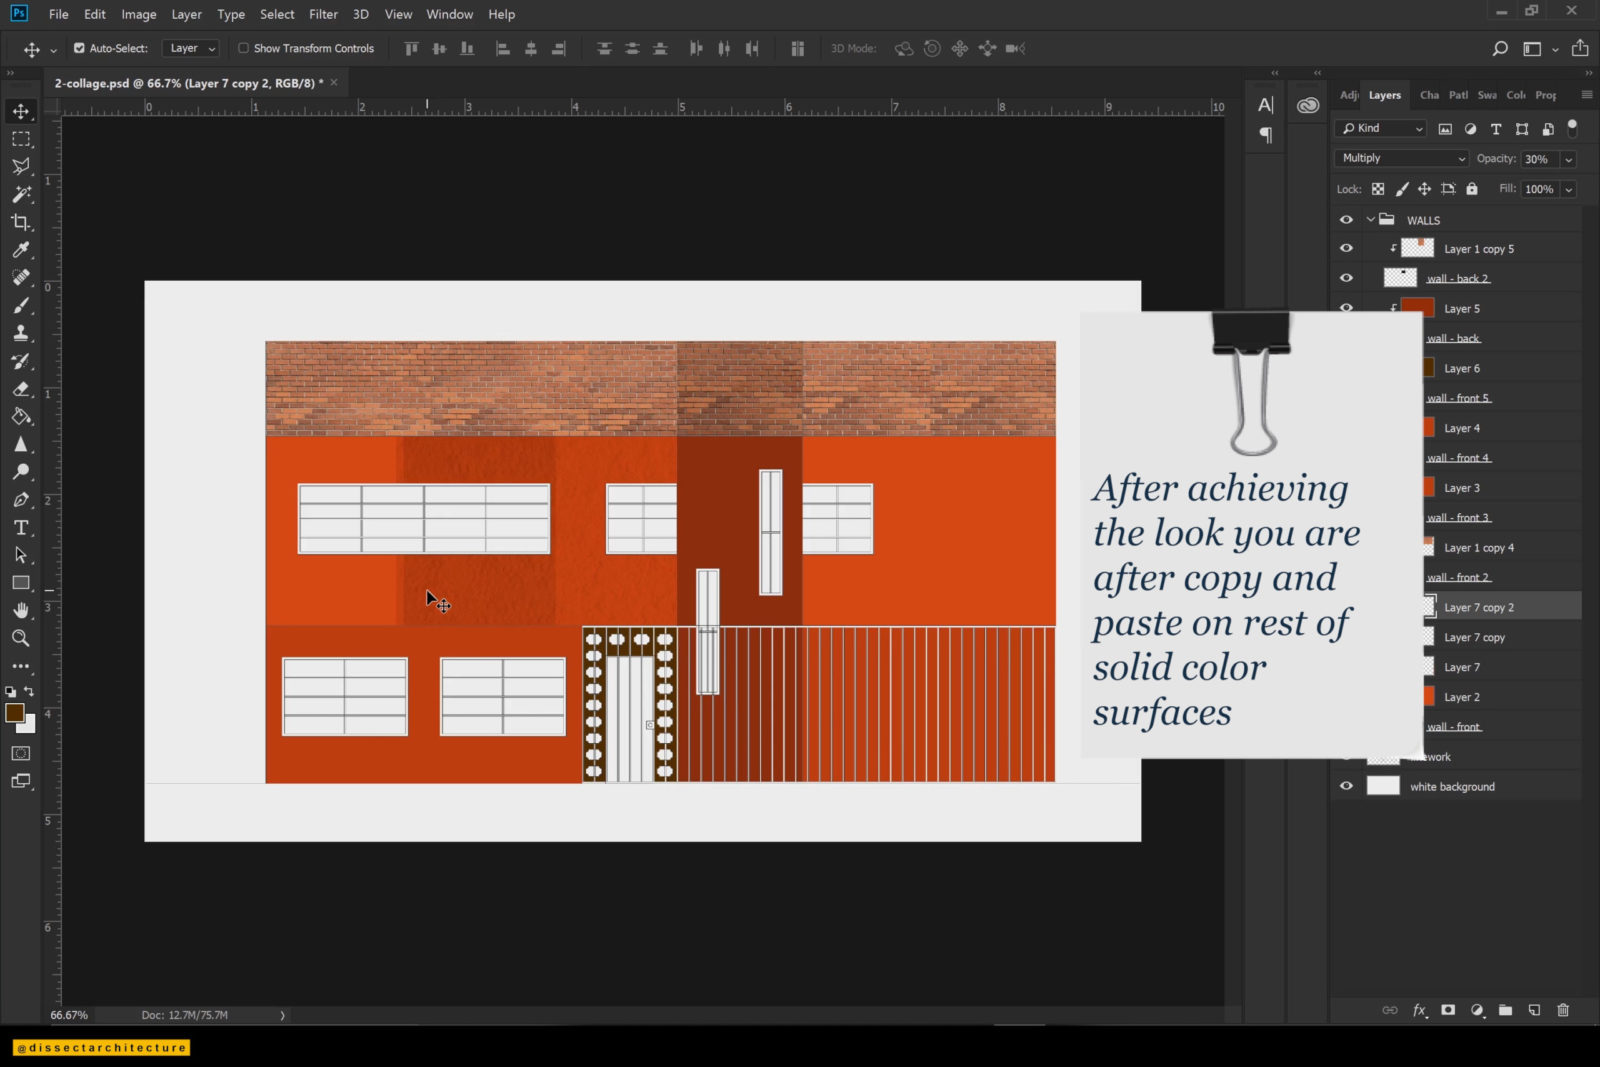
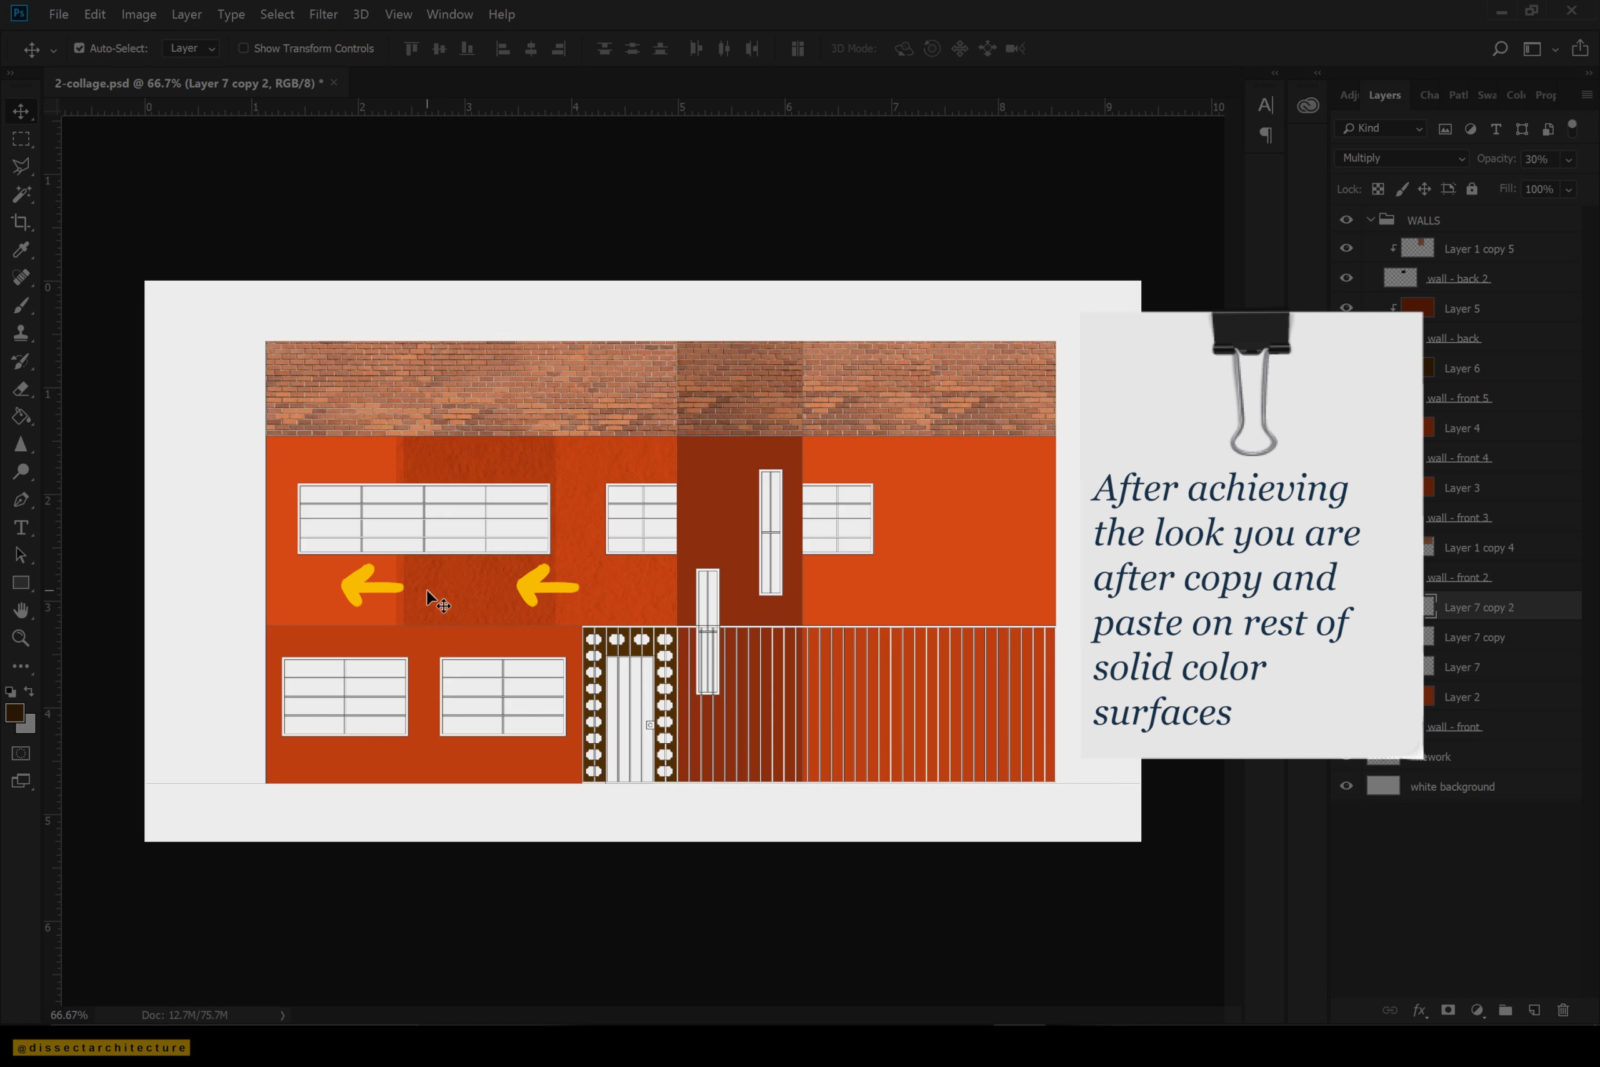
After achieving the desired look then copy and paste the texture to place it on the rest of the solid colored walls.
Step 09
Let’s move on to a different facade element.
Use the Magic Wand Tool to select the glass of the windows and then using the Paint Bucket to fill the selections with color in its own layer.

Step 10
Then we’ll add a Glass Texture and create a clipping mask so it is contained within the fill.
Copy and paste the glass texture and place it over the rest of the windows. Continue the same process for the rest of the facade elements that need color/texture.
Step 11
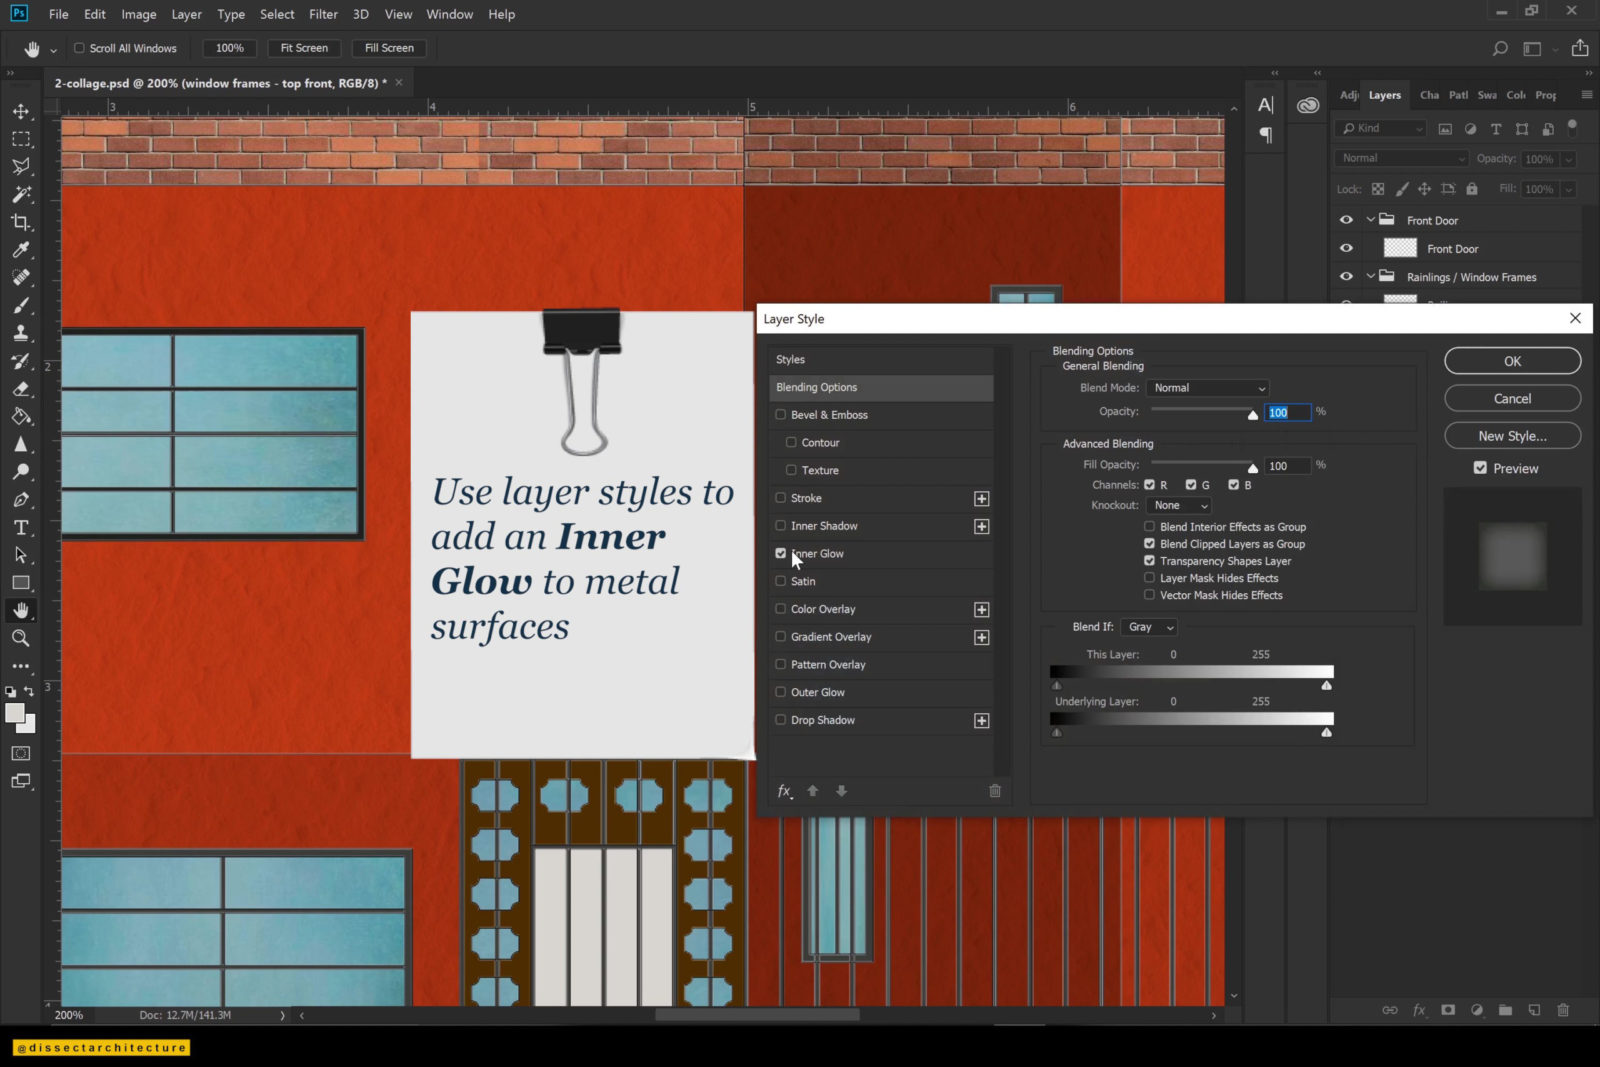
The facade that I am working with has some metal railings.I am imitating the materiality by adding the Inner Glow Effect by double-clicking on the layer to open the Layer Style Panel and selecting Inner Glow from the left menu.
I am selecting the glow to be White and selecting the source to be Center. Then I adjusted the size to be 7 px and lowered the opacity to 25%. You can adjust this to your drawing as necessary. Make sure you have the preview option check to preview your settings.

Step 12
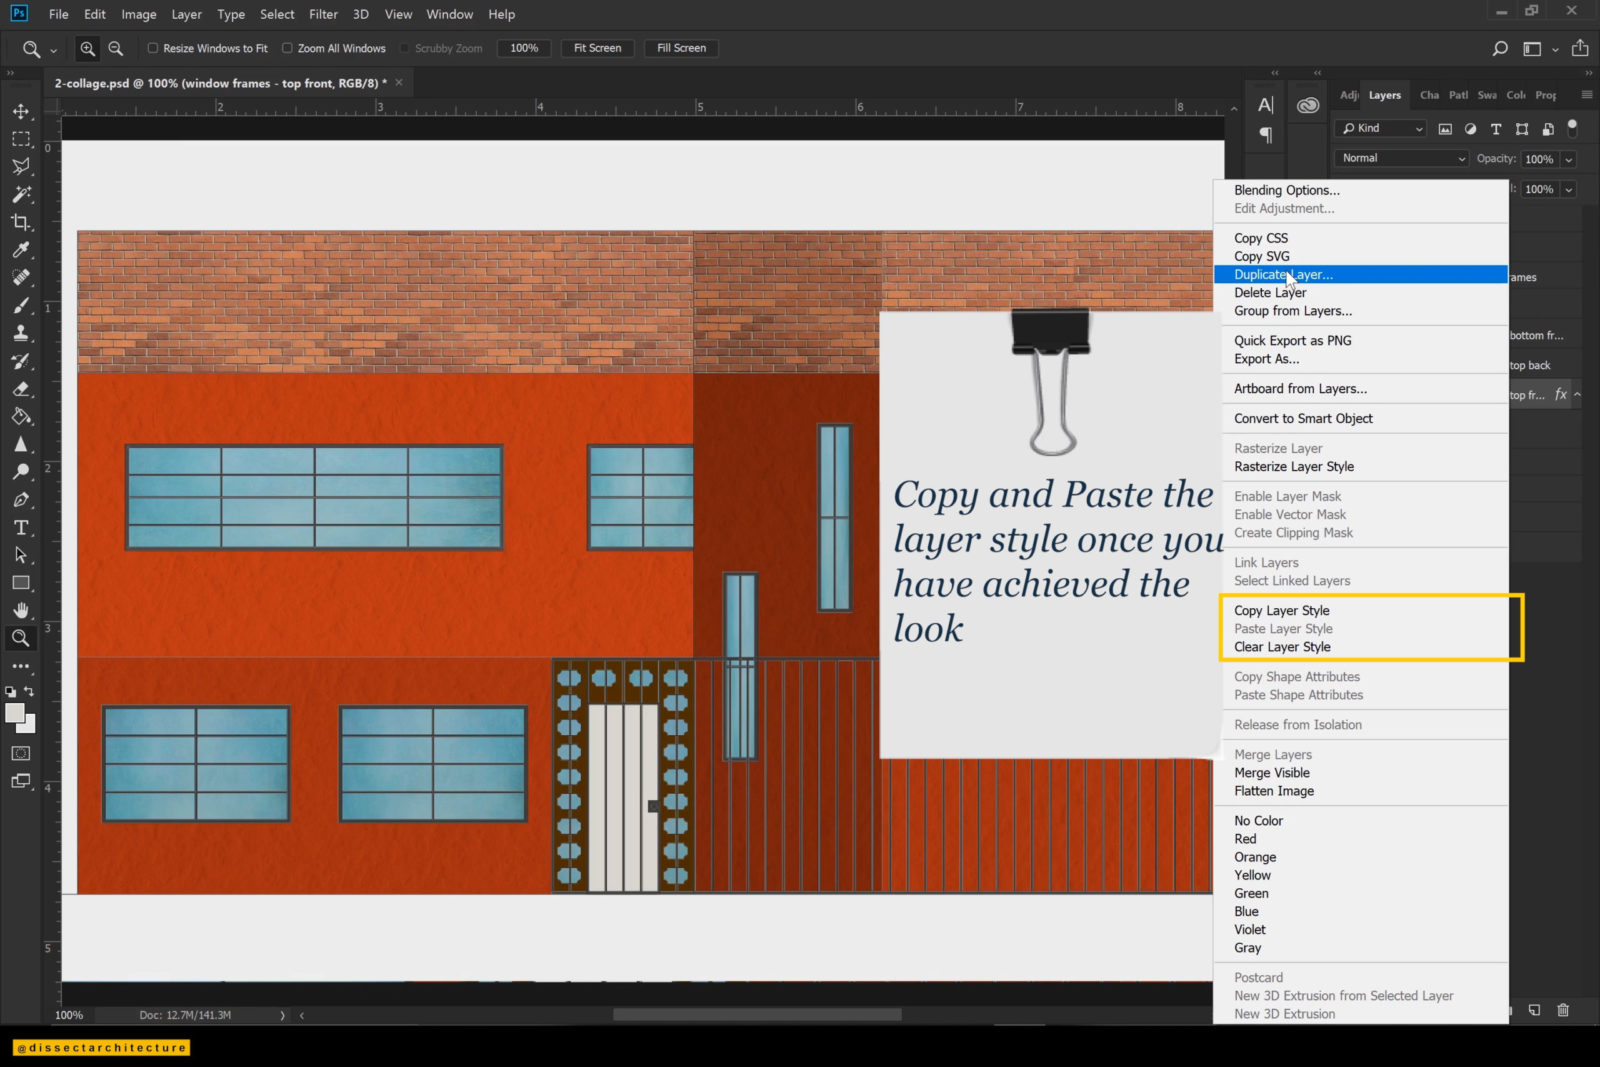
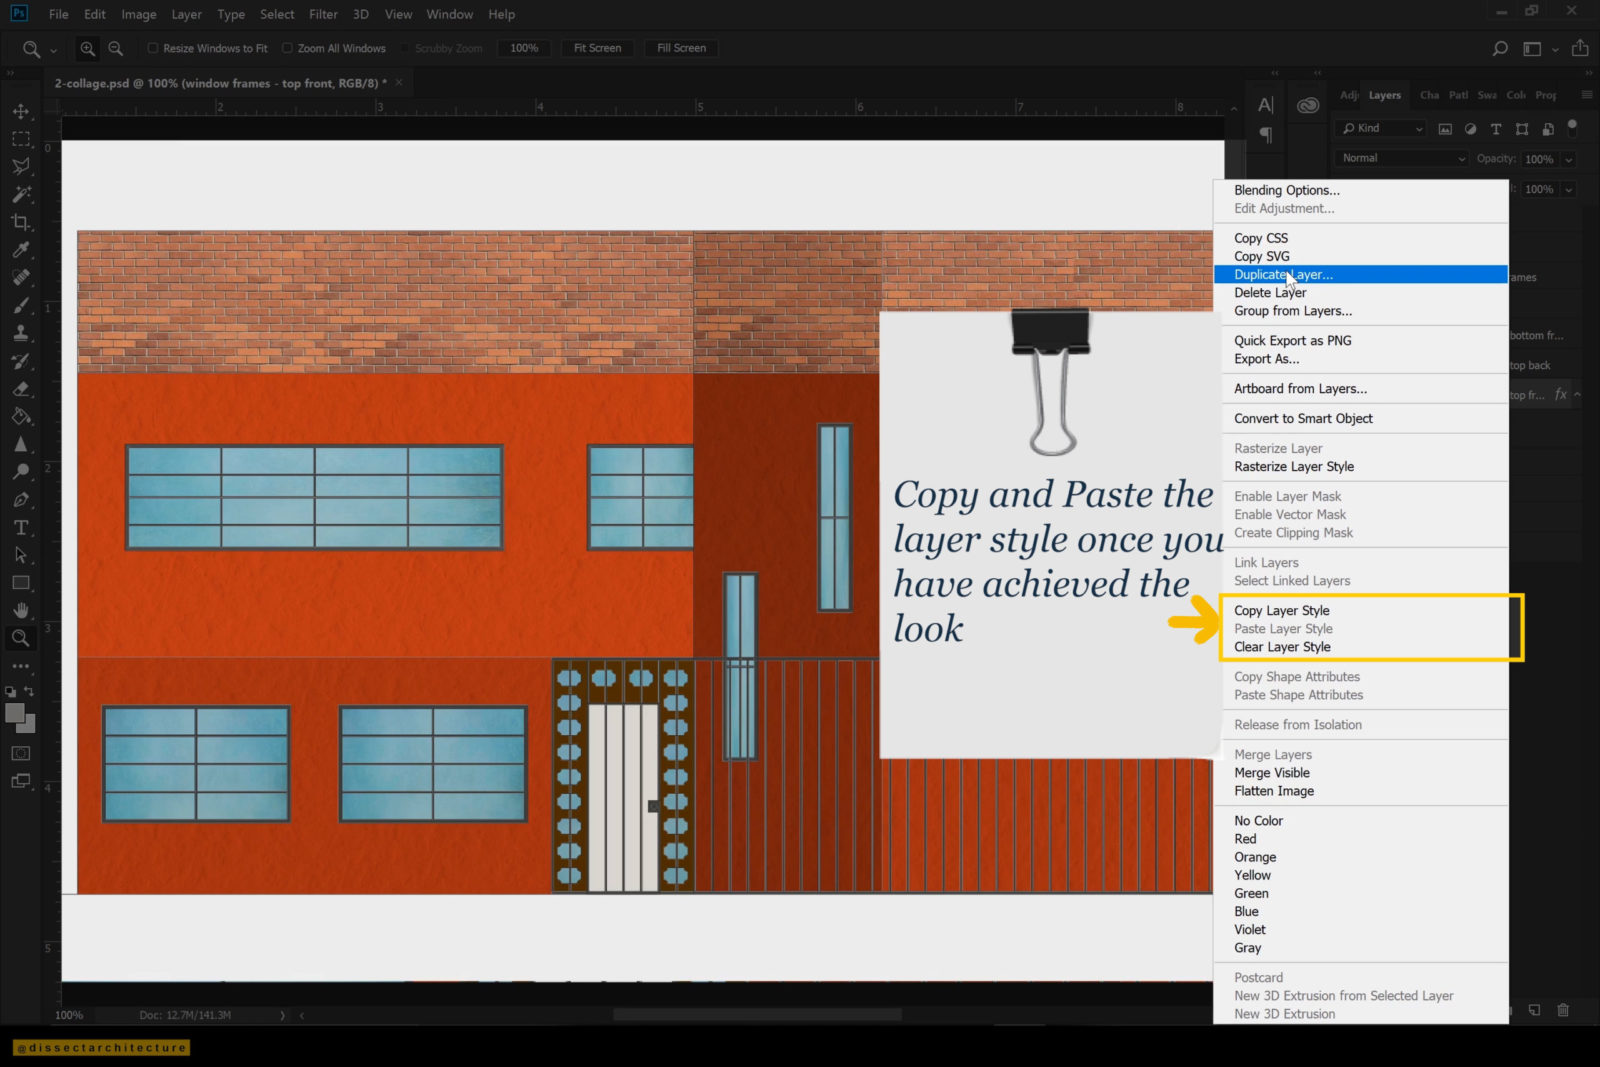
If you’d like to apply the Layer Style to other layers copy the layer style by right-clicking the layer name and then selecting Copy Layer Style and then right-clicking on the layer you’d like to place it on and select Paste Layer Style.
Step 13
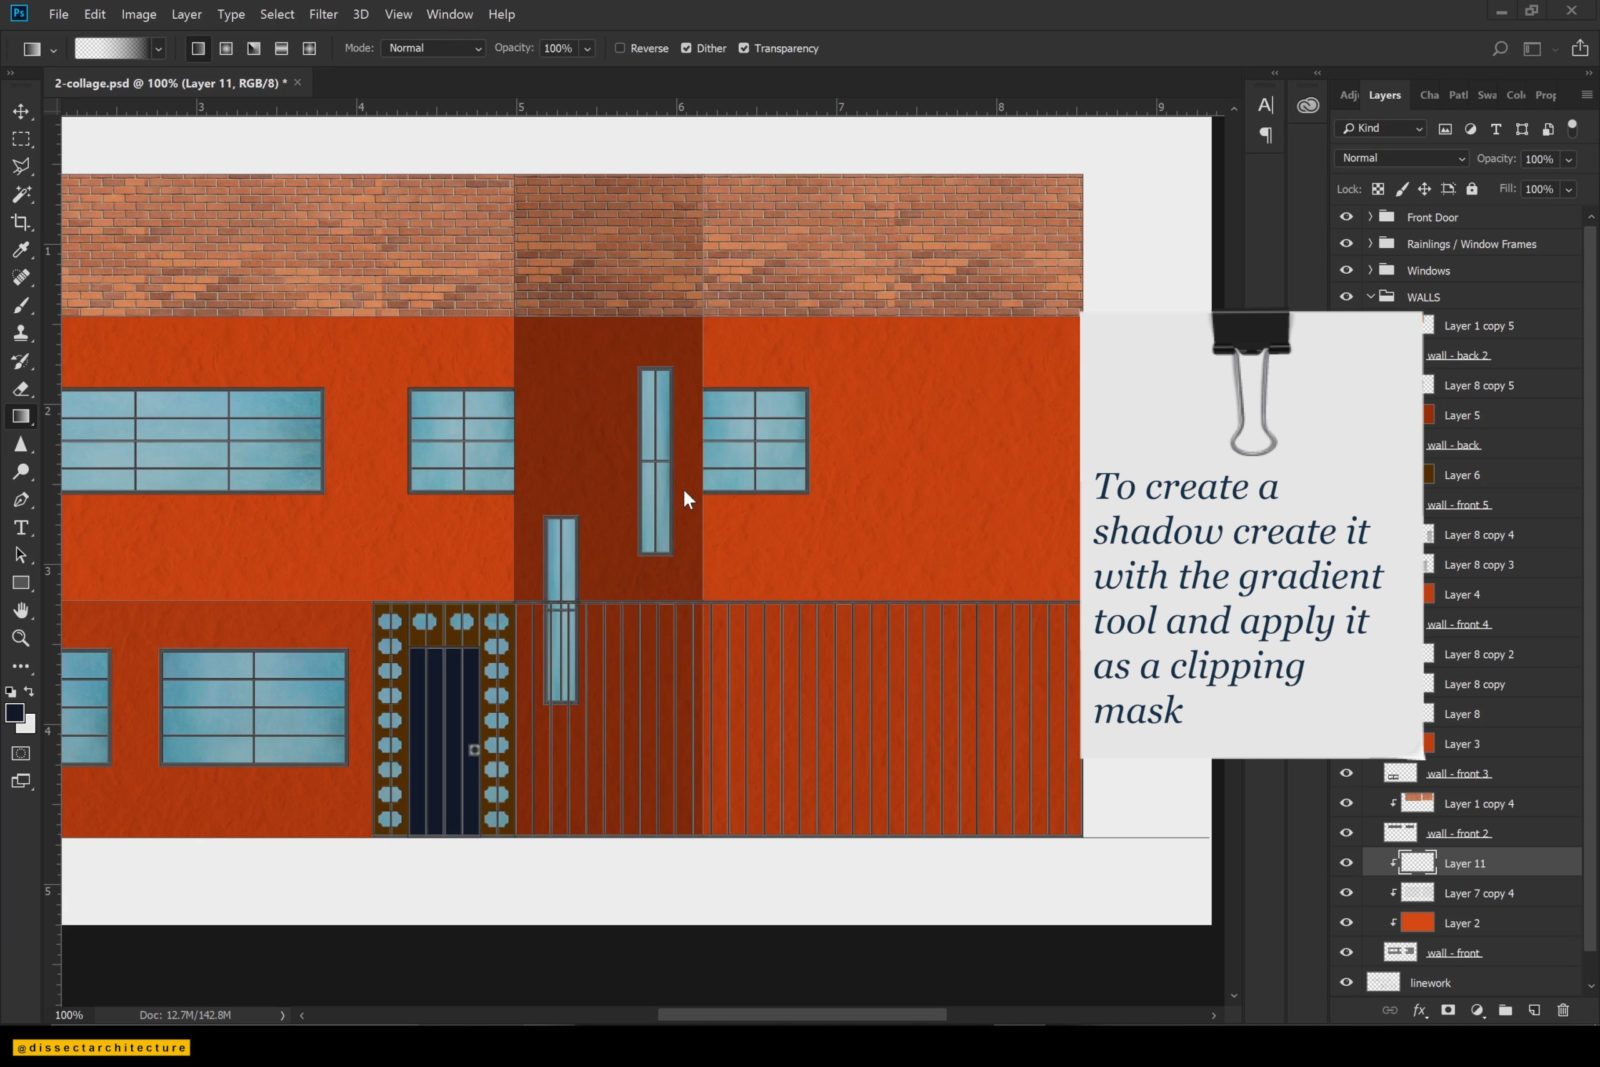
Let’s start to add shadows to your Collage Architecture Elevation in Photoshop.
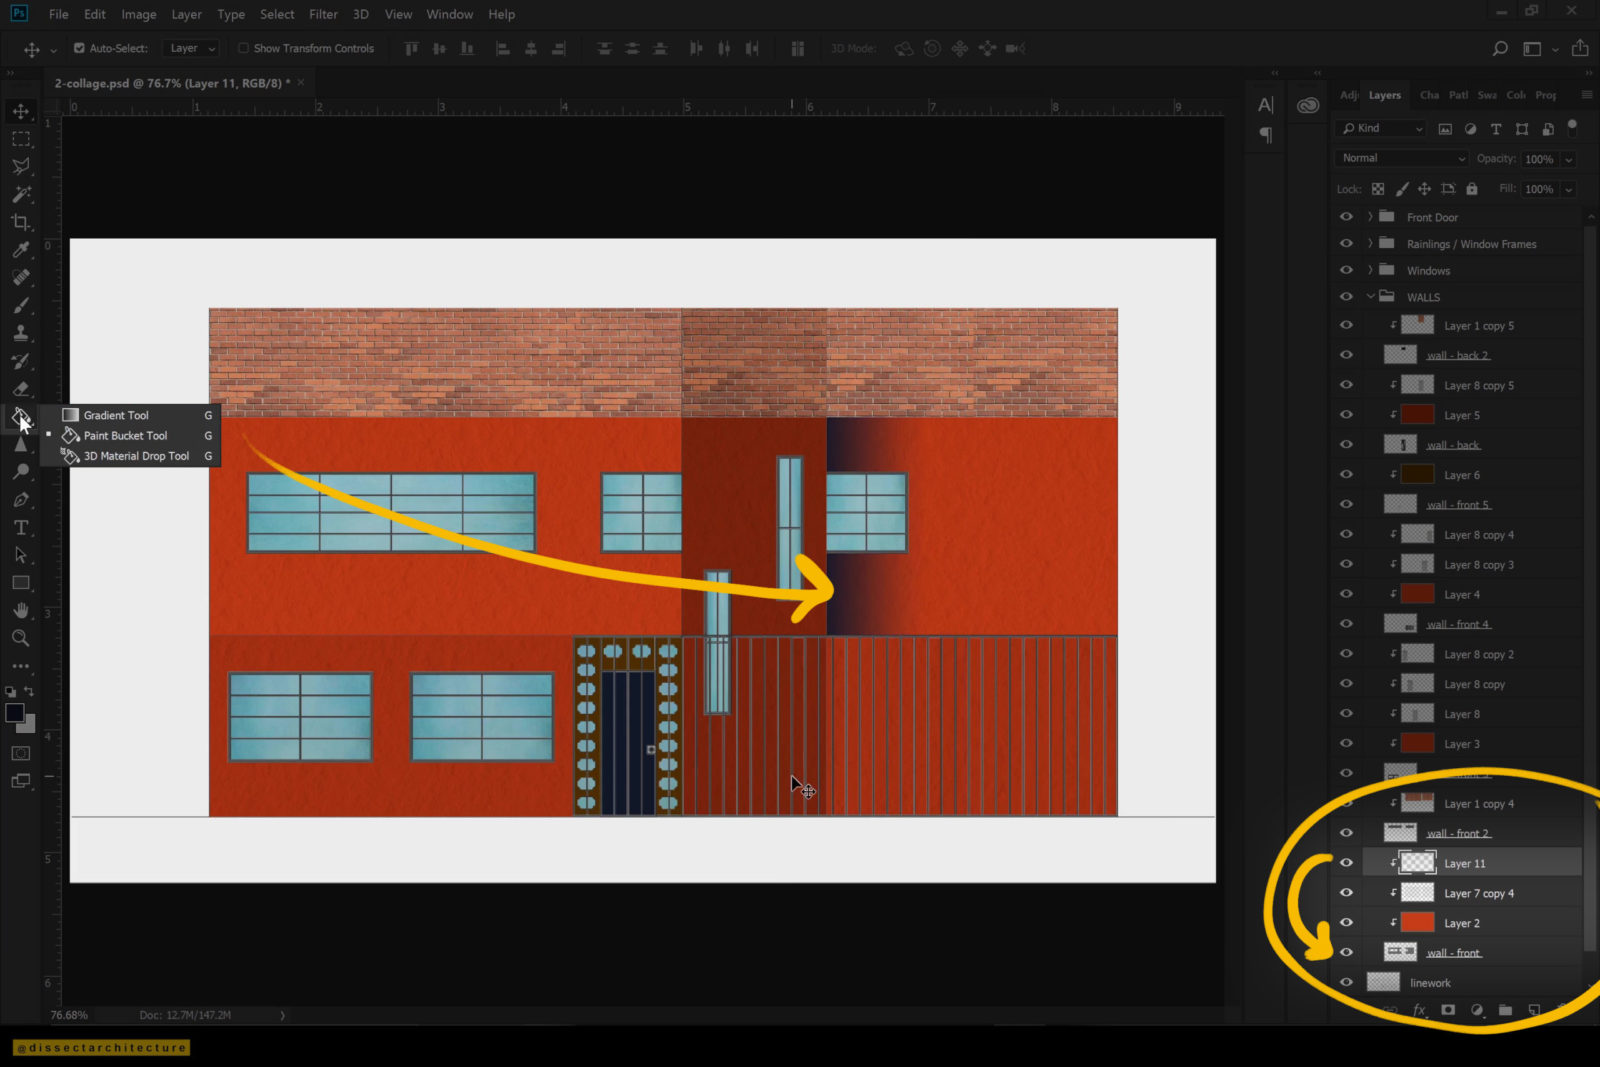
I am doing this by using the Gradient Tool to create a fading black gradient on a new layer and clipping it to the layer it will be added. Lower the opacity of the layer with the gradient and use the Transform Tool to change it as needed.
Then copy and paste the Shadow Gradient created to add it to the rest of the surfaces. You can also trim the Shadow Gradient with the Rectangular Marquee Tool to deleting any areas.
Step 14
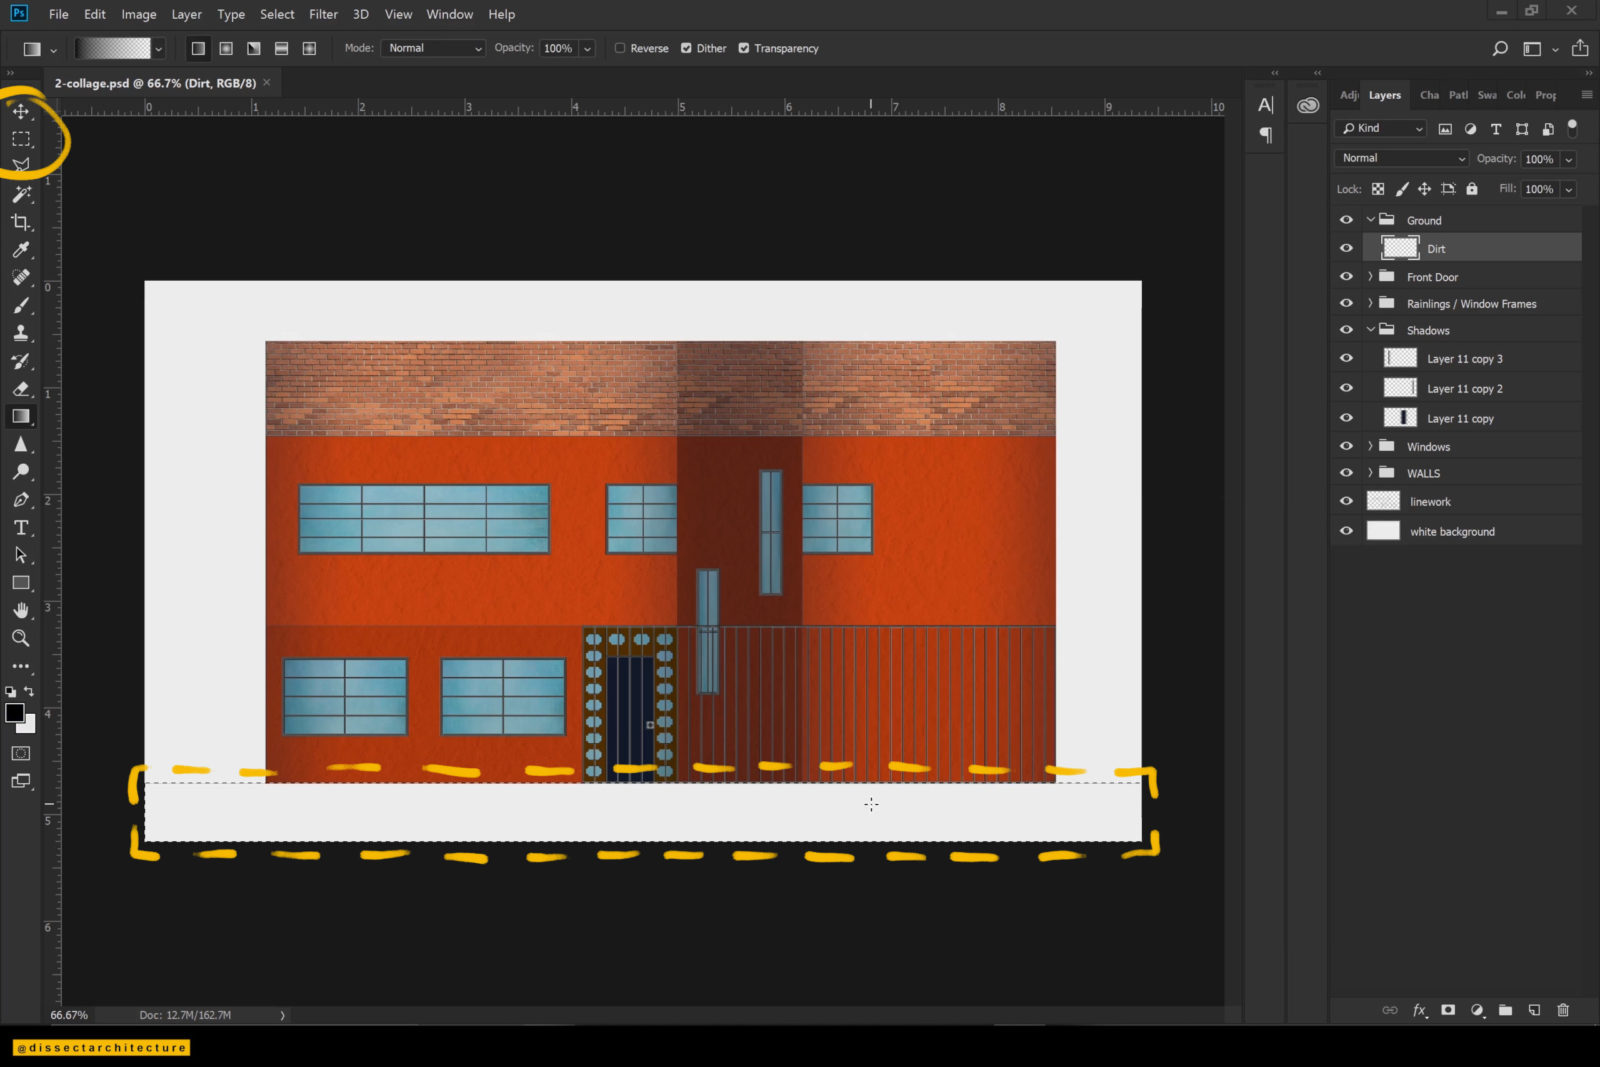
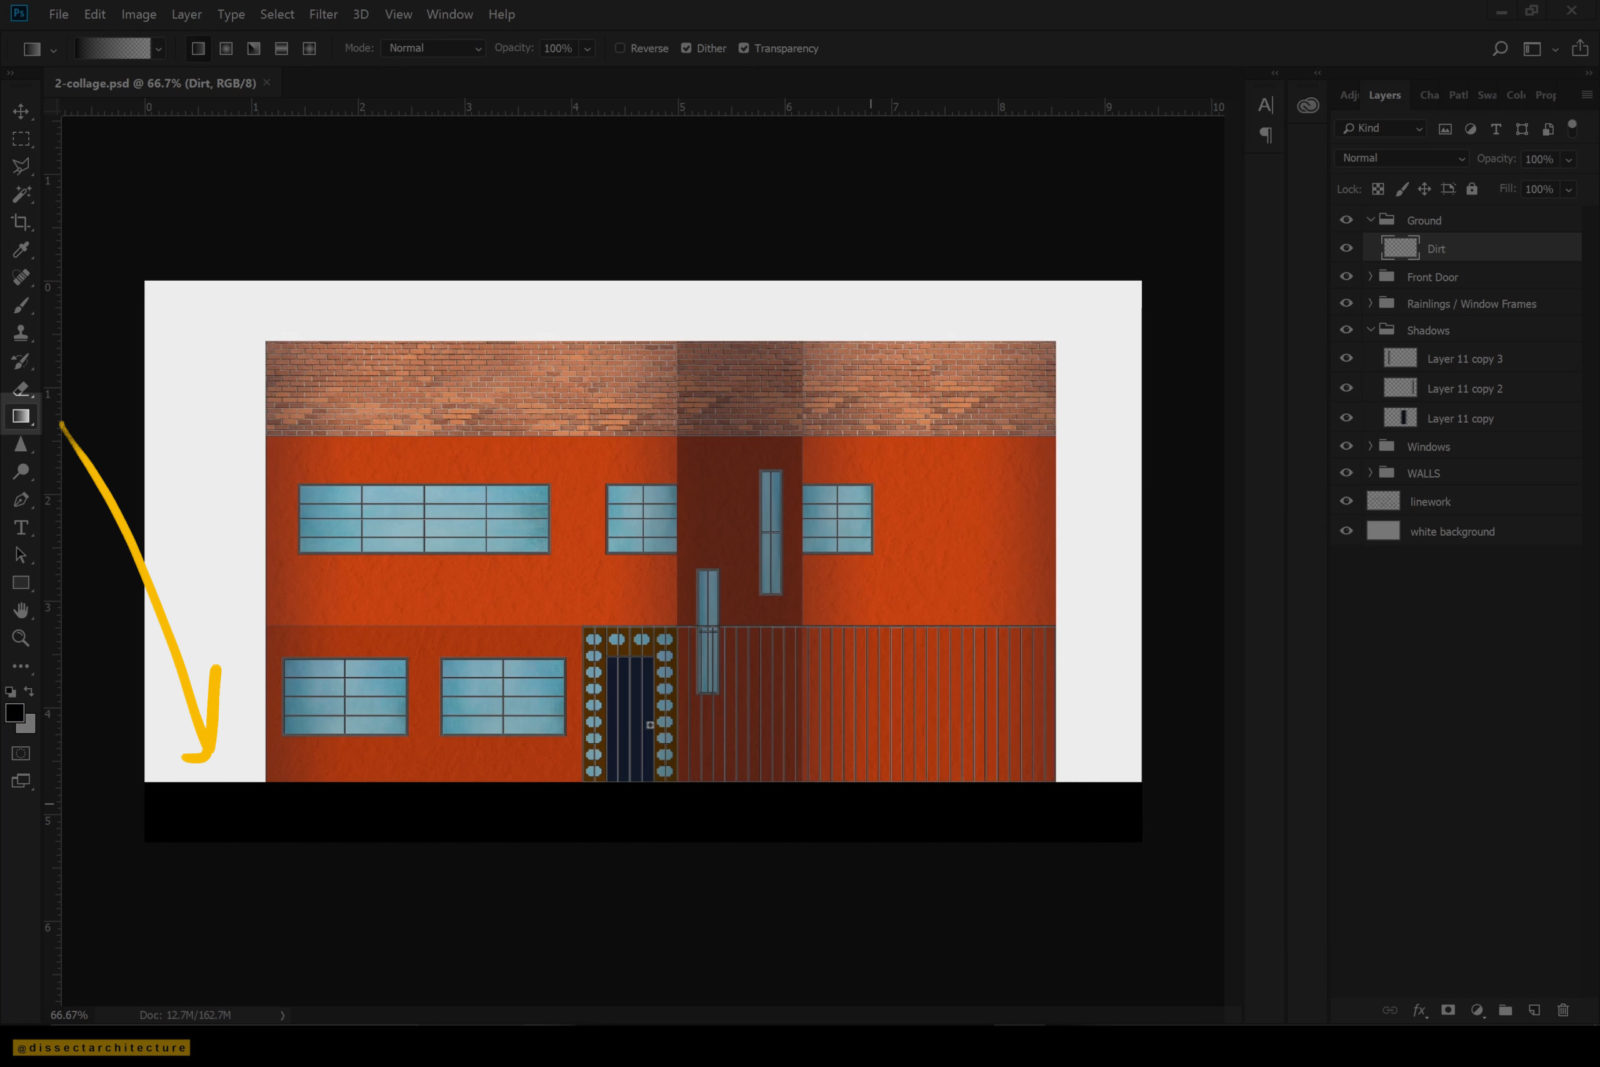
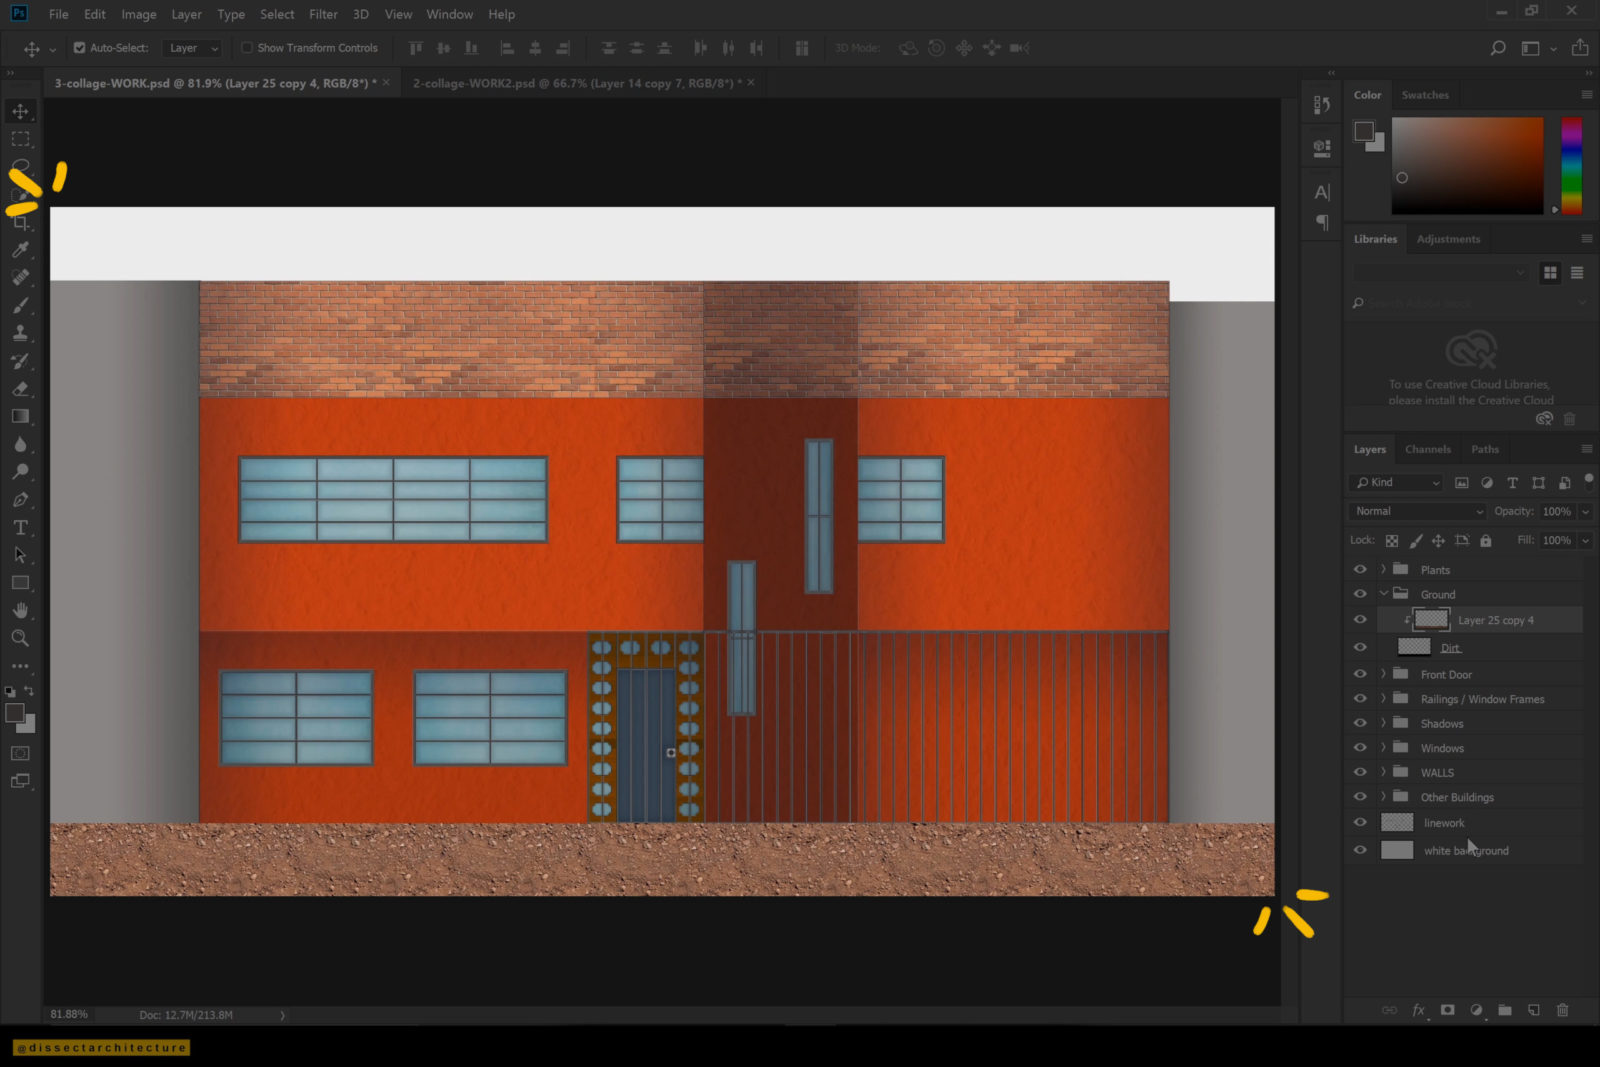
Afterwards add the Ground Plane.
Use the Rectangular Marquee Tool to select the designated ground area. Then, fill the selection with the Paint Bucket Tool. I am adding a black color fill.
Step 15
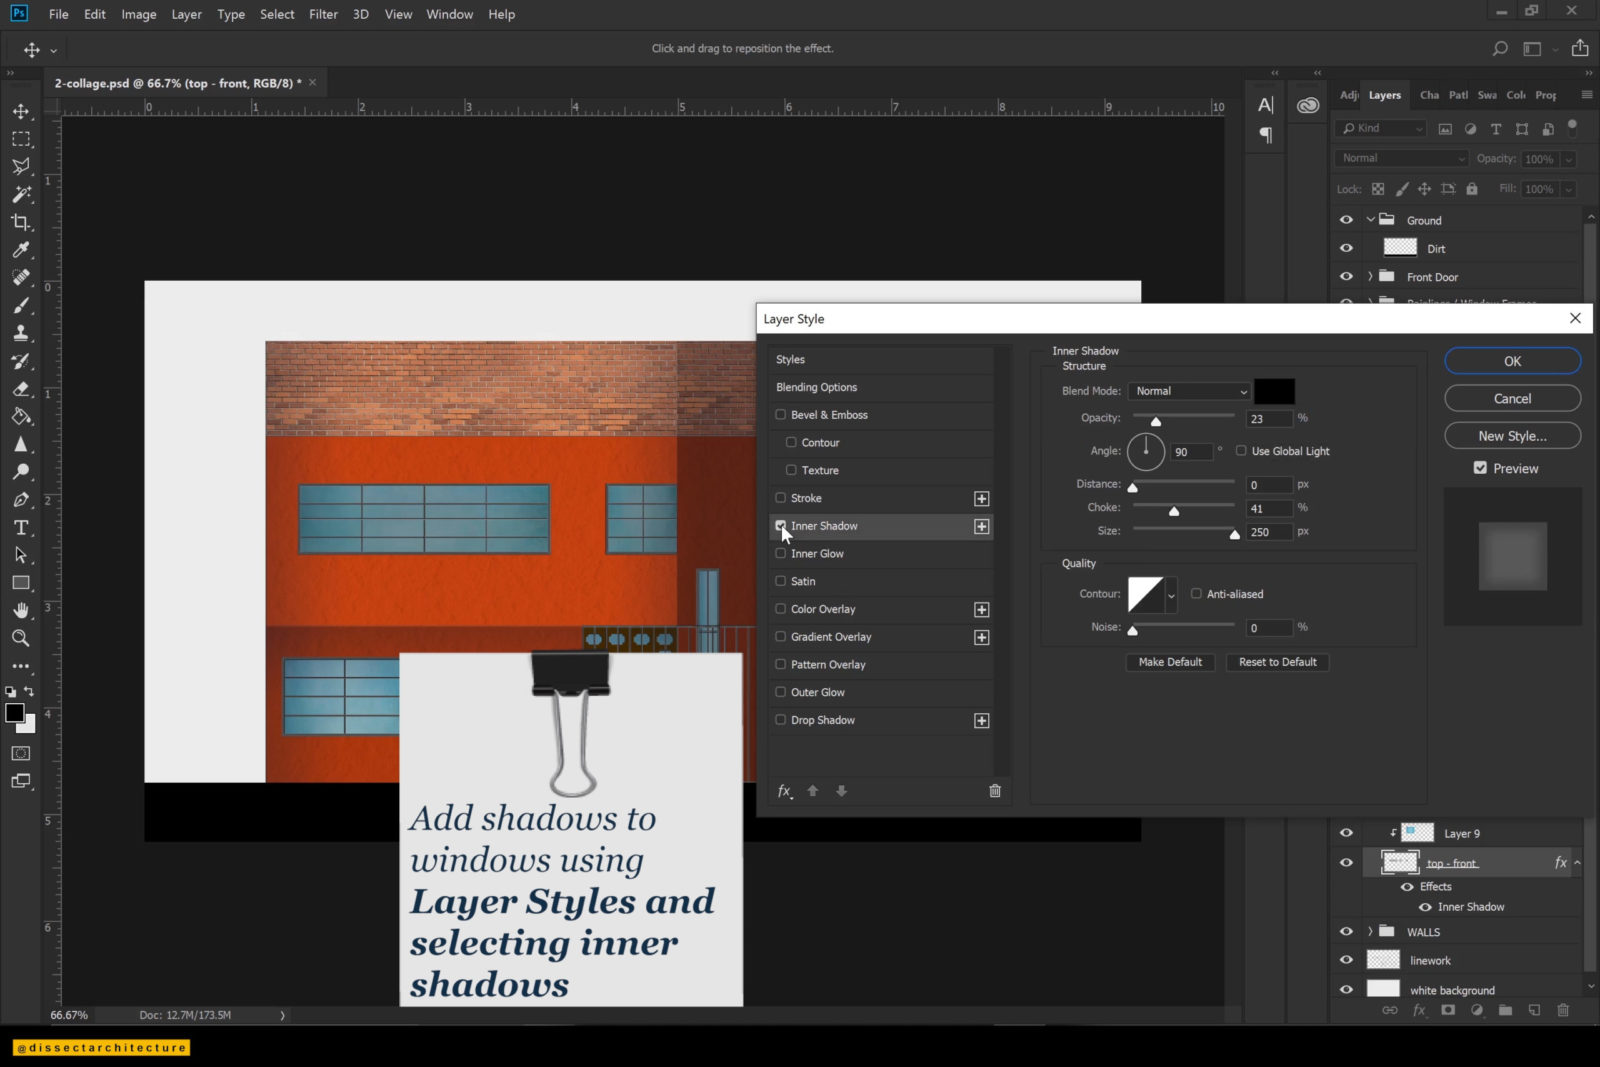
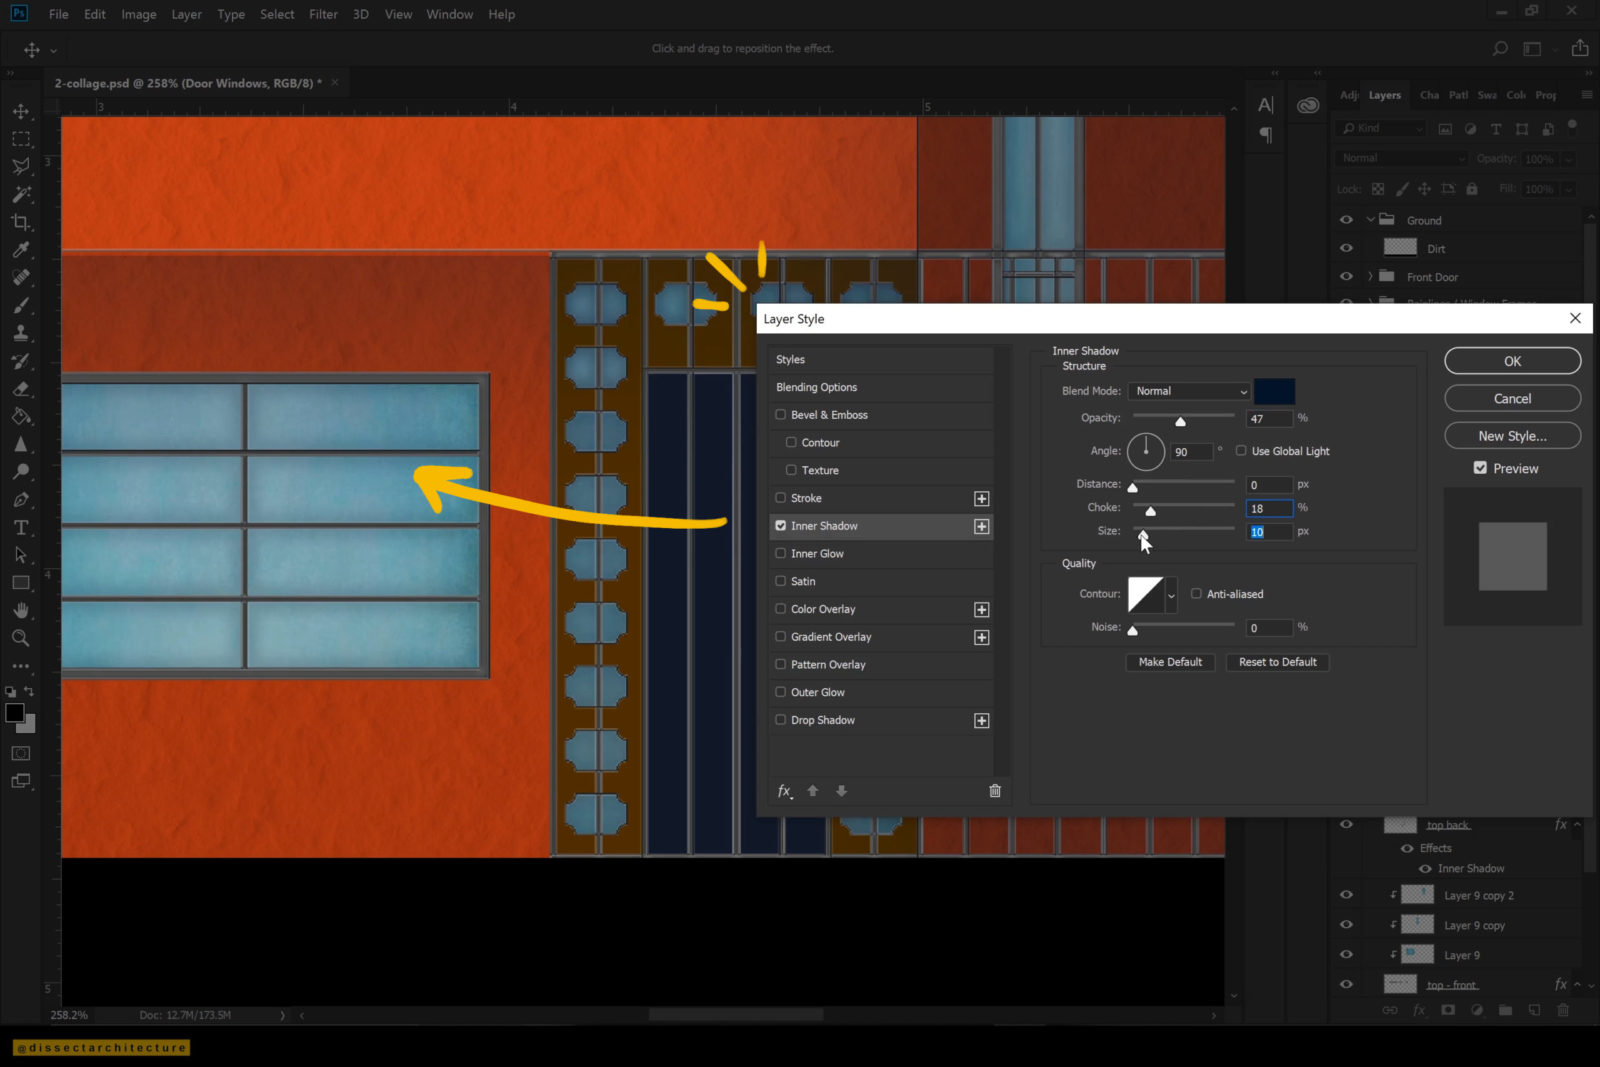
I am going to back to adding shadows to add subtle shadows to the windows by opening the Layer Style Panel of the windows with the layers.
On the left panel select the Inner Shadow Option. I am adjusting the size and opacity and changing the color to a dark blue color. I am copying the layer style and adding to the rest of the window layers.
Step 16
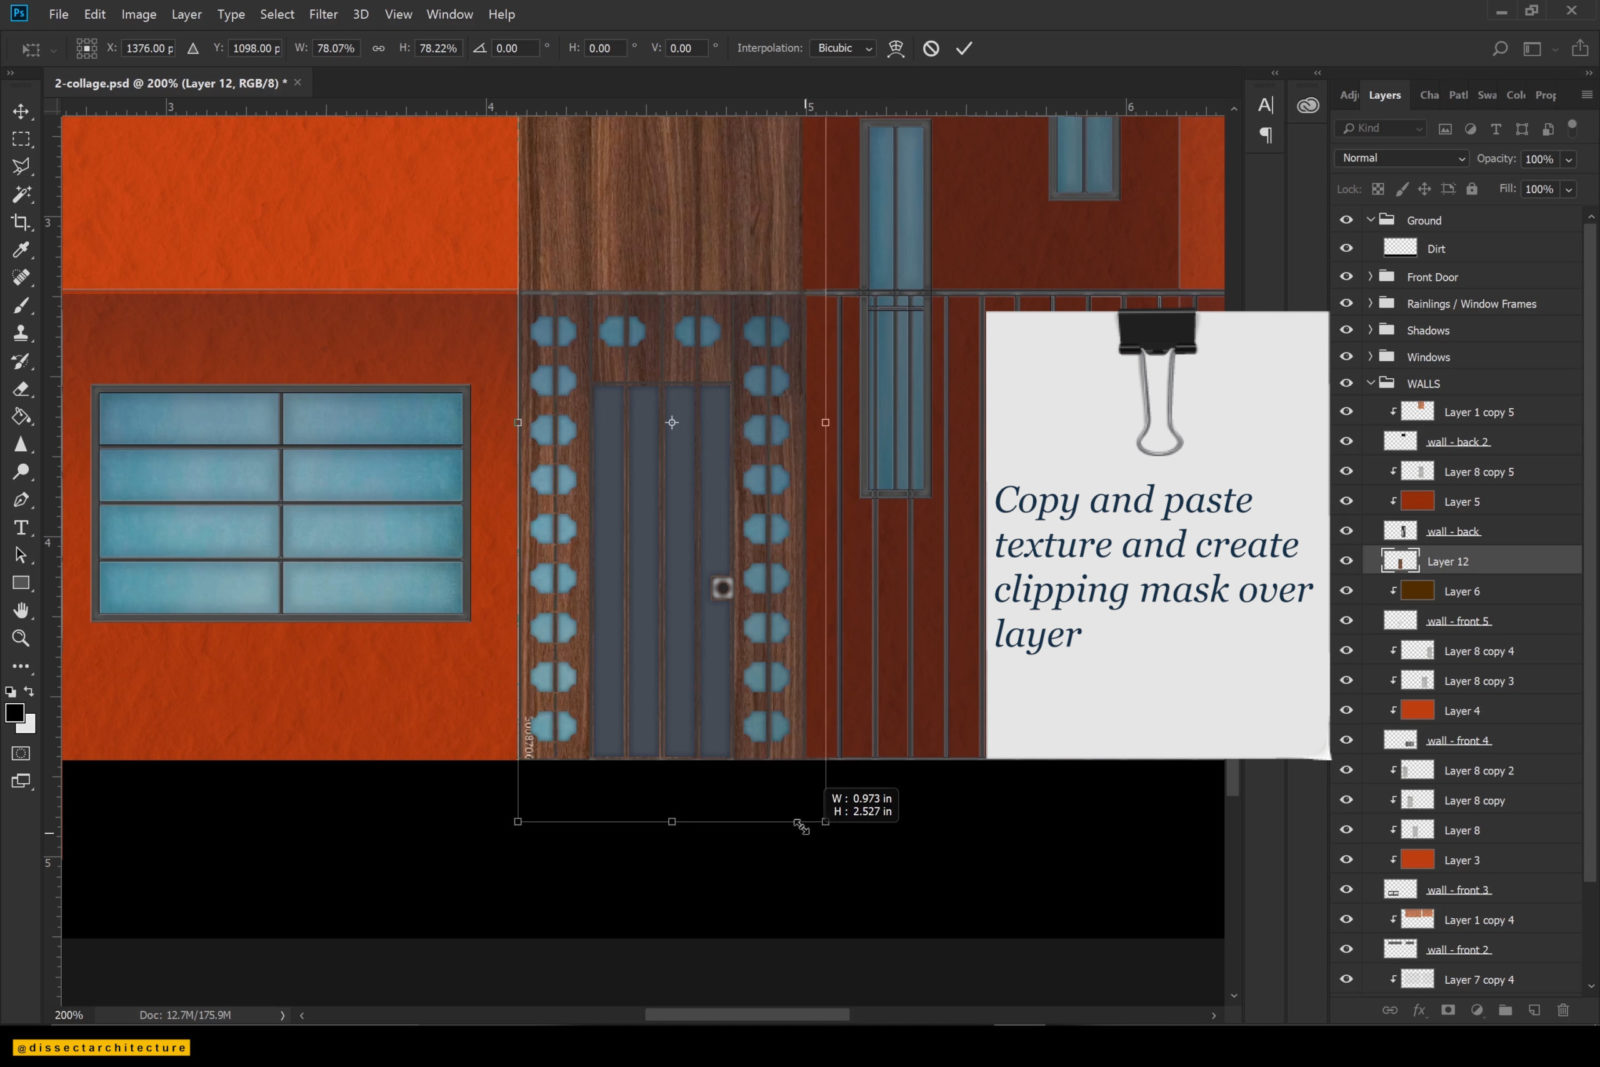
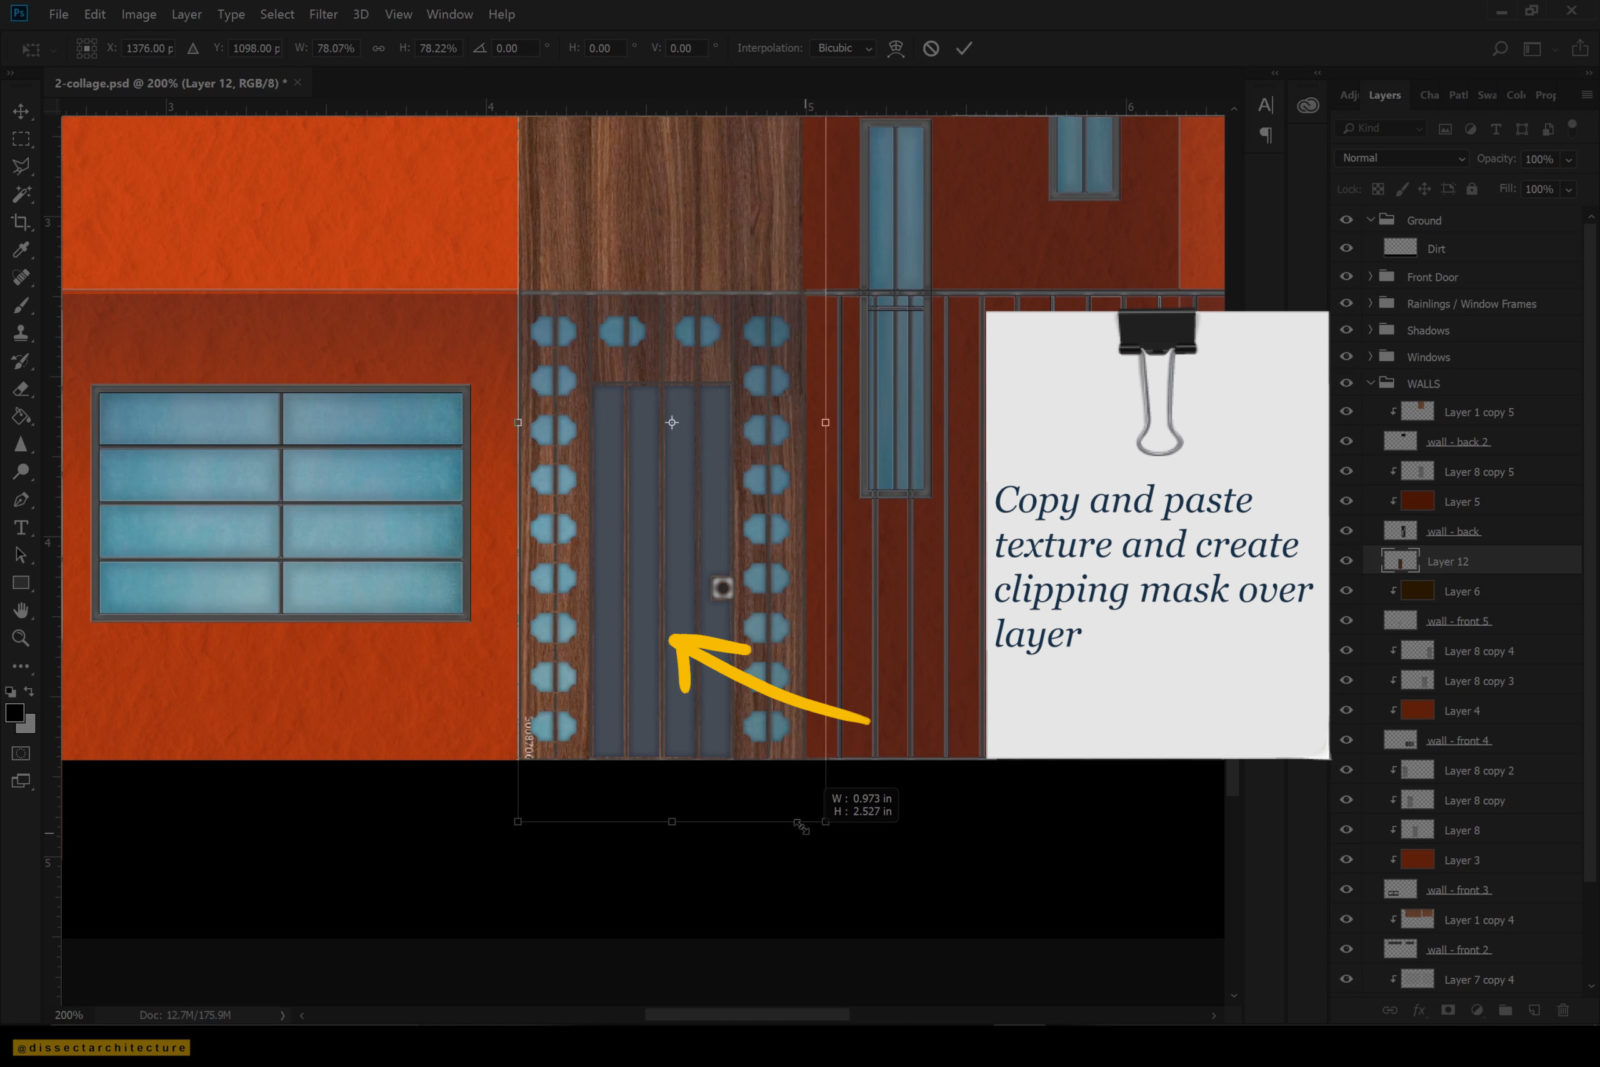
Make any other additional changes your drawing needs, such as adding any more textures that you might have missed.
I am adding a wood grain texture around the front door by pasting it over the color fill of the layer and creating a clipping mask over the layer.
Step 17
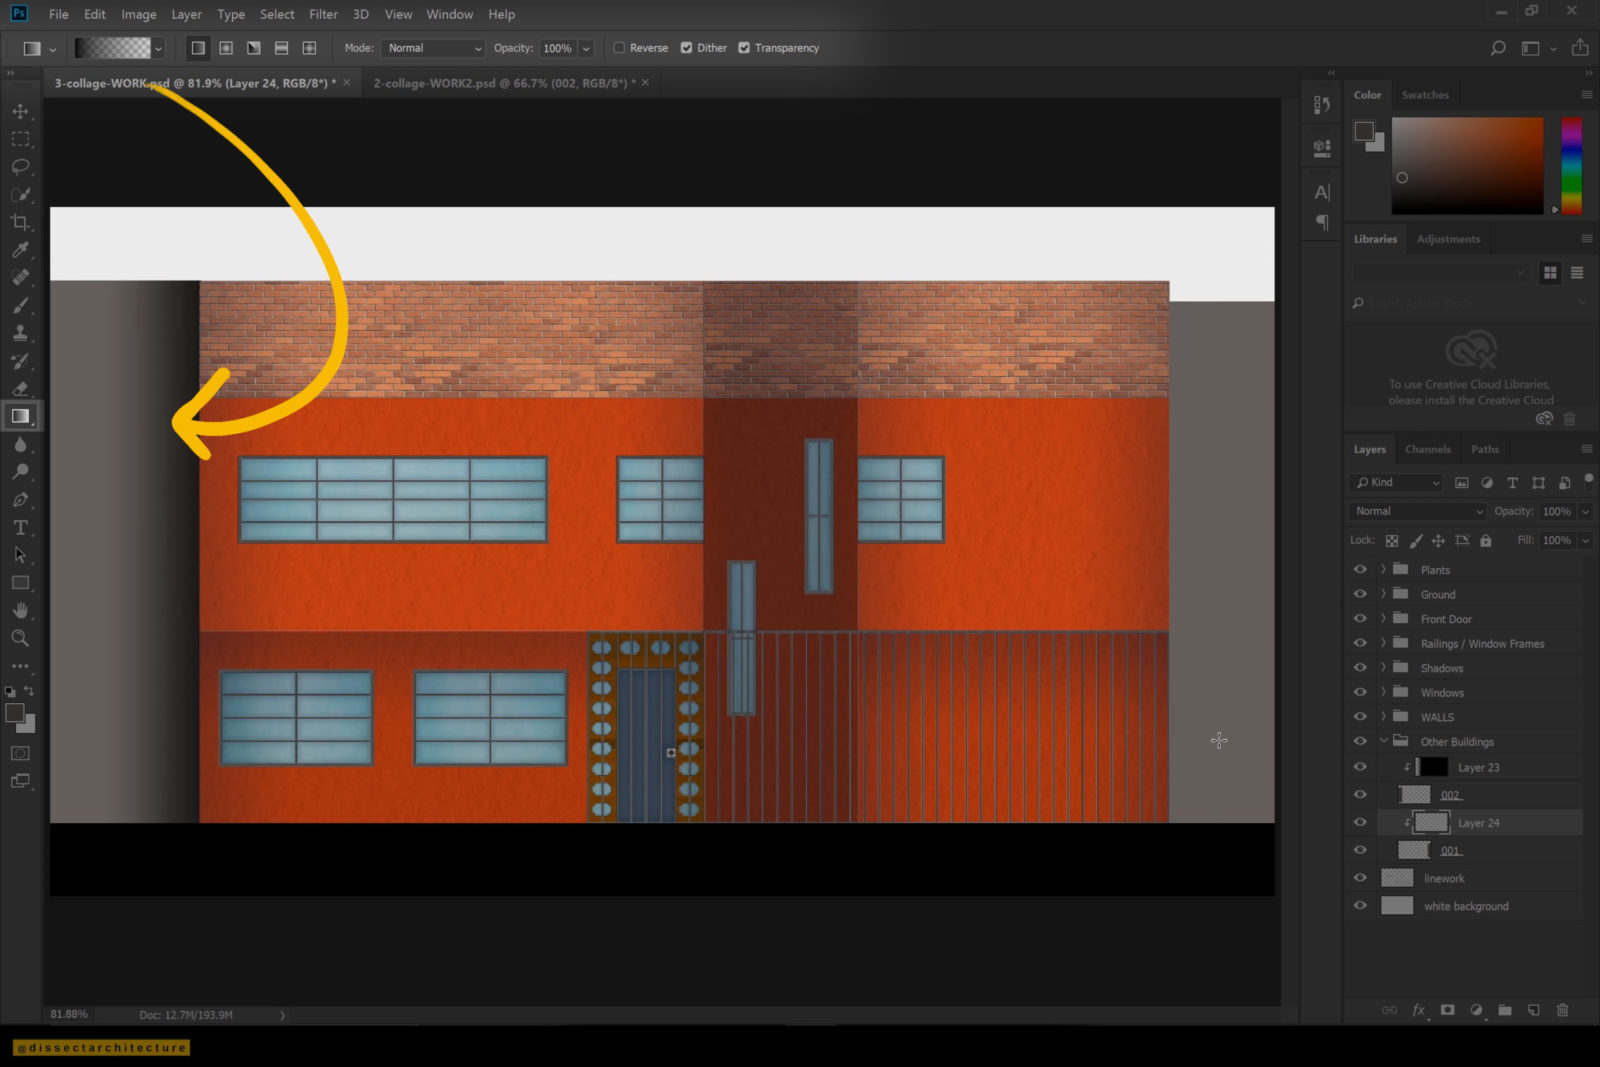
Afterwards, add the surrounding buildings and entourage to the Collage Architecture Elevation in Photoshop.
I am first adding the buildings by using the Rectangular Marquee Tool to create the mass and filling it with the Paint Bucket Tool. Add shadows to these buildings by using the previous Gradient technique.

Step 18
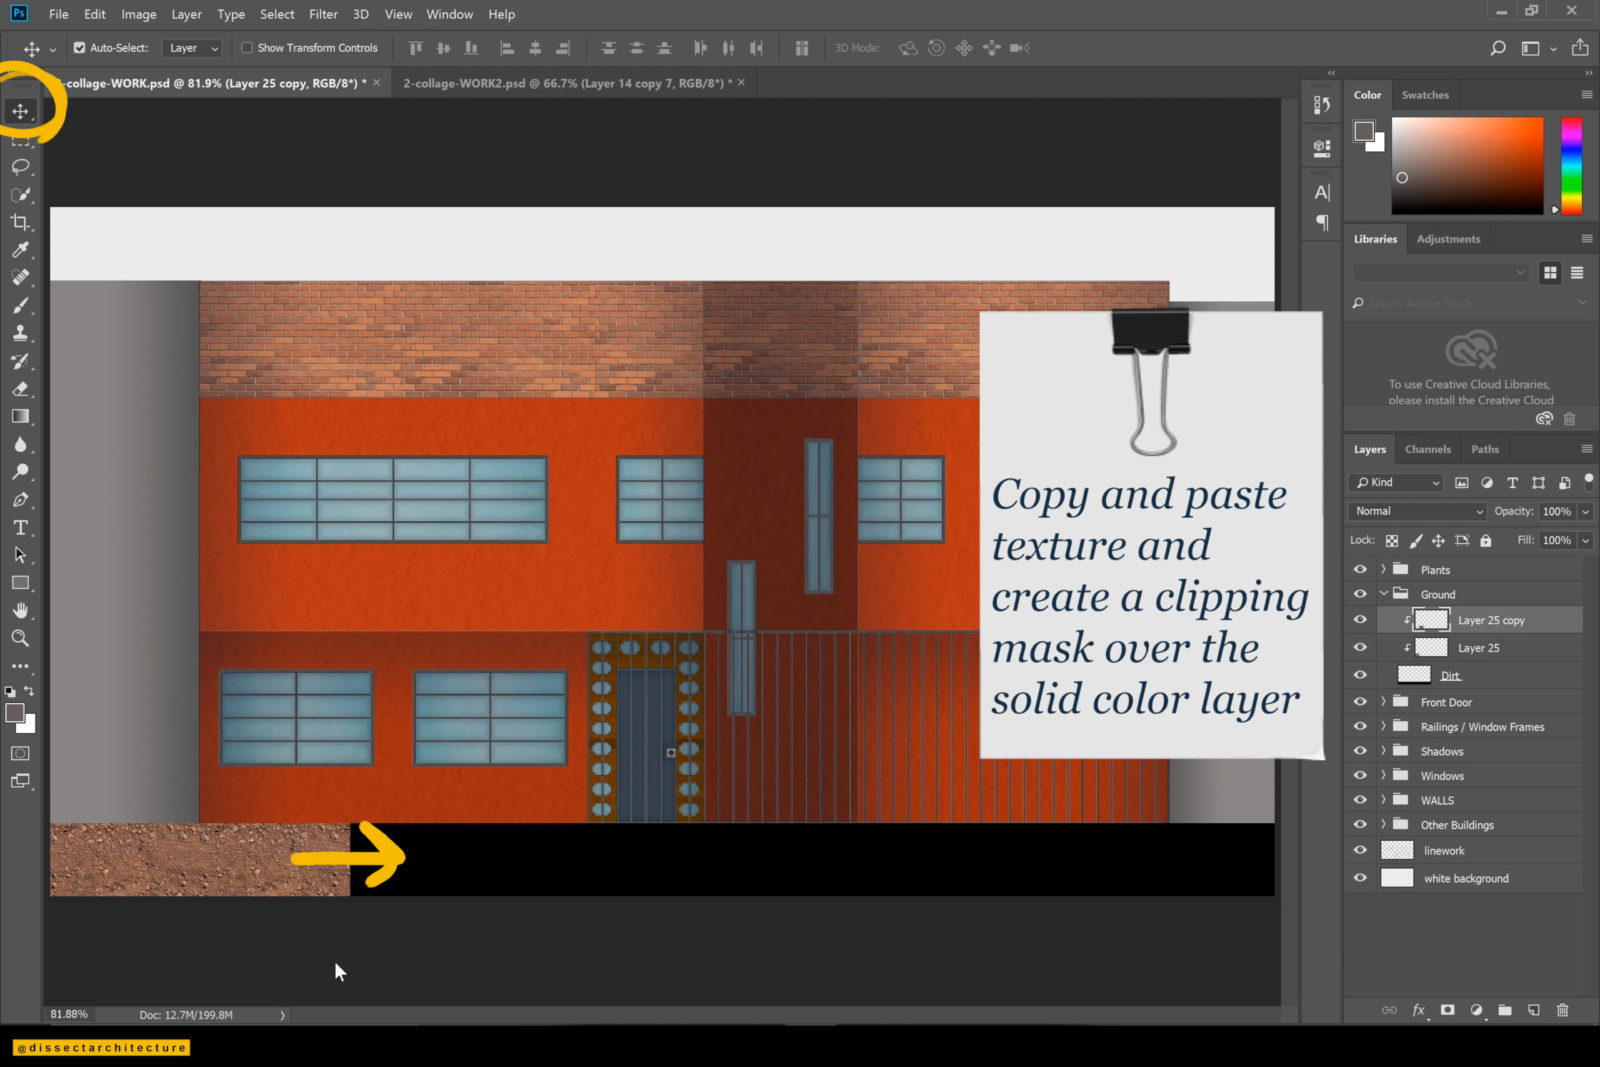
I am now adding a dirt texture to the ground plane by creating a clipping mask by hovering over the layer and clicking it while holding the Alt key.
Then, I am copying and pasting the texture until the ground plane is completely covered. Afterwards I merged the layers and lowered the opacity of the texture.
Step 19
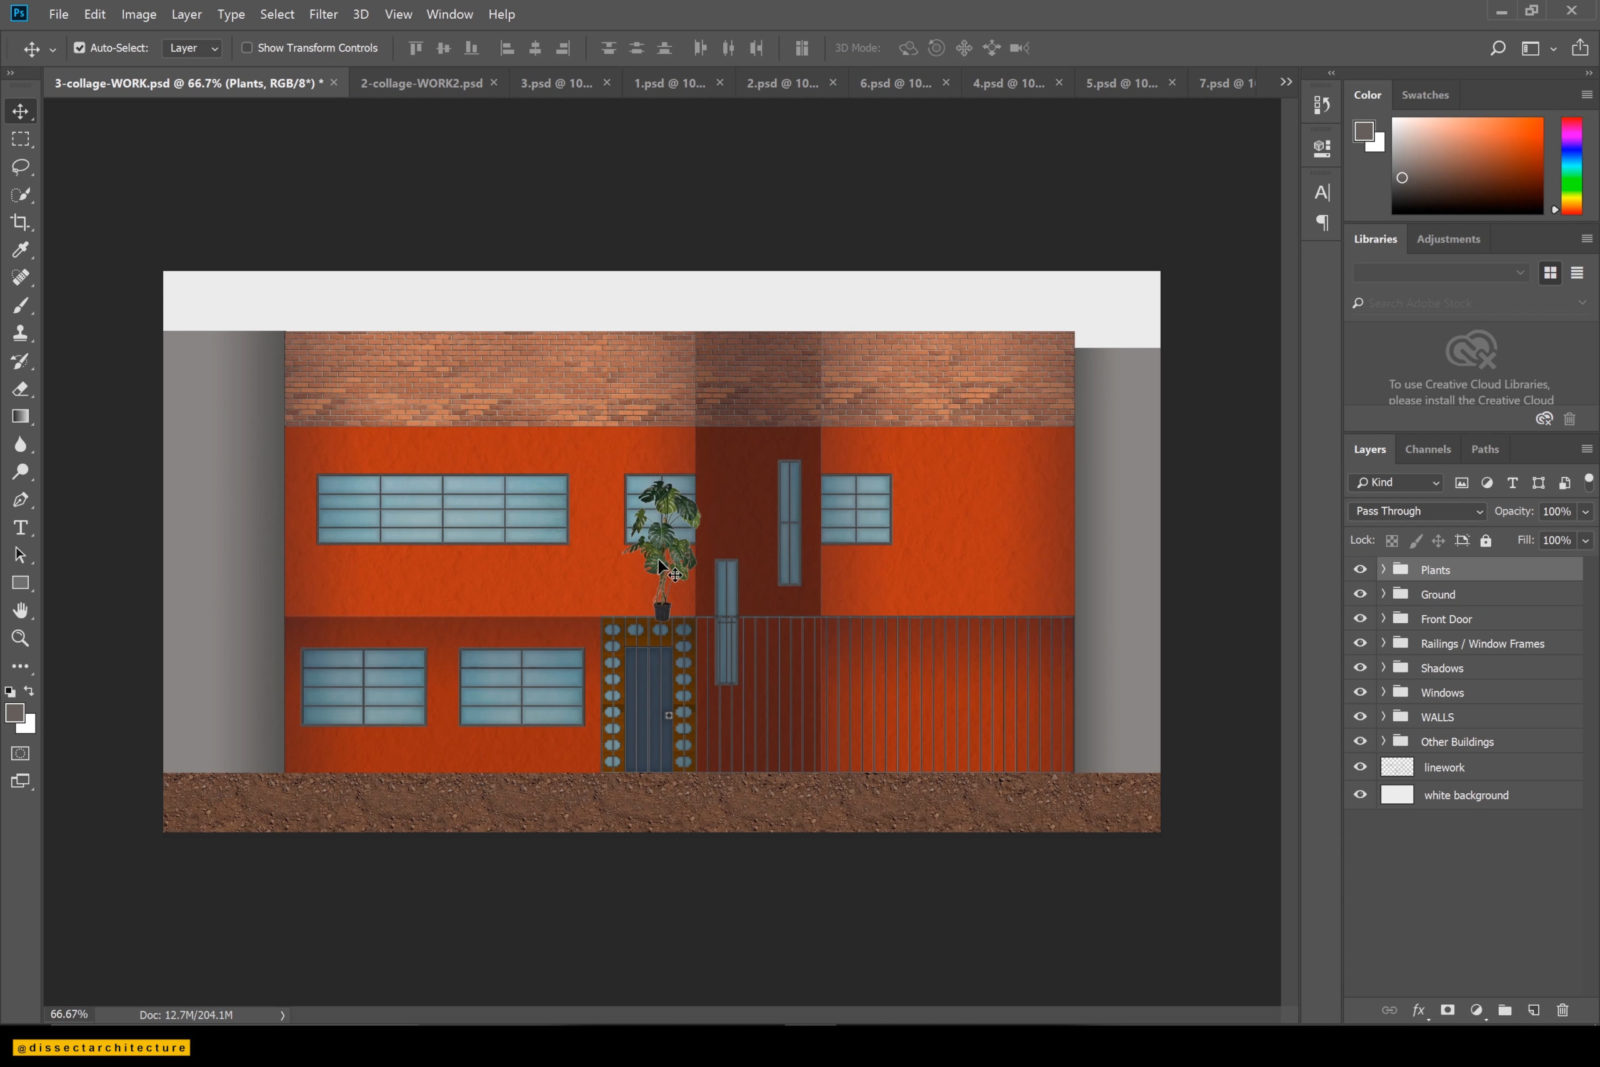
Now it’s time to personalize the image!
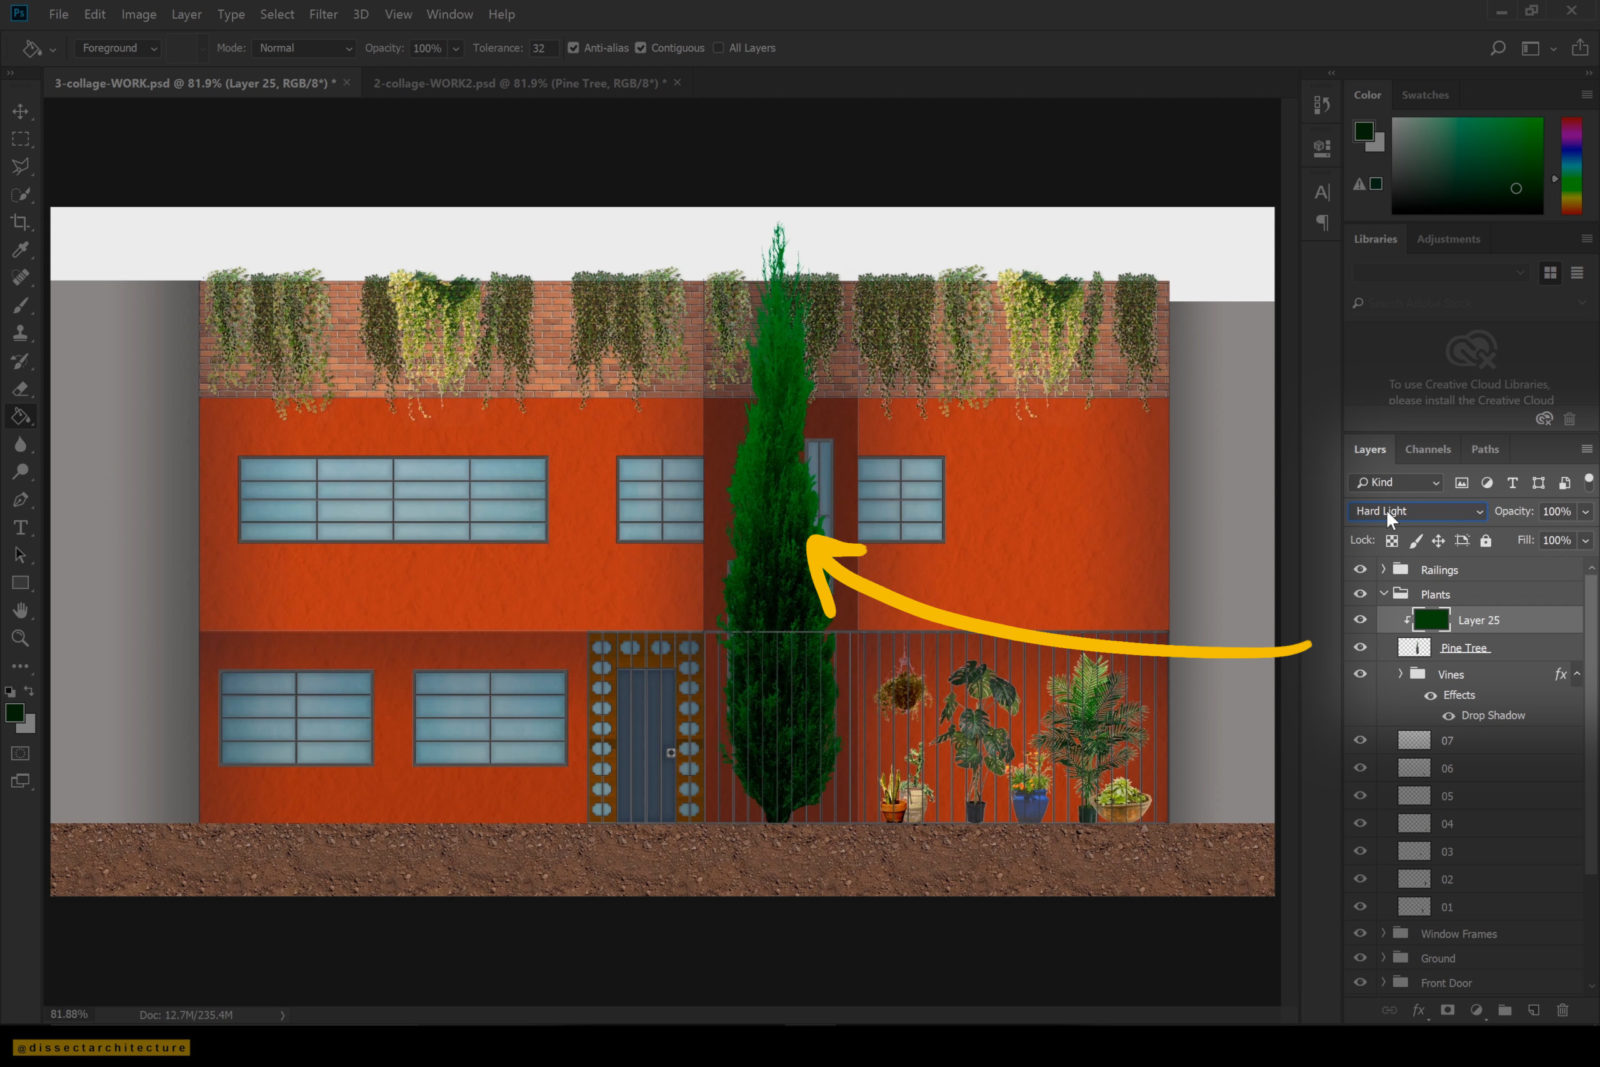
I am doing so by adding a variety of plants. I am adding .pngs of plants that I have found online. These can easily be found on Pinterest or Google Image Search. Here are my Pinterest Boards where I have created boards to save different entourage options.
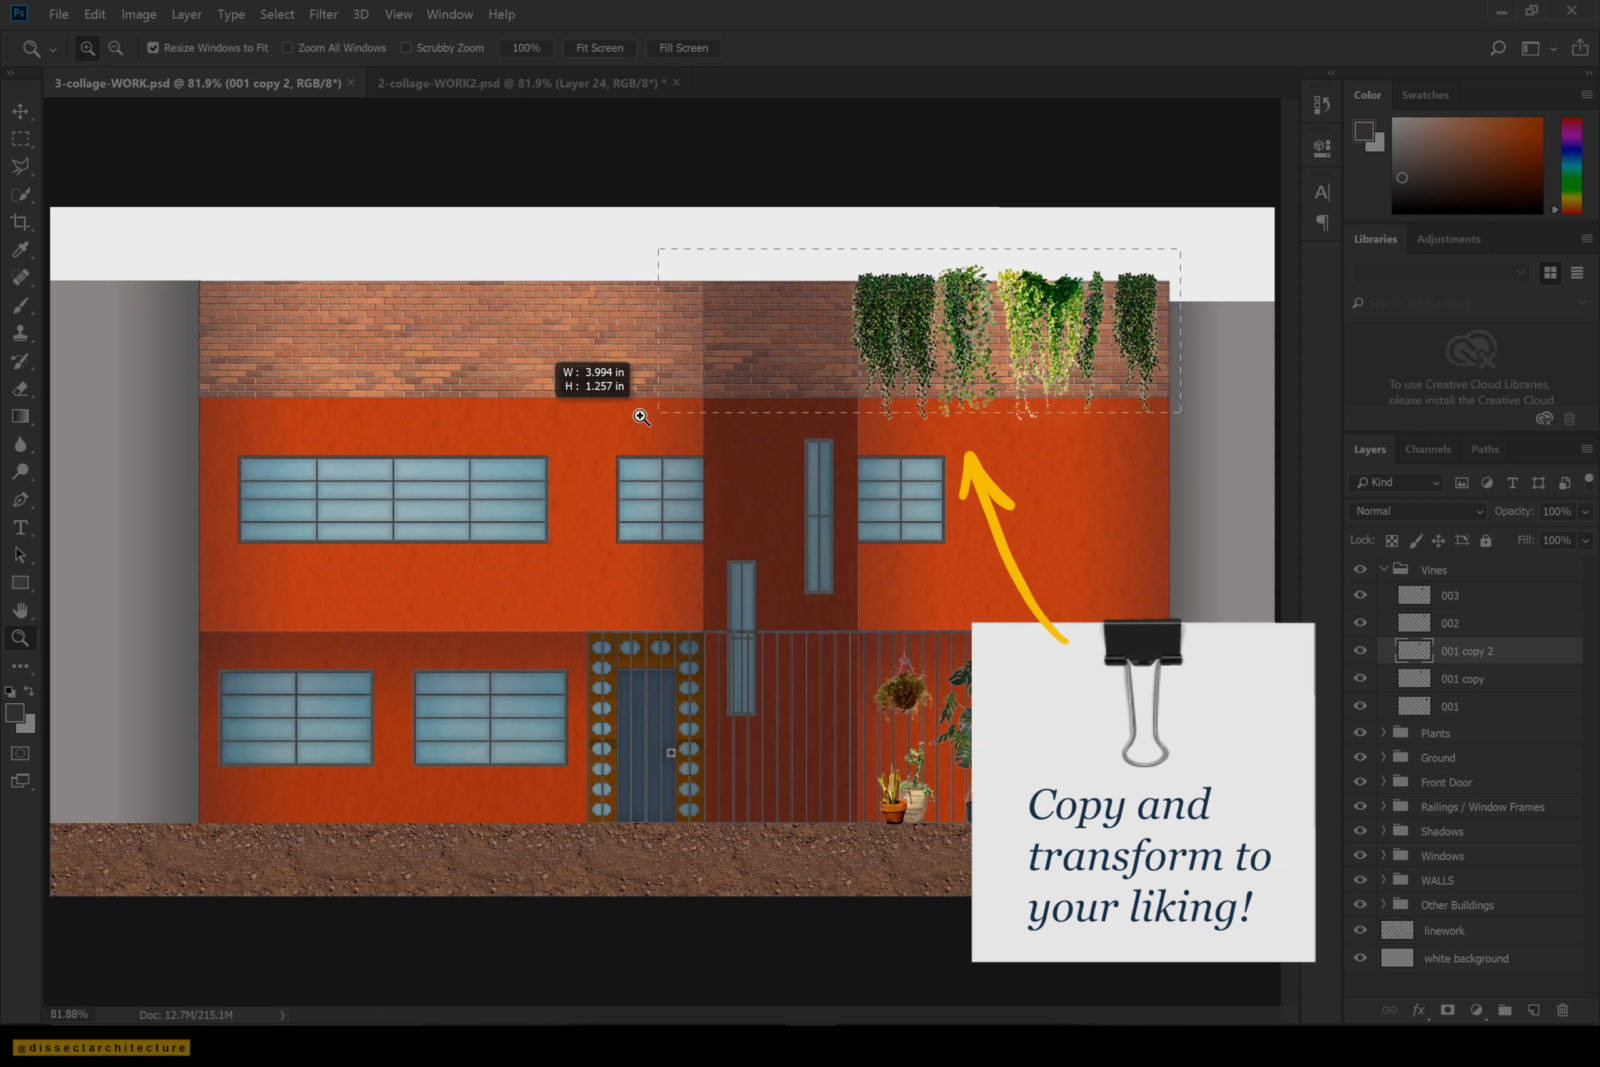
Some of these plants are vines hanging from the top wall. You can add variety by transforming them as needed or mirror some of the .pngs.
Step 20
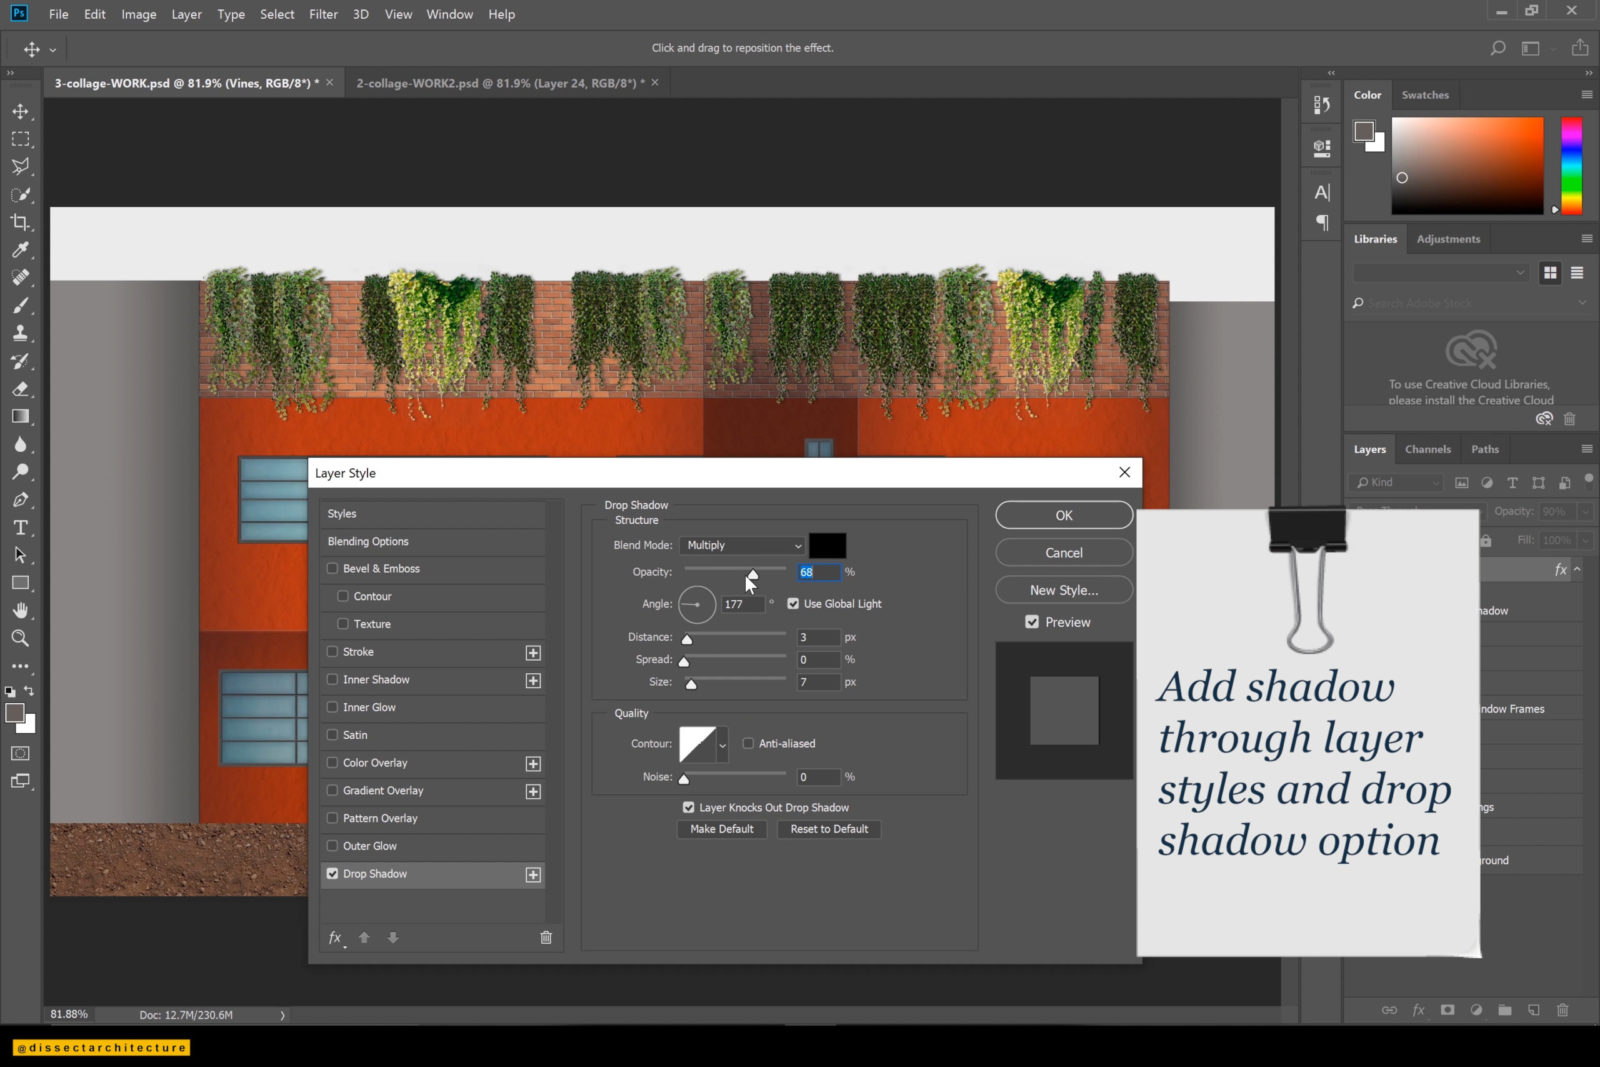
Then add shadows to any of the plant cutouts by double-clicking on the layer to open the Layer Style Panel and from the left side panel selecting the Drop Shadow.
If needed you can color correct any of the plant cutouts by adding a color fill over the layer and changing its blend mode. You can also adjust the brightness and contrast if necessary.
Step 21
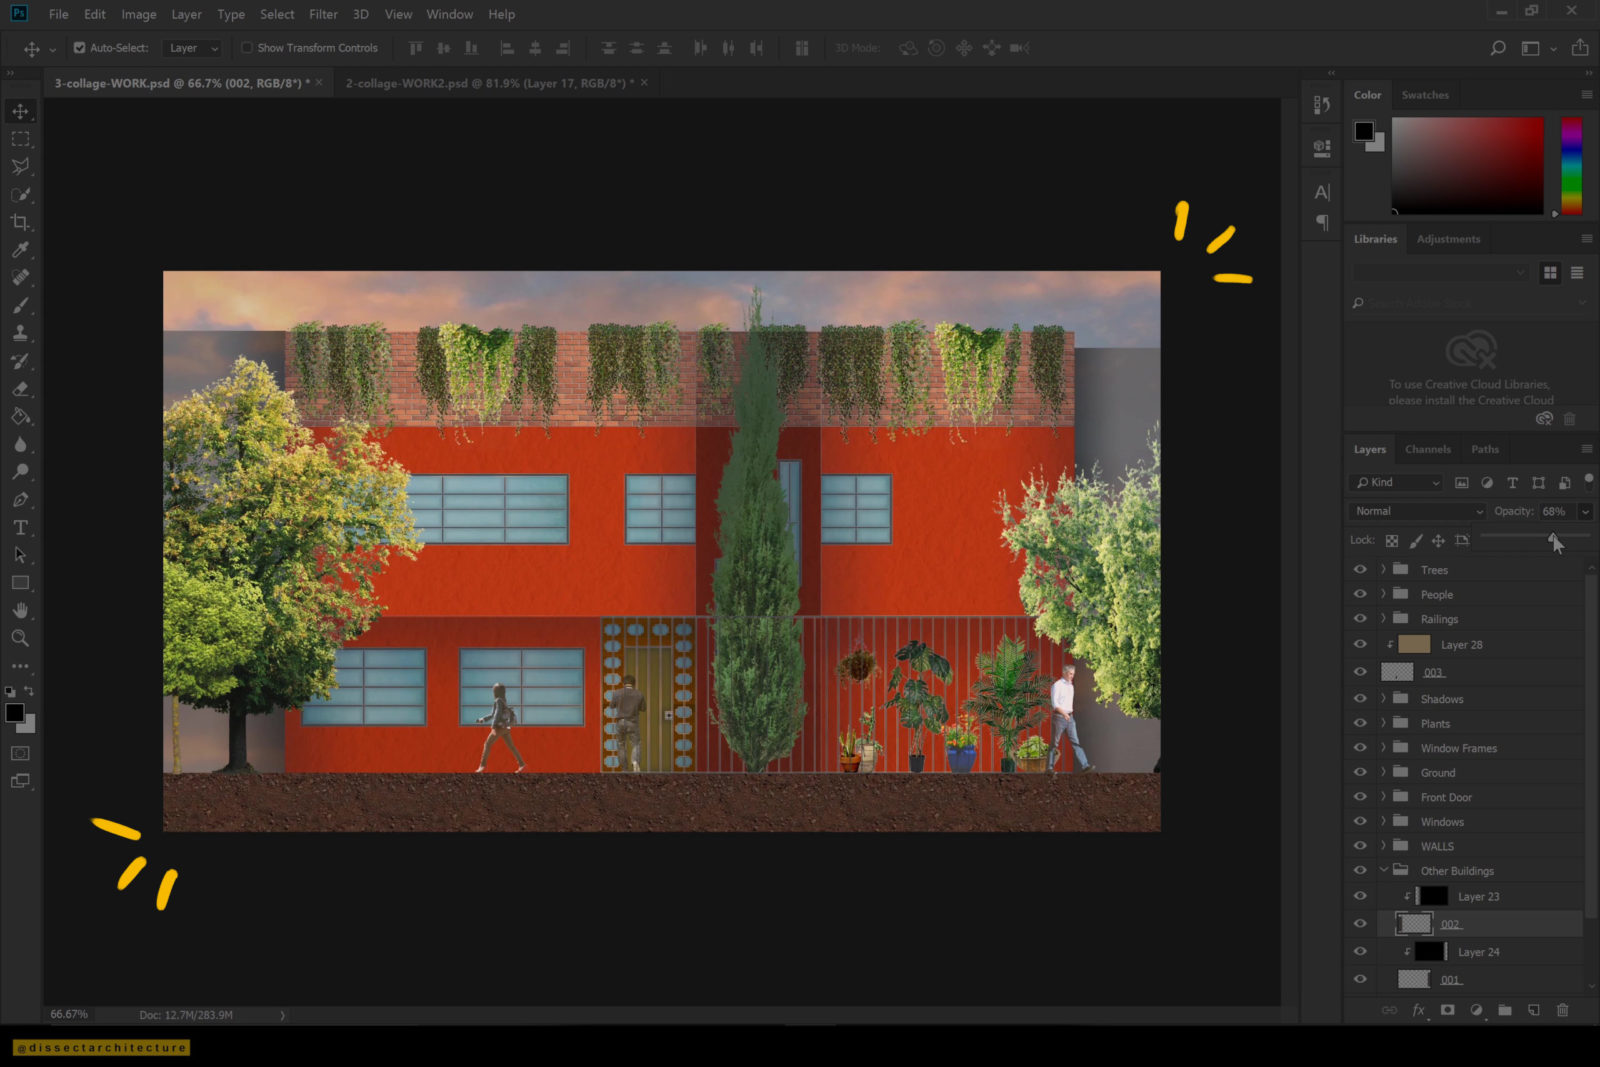
Make any last finishing touches to your Collage Architecture Elevation as you see fit, like color correcting or changing any colors that don’t seem to blend well.
At this point I am also adding .png cutouts of people as well as trees. I also added a texture of the sky behind all the other layers. I added 2 sky textures – one above the other and changing their blend mode to blend both.
Afterwards, I added a grain texture and beige color fill over all the other layers to change its blending mode to create a sort of filter over the collage image.

")
")